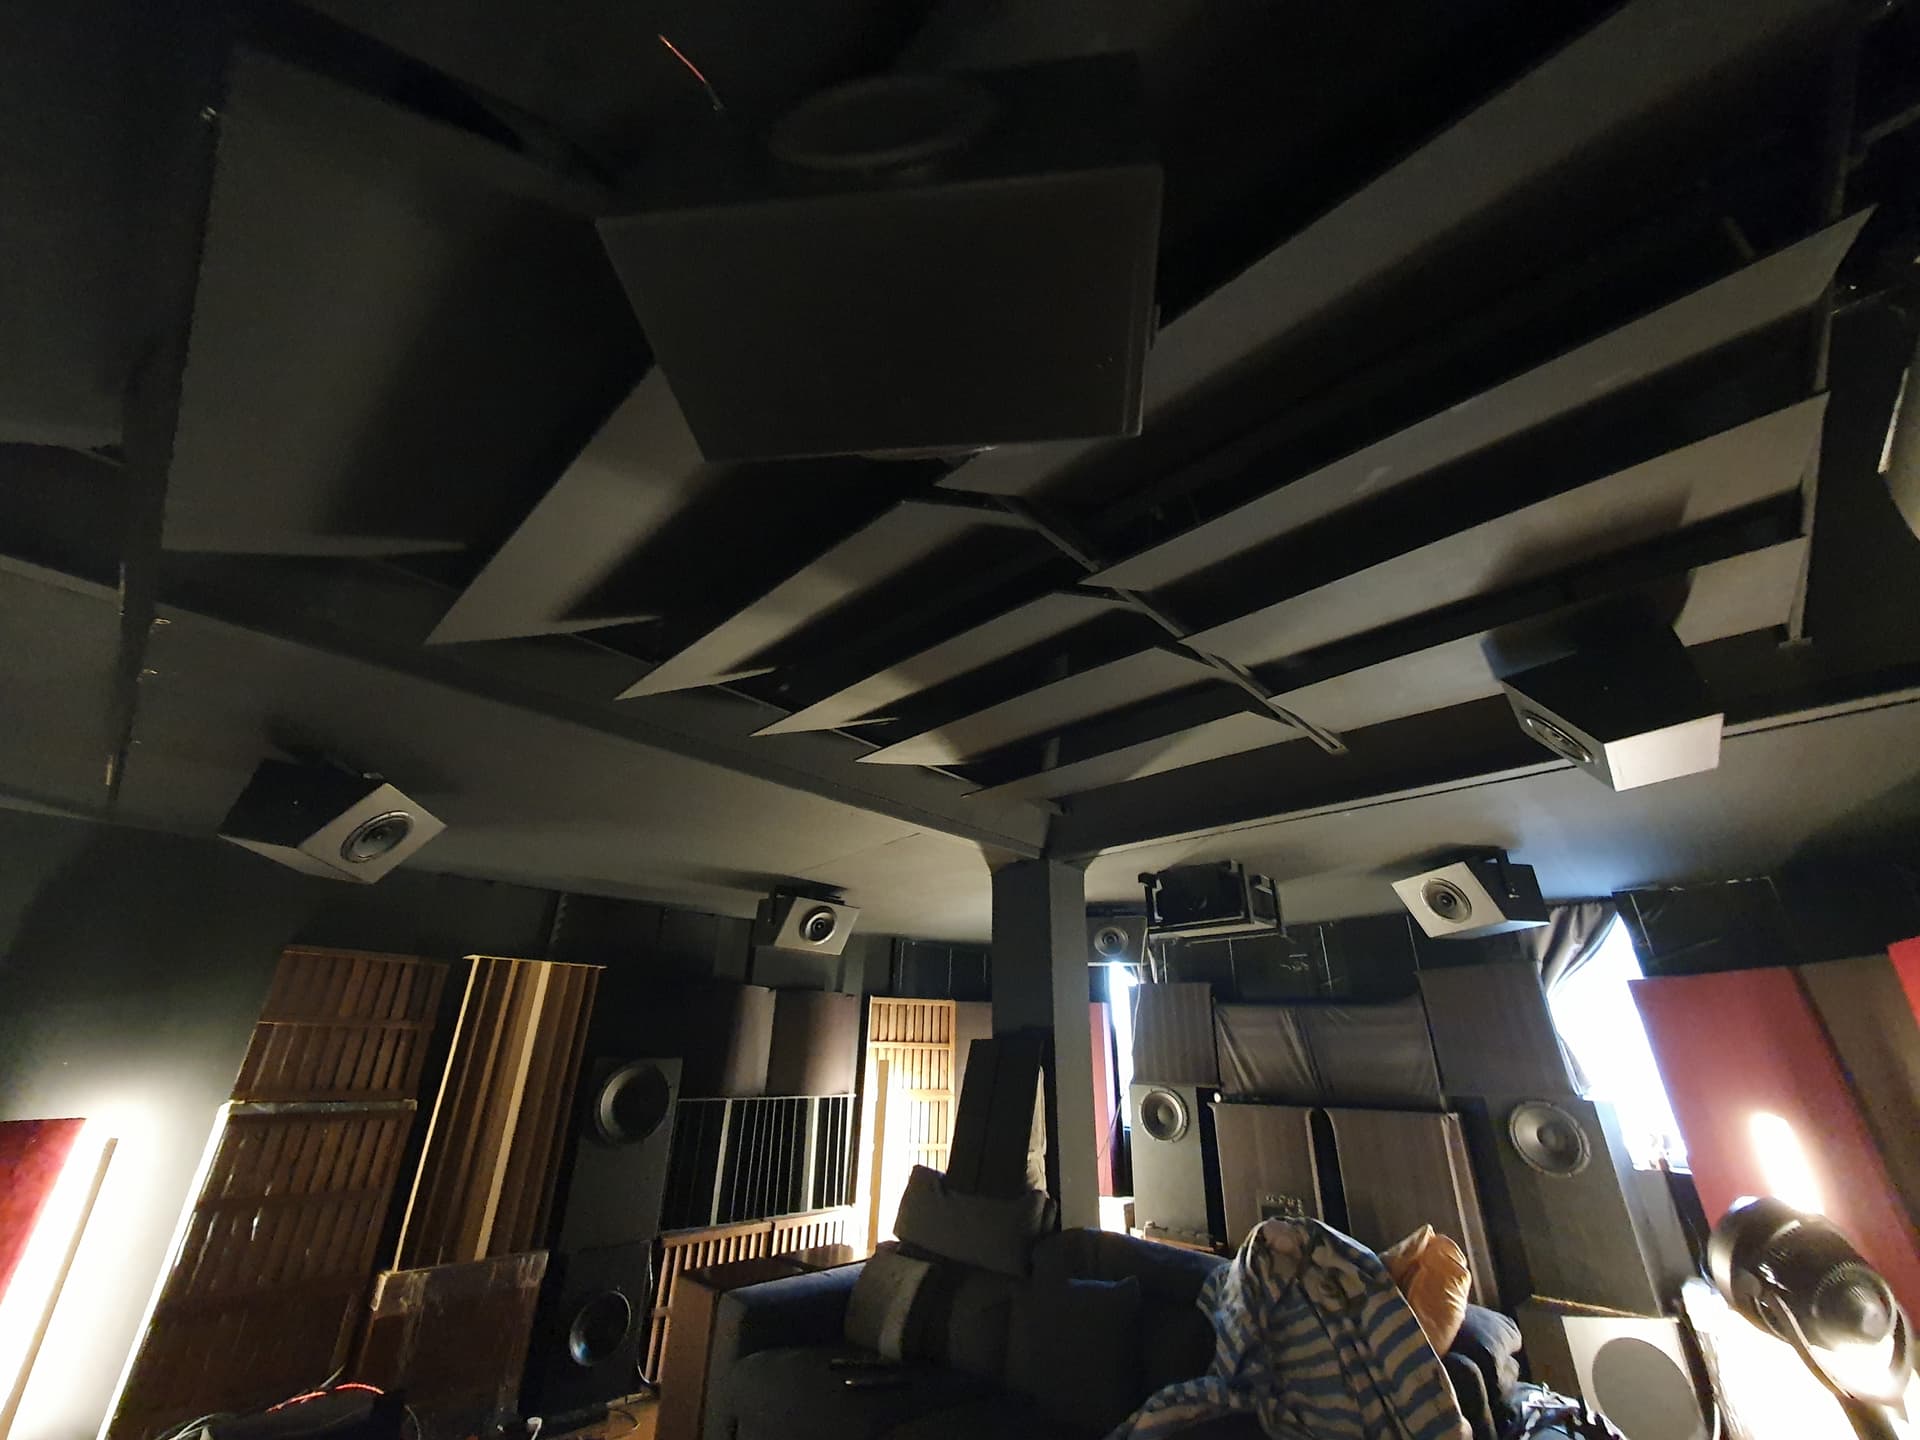
And then, there are six.
Other side view. Top rear right barely clear the pillar, same as the rear right haha.
And then, there are six.
Other side view. Top rear right barely clear the pillar, same as the rear right haha.
power! how does it sound? ![]()
How do you line up these atmos to MLP? Laser or just eyeball
Haha, just install only, yet to run any wiring.
Will also do some other bed layer minor layout fine tuning and then rerun calibration.
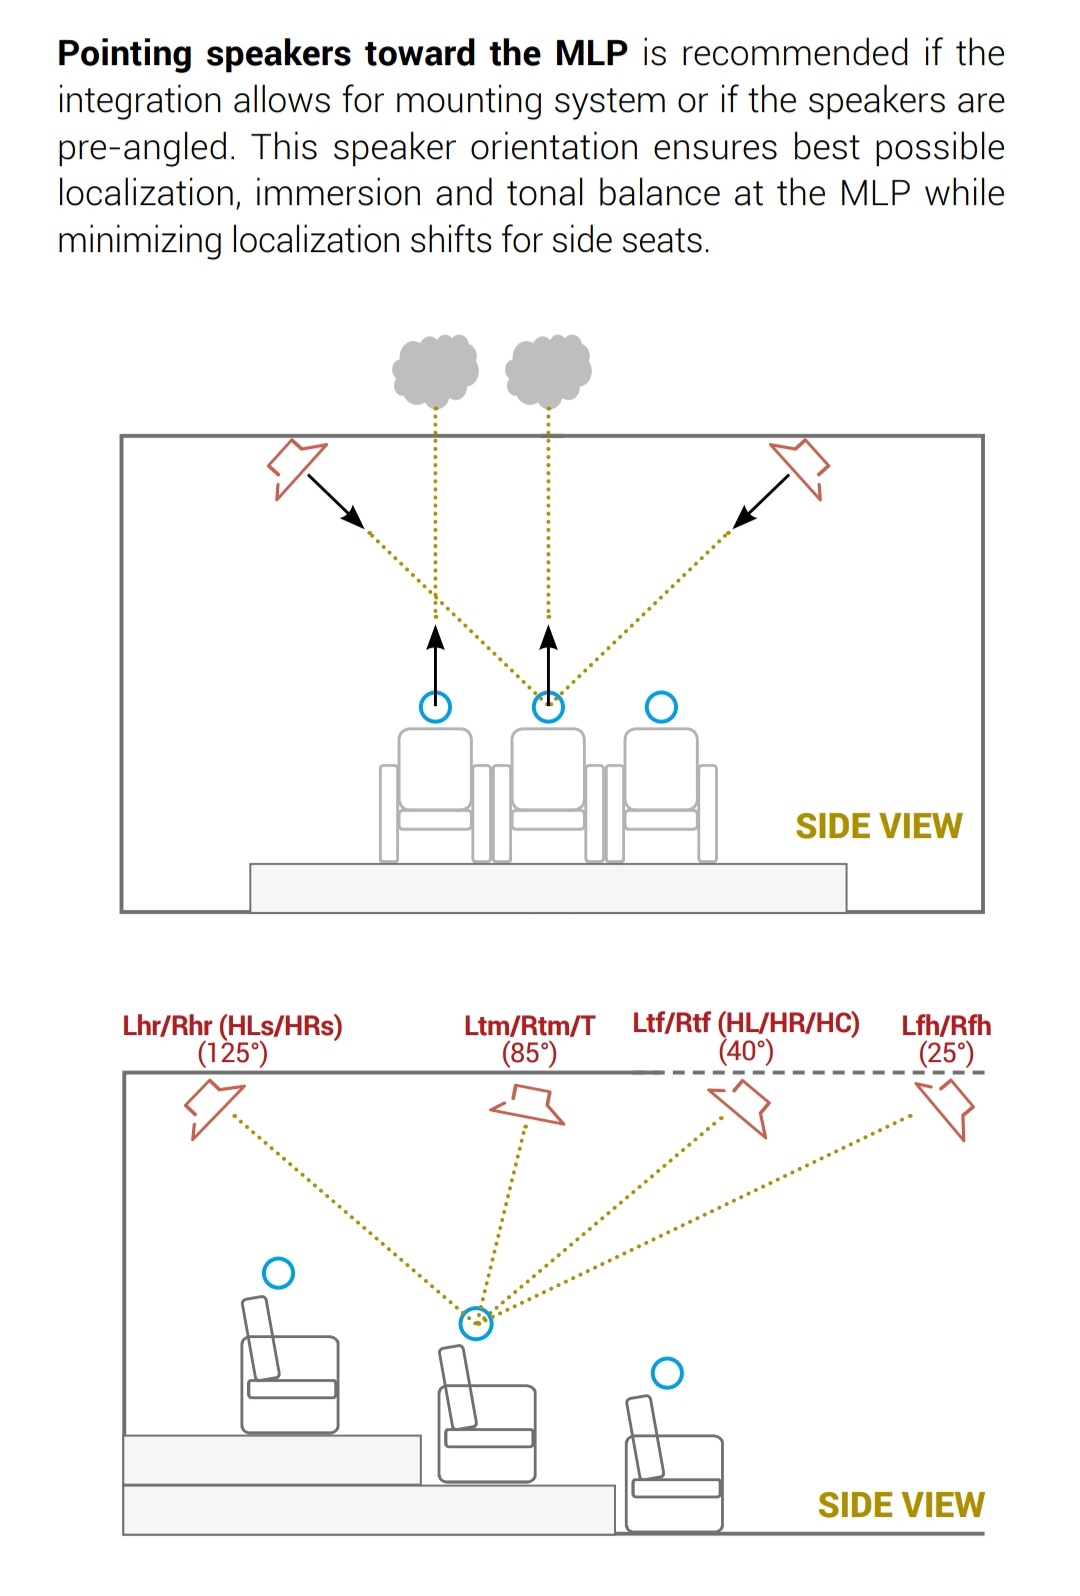
The brackets have slight adjustment for fine tuning the toe in either direction. The bracket angle is directly aimed at MLP.
Similarly there is about 10deg of up down inclination.
My target calibration axis for the full range drivers is about 10-15deg off axis.
From a toe in aiming, I will aim them directly at MLP. The 10-15deg off axis will be in the vertical direction. They will aim above the head, of MLP, cross firing style.
From trinnov layout guide. Aiming at MLP.
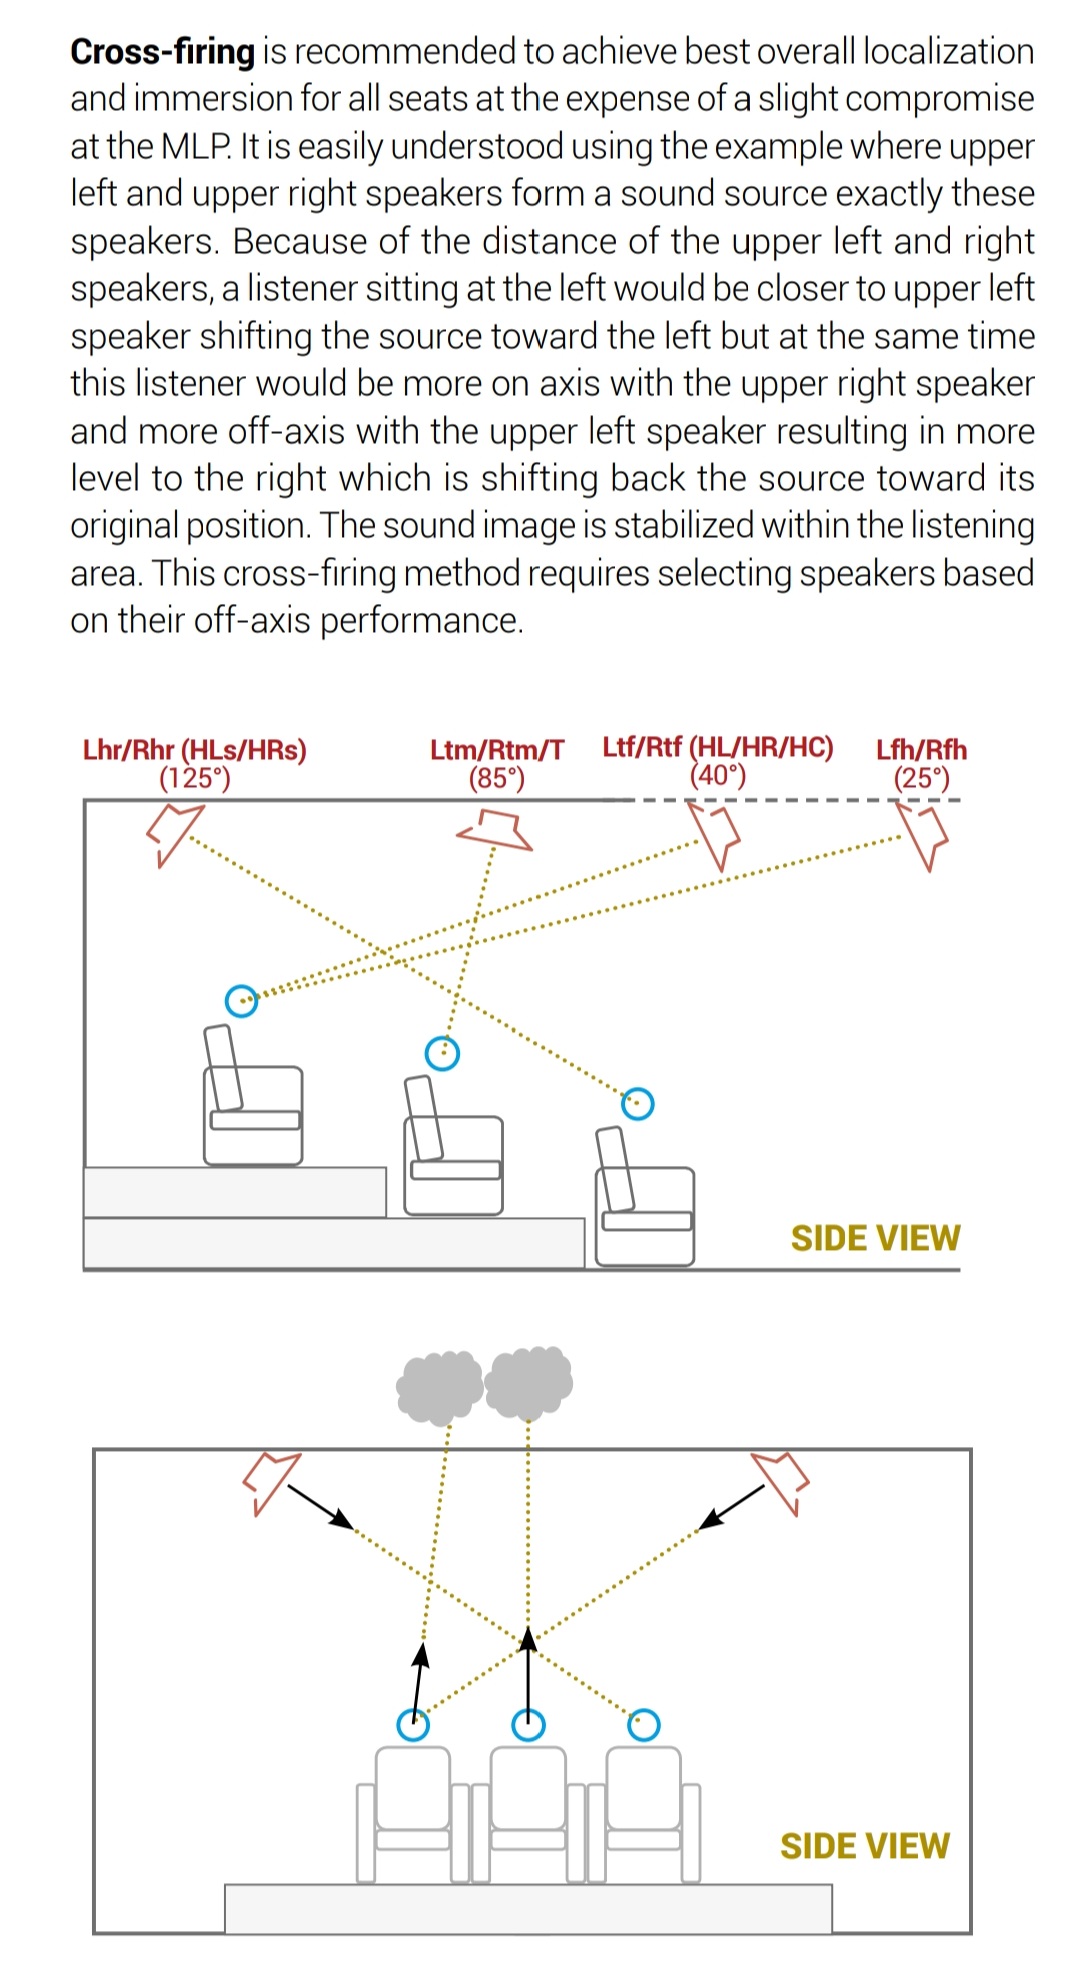
Cross firing
Actually one can differentiate aiming at MLP vs Crossfiring, in the horizontal vs vertical plane.
In a nutshell, my approach for first calibration is still to aim at MLP, but since the target axis is about 10-15deg off axis, I’m actually cross firing vertically by that number…
Trying to hit the best of both approaches? Haha, we’ll see.
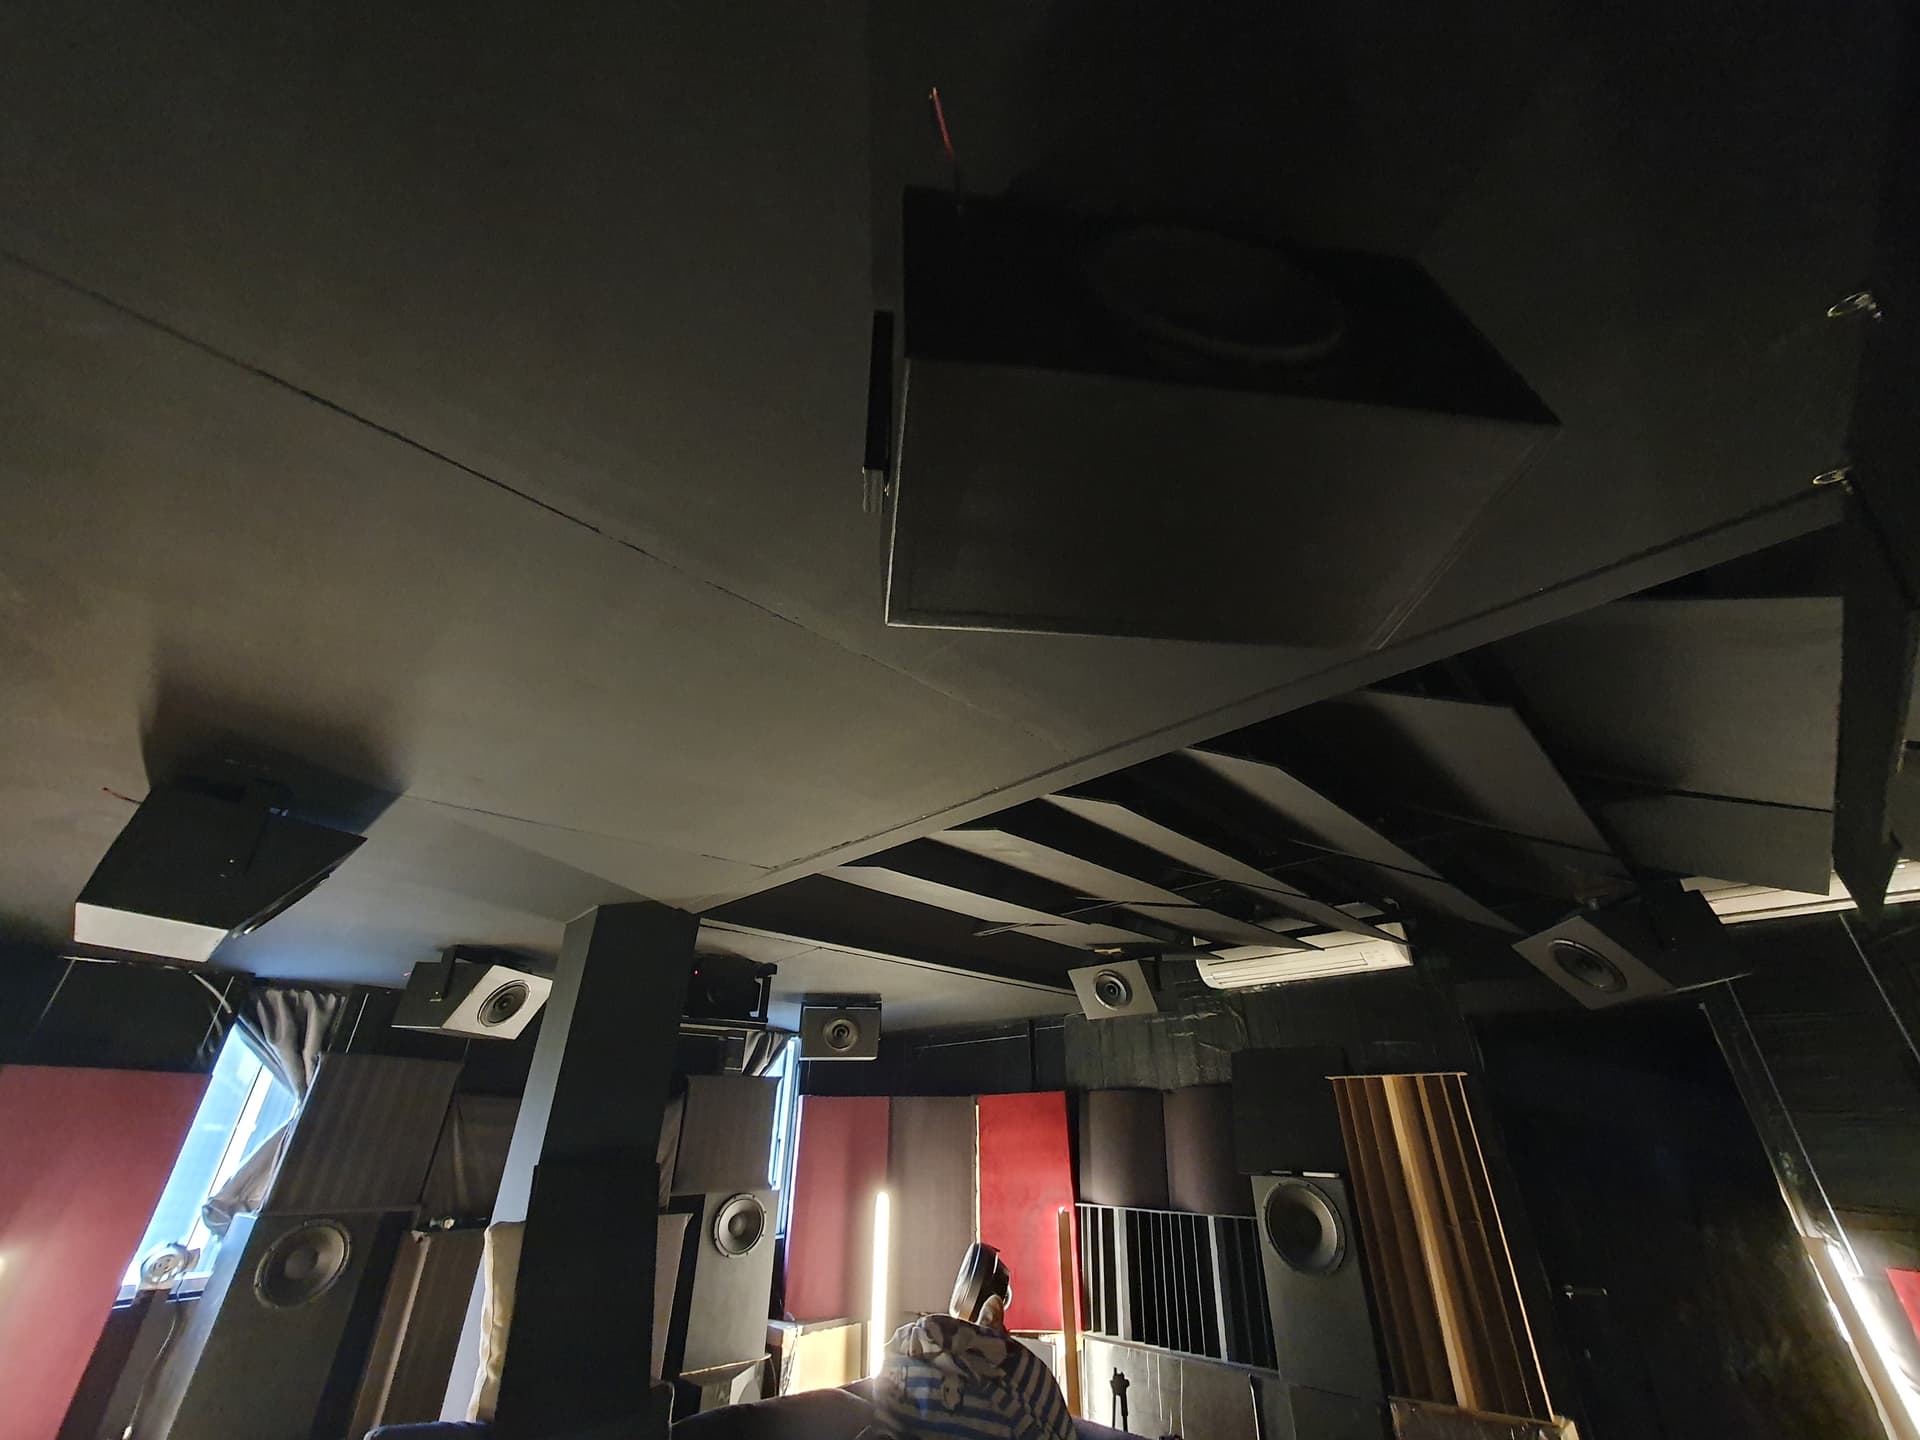
WOW. They look big enough to be a subwoofer. Awesome!
Benefit of able to have a large room
Did the first calibration on Tuesday, been listening on and off over the last week.
Yesterday a friend came over for the inaugural atmos demo haha.
No surprises so far, the full range speakers sound great after calibration. Good timbre match with bed channels when testing DTSX callout, dolby 9.1.6 full band pink noise.
After listening to so many familiar demo tracks on 7.1 for almost a year , it really becomes very obvious now that the tops are finally here to complete the presentation.
Let me refresh the open invitation.
Visitors are always welcome, now that atmos is up and a complete experience.
Always happy to share and hear different perspectives.
More ears to spot issues so I can improve on them!
Got the old JVC X5900 calibrated.
Still comes back to this strange scenario. I don’t think it’s a case of not enough lumens, as SDR can be calibrated to look very bright even on my large screen.
The problem with HDR is really, no single static tone map curve can handle the vastly different levels of content out there… Some look too blown , some look too dim.
But the same movie in SDR master looks great…
It feels like a gear push where user needs the latest equipment with advanced dynamic tone mapping to handle this variation and produce a reliably good looking image.
Natural look
More punch and pop look
That’s correct. HDR tone mapping is far from perfect but when it is done well, it looks stunning. It is not about how bright the lumens can hit for a projector but rather how it can handle scene-to-scene variation in highlights and shadow details. As a rule of thumb, if your projector is only able to produce around 60 nits or lower, one should calibrate the display to accept SDR2020. 70 nits IMO is the lowest one can go to continue enjoying HDR content.
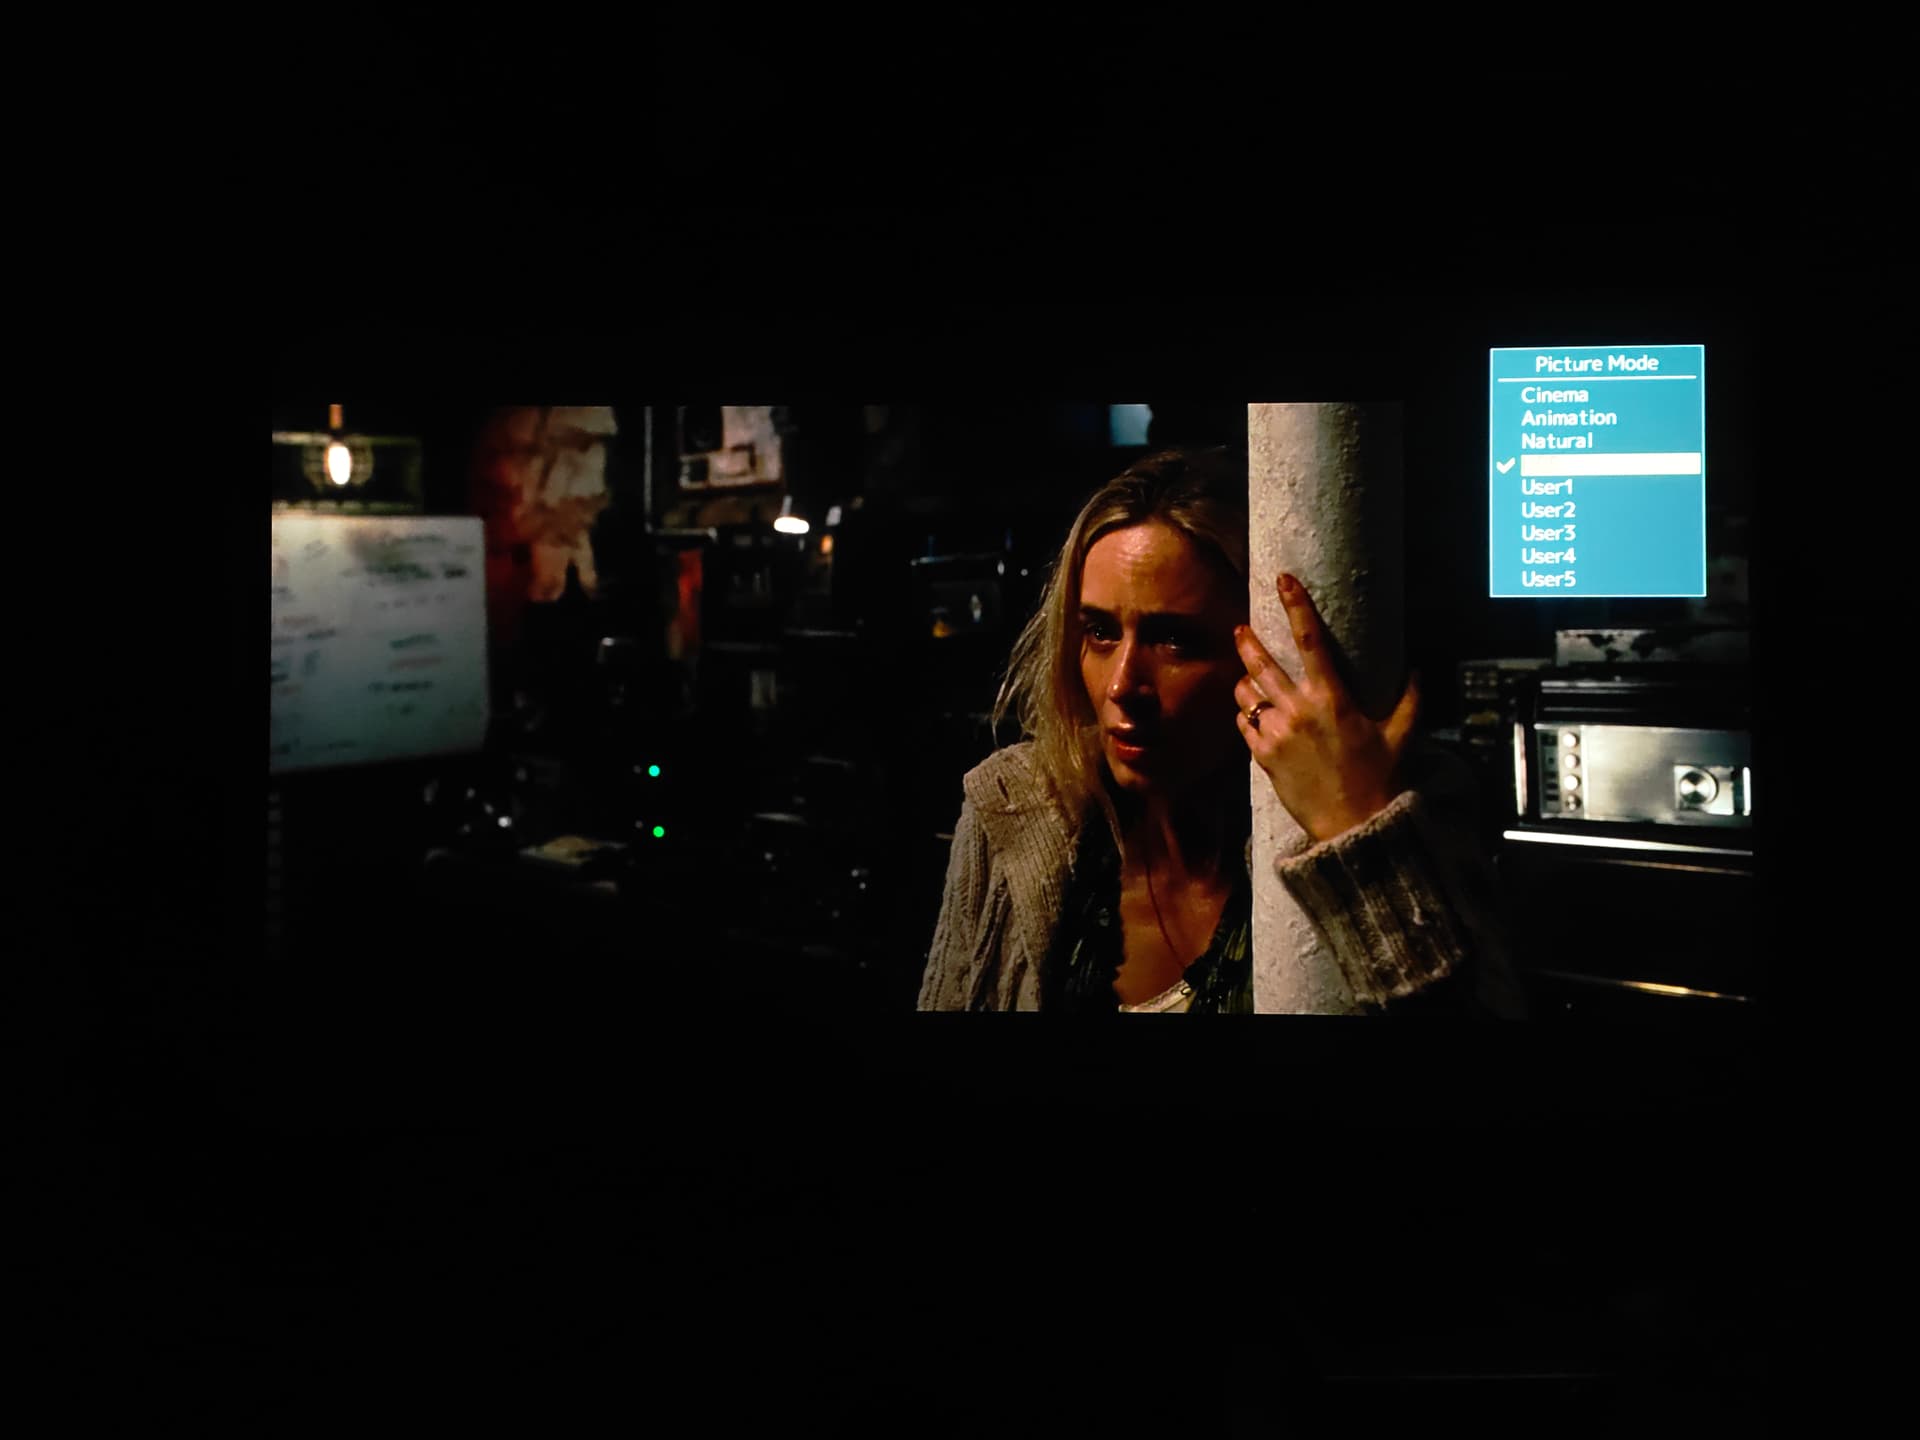
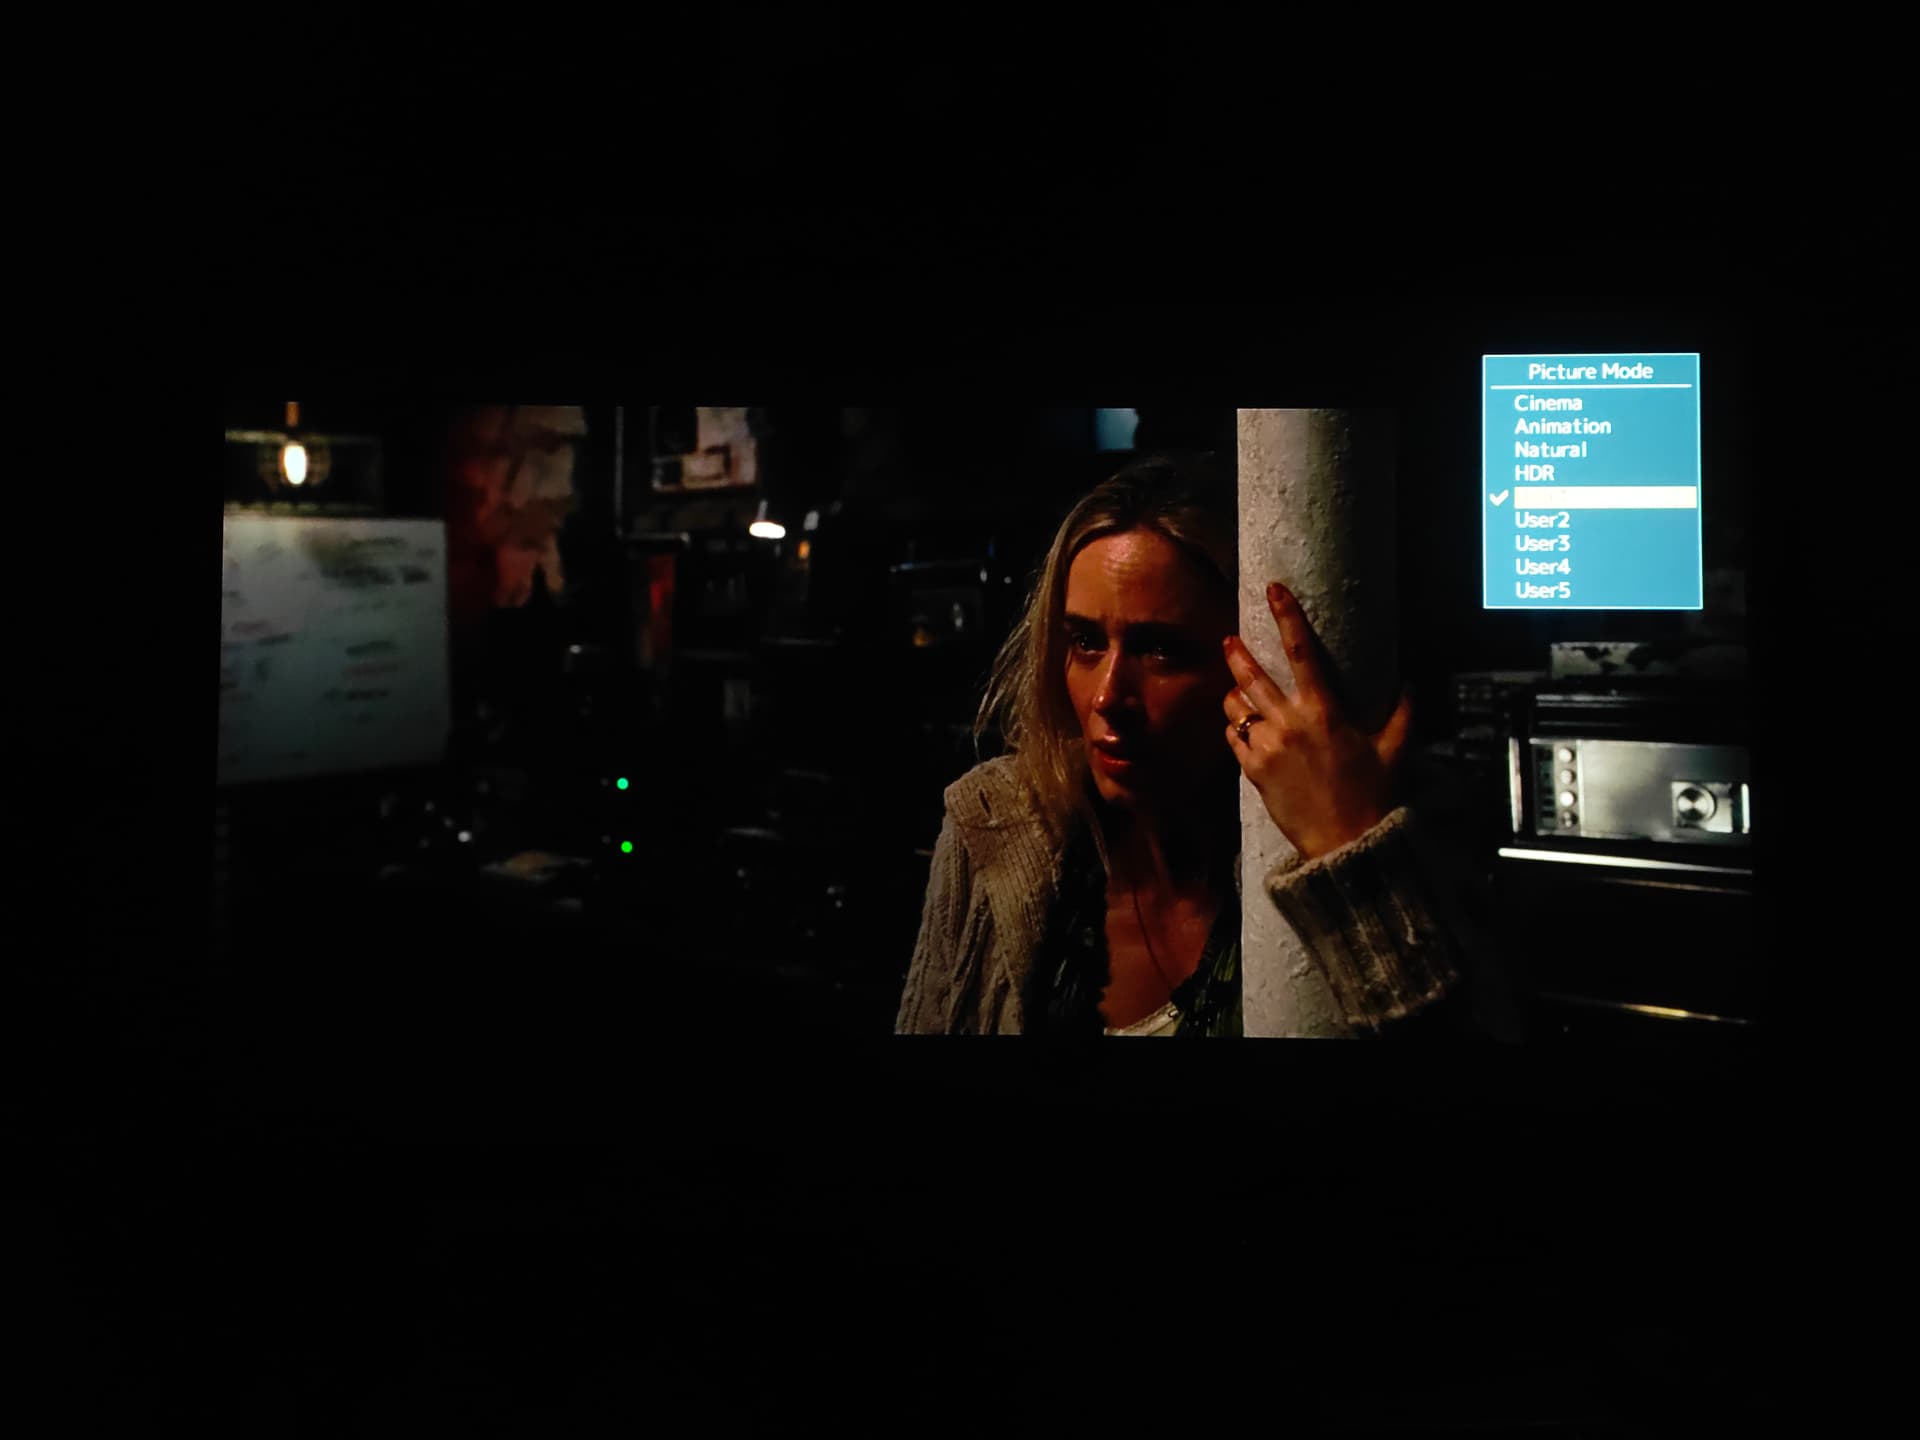
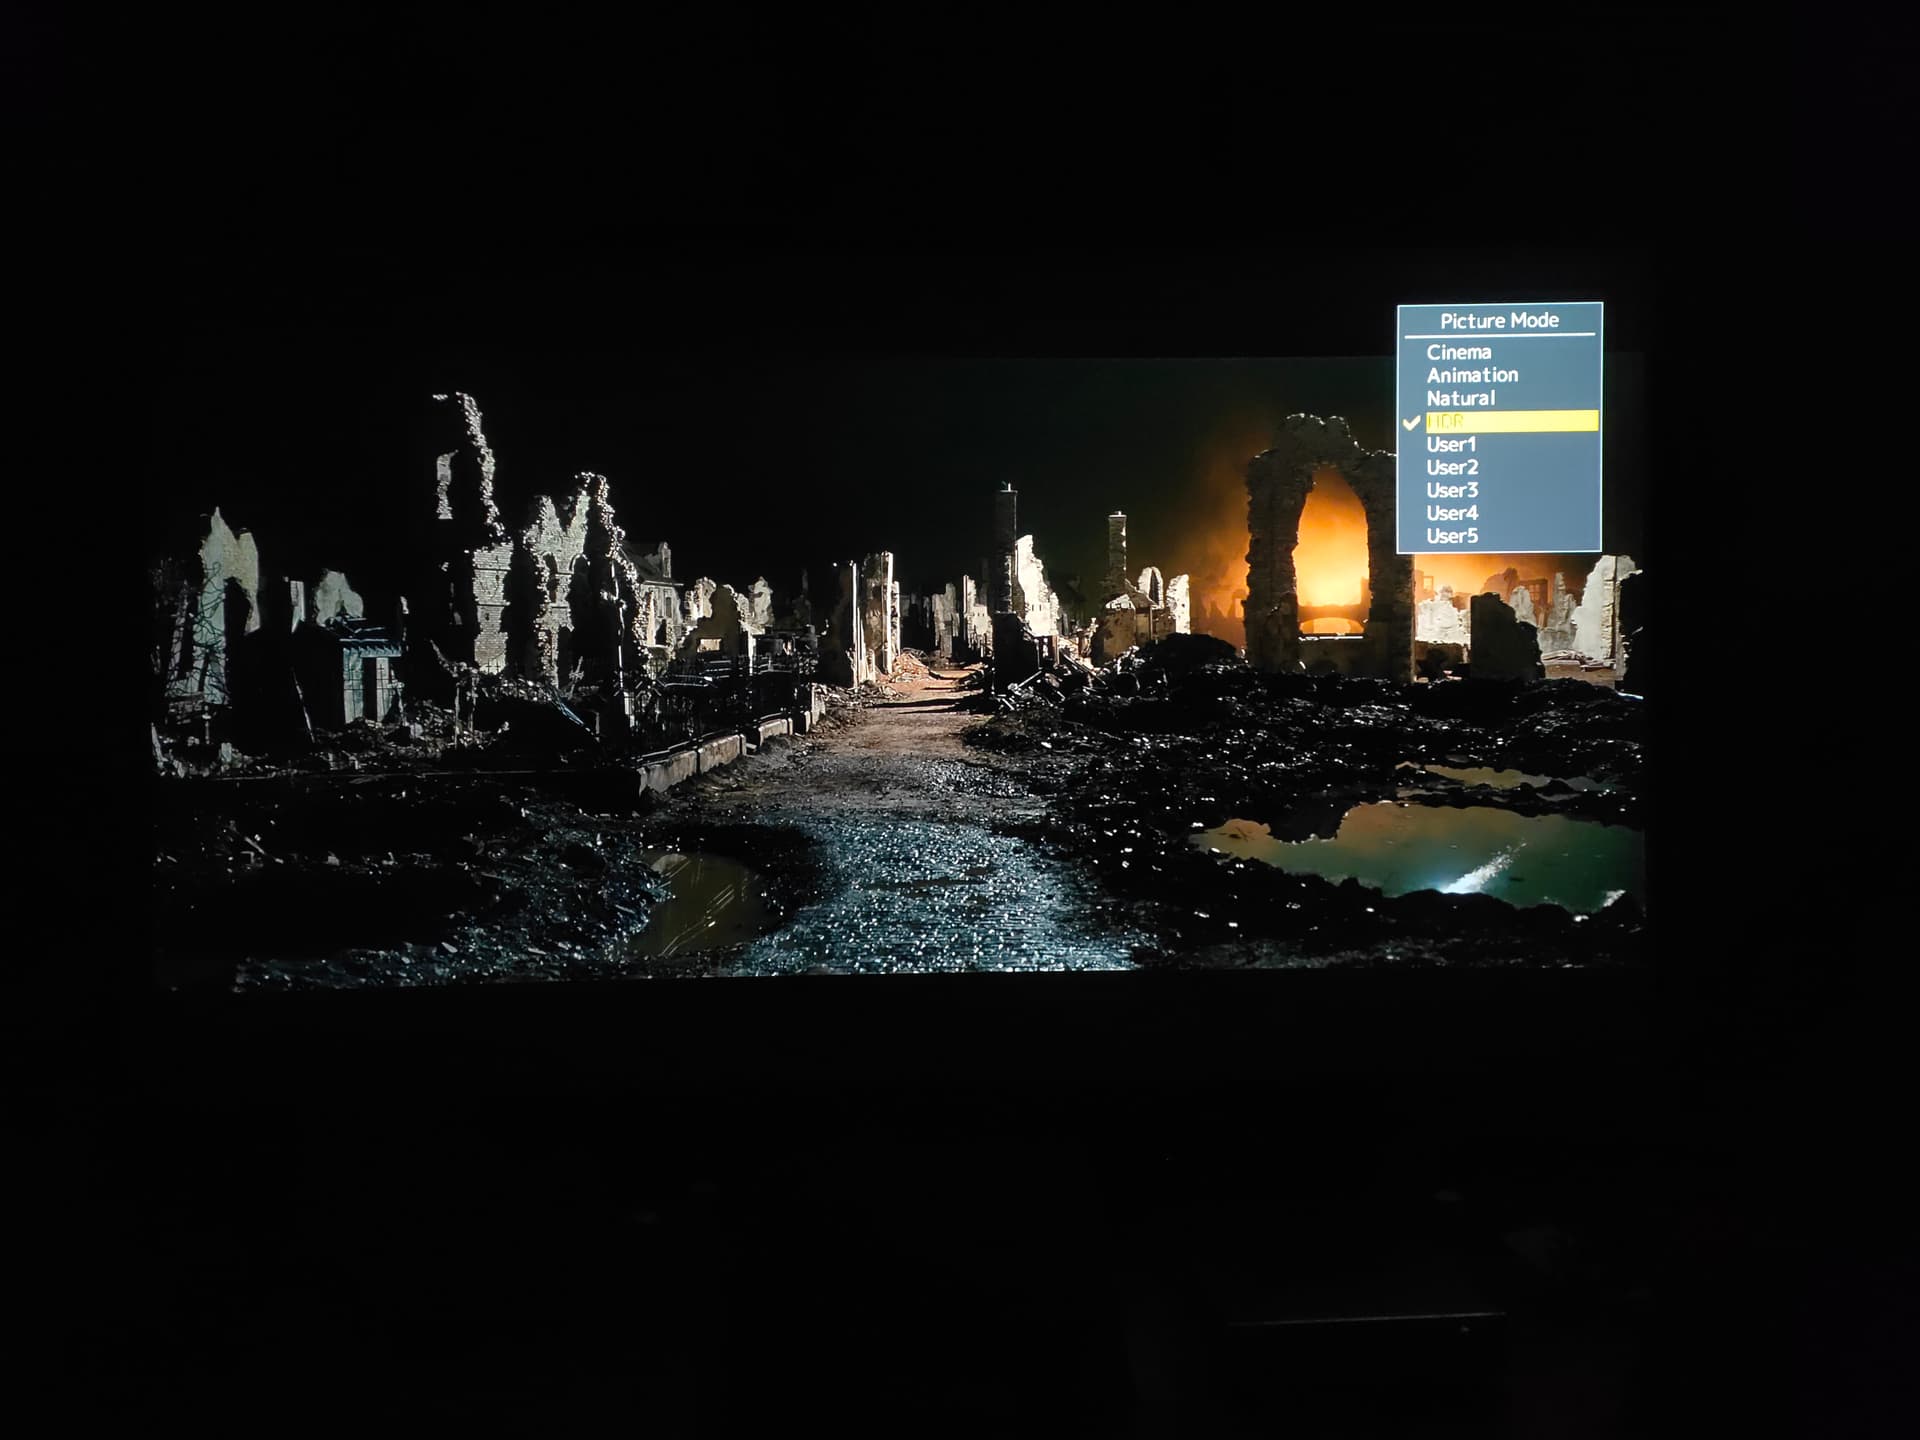
Did some more viewing to get feel of the new calibration. Loaded several custom curves, in addition to the default JVC HDR curve.
The differences are interesting. Thoughts?
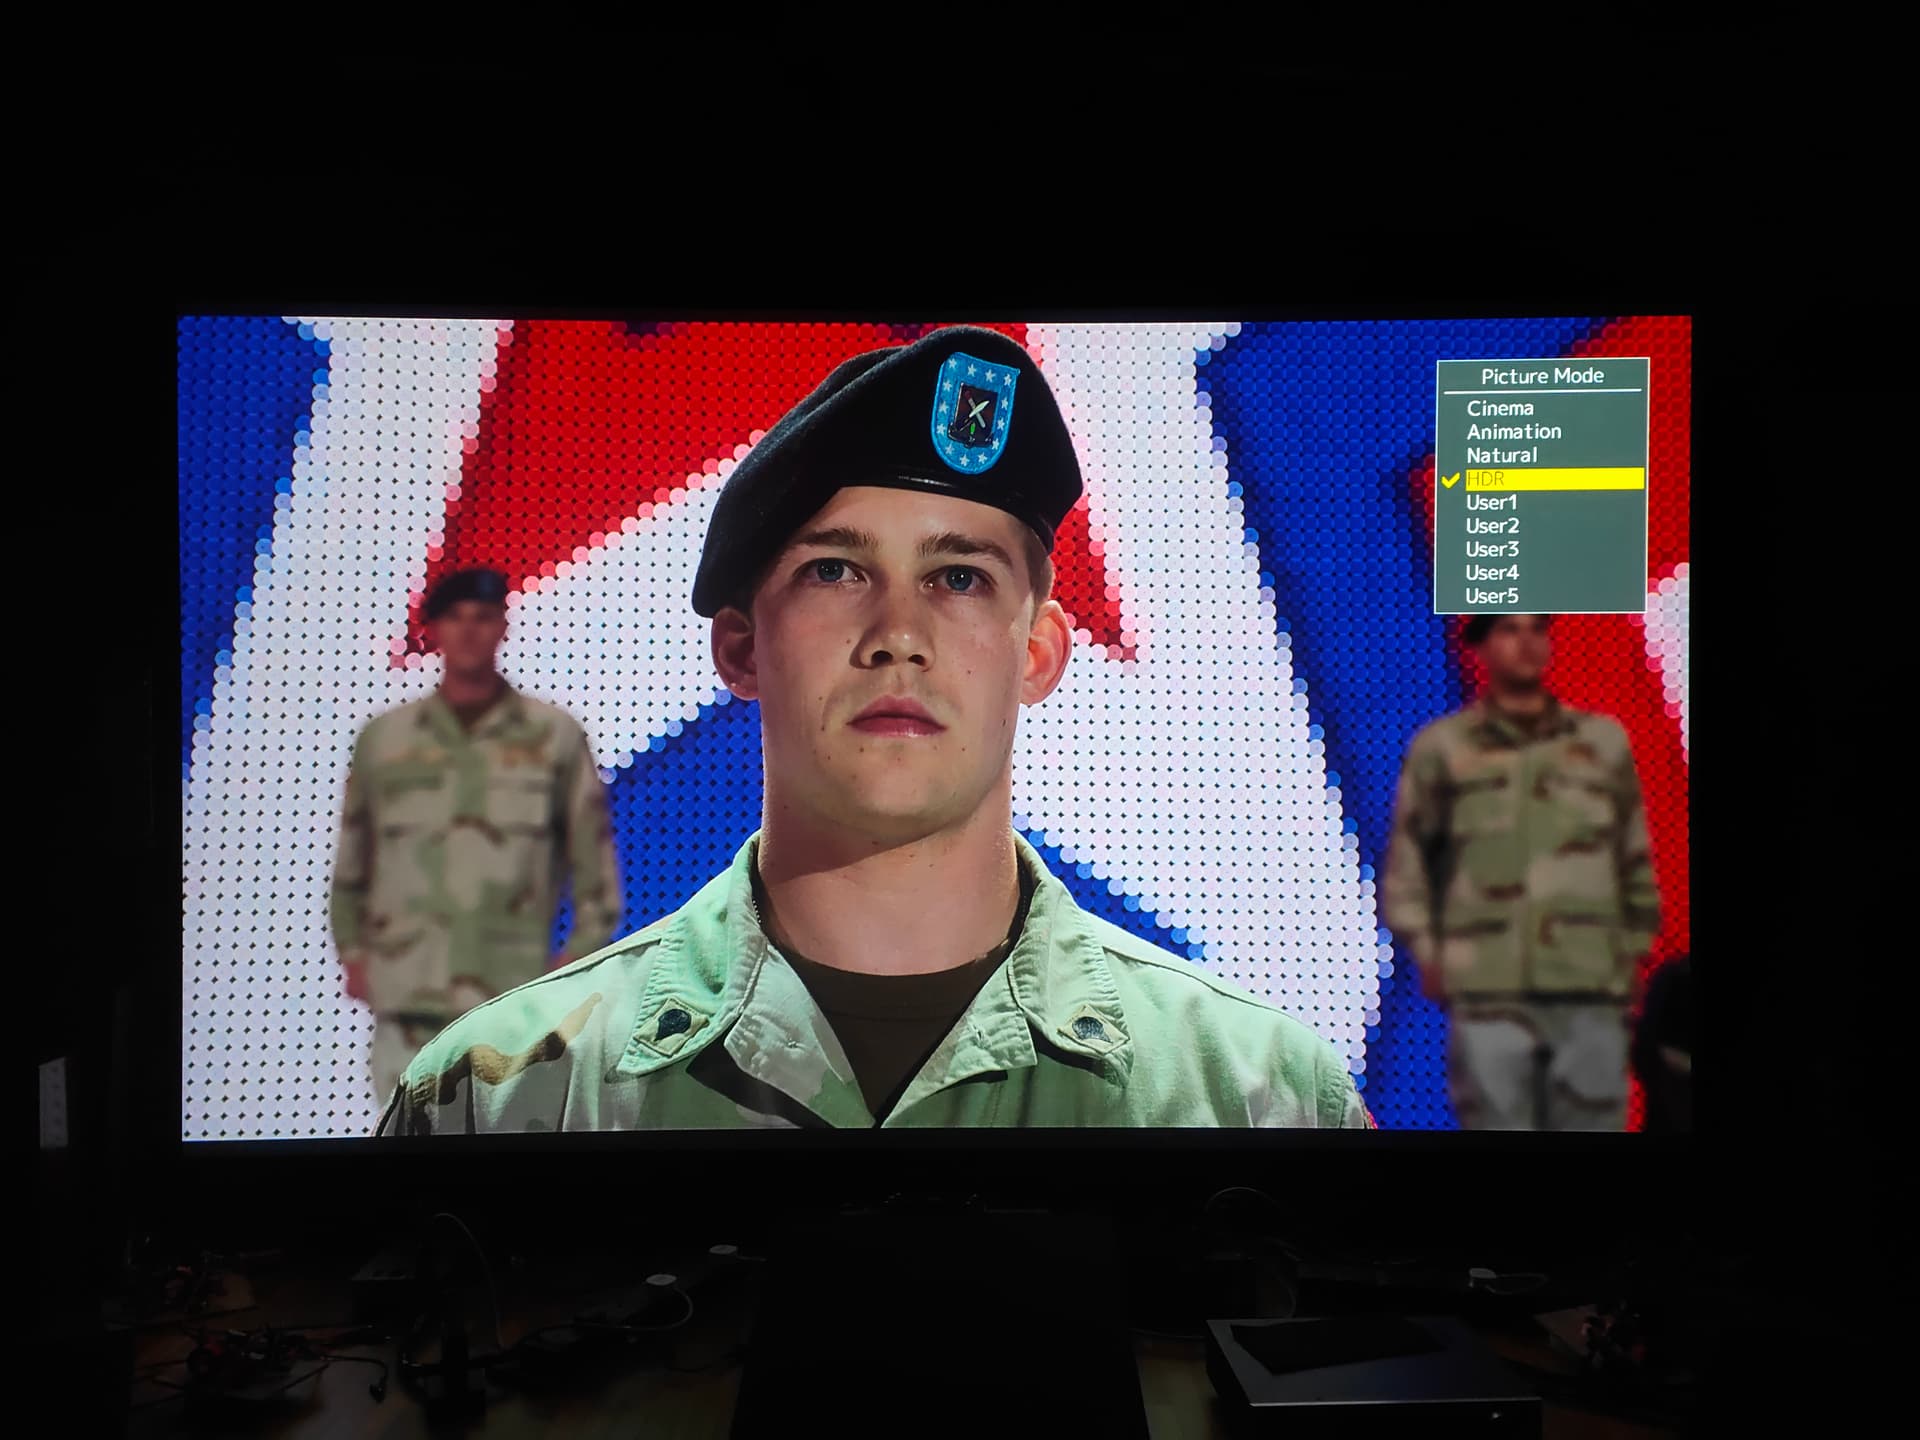
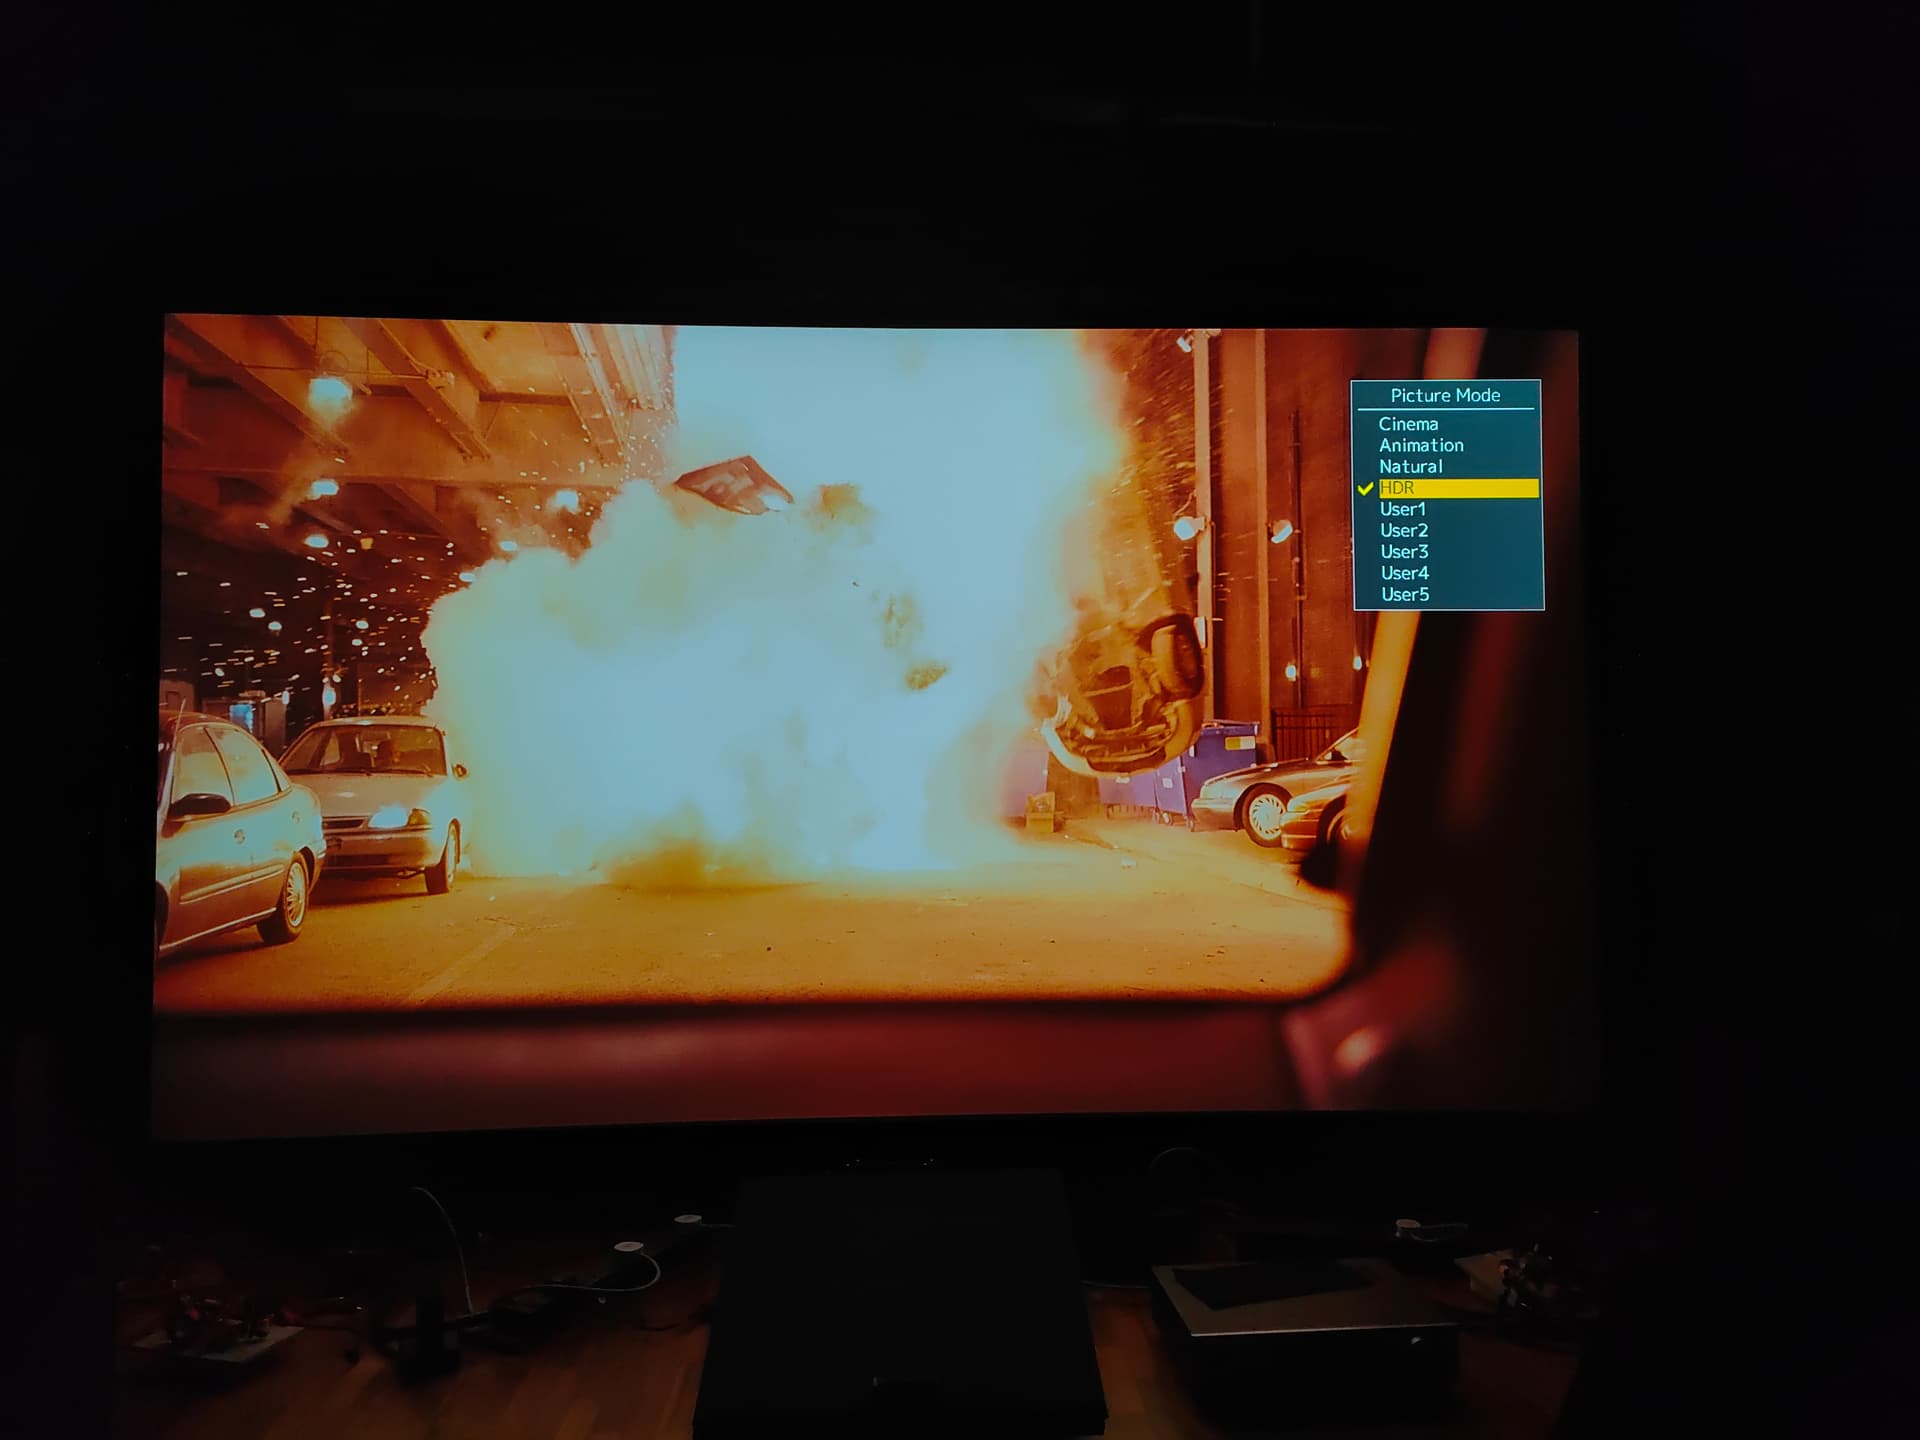
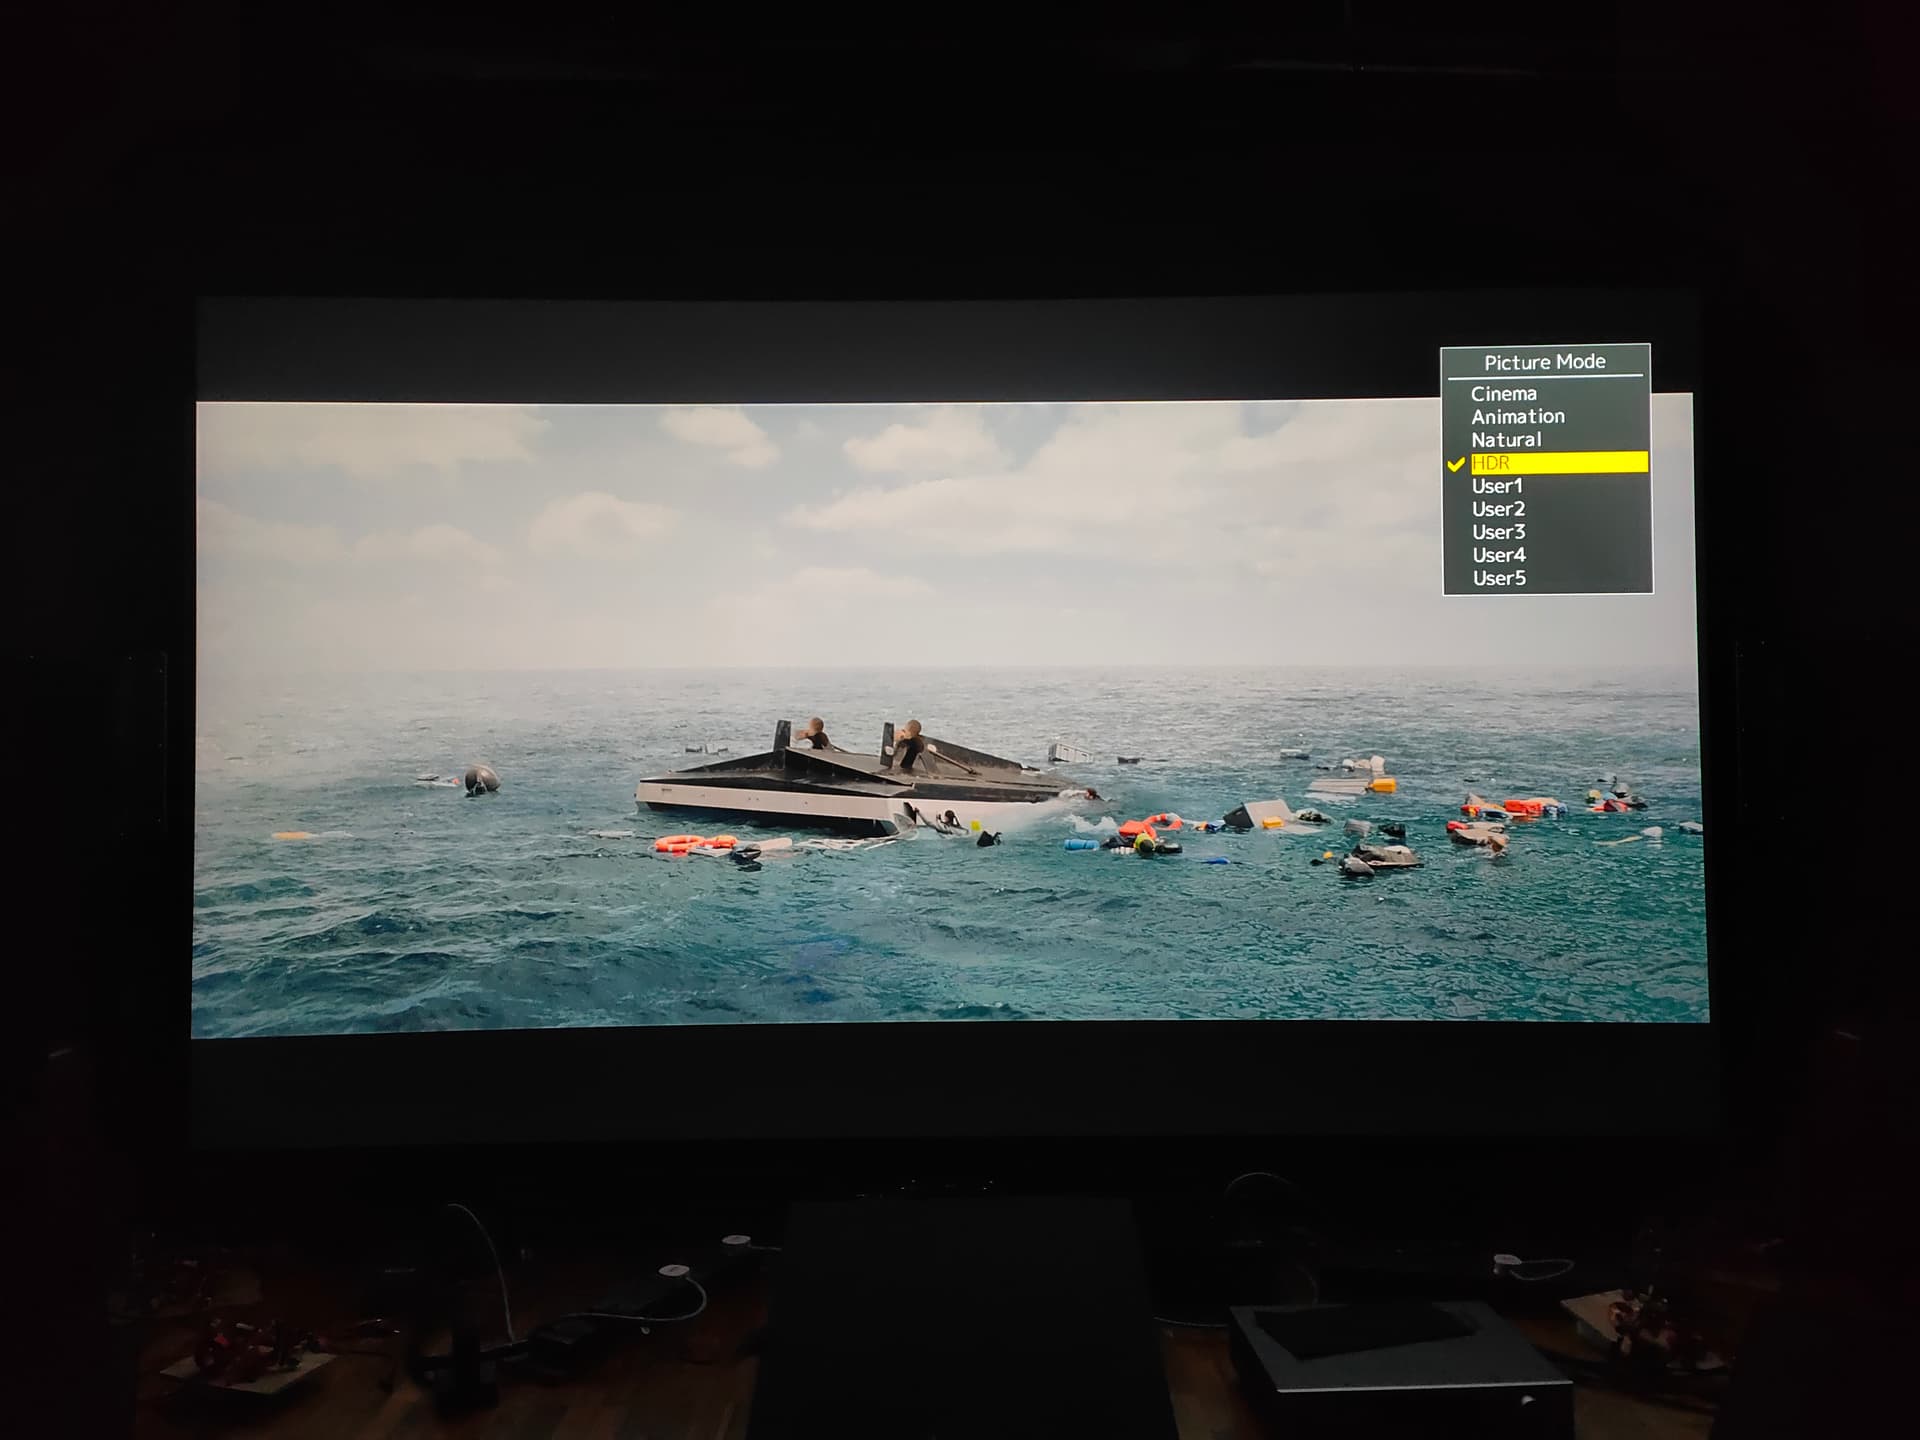
HDR
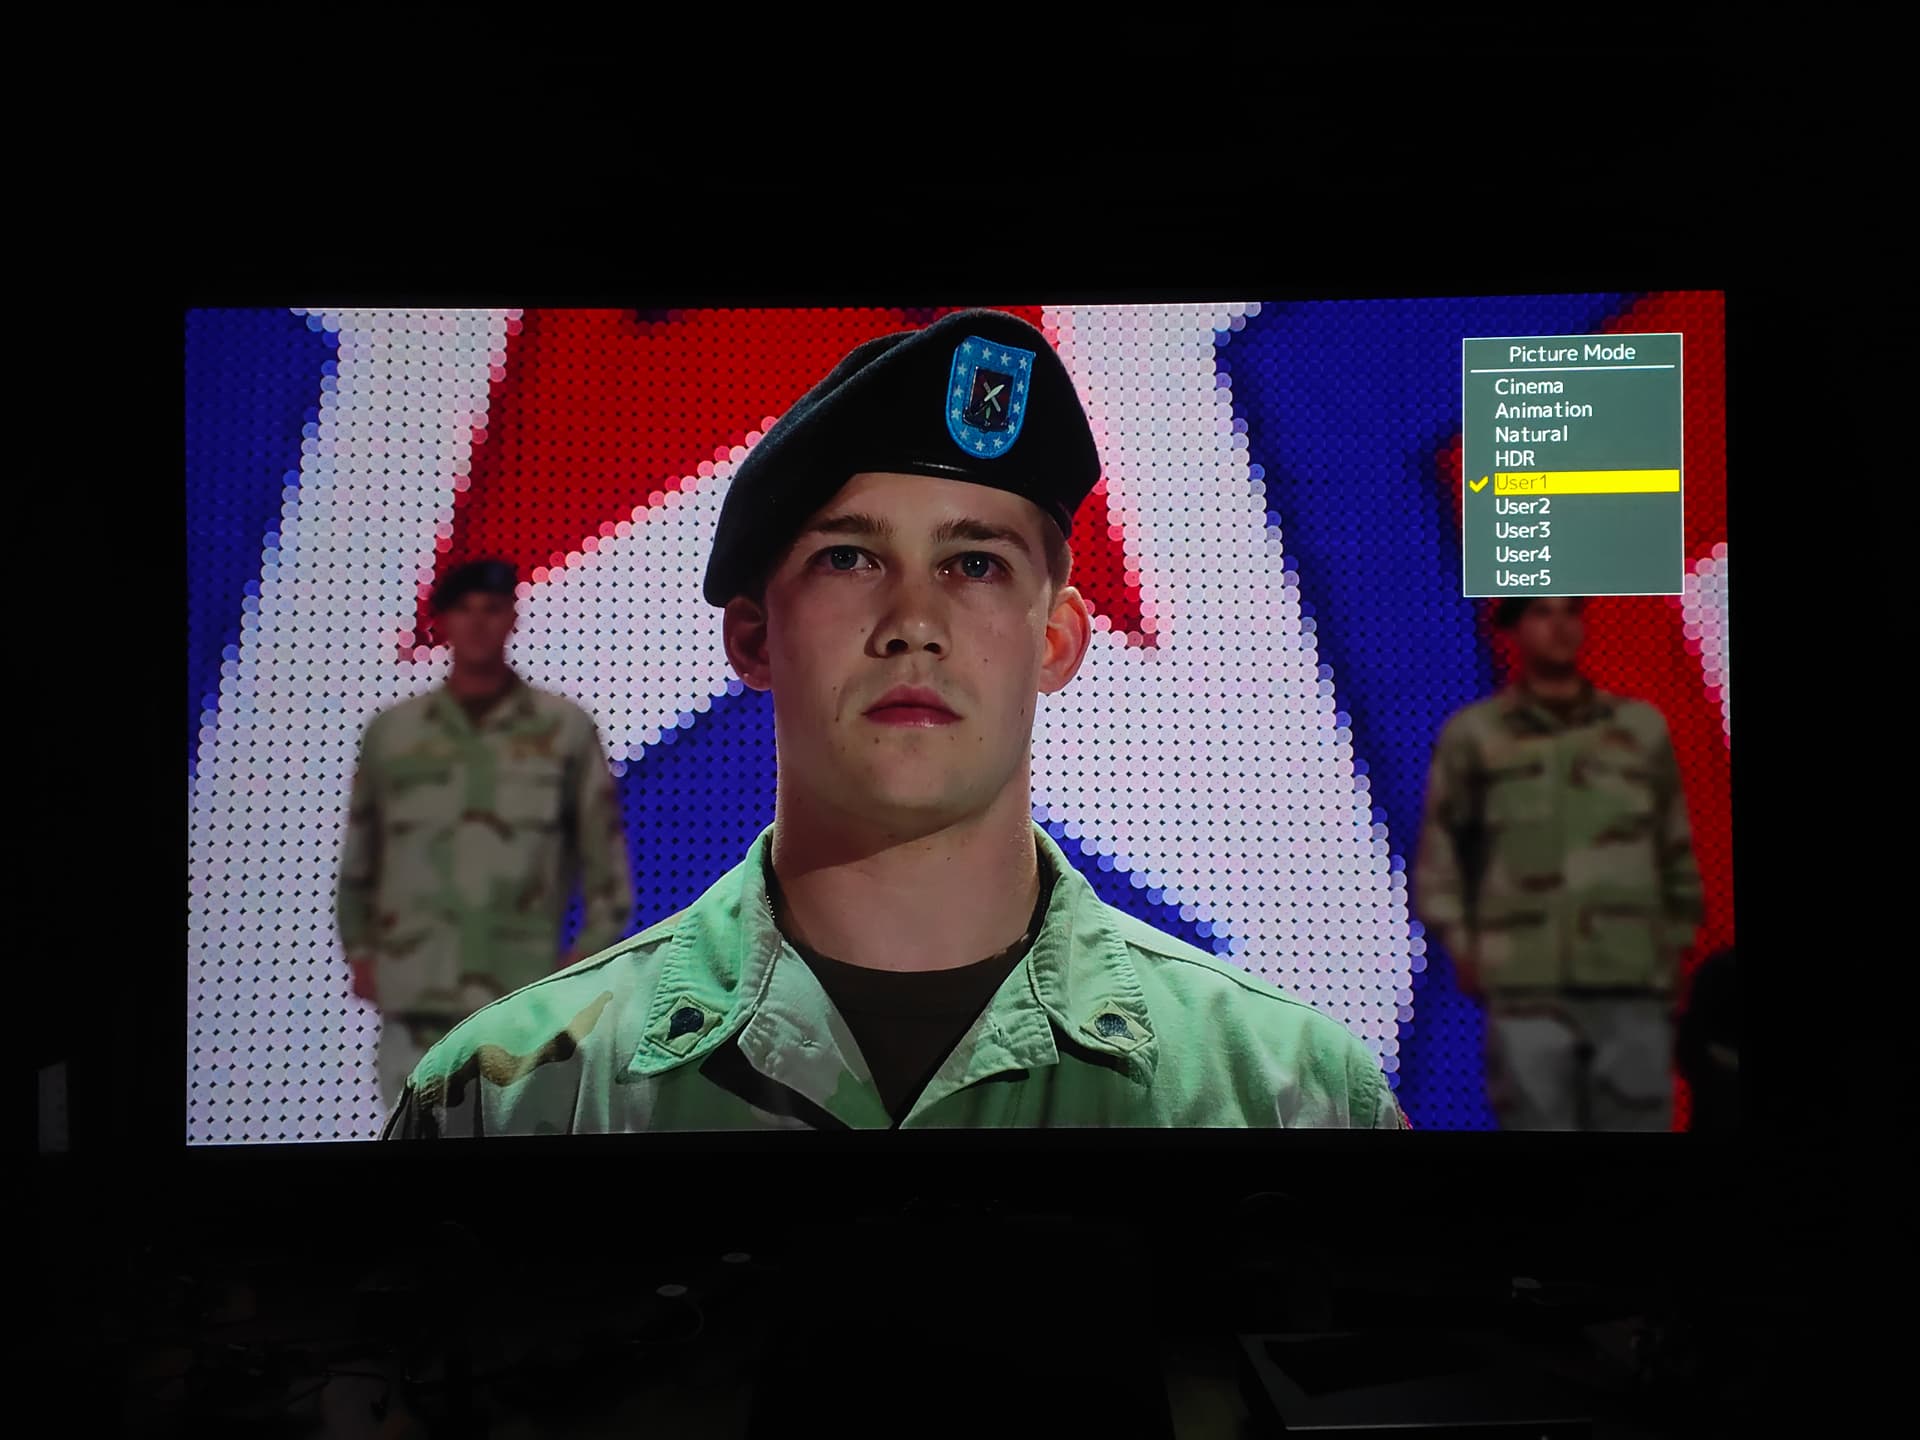
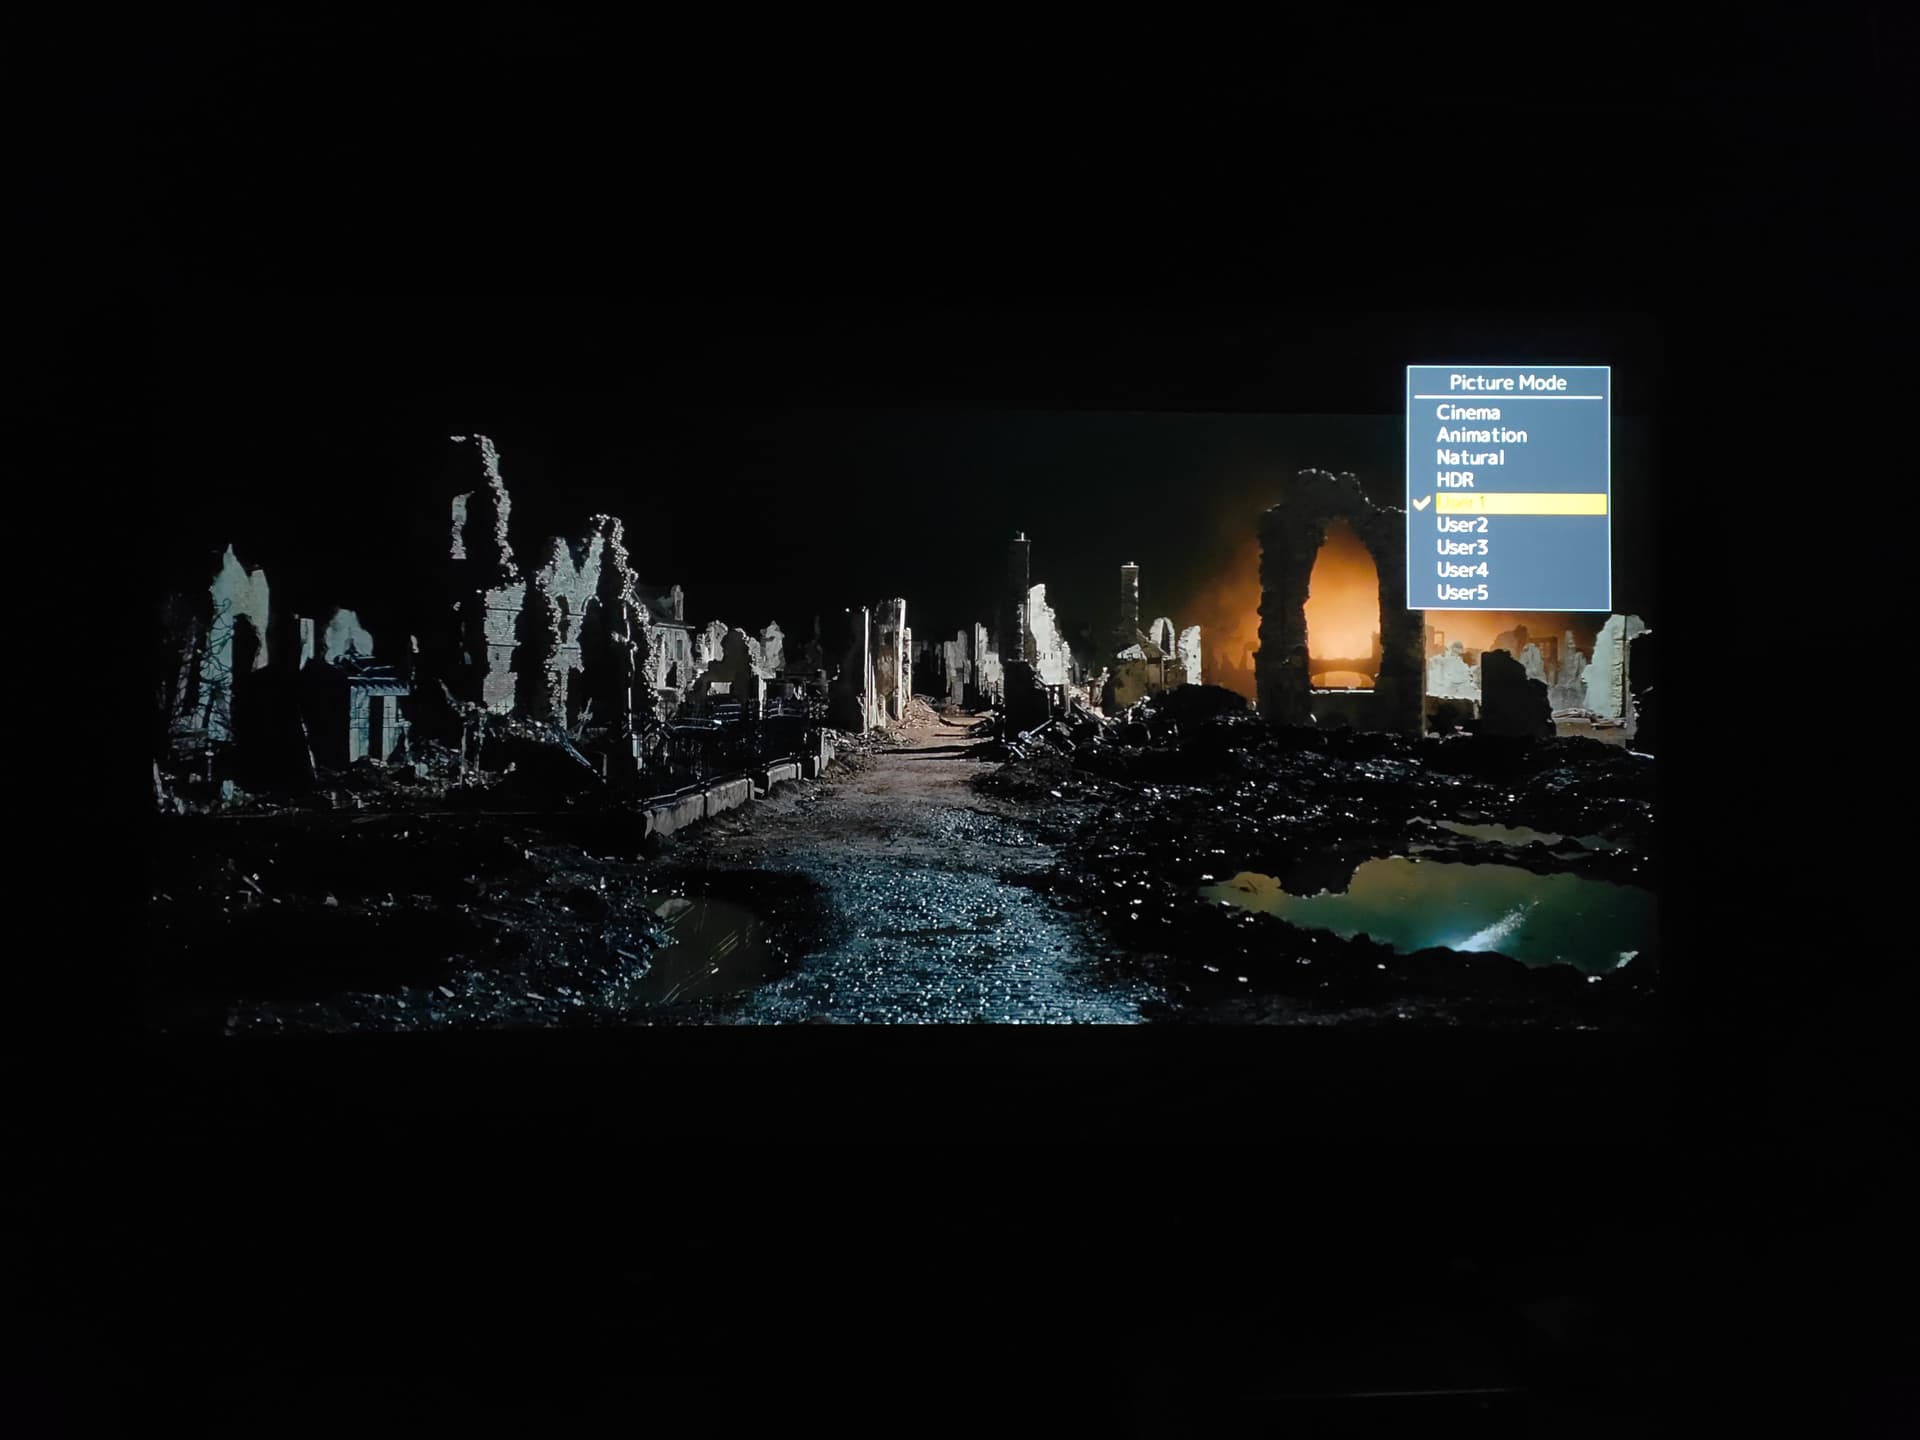
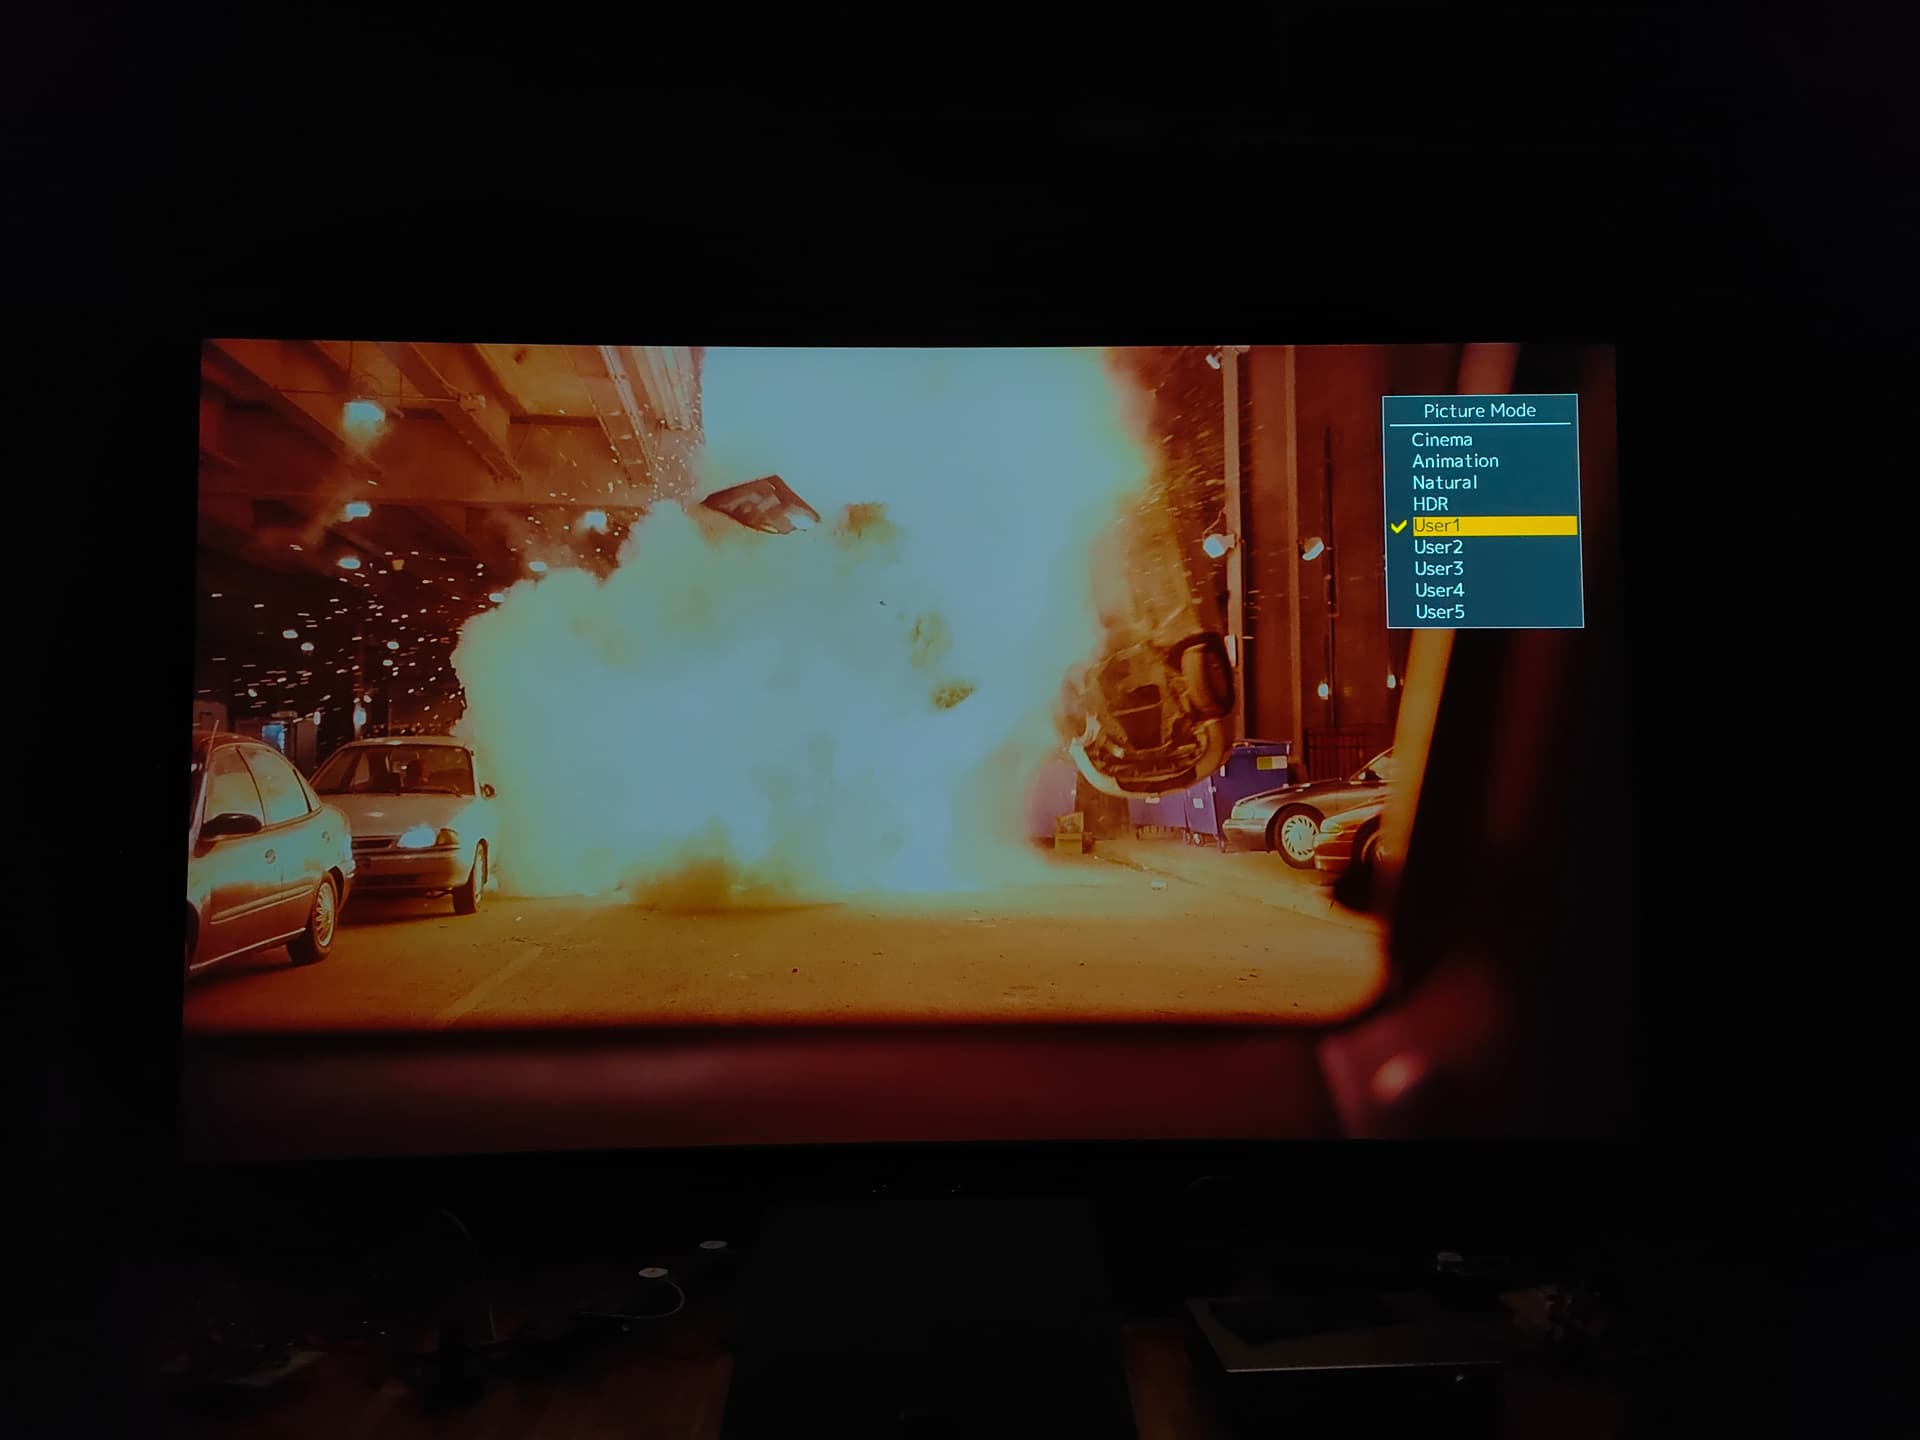
Custom
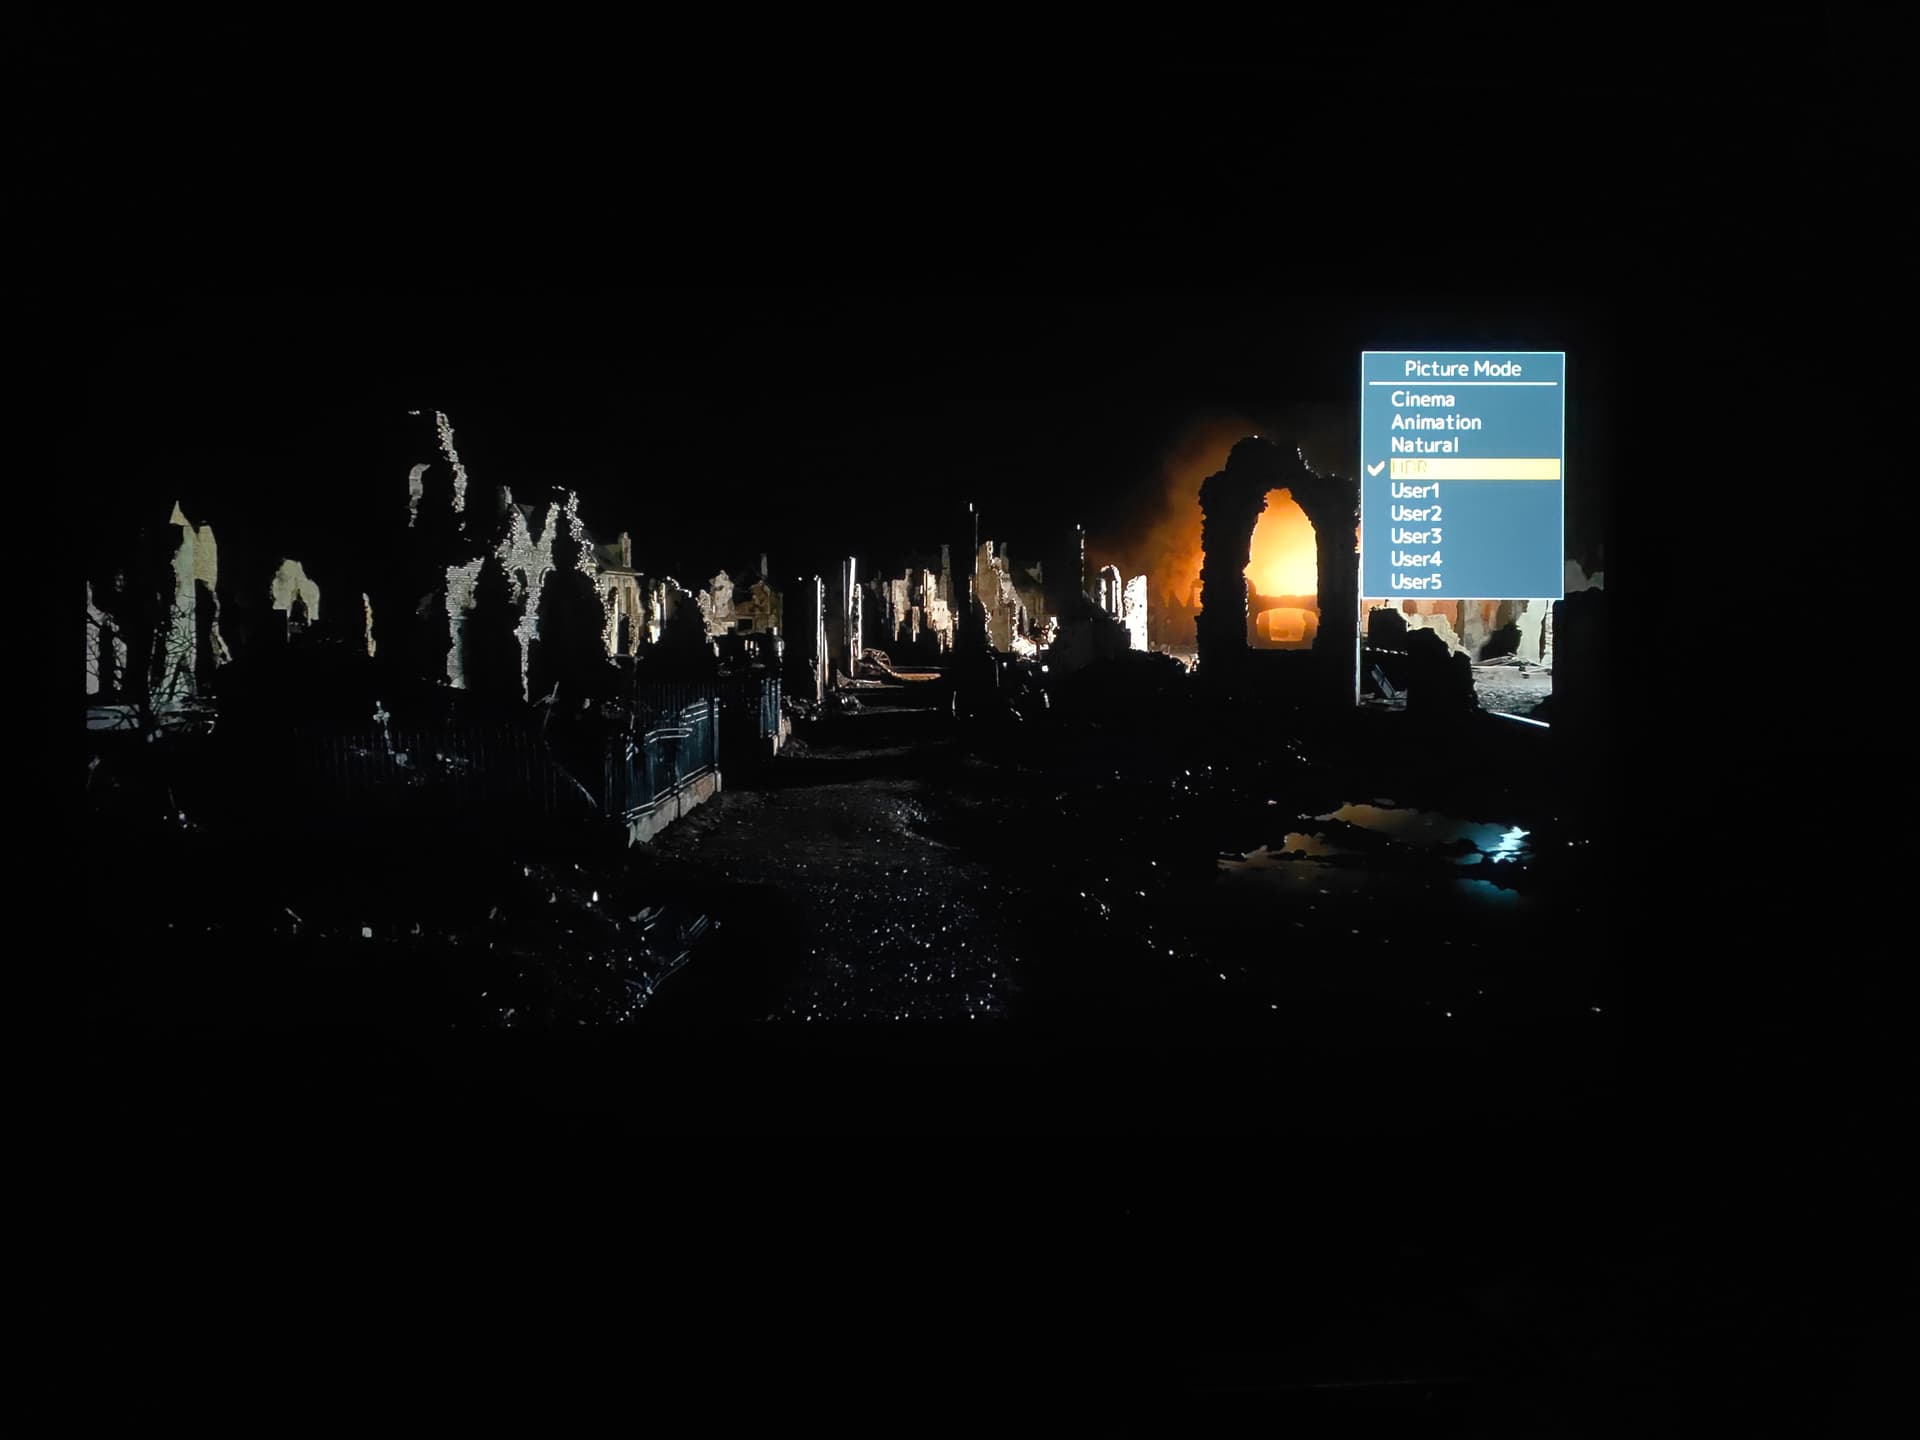
HDR
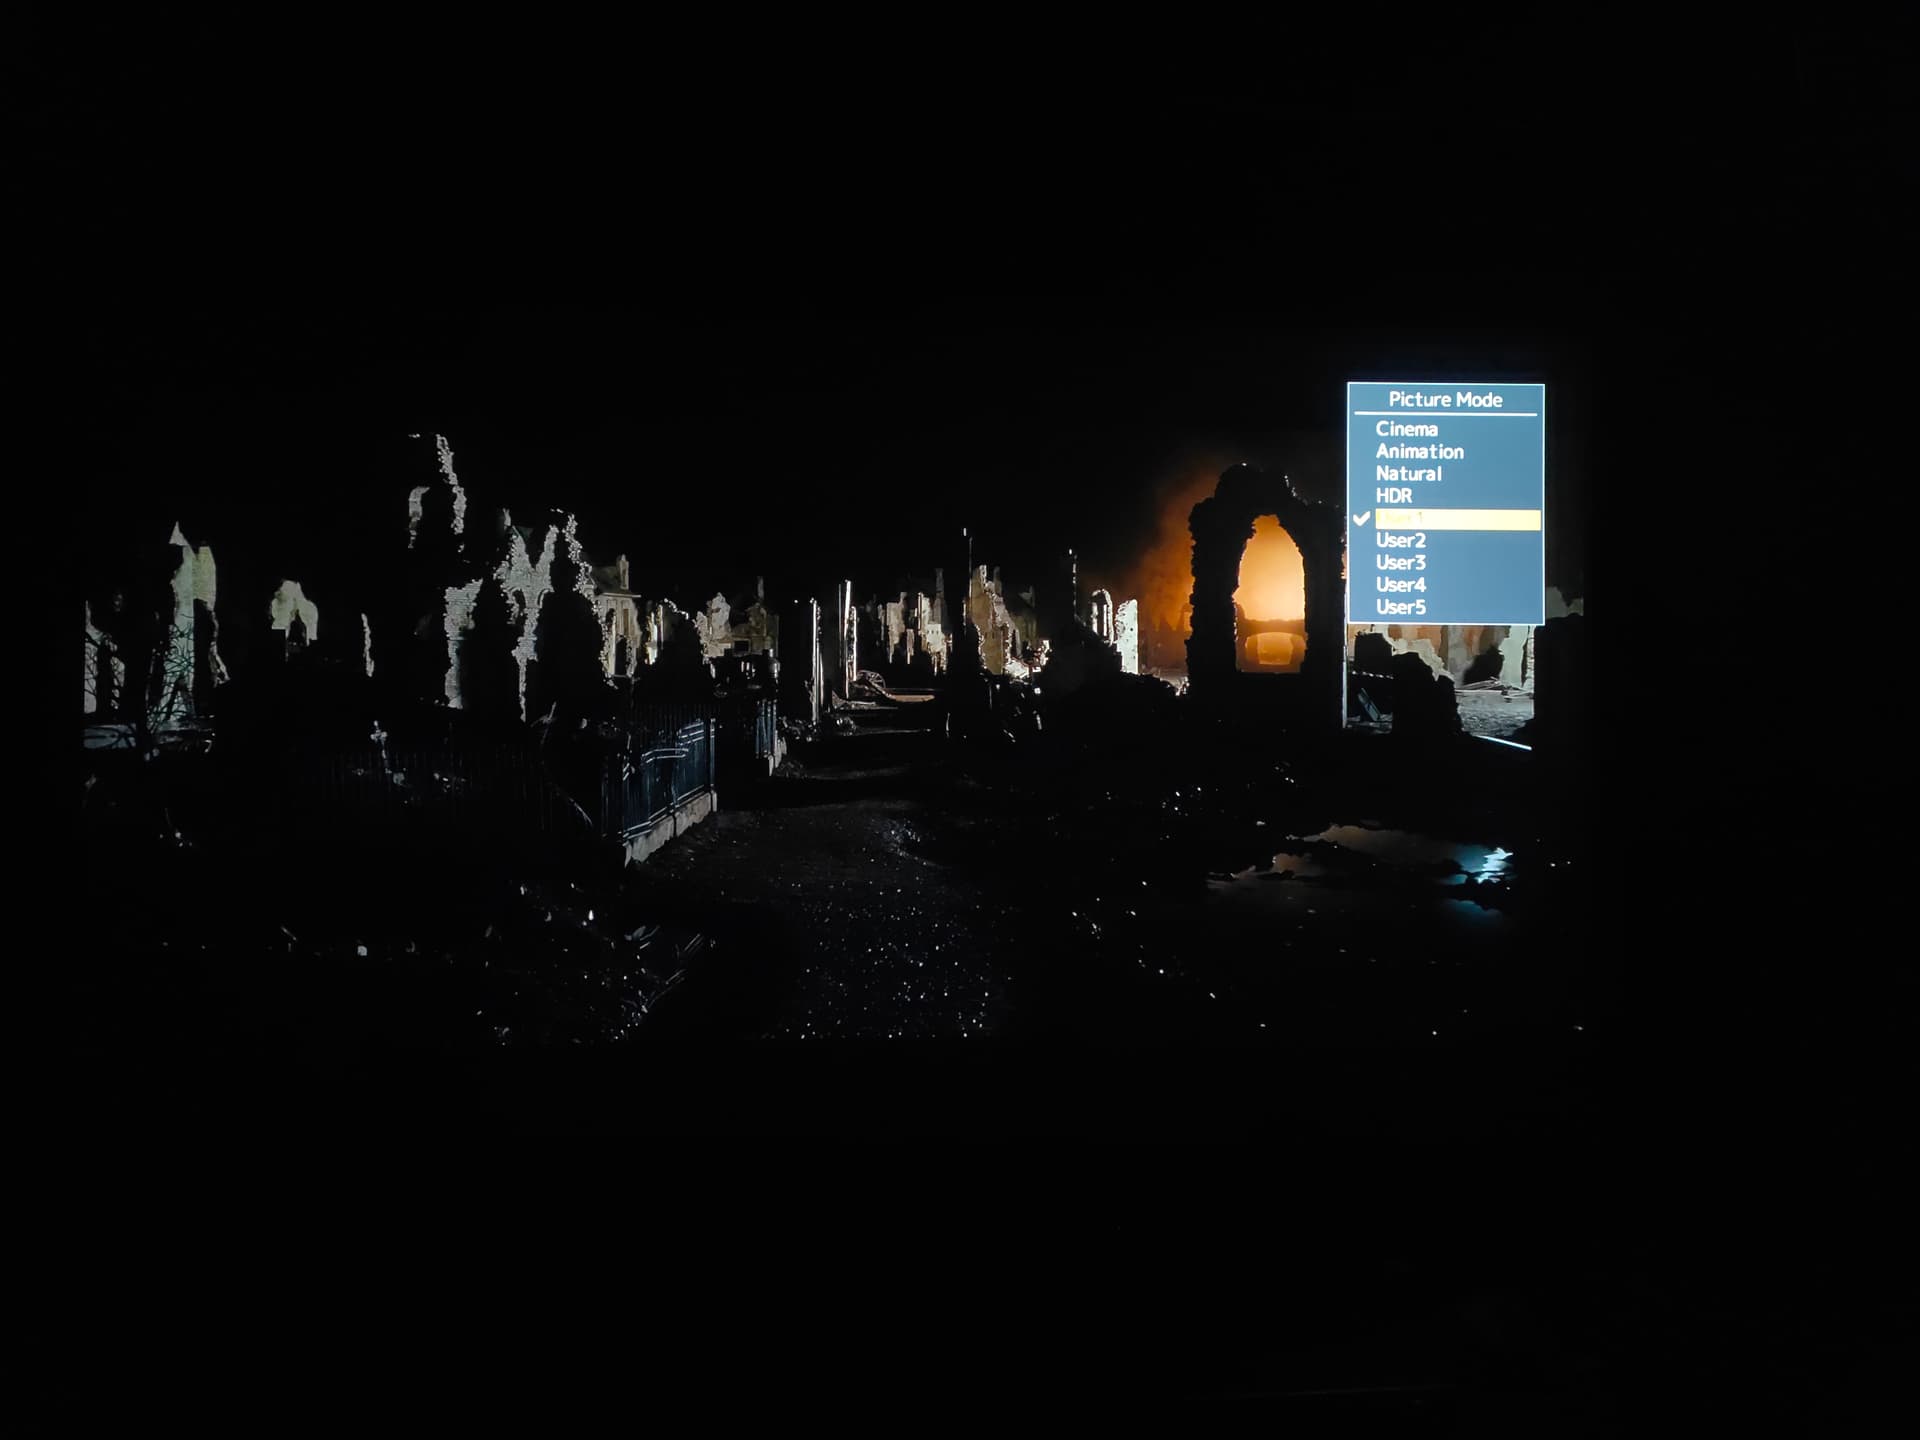
Custom
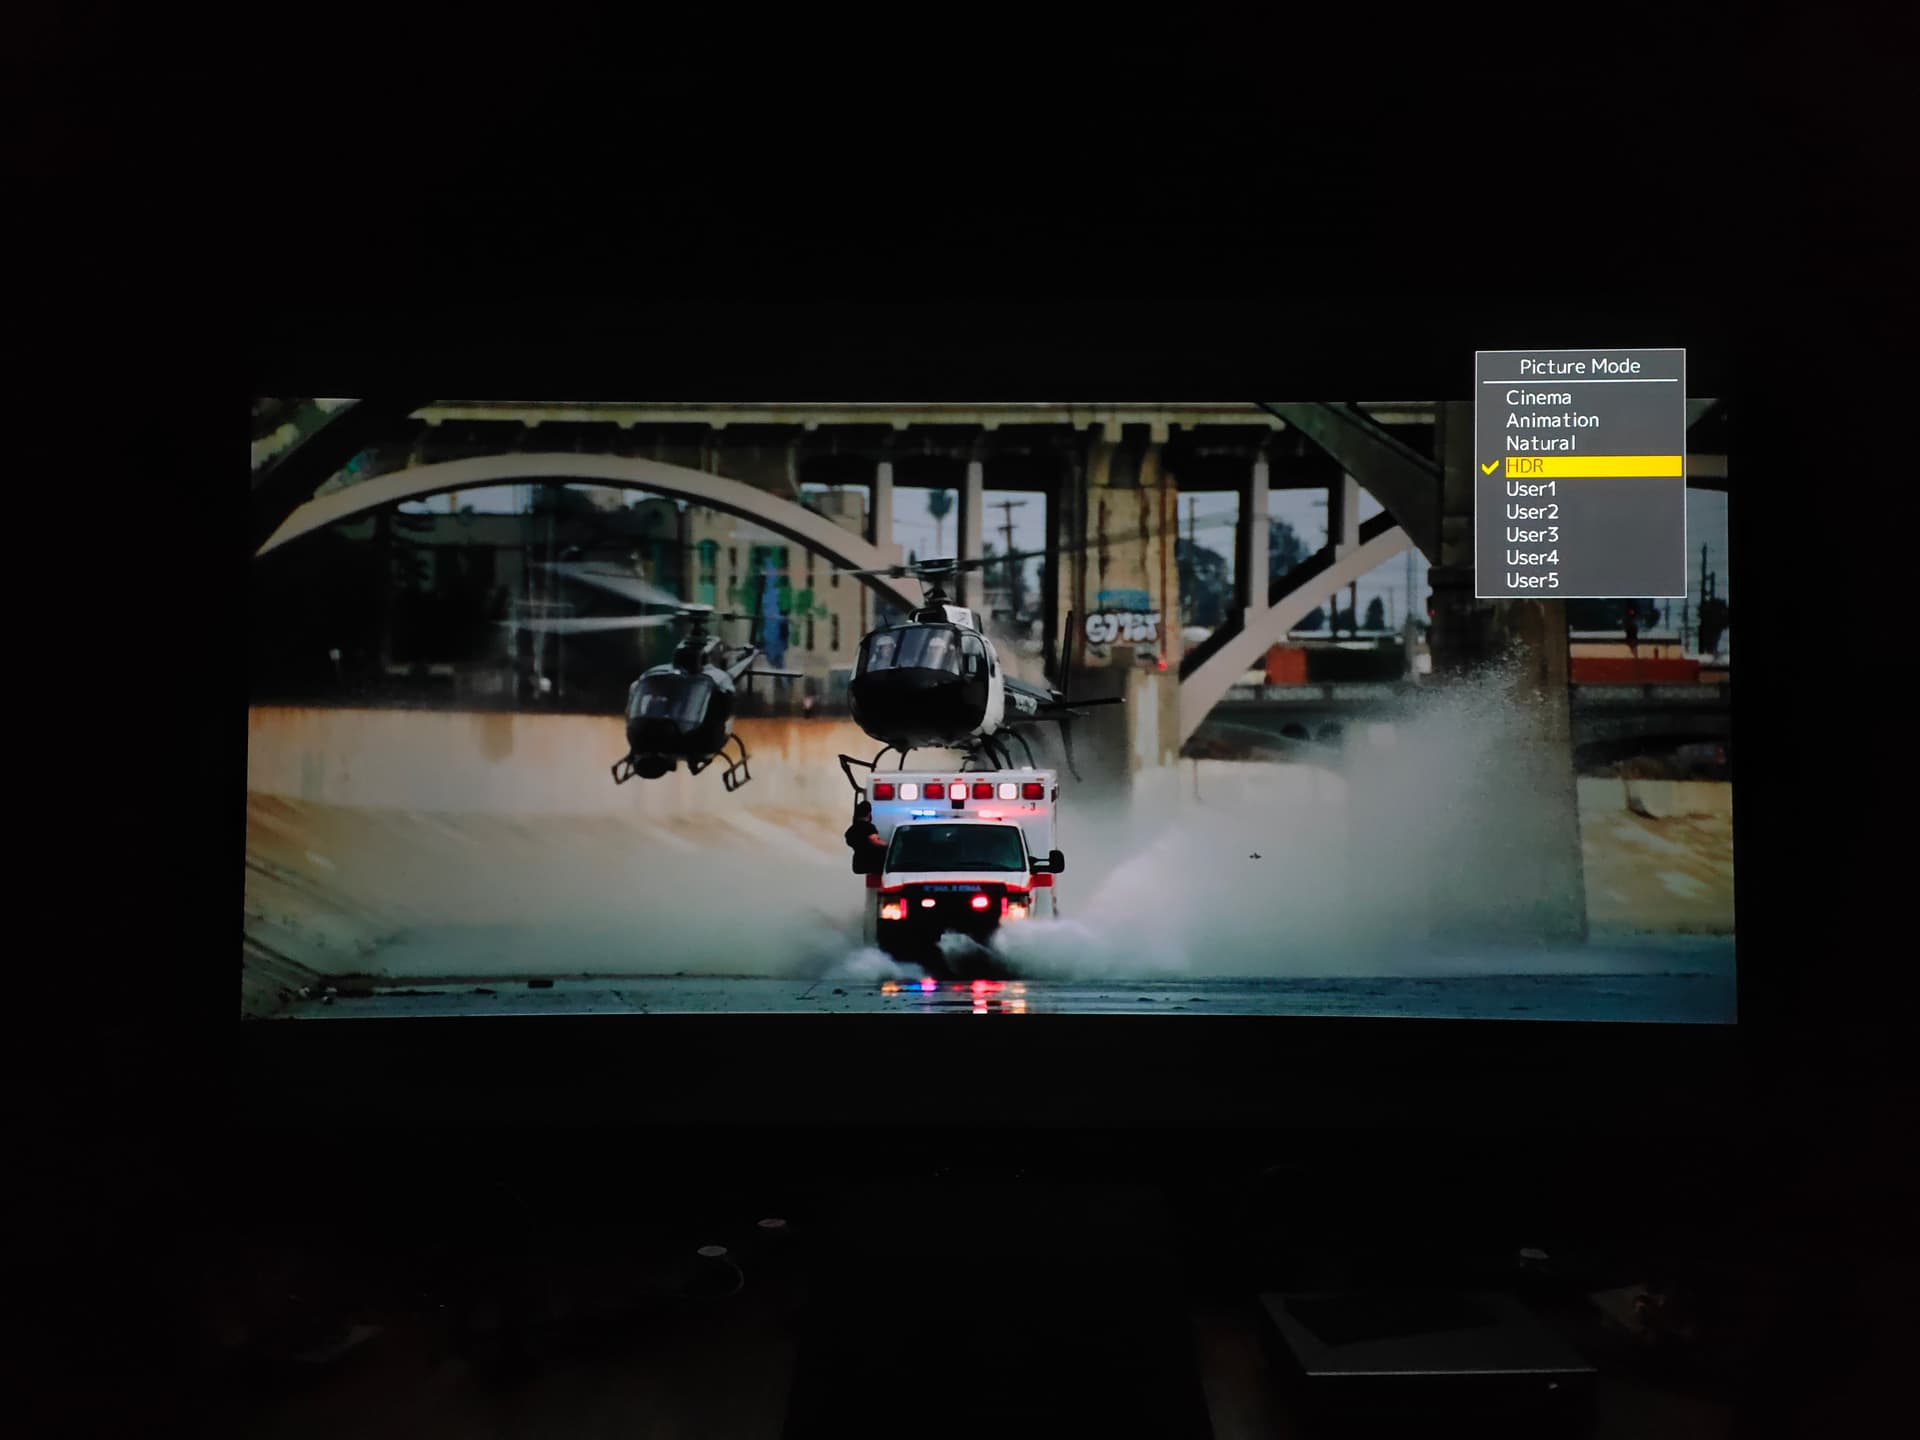
HDR
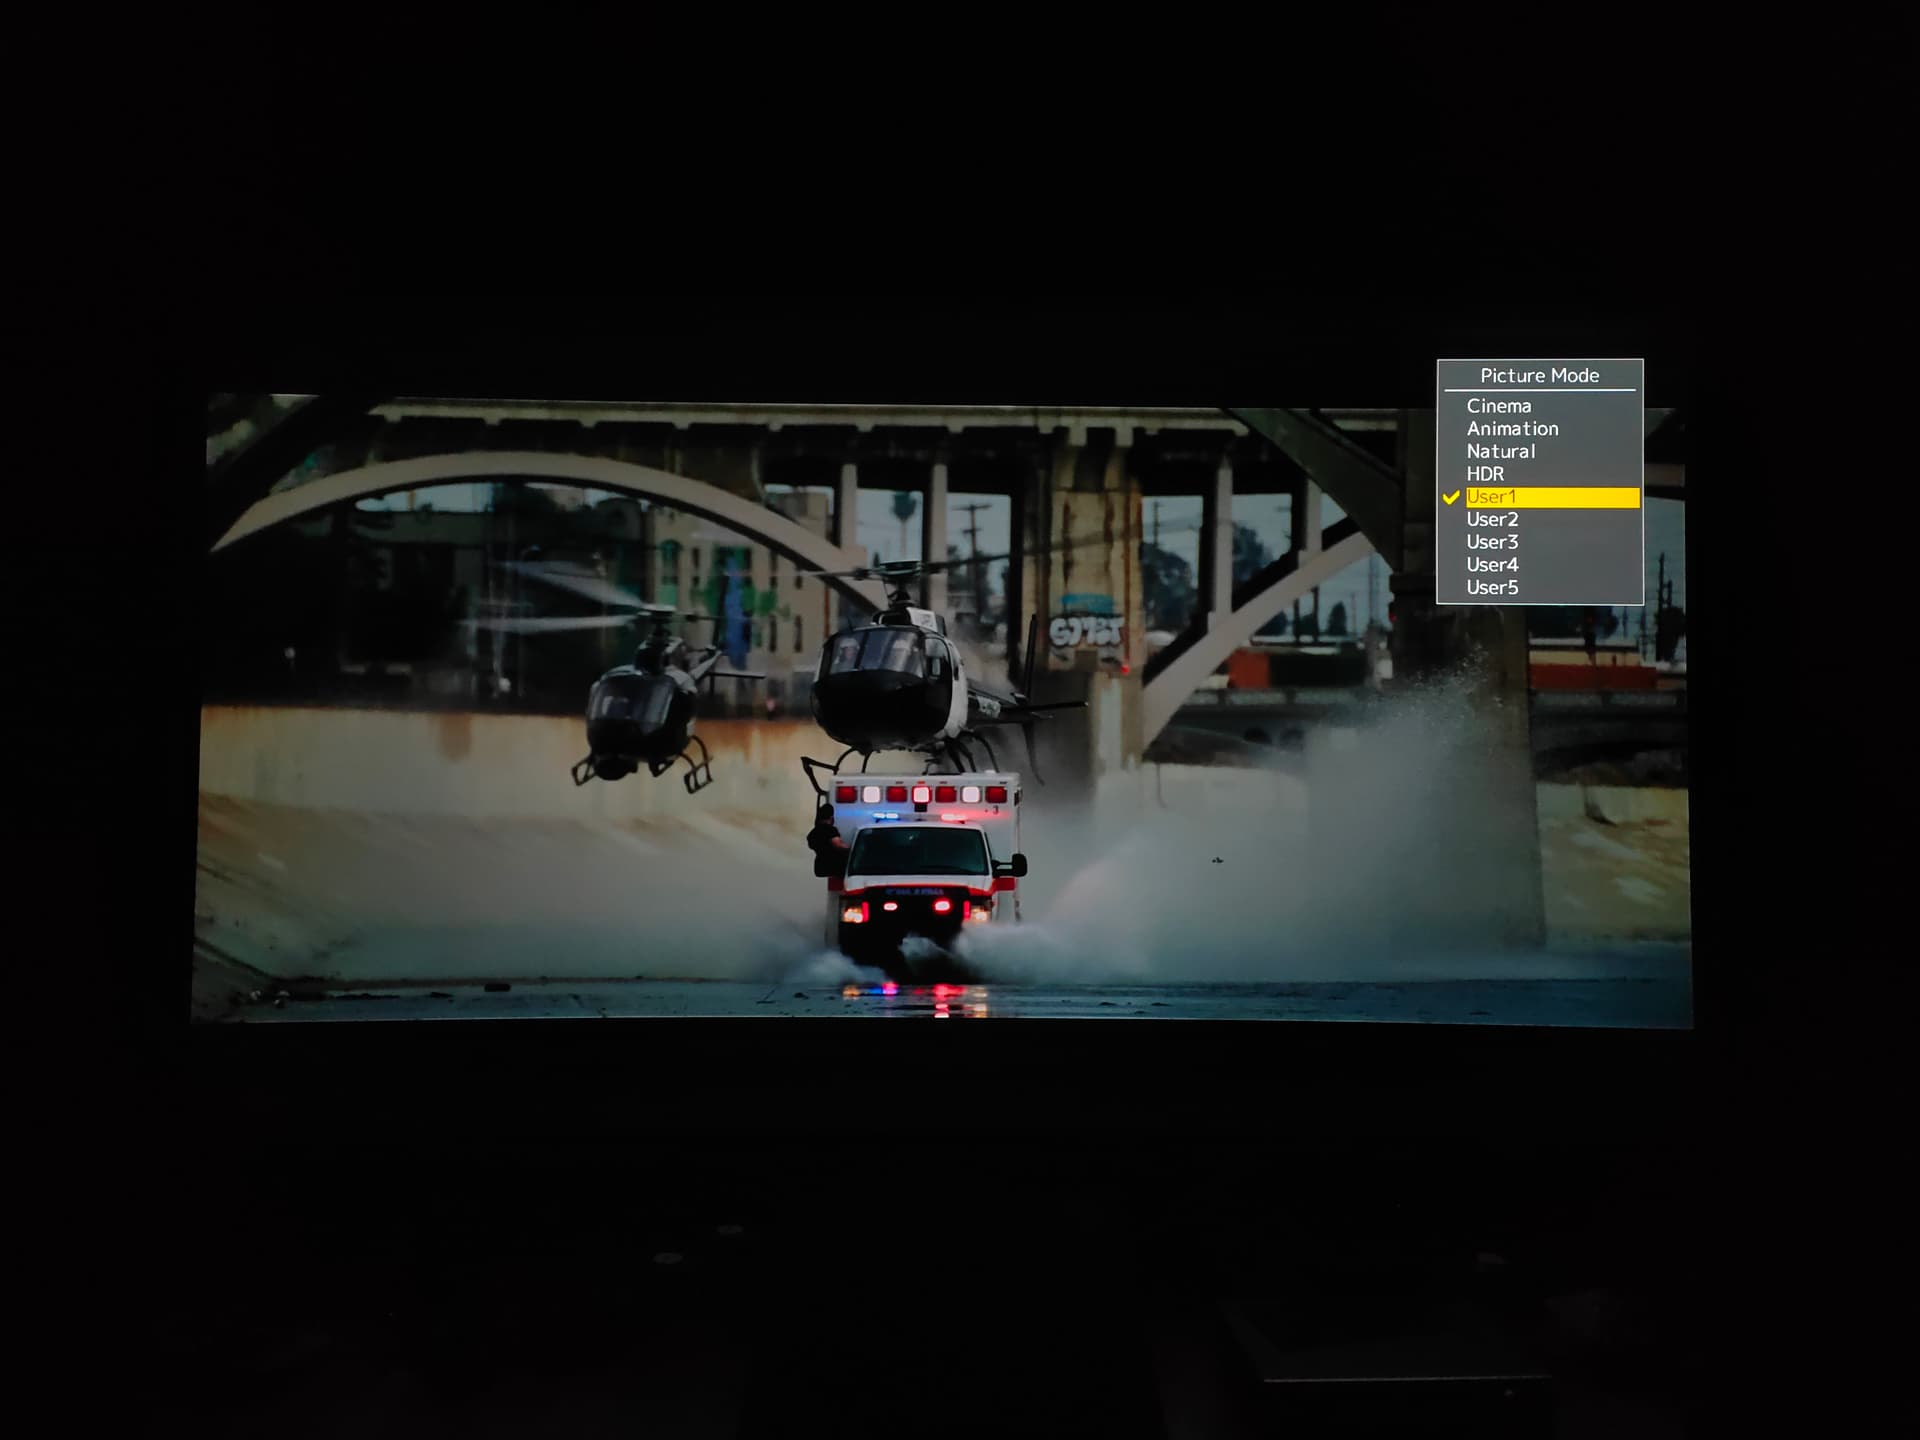
Custom
HDR
Custom
HDR
Custom
HDR
Custom
HDR
Custom
HDR
Thought it handled the Meg scene well, the clouds details still visible.
All in very stoked with the calibrated image. Yes it is far too little lumens for my screen, but actually with some tweaking can get a more than acceptable image, at least for newbie like me.
All images taken in low lamp mode… ![]()
Edit : bonus points for those who can name all the scenes ![]()
Nice! Enjoy your new toy!
Is both sdr and hdr modes calibrated?
Well personally, I’ve always preferred a well calibrated sdr image compared to hdr. I find it much more pleasing and natural, plus less eye fatigue ![]()
Yes both SDR and HDR are calibrated. Sifu Calvin uses the spyder meter for grayscale and gamma, 33 step JVC autocal. Corrected the gamma ‘droop’. Images look more 3D with better depth after this correction.
Colour calibration is done with another dedicated sensor that has a reference 6500k white point that is calibrated at each initiation.
I didn’t know this but the JVC needs to be color calibrated at multiple iris positions. Each cal is only good for 4 iris steps, eg 0 to - 3. The color jumps visibly from - 3 to - 4. So we calibrated 0, - 4, - 8, - 12 for both low and high lamp . As a result, there image is tremendously accurate down to the dimmest scenes, no tinting of the grays and shadow details at all.
Haven’t done much SDR checking, but what I’ve seen looks very very good. Will check and share more scenes in coming days.
Regarding the eye strain… I think it’s quite a contradicting situation.
The custom curve images above, all look very color accurate, no crushed blacks, no blown highlight… The HDR images just have a bit more pop that attracts the eye. But actually there is lost details. Look at the shoulders of the uniform on Billy Lynn scene. The HDR image has lost a lot of the greens to whites in the trade for brightness.
With the better pop and punch of the HDR image, there is also a bit more eye strain, because of the simultaneously brighter highlights and darker shadows. Which to my understanding, is the whole premise of high dynamic range. Bright, and dark, at the same time…
But really there is an eye limitation, that causes fatigue… So we need those dynamic tone mapping tools, to find the balance that has lots of pop and punch, full highlight and shadow details with max color, yet little eye strain…
Such is the conundrum…
Ah both modes! Nice! Since it is done by a sifu (is he in this forum?), u can sit back and enjoy the pq! Haha
And from what u described, ie. Using another sensor that has a reference white plate, it seems like he is using a spectrometer. If it is, your calibration shld be v v accurate.
Cos the spectrometer will calibrate your colorimeter against your actual display unit. This is the reference way of calibration!
Yep…that’s correct. JVC has this Iris-step issue that will impact the color accuracy. For me, I’m too lazy to each “4-Iris step”…I will stick to one that works and calibrate accordingly. Video calibration, especially on JVC projector is very time consuming. JVC Autocal s/w is good for gamma tracking but lacks the finesse and granularity in color control.
Yes, HDR premise is all about whitest “white” and darkest “black”…this is where HDR shines provided the display is properly calibrated. Hence grayscale and gamma is very very important.
Can’t agree more… ![]()
You should consider getting a Lumagen Radiance Pro when the time is ripe.
On the first soldier scene, the colors look more accurate on the HDR. The Custom has a greenish tinge on the skin.
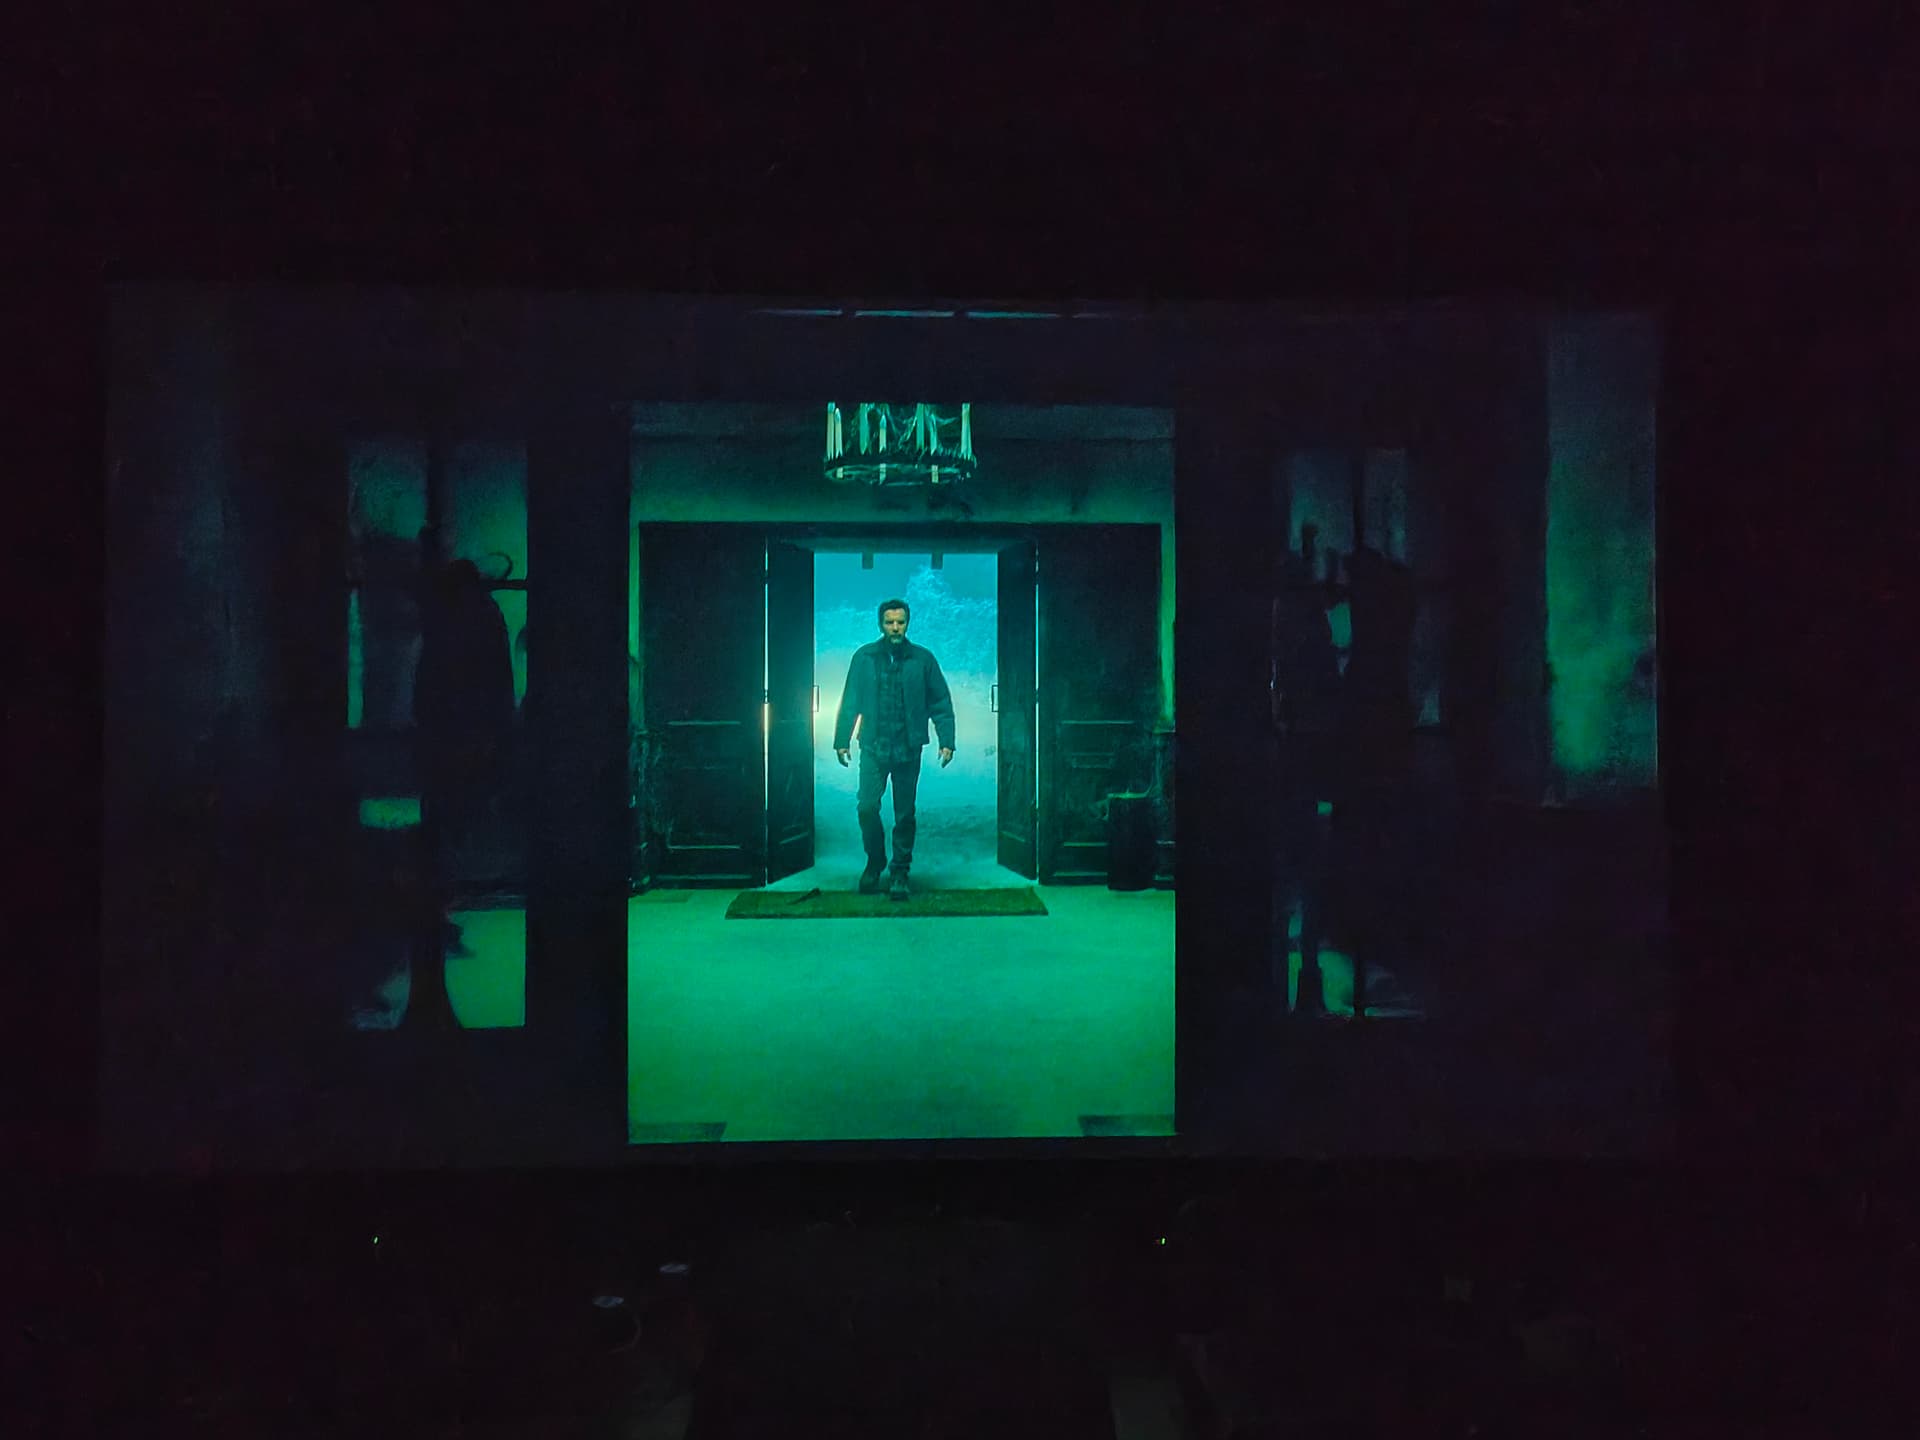
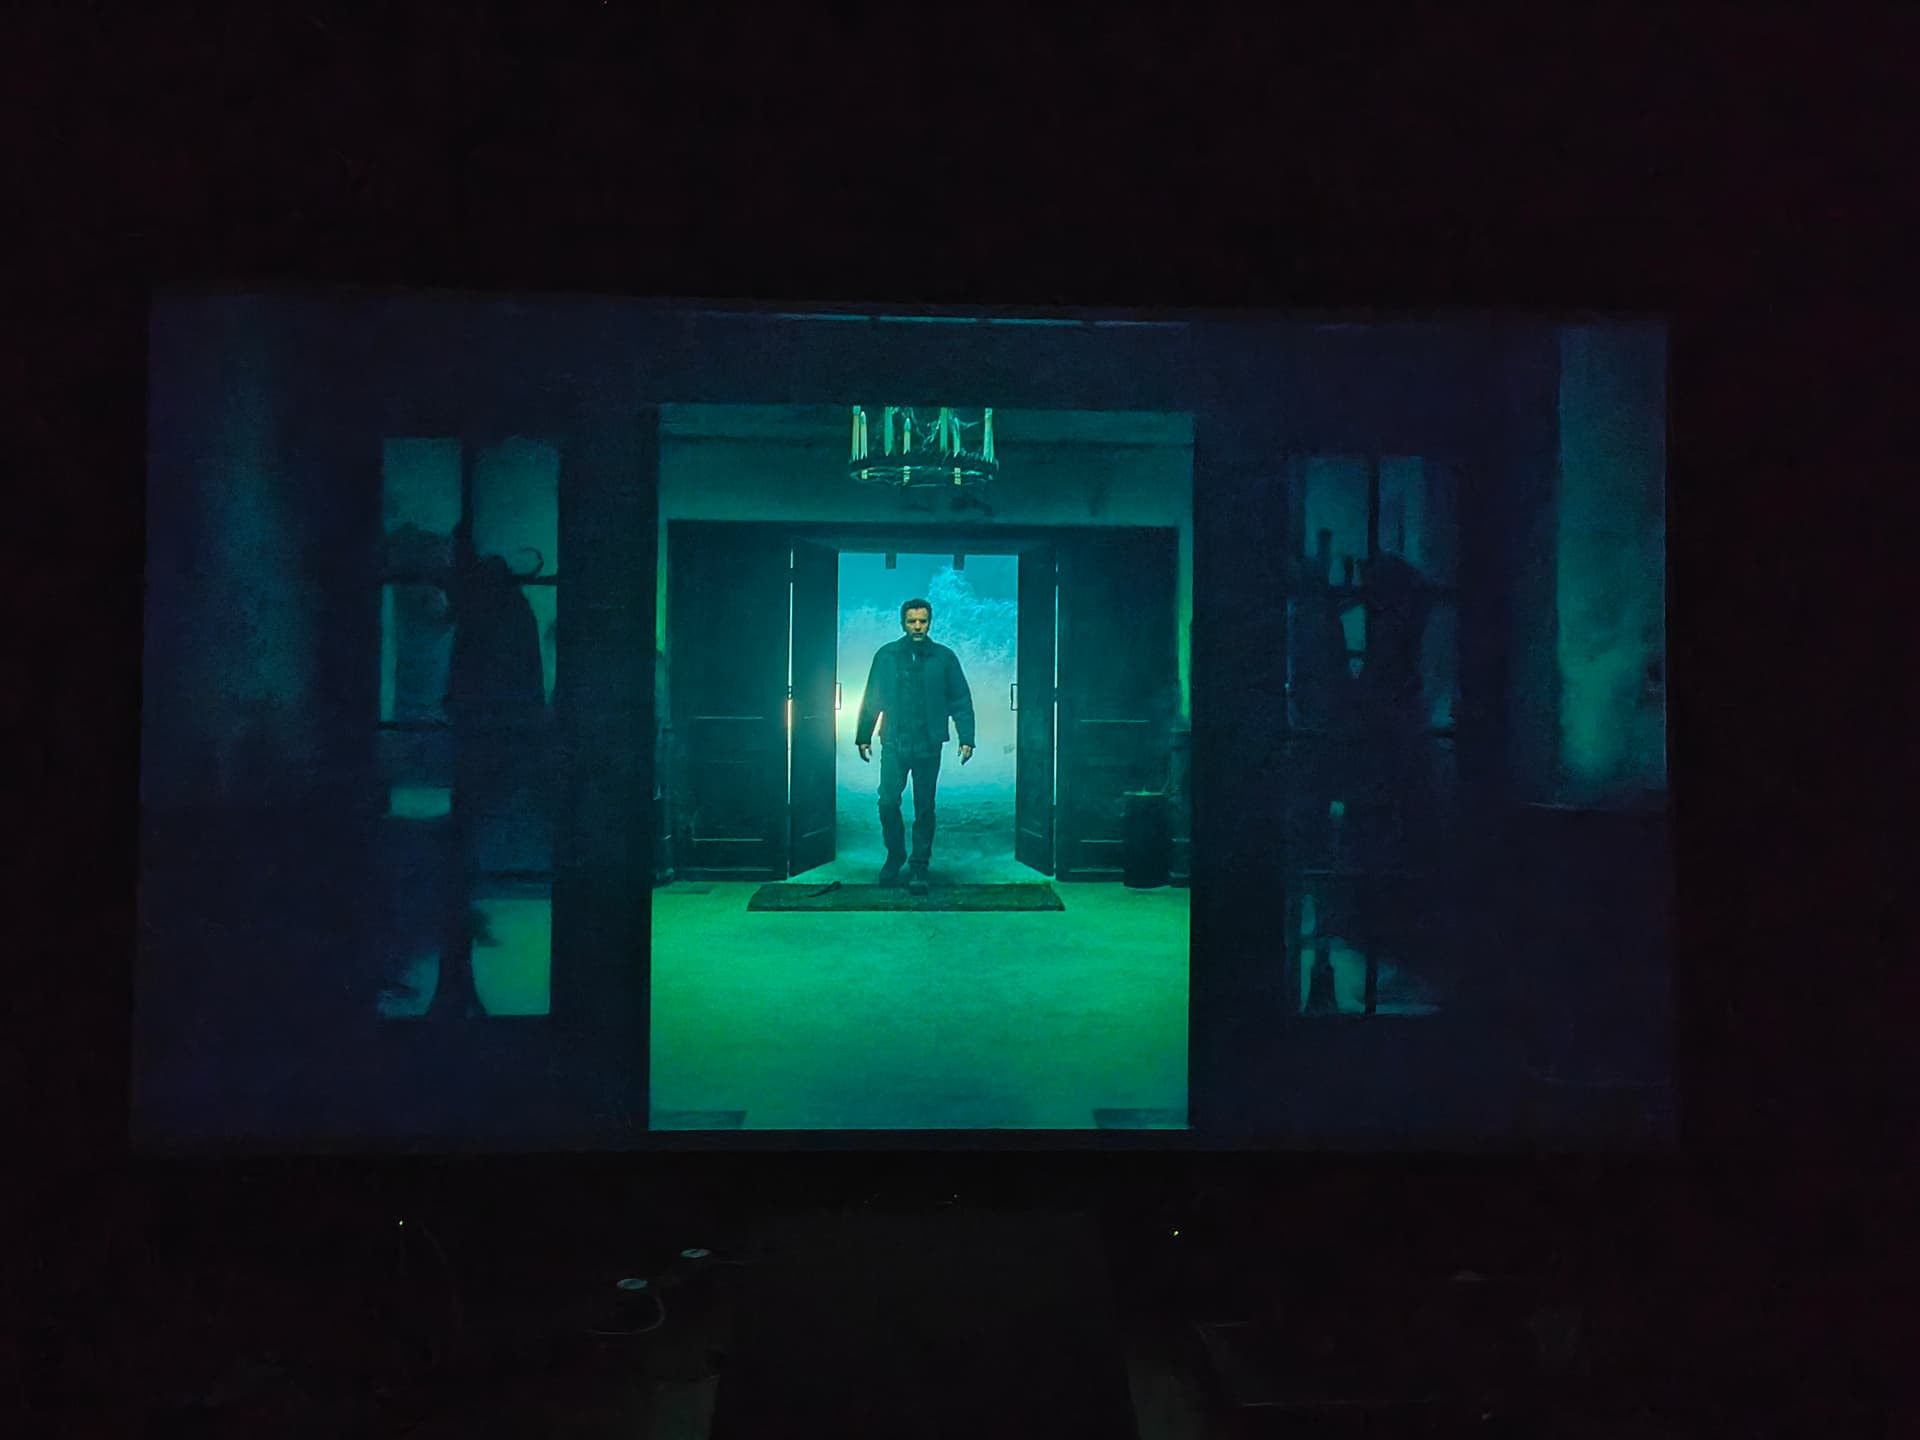
The third scene, they guy walking through the door, the HDR looks more contrasty. The Custom looks a bit washed out
The first graveyard scene, the HDR colors through the glow on the right side look much better. Same with the 2nd graveyard scene
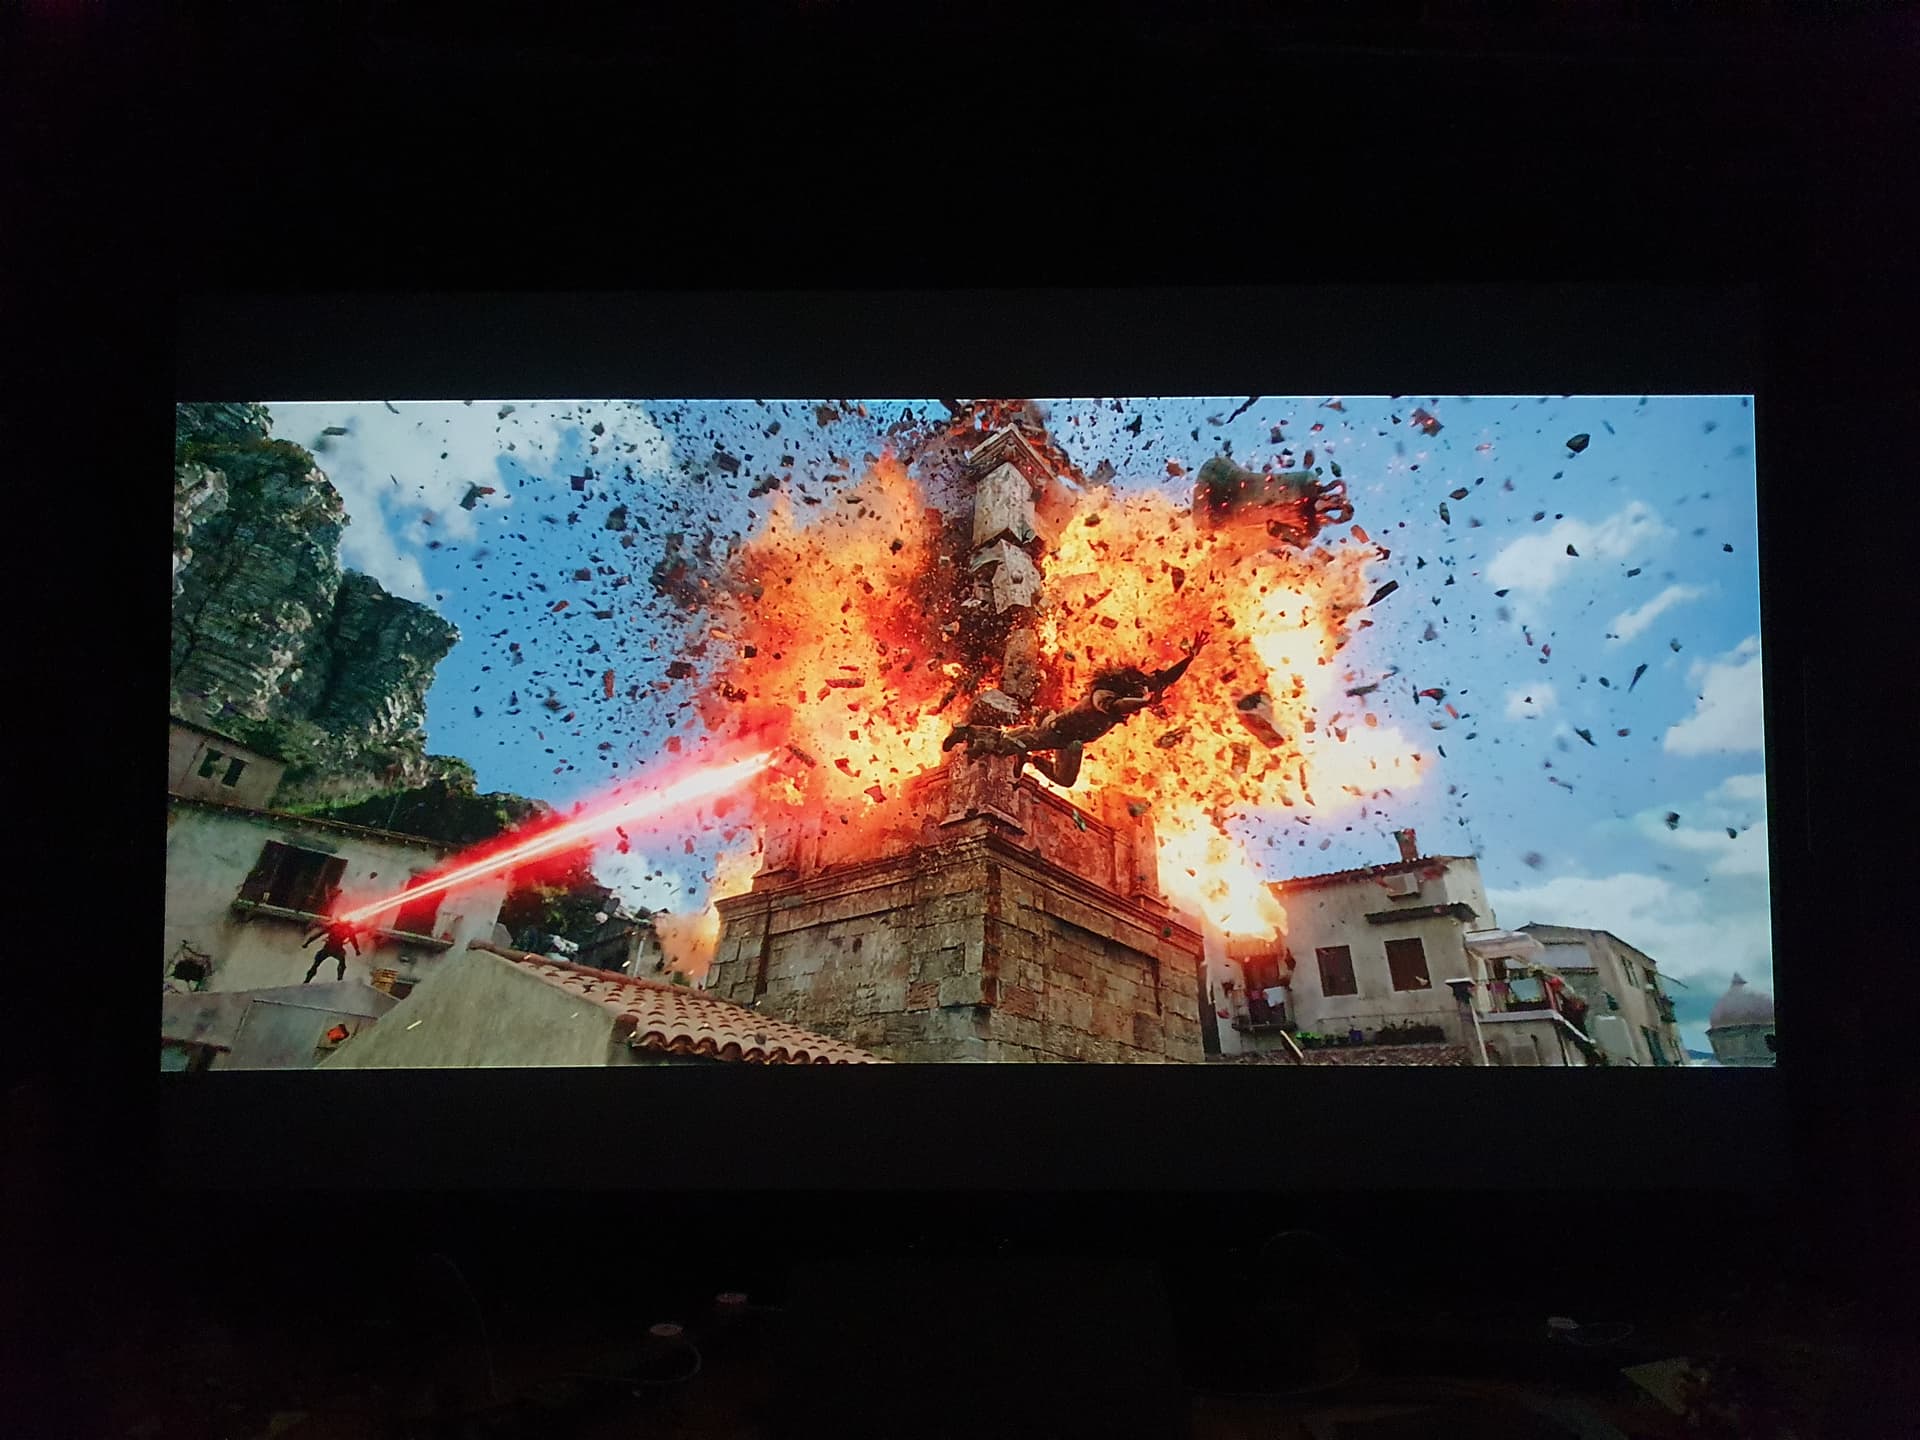
The explosion scene, there is definitely more vibrant color in HDR with no loss in detail
The Meg scene is not bad. Does your projector have JVC frame adapt? I think I’ve seen better, but you will need MadVR or Lumagen