Gavin's DIY Home Theatre (Hardcore)

One last bit of work on the room - blanking out those windows. For various reasons, built windows in the room, but they will be blanked out for bat cave HT usage.

This was a compromise decision due to sound isolation compromise - both inwards and outwards. However, the alternative of building a completely sealed room is also not practical.

One of the most technically challenging parts of the room design is the ventilation system. For most of us, we just seal the room with an AC unit inside. There is no fresh air exchange etc.

From past room experience, I knew ventilation was important, to air out the fumes from the material, as well as for fresh air. So some windows is needed.

One of the last things to complete before setting up the gear and firing up sound and image was the window ‘plug’.

Nothing fancy, just some curtains, and plywood.

Actually first installed only the plywood without curtains. The right wall is west facing, and the afternoon sun made the entire plywood surface into a heater that radiated heat into the room. So I installed a light color reflective curtain (old curtain from previous house haha)

Plywood plugs partially installed.

All plugs installed. I have some diy foam seals around, to try and add just that little bit extra sound isolation. This is also where I channel my form follows function philosophy… Haha, it’s gonna be behind speakers and acoustic panels so just various shades of blacks.

I actually went outside to check what it looks like… :sweat_smile: so I should probably iron the curtains right…

2 Likes

Next up, surround speakers. I’m using coaxial pro audio based speakers.

There’s quite a lot of theory about what makes a good surround speaker, or even HT speaker in general.

For me, one of the most important criteria is even directivity - how similar the sound is on axis vs off axis. In hifi circles, for the longest time it was not well understood (now we have a measurements and data driven revolution pioneered by ASR and Erin audio) why speakers that measure similar on axis can sound very different.

The reason is off axis sound dominates in room, especially for longer listening distance, less acoustic treatment etc.

For HT, this is even more important especially if there are multiple seats. Each seat will be receiving a different part of the speaker response.
But even for a single sweet spot optimised HT, good off axis response is very important to create that enveloping (not immersive :laughing:) sound bubble, as well as seamless panning and sound field across all speakers.

Instead of trying to explain in further detail, this review of the latest 8inch JBL monitors talks a lot about the directivity and why it is important.

These days, there are very well designed, almost textbook measuring controlled directivity bookshelf speakers and towers. These are ideal for HT application. However, with the advent object based tracks requiring ceiling speakers, this shines a spotlight on the Achilles heel of 2 way speaker with tweeter and woofer.
The vertical directivity falls apart as the path length difference between woofer and tweet when going vertically results in significant dips in the response. This was also mentioned in Erins review above.

As with most things in audio, it is a case of compromise. One can choose better horizontal directivity with a waveguide, but accept the response dip when panning upwards to the ceiling channels. Or choose coaxials with good panning horizontally and vertically, but perhaps slightly less perfect response overall.

2 Likes

After all that theory, what does it actually mean, or look like?

Here’s an example of very good horizontal directivity with a waveguide. Credits to Erin’s review of the Dutch 8C ( Dutch & Dutch 8c Speaker Review)

Looking at the 40deg off axis line, it is flatter than some speaker’s direct on axis response.

Here’s an example (or three) of a very good and well engineered 2 way non waveguide / controlled directivity speaker. The green 40deg lines are actually very good, because these are all solidly engineered. They are nowhere as even as one with a WG, like the Dutch, or JBL.

Focal Aria 906 (Focal Aria 906 Bookshelf Speaker Review)

SVS Ultra bookshelf (SVS Ultra Bookshelf Speaker Review)

That is in the horizontal plane. How about vertically, the Achilles heel? That big dip when trying to reach up and pan to the atmos speakers…
Dutch 8C

Focal Aria 906

SVS Ultra bookshelf

Well, here’s the coax to rule them all. Pretty much nobody does coax better than Kef.

Kef Ref 1 (Kef Reference 1 Meta Bookshelf Speaker Review)


And the new Andrew Jones Mofi SourcePoint 10 (MoFi SourcePoint 10 Speaker Review)


Note : the bigger 10in coax has more ragged response, fitting the adage that big speakers have big problems. It just comes with the territory.

Hopefully now it is a bit clearer what tree i’m barking up. How does the difference actually sound in practise? It is probably one of those things where it is subtle, and unless you know what to look for or have a comparison / reference, it is very hard to tell what’s missing, or what else is there to improve on.

Note 2: Eagled eyed readers will notice that the worst dips vertically occur in the direction of the woofer, not the tweeter. The vertical response in the tweeter direction actually looks much less compromised than theory suggests.

This means that when the 7 bed channel speakers try to pan upwards to atmos, they are going in their tweeter direction. However, most atmos speakers, are also placed TW side up, are reaching downwards to meet the bed channels, with their dip in response.

This means that it may work better to place the atmos speakers TW side down, so as better meet the bed channels pan.

However, this will mean that the center atmos phantom - the Voice of God (VOG) location, will be in the direction with the big dip. Talk about compromises.

In terms of light seal, could you not have put opaque window film? Can still open windows for light and air

Yes, i didn’t completely block off the back windows as i’ve been opening them for air exchange every time before i use the room. still figuring out how this will work in the long run.

Light wise, i don’t really have a use case where i need external light as this is a dedicated HT… for other mixed use spaces, yes there are many other ways to skin the cat.

Recently, there has been gathering momentum about the benefits of coaxials for use in a dedicated HT setup.

Shane Lee’s recent review of the Ascendo 6in coax. He has reviewed pretty much everything worth reviewing, including perlistens, and i think it is noteworthy that he finds the coaxes to still be outstanding and do things better than other speakers.

A stream with the designer from Ascendo, about why he feels the coax is the most ideal solution for a HT.

Most of Ascendo’s speaker options are coax.

Especially for surround and atmos, JTR also offers coax options only.

So now that we have covered the reasons why i chose coaxials for the HT surrounds, let’s actually look at the surround speakers i’m using. Actually, i have another consideration that coaxials are perhaps not the most ideal design to use for HT surrounds, but that is a discussion (and a project) for another day.

These are kits from Diysoundgroup. The Vortex 12 and Vortex 15 coaxials have been discontinued because of their relatively high price point.

Vortex 15 on axis response.

Vortex 15 polar response

Vortex 12 polar response

Yes they are not perfect, but they certainly behave a lot better than other coaxial options out there, especially for the cost.

Here’s some builds and implementations of the coaxial speakers ‘in the wild’.

V15 as nearfield monitors?

V15 as LCR in screen wall

V15 LCR and volt 10 coax surrounds and atmos - full coax build

Titan 818 LCR, 8x Vortex 12 surrounds, 6x Vortex 12 Atmos

And finally the big crazy Ascendo build with the new 80in subwoofer. Using their 12 inch Coax monitor for all surrounds and atmos.

2 Likes

WOW! what a great planned hard work!

1 Like

This is what the Vortex coaxial drivers look like.
The 12in version.

A look under the AT dust cap for the short horn for the compression driver. This is one part of the black art in making a well behaved coaxial. The transition from. The horn to the cone, as well as the cone profile, which makes up the ‘waveguide’ for the CD.

The surround and gasket, which is another area where most pro audio drivers do not optimise for smooth response.

A better look at another coaxial from The JTR 110HT, without the dust cap.

The build starts with a run to the local woodshop.

After learning that that wood shop is closing and moving to Kranji, brought forward plans and ordered the supplies for the LR mains, as well as Atmos cabs. Running out of space…

Simple rectangular shallow sealed cabinet.

The smaller V12 is closer to the bracing - need to cutout a relief. That’s the celestion compression driver used in this kit, mounted on the back of the woofer.

V12 and V15 size comparison. I’m using the V15 coax for side surround, and V12 for back. In my experience, the side surrounds are the next most critical speakers in a HT, after center, and LR mains.

I did the usual magic tape damping on the internal bracing structure. In addition, try some different things - reuse the driver cutout piece.

Installed on the bottom half of the baffle.

Simple sand and paint with a water based rubbery black paint. Not quite as thick as duratex but similarly durable with enough coats. I did 2 coats, nothing crazy.

All 4 surround cabs done!

Next, start building the crossover. Very professional, comes with a PCB.

I ordered larger AWG inductors - don’t quite fit in the allotted space :sweat_smile:

Completed pair of crossovers. Quite a high component count - a good thing as the designer was prioritizing a good response, vs cutting corners and cost.
Note some blank spaces in the crossover. I didn’t install the optional parts for additional HF padding, as well as the additional woofer boundary compensation, since I will be using these on wall

V15 ready to be assembled.

As usual, i do some free air run in of the driver to loosen up suspension.

Mounting crossover, remember those 2.99 ikea pillows haha.

Wire up!

Tip that I saw somewhere to keep the wire tidy.

Messy work in progress.

2 Likes

At this point, it is appropriate to point out some similarities.

This

And this.

Imitation is the best form of flattery :sweat_smile:. The Ascendo coax 15s are ported, and likely uses higher spec driver, knowing then…

I should have probably ported mine as well, except I wanted all sealed for low group delay, and also I have other plans for the low end… More on this later.

Also, yes they look weird with the woofer so close to the top edge. Yes, this was fully intentional, part of the form follows function philosophy. :grimacing:

2 Likes

Remember those ikea pillows stuffing. I literally ran out and had to scavenge from existing speaker for stuffing.

Enter the legendary diysoundgroup magnum 12 midbass woofer.

Recall from storage. Still has all the packing from moving house.

Stealing the stuffing.

A tale of 2 rednecks. The Vortex 12 is based on the eminence Kappalite 12 coaxial, and the Magnum 12 is based on the eminence Delta pro 12A.

Incidentally, this driver combo will actually make for a very potent 3 way speaker.
Ascendo actually has a 15in coax 3 way for stereo applications.

The two sealed magnum 12 midbass subs were built for my previous setup, and never got them finished. Took this opportunity to sand and paint them.

Loaded up with a pair of aurasound NS12 woofers. Another driver with goldilocks /unicorn set of specs.

They are basically Unobtanium at this point, out of production and also very rare in the used market. Some photos from my gallery.

For scale with the Nero 21.

Scale with the SB34NRXL (Right, center channel woofers ) and Fi IB318 (back)

It uses a very innovative overhung voice coil (edit : UNDERHUNG not overhung) in neodymium motor that is removable - bolted on to the basket/spyder /cone assembly.

The Aurasound NS series were exotica in the diy market. The most exotic claim to fame is probably the big brother NS18. Its exotica and Unobtanium status probably ranked together with the LMS Ultra 5400, if not more rare.
A derivative of the NS18 was used by Magico in their 18in subwoofer.
Magico Qsub

Aurasound NS18

Also the NS15 were apparently used as the bottom end of the magico horn loaded flagships.


REVIEW_2028

I’m using the NS12 woofer module as a stand to get the Coax to the right height, as well as to supplement the low end as a 0.5 way. Like so.

Here’s a ARC quick measure of the response with and without the woofer 0.5 way. Paiseh that time haven’t figured out how to overlay measurements with quick measure.
No woofer.


With woofer.

Those large dips are due to side wall placement and SBIR… Ouch :sweat_smile:

Edit : some links for what SBIR is and how it butchers the beautiful anechoic response of a speaker in room.

Talking about SBIR, take a slight detour to explore what it means.

Floyd Toole’s incredible book has a section on it.

https://www.amazon.com/Sound-Reproduction-Psychoacoustics-Loudspeakers-Engineering/dp/113892136X

Here’s an extract from the book. Anechoic response (left) what we see with the klippel NFs, vs in wall - flush mounted (right). The boundary gain reinforces the low end very nicely. Free bass boost.

When the speaker is against the wall but not flush mounted (on wall), SBIR rears it’s ugly head.

Next is something that unfortunately happens quite often, sometimes due to unavoidable constraints, sometimes because of lack of information. Stuffing the cavity mitigates it slightly, but not completely. Avoid as far as possible.

My speakers are currently ~ on wall ish. Talk about breaking rules… :sweat_smile:

When come time for the final setup of acoustic panels, hope to mitigate it somewhat… :sweat_smile:

1 Like

It’s been a while since the last update. Next item is the screen.

For me it is a foregone conclusion to go with AT screen. I will take my chances with a bit of image quality, in order to have the center channel behind the screen. AT screens not too common as they require basically a dedicated setup, but I don’t think any else comes close to the natural presentation of cohesive sound with the image. Many here have experienced Bryan’s top notch screen and center channel experience.

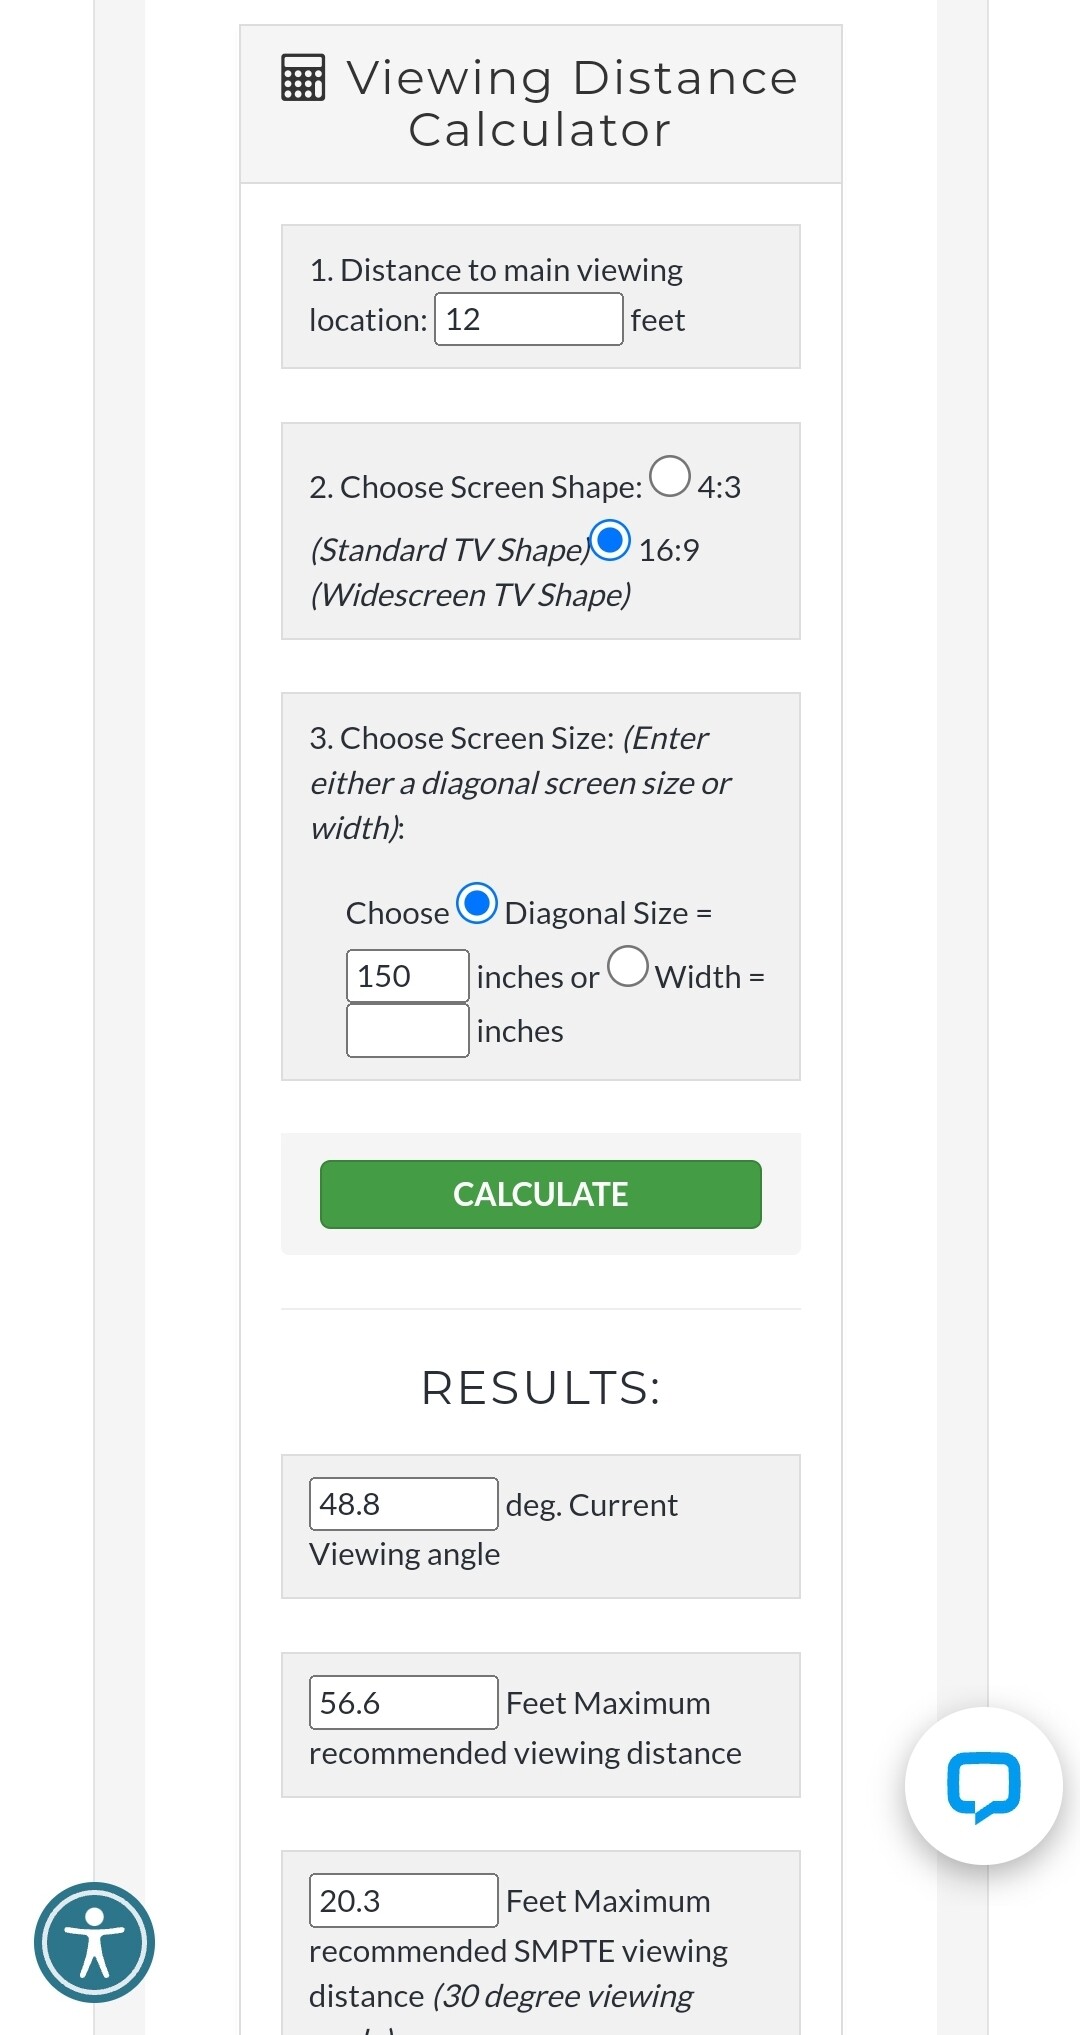
Size wise, I basically went with the largest screen I could possibly fit. THX maximum is about 45 degrees, I’m at ~50 deg which is common for hardcore setup on Avsforum.
Erick_Garci_diagram

The logical screen size for my room I think is 135in. With the common saying that you wished it was one size bigger, I skipped 135in and went to 150in. It’s XY Screen, 4k material, got it through Earth Sound.

By my calculations, I had 10cm each between screen and floor / ceiling on the front right corner with the low ceiling.
Guess what - the first time I had the screen up and fired up the image, I thought I could have gone 160in…:rofl::rofl::rofl:. Just kidding. This is plenty fine… Or is it? :rofl::rofl:

I use this screen size calculator, very useful.

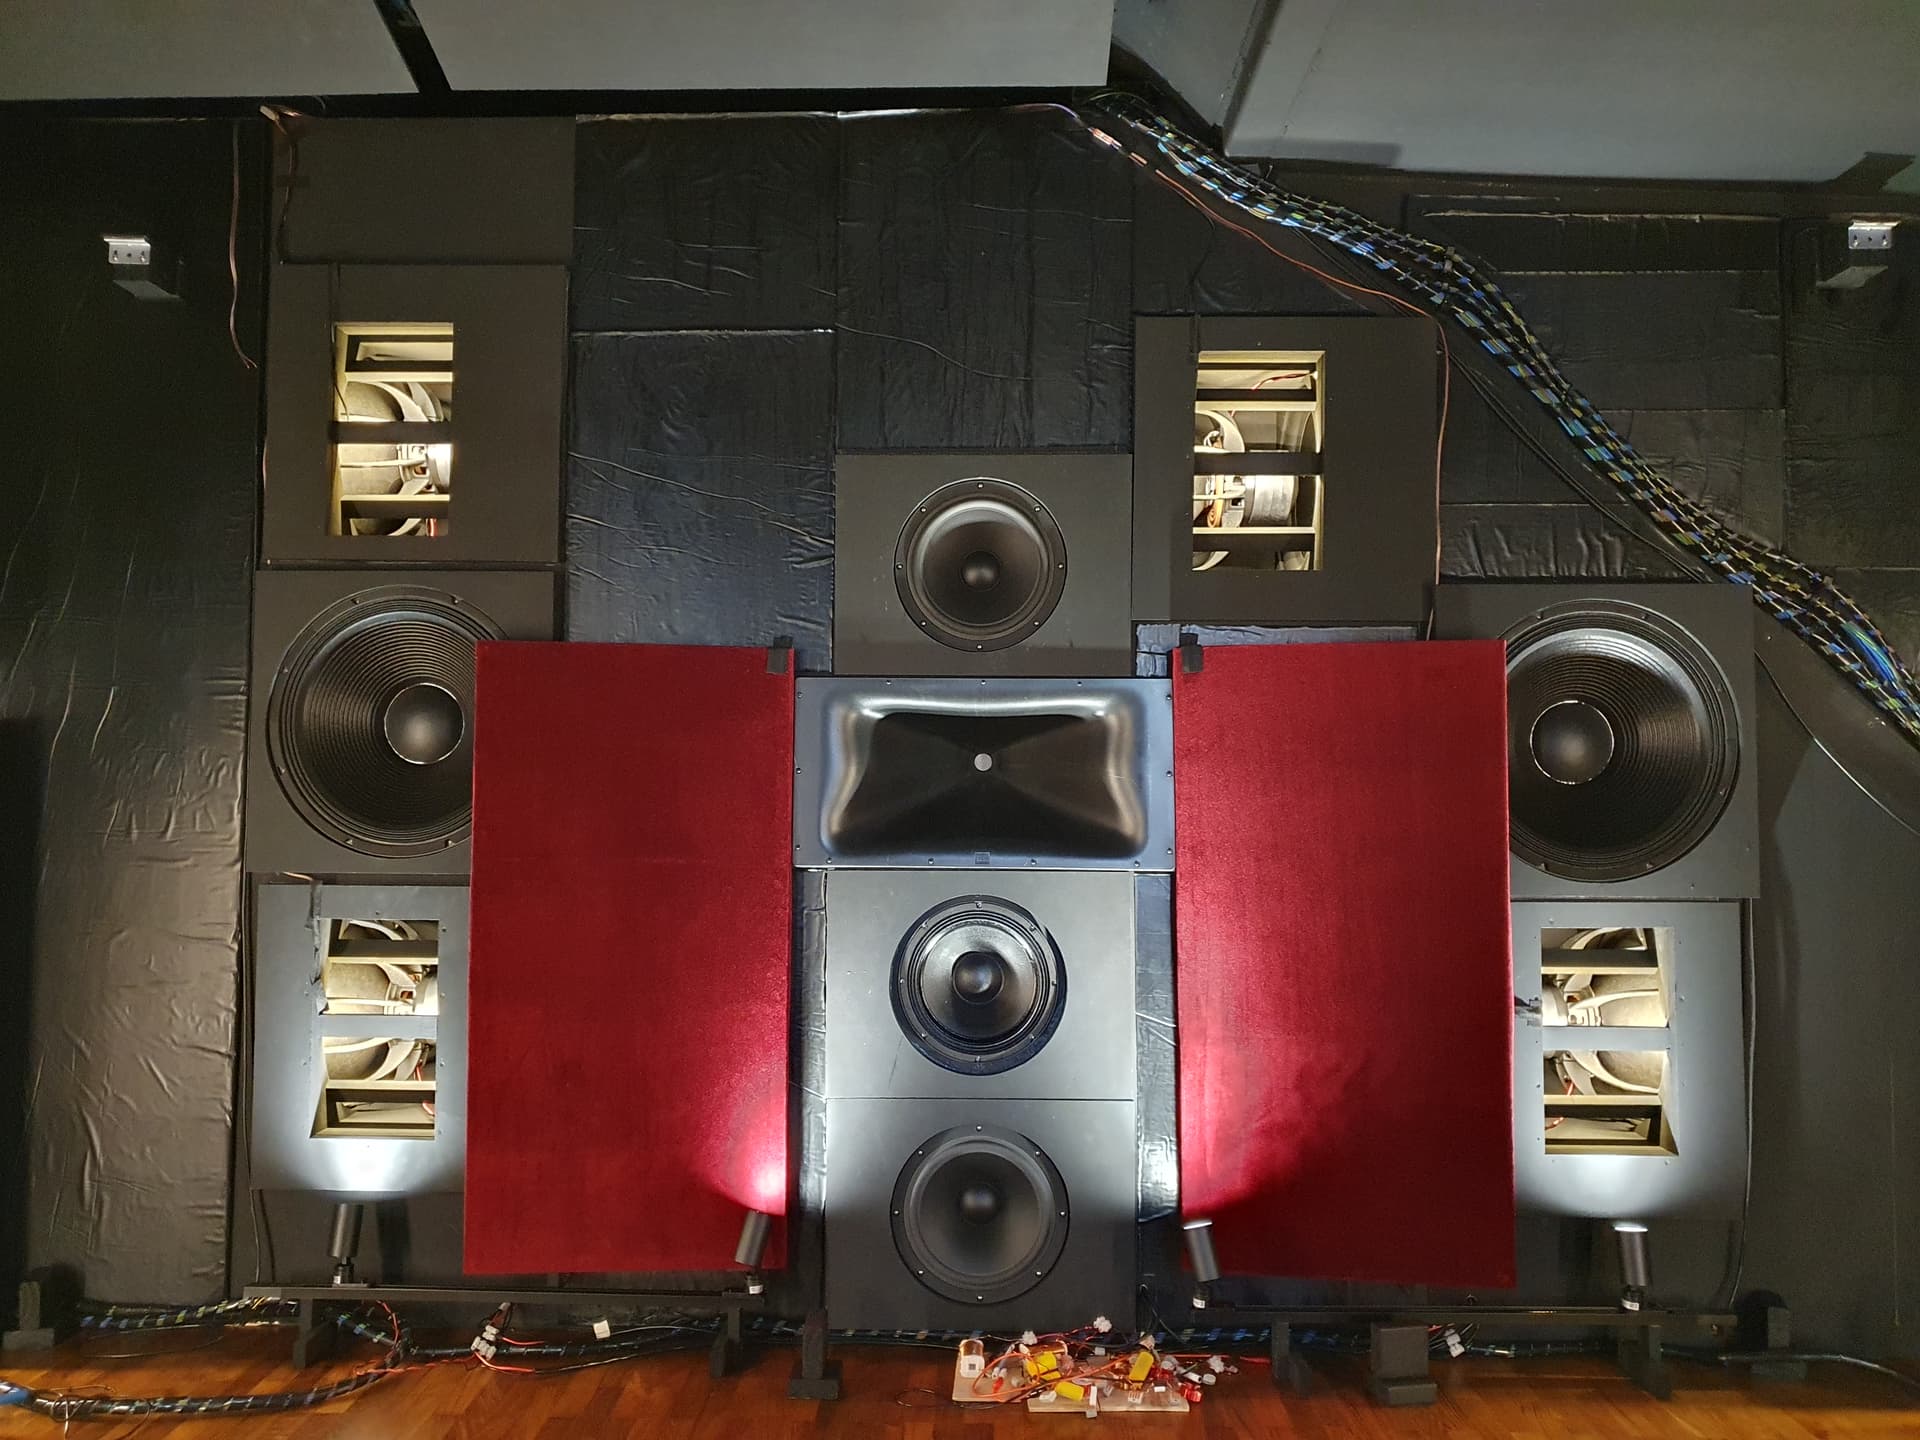
I just saw another thread asking about mains placement. I prefer to keep the mains outside of the screen, both for a wider front stage, as well and avoid the screen HF loss on the mains. With the screen about 50deg, the mains are roughly 55deg apart.

I always wonder why are movies still in scope 2.35. Everything should just be standardized in 1.85 as all TV are that ratio. With imax enhanced, I hope most agree that movies are more immersive with that taller vertical image. For me, it is always a thrill when I fire up a movie and it’s 1.85 with full image height.

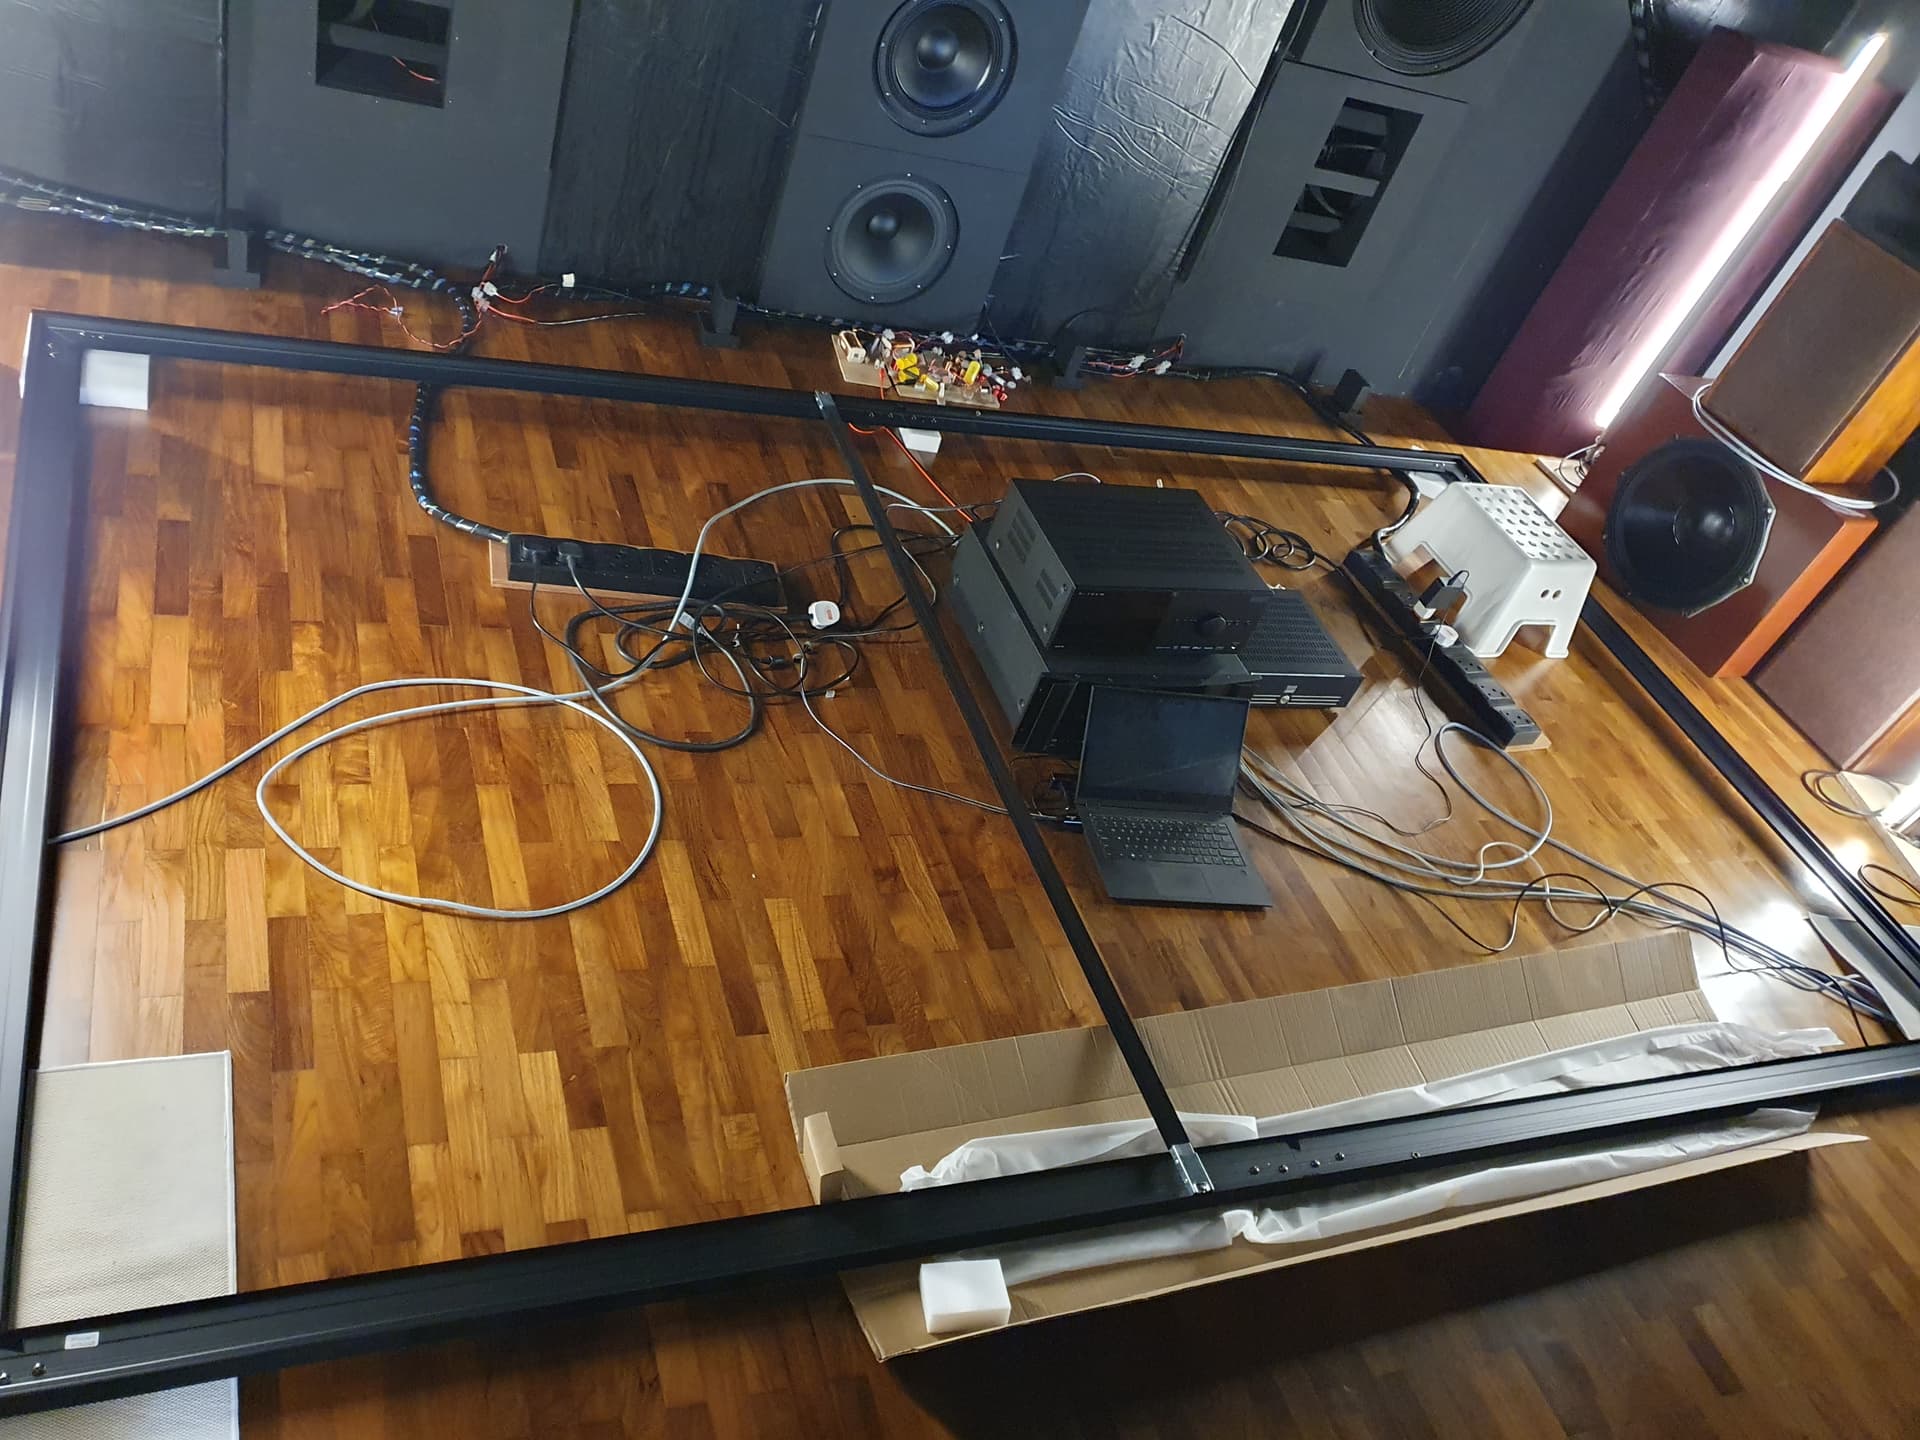
It was a great milestone to clear out the room and have enough space to start assembling the screen frame. I actually had no idea how I was going to mount the screen, needed to have the hardware in front of me to strike the inspiration. Luckily Murphy didn’t give me too much of a hard time, maybe just 2 curveballs.

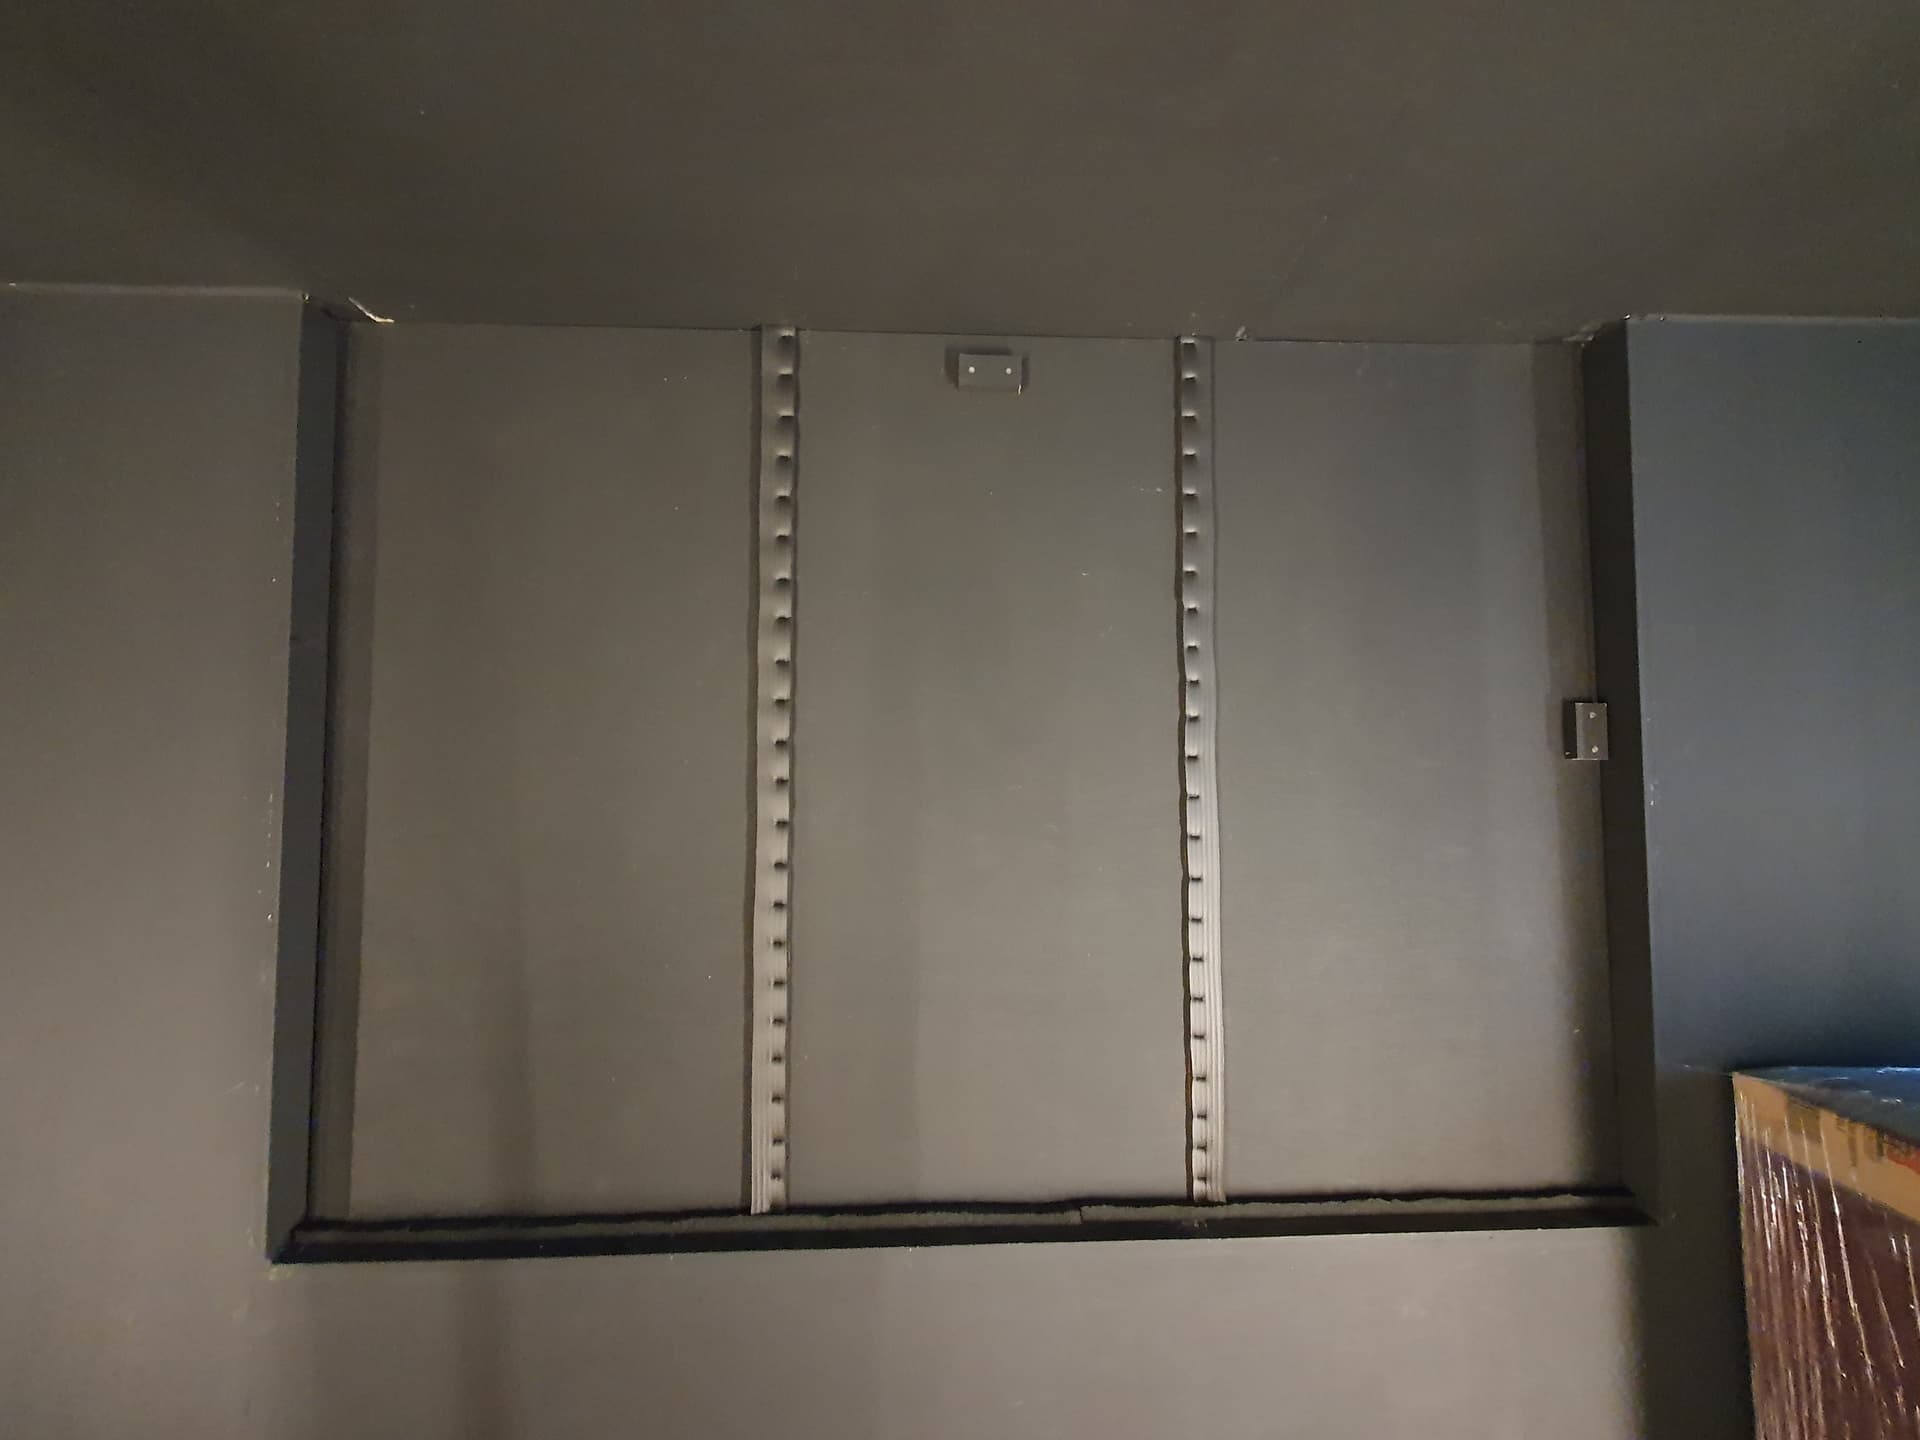
First, due to the size of the screen, they included a couple of struts to brace the span near the middle. Here’s one of the struts being installed.

The problem is, I guess the good people at XY don’t expect their AT screen to be used with the JBL 4722 speaker, because the struts block and will cause diffraction on the center channel… :sob:

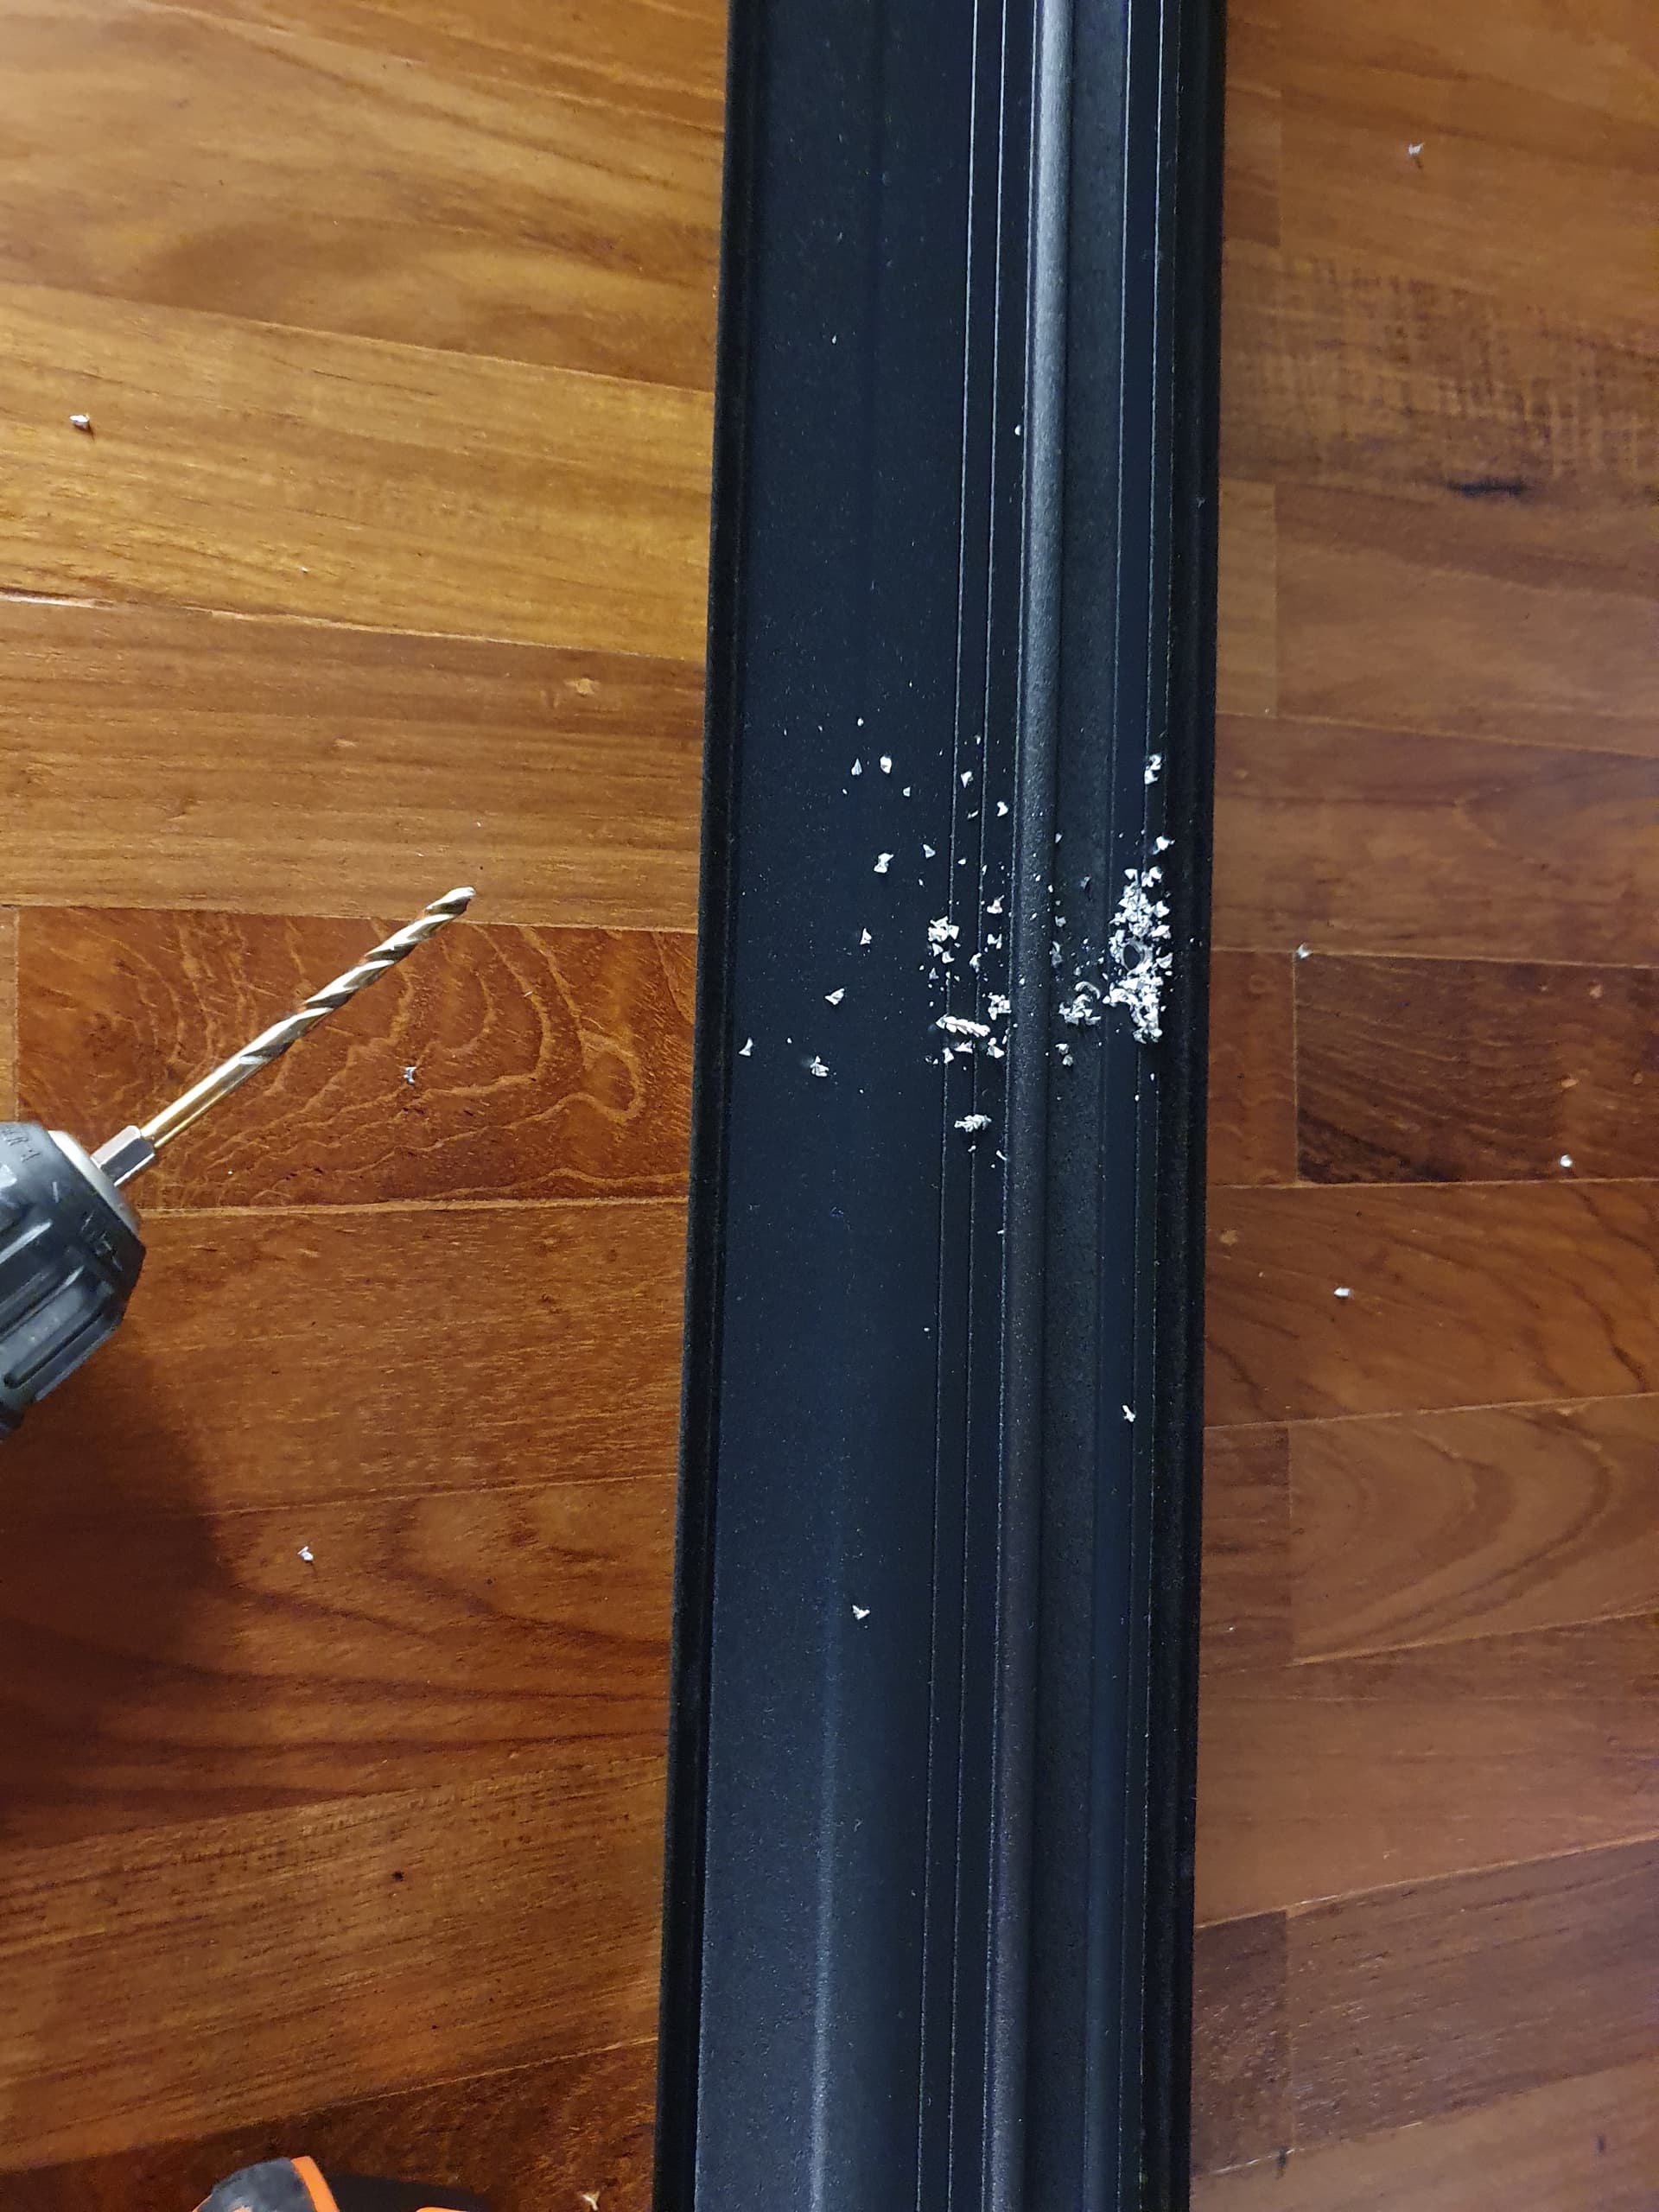
Thankfully, it wasn’t to difficult to shift the struts to a wider position to clear the center waveguide. Drill a couple of holes, buy some extra nuts and washers.

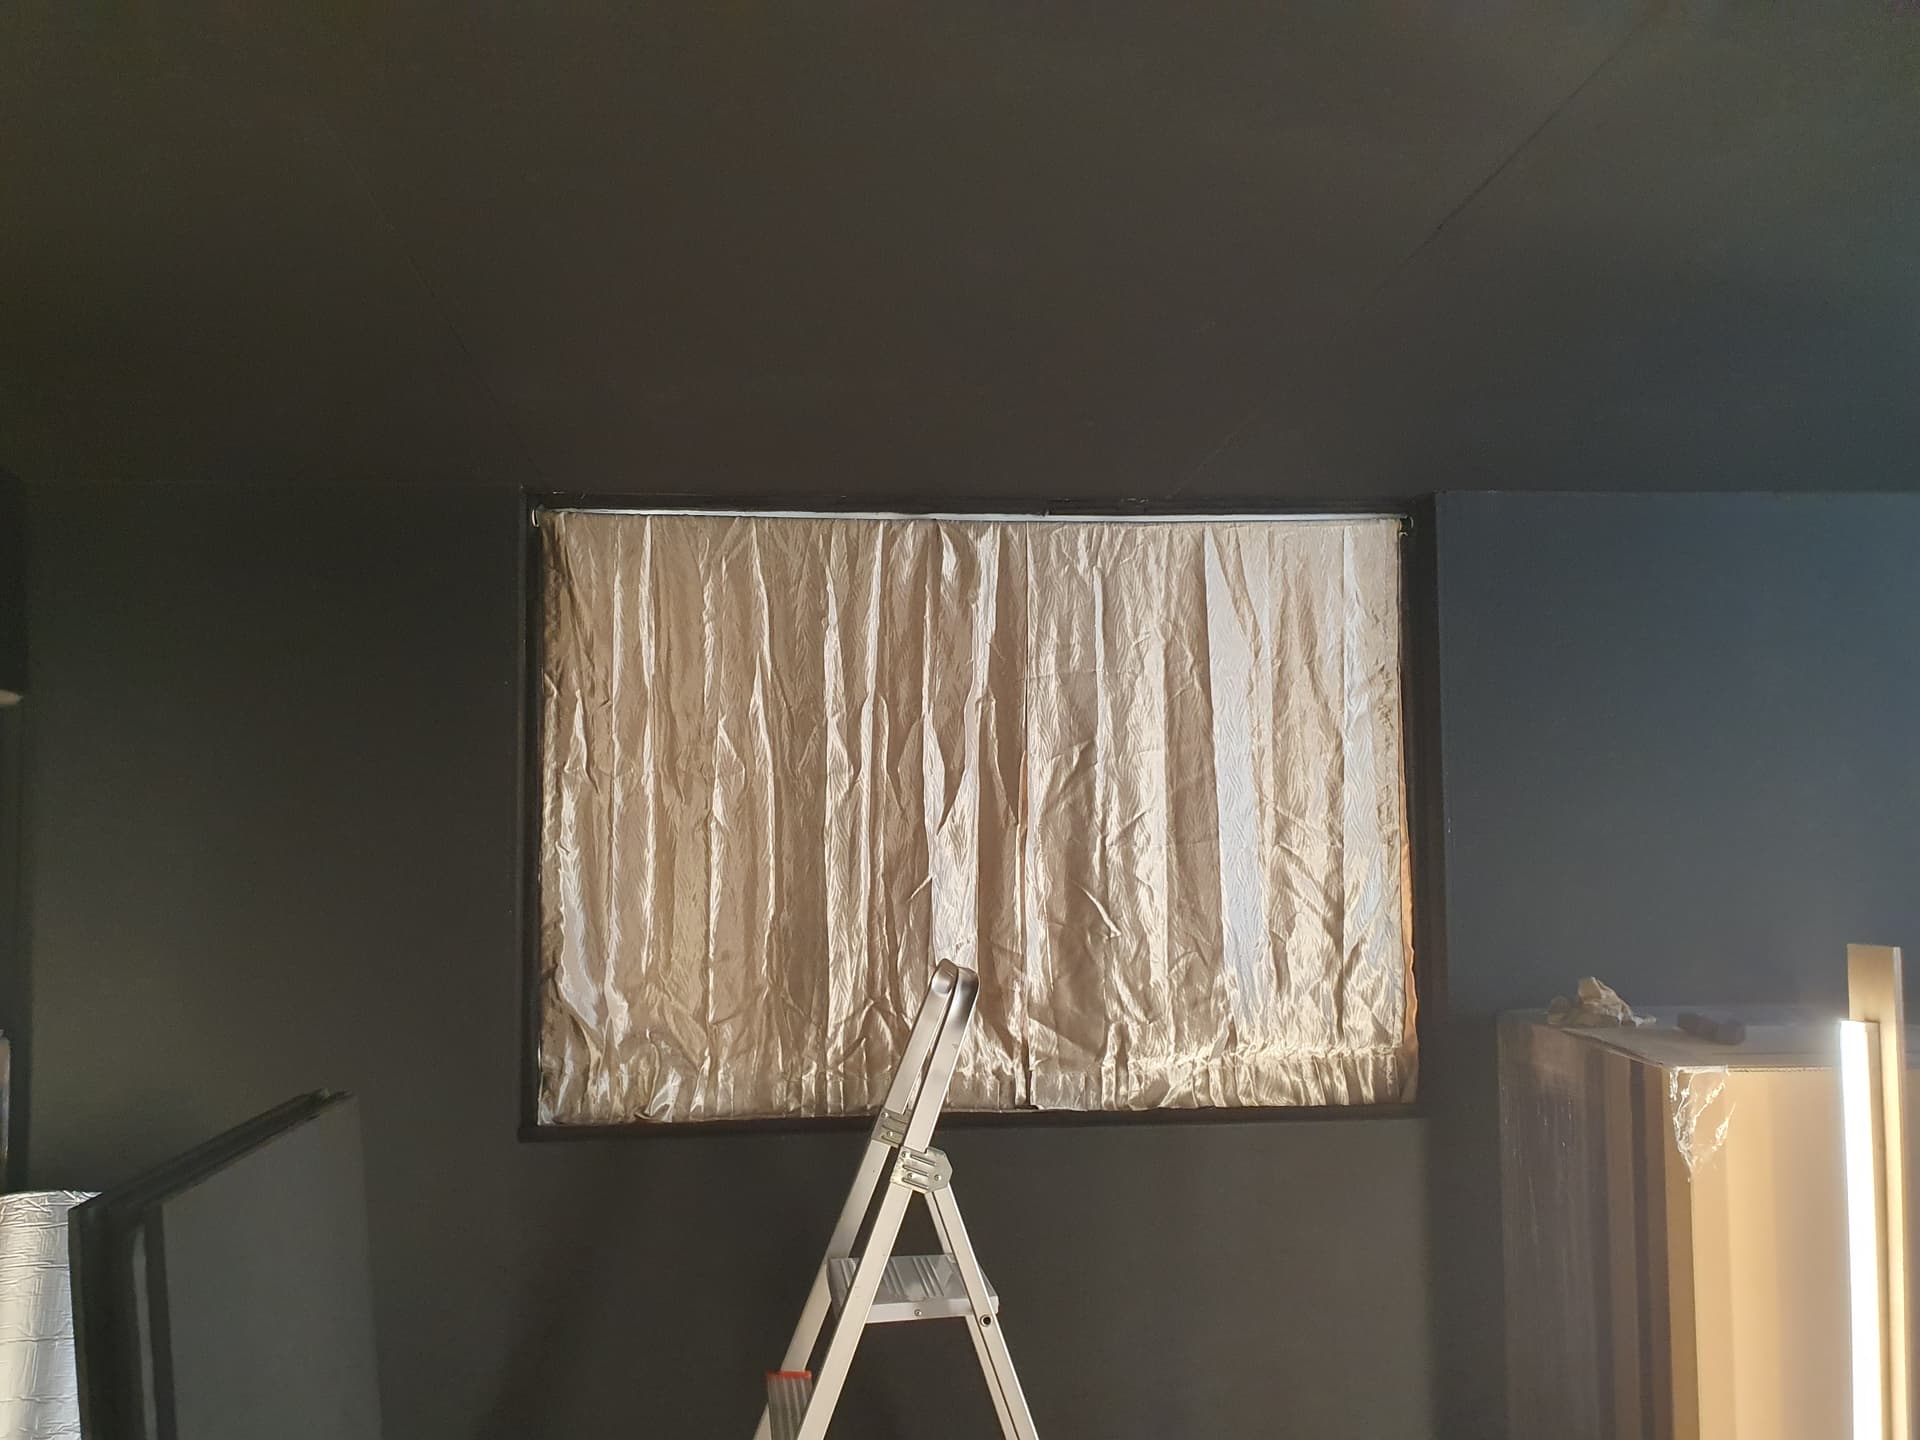
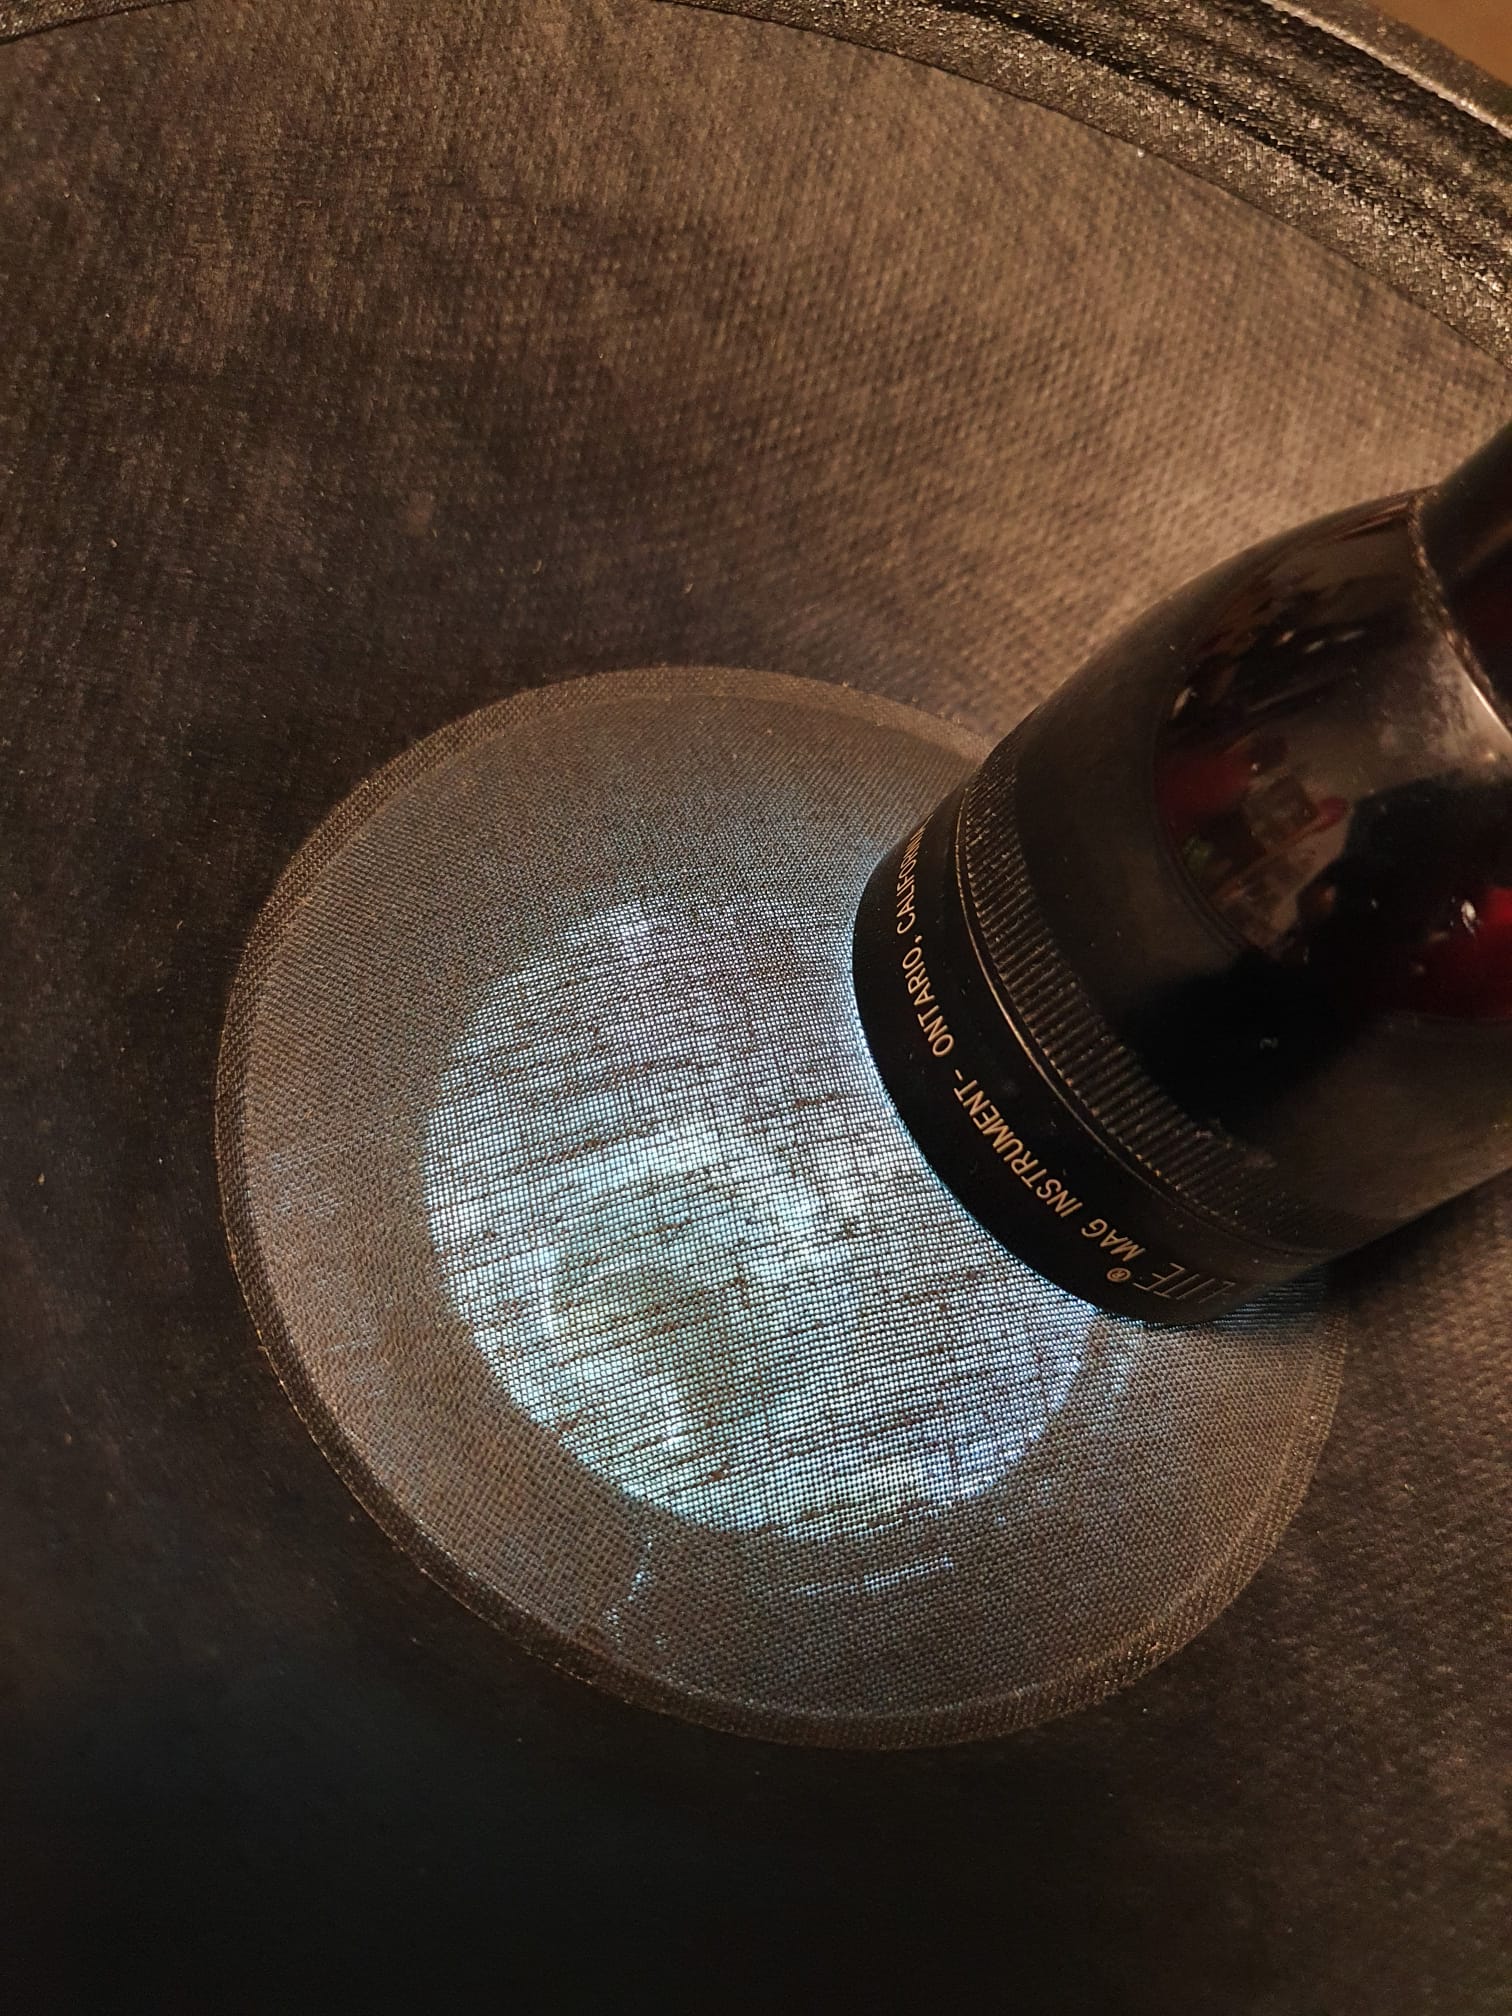
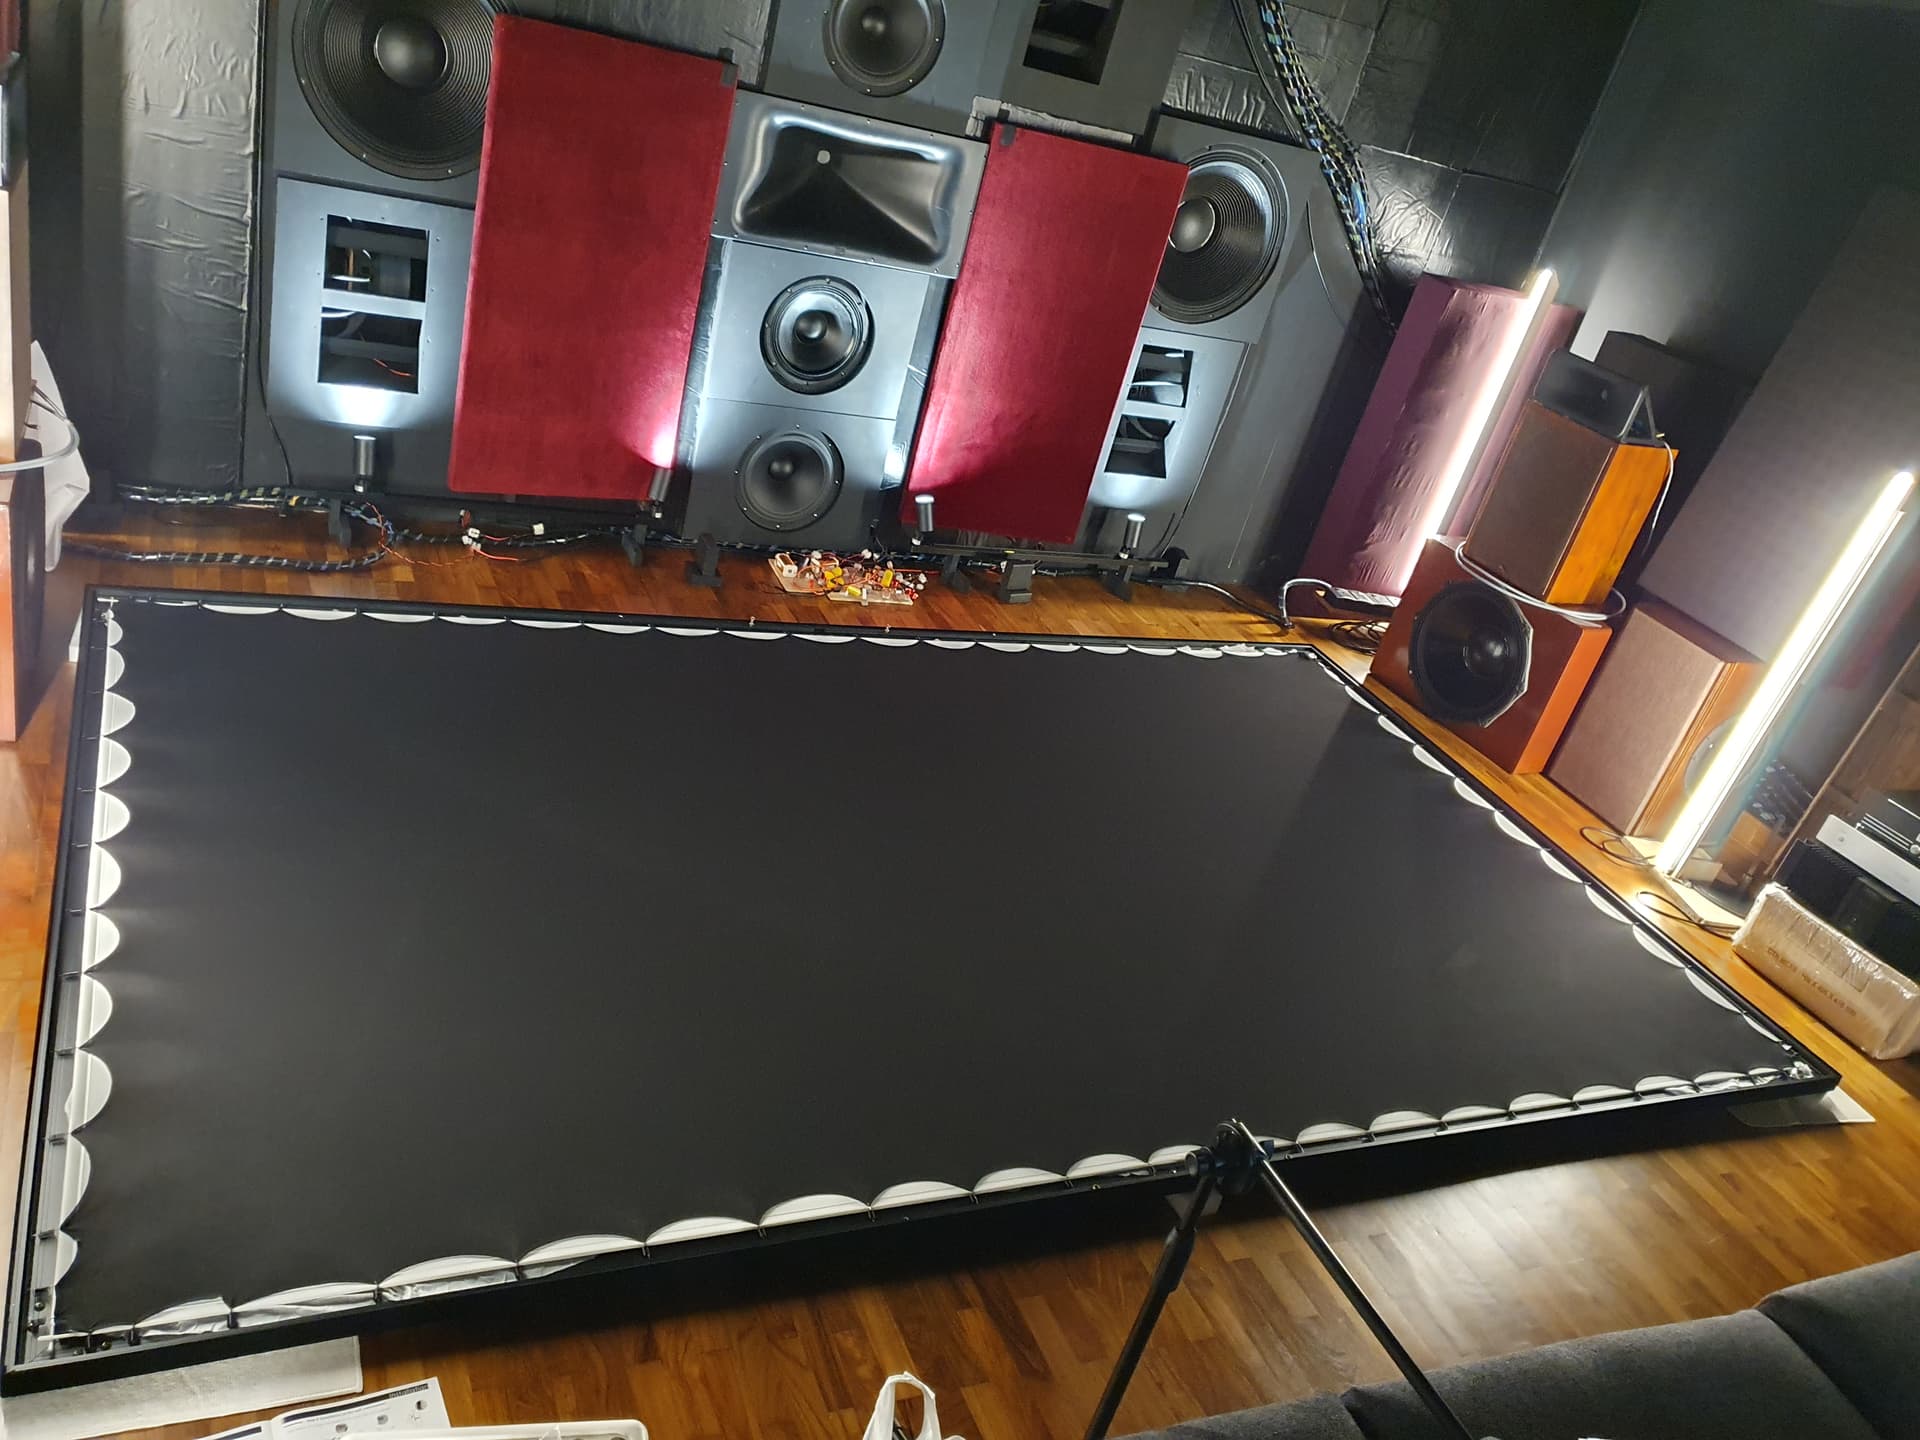
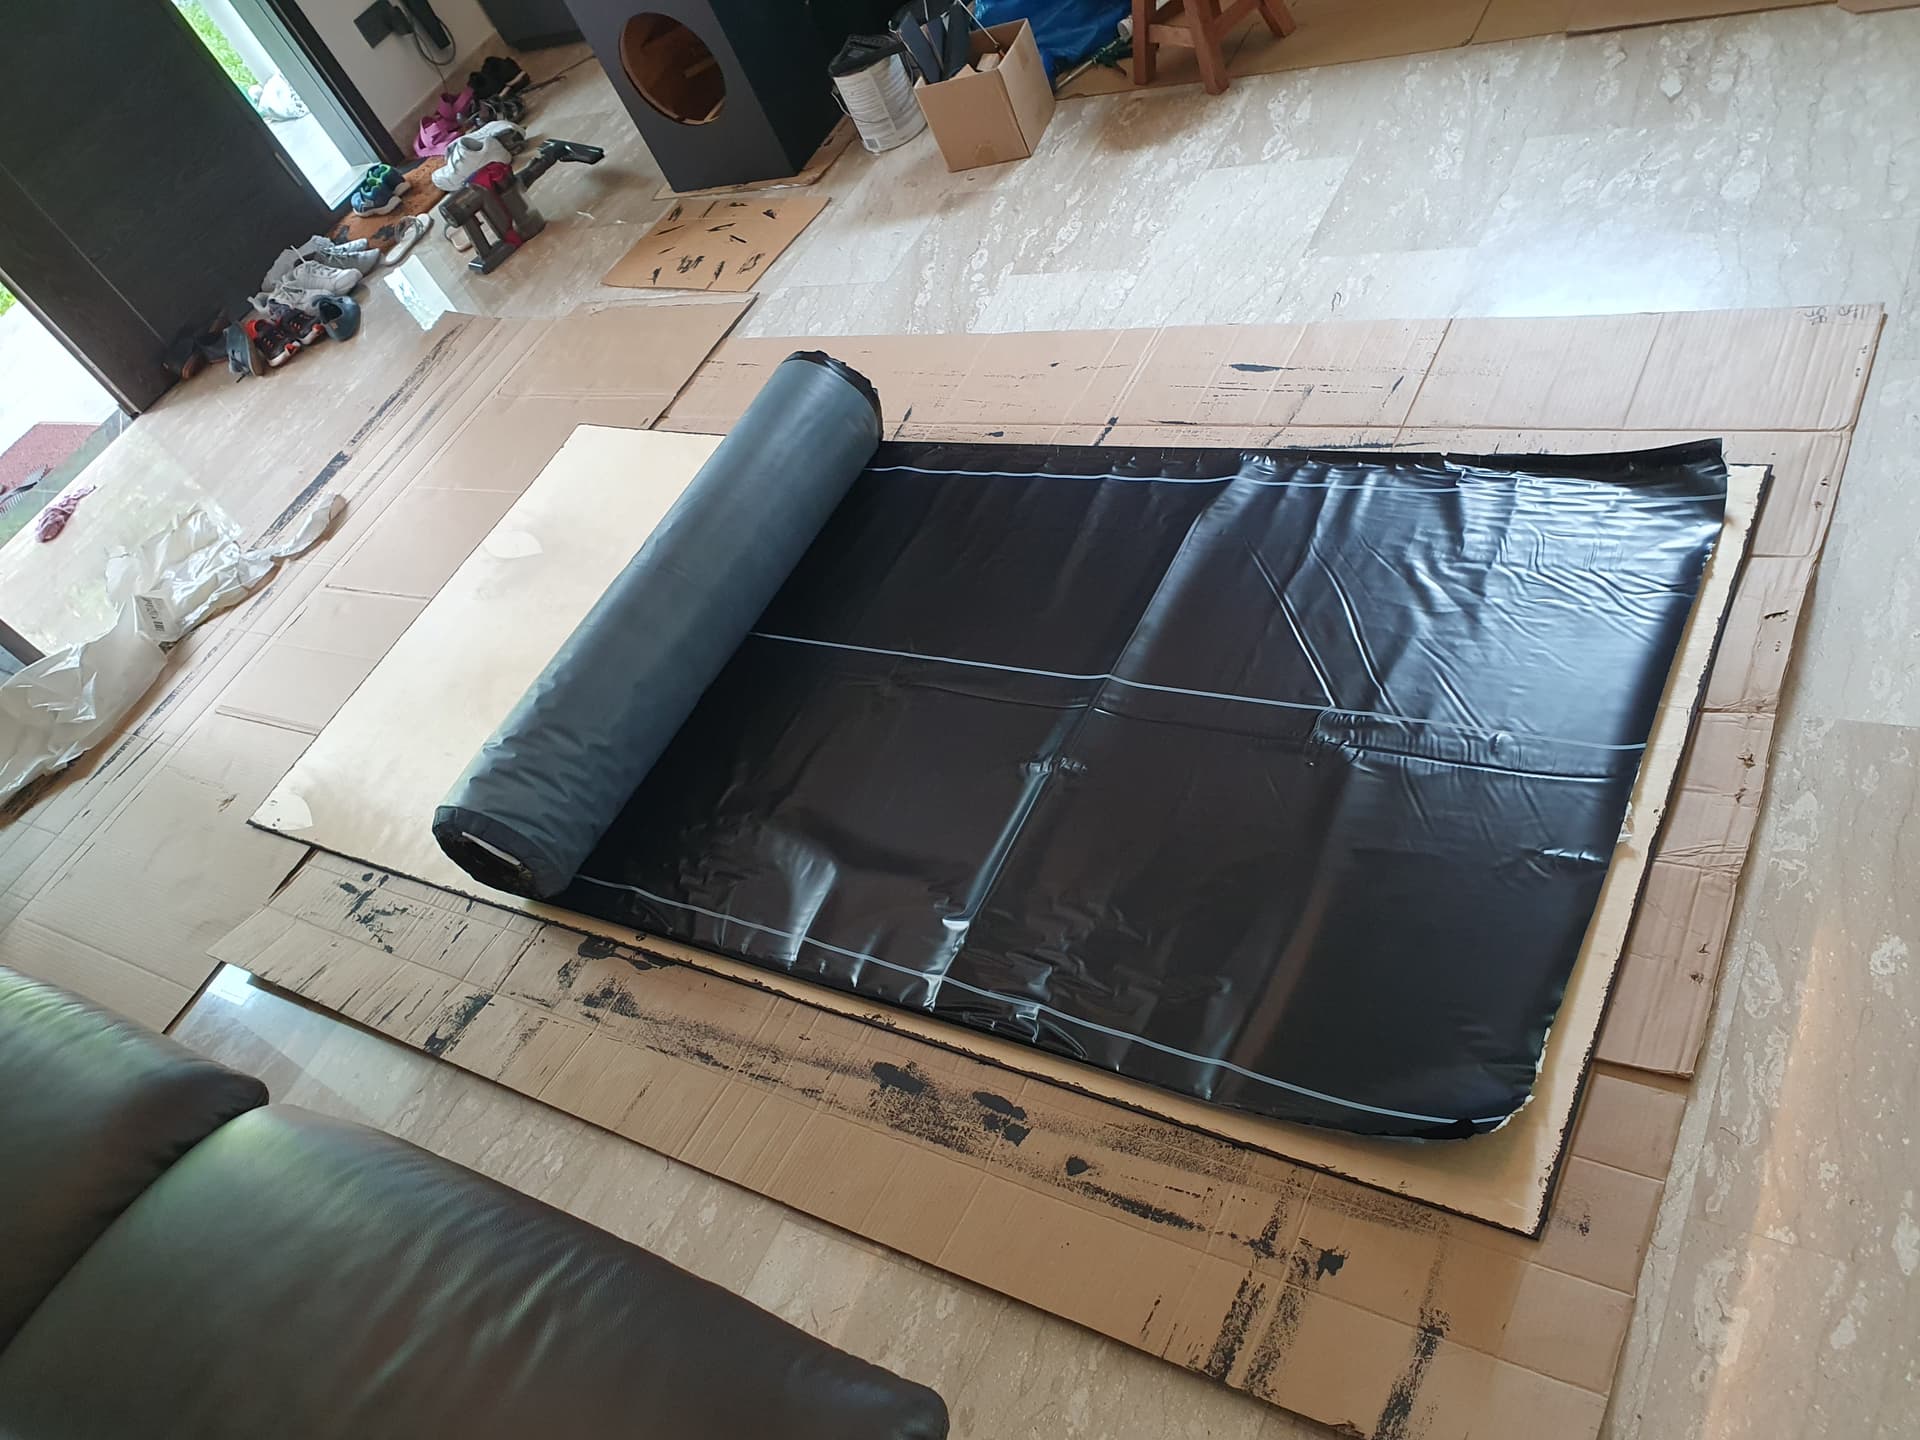
Next, was realizing that the screen didn’t come with a black backing cloth. This is important to reduce the light reflection, and raising the black floor level. However another layer does mean more HF attenuation on the screen channels. A quick trip down to Chinatown people’s park, level 2 above the hawker center. Got some stretchy black spandex that did the job.

I may have underestimated the amount of stretch needed on the spandex. It was literally a stretch to get it onto the frame. The idea was that more stretch = more acoustically transparent :sweat_smile:

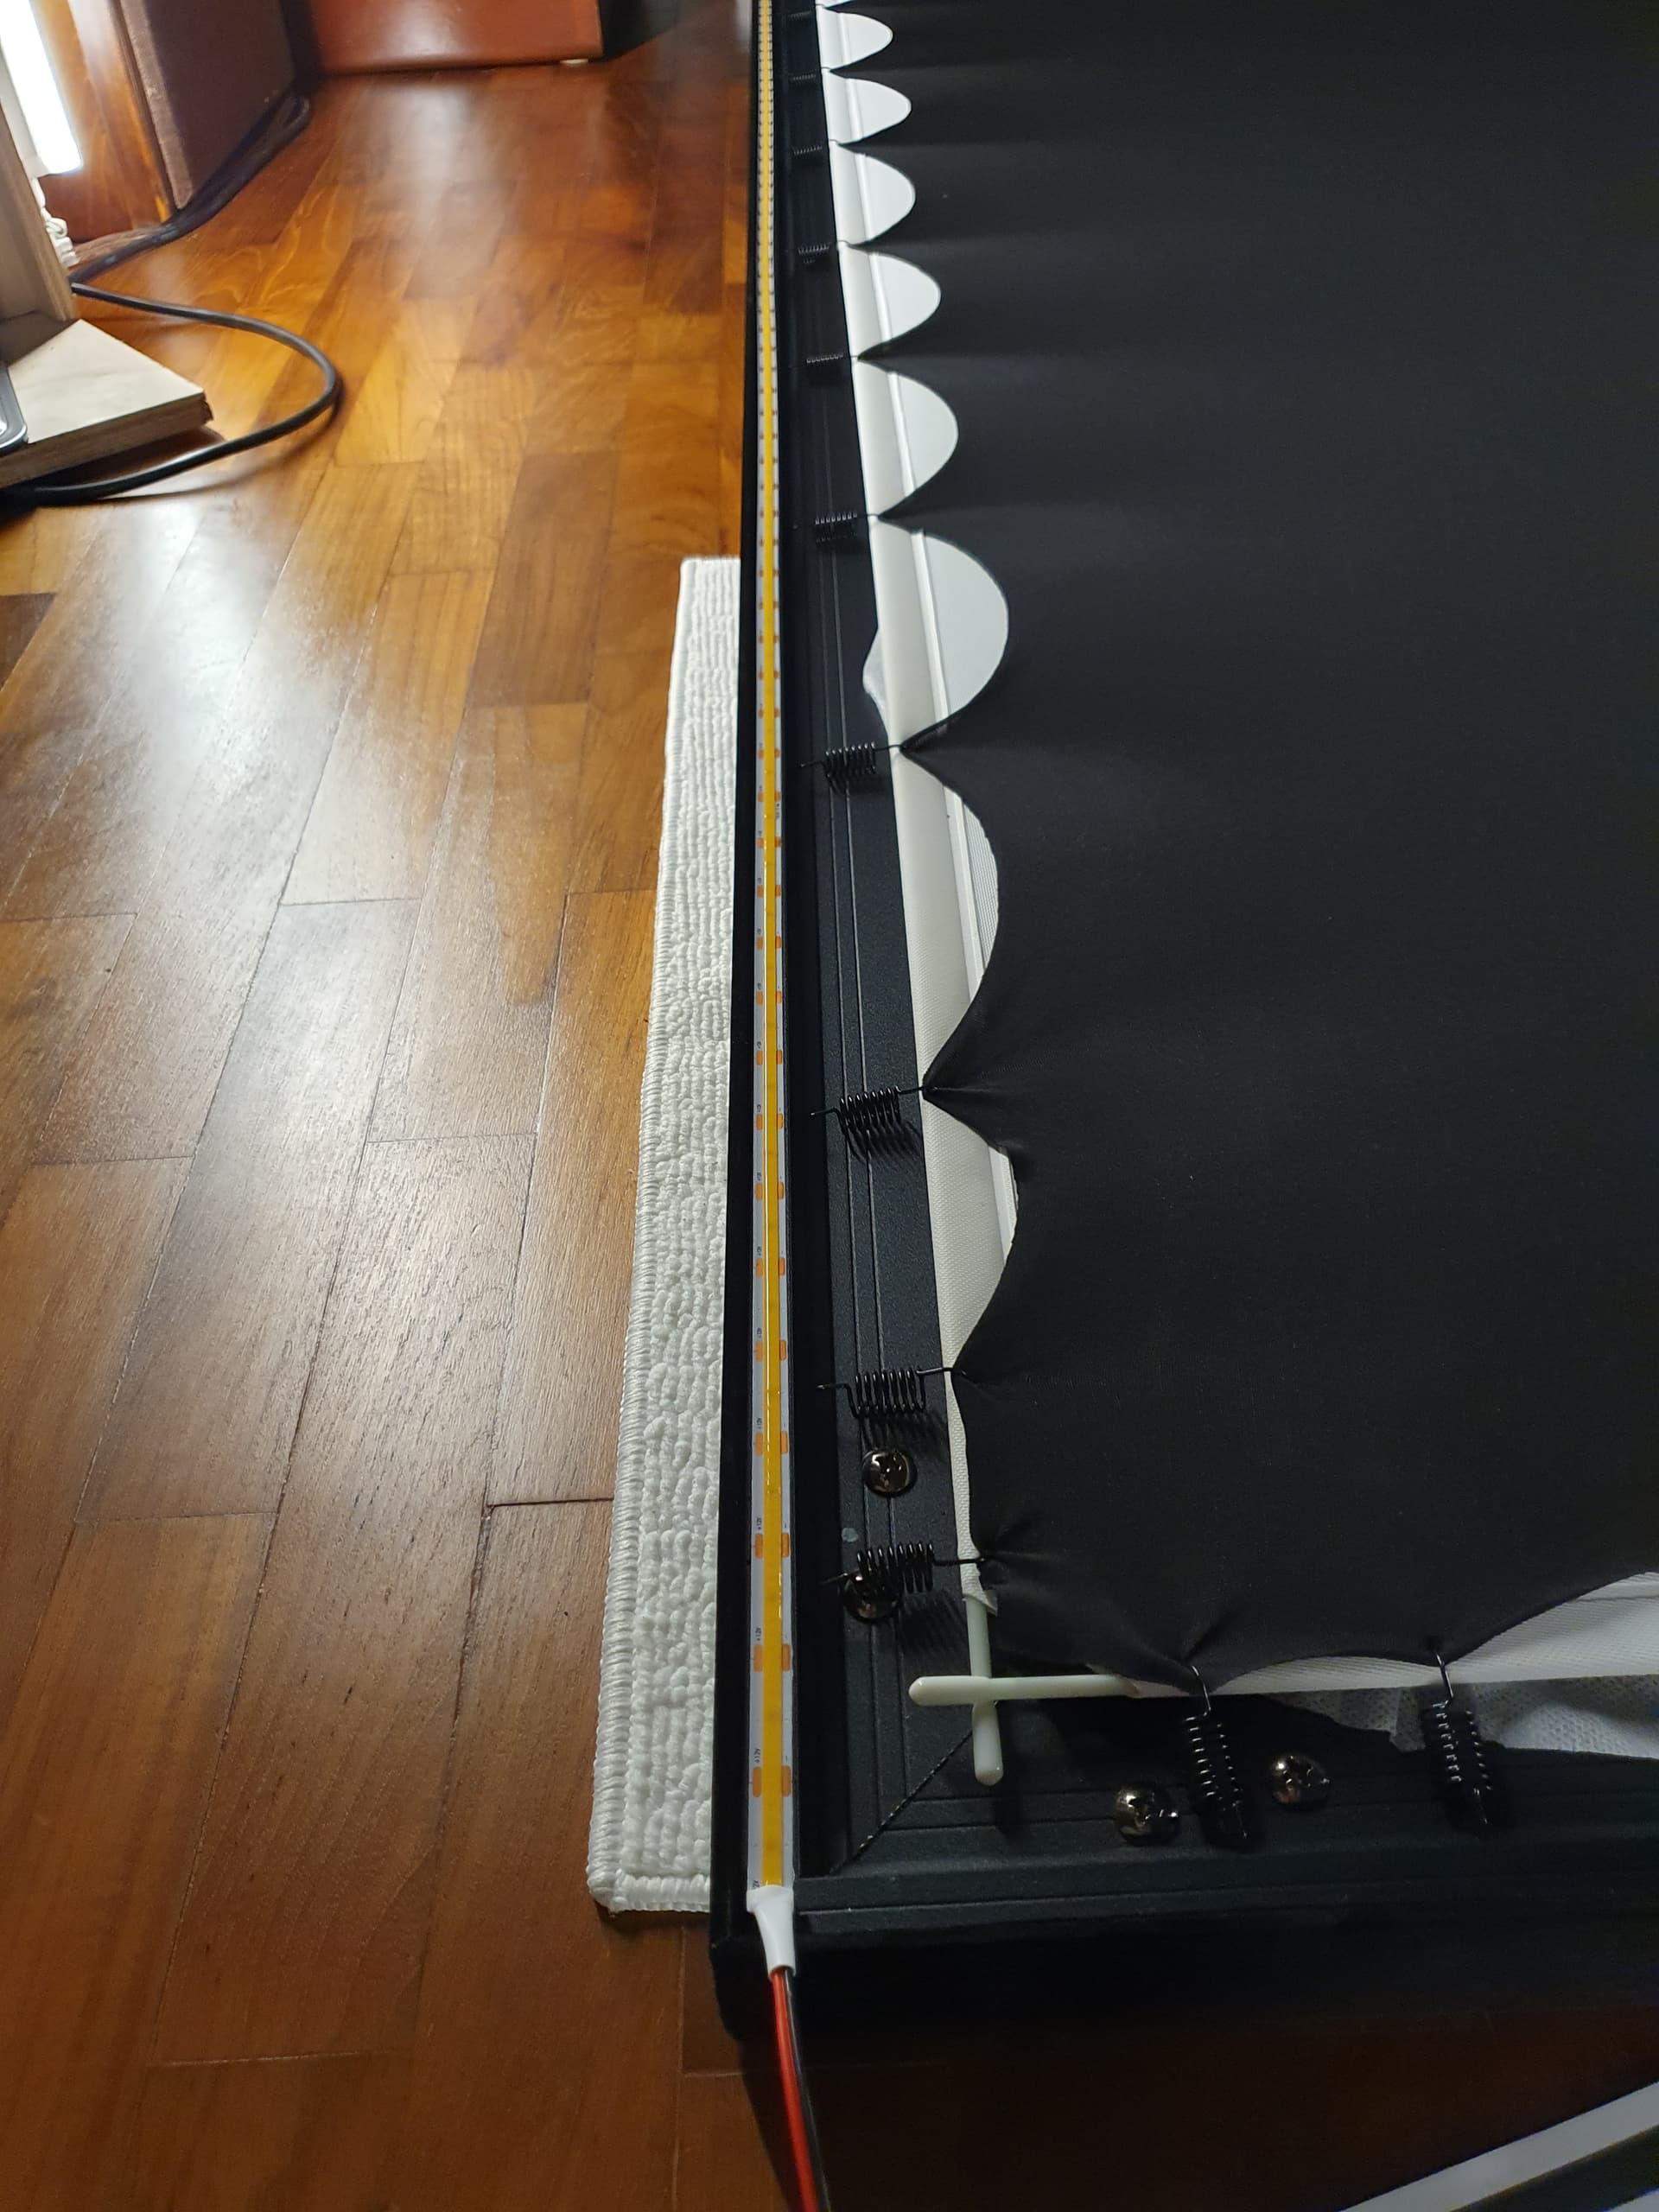
I used the existing screen fabric mounting hooks to secure the spandex. I also added some led strip lights around the back of the screen frame, but these turned out really quite dim.

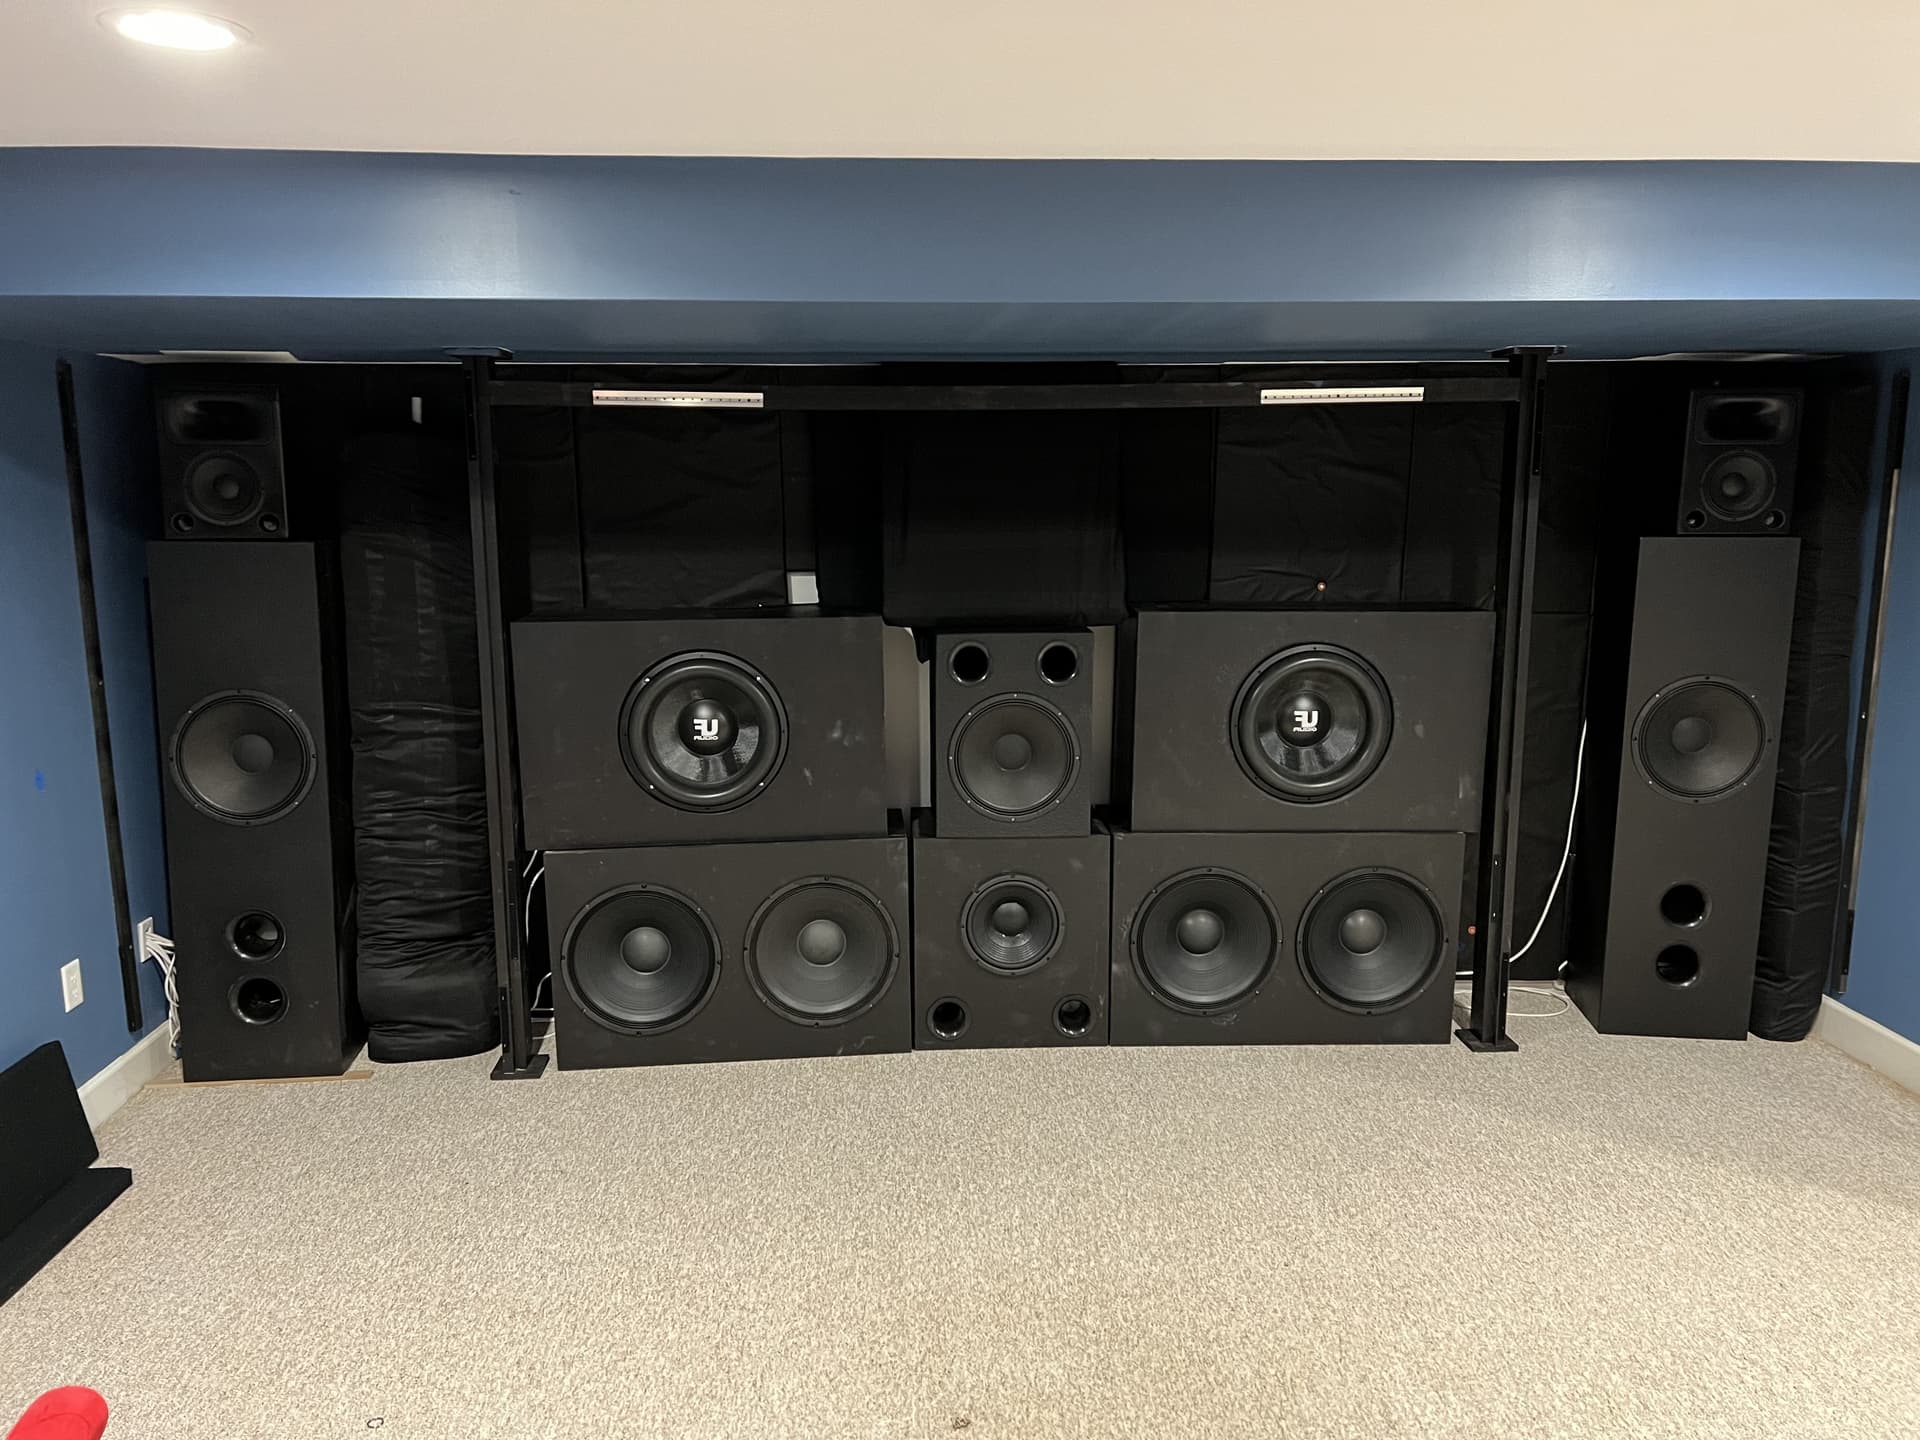
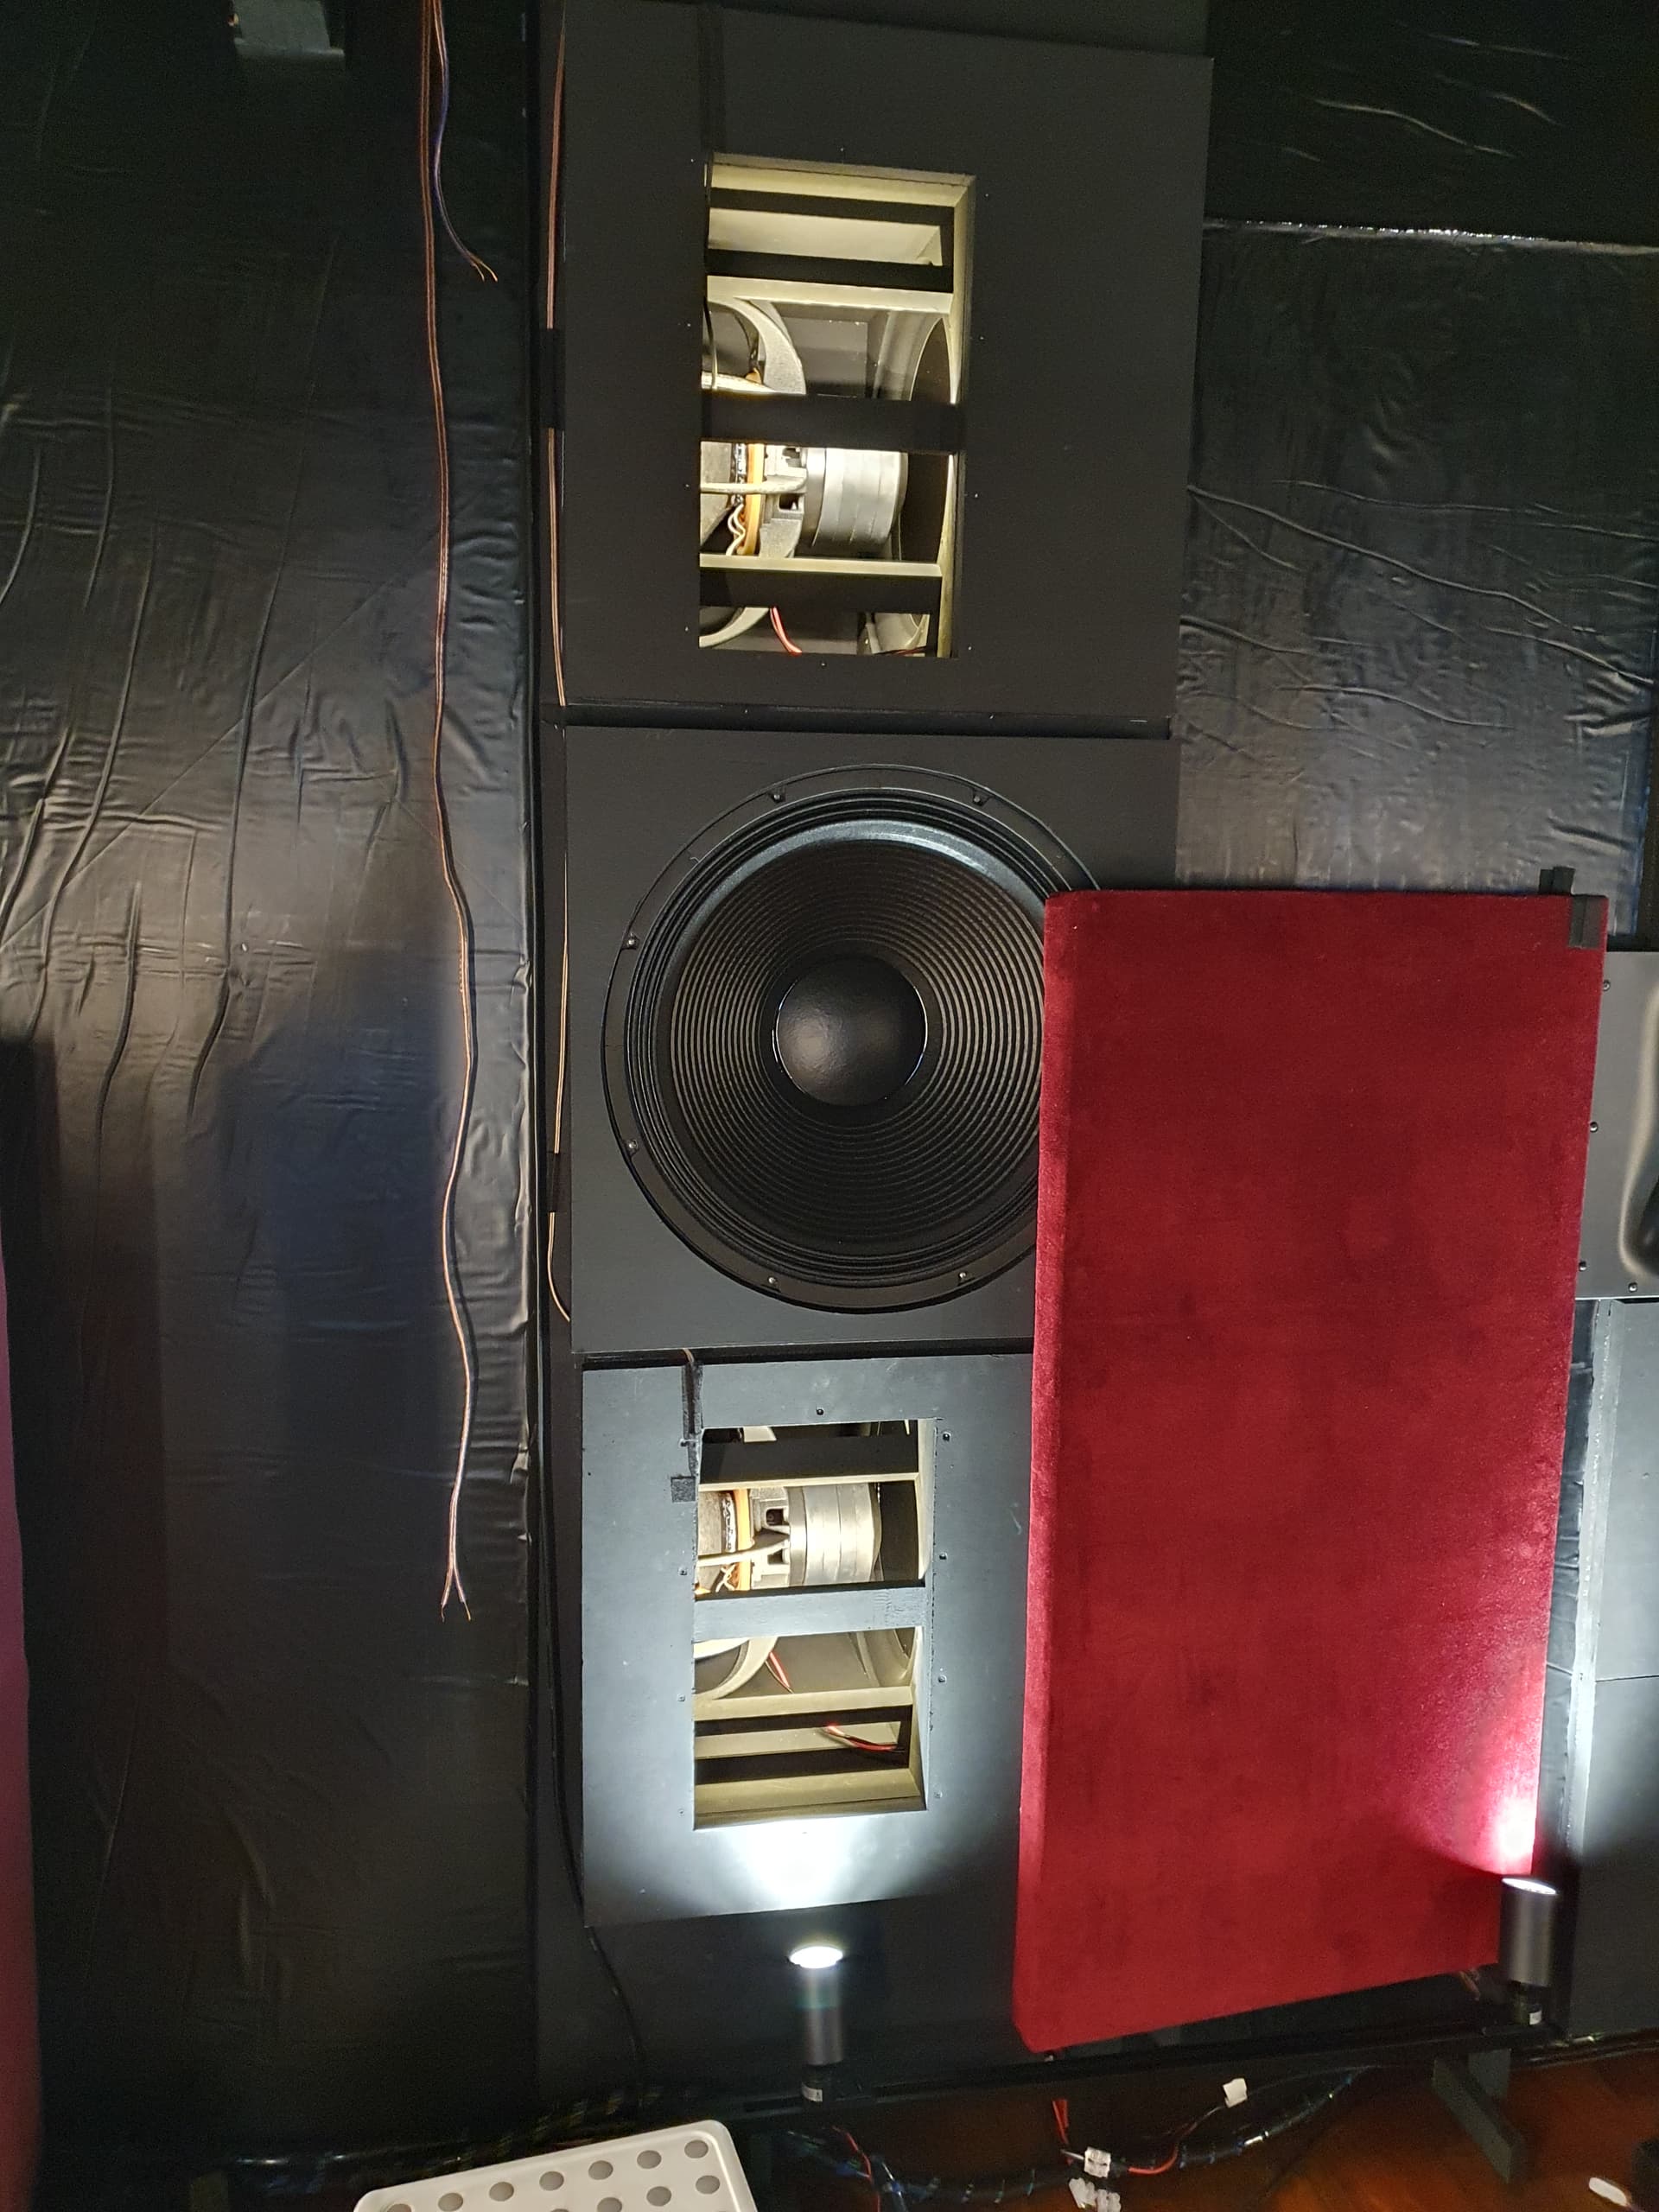
Similarly, I added lighting to the manifold subs, hoping that they would be visible behind the screen with lights on. I think this was one of the last time I have seen them… :rofl:

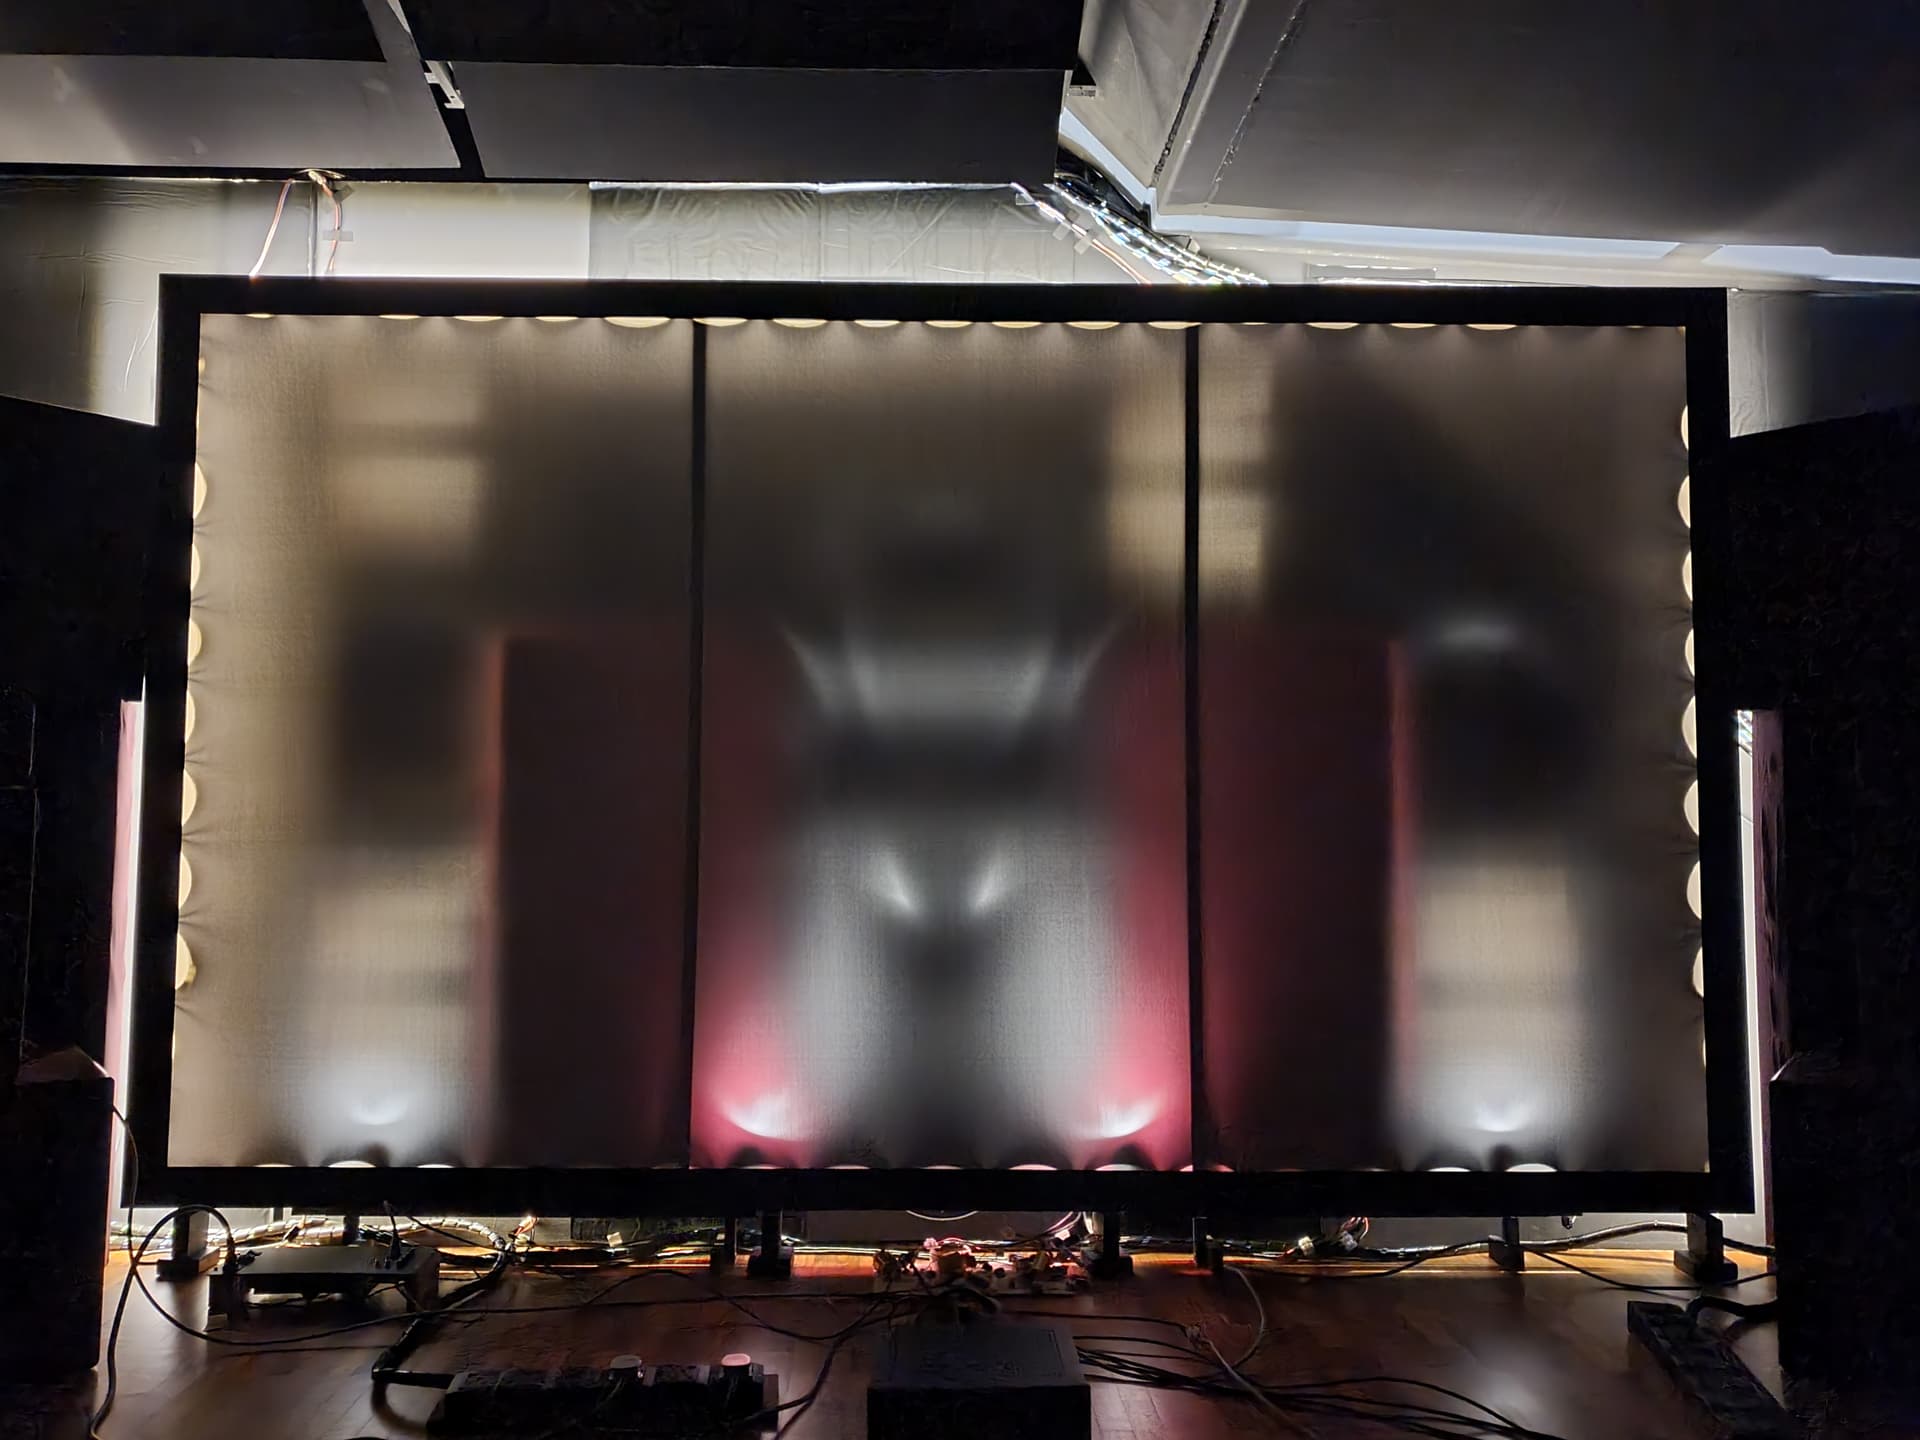
After that, it was truly a milestone to mount the screen and see the vision take shape.

Unfortunately, the back lighting didn’t really work so well… This is the best I can capture with the camera… :sweat_smile: Can also see the stretched out black spandex. :sweat_smile::sweat_smile: Actually, it would probably be much more visible without the black spandex.

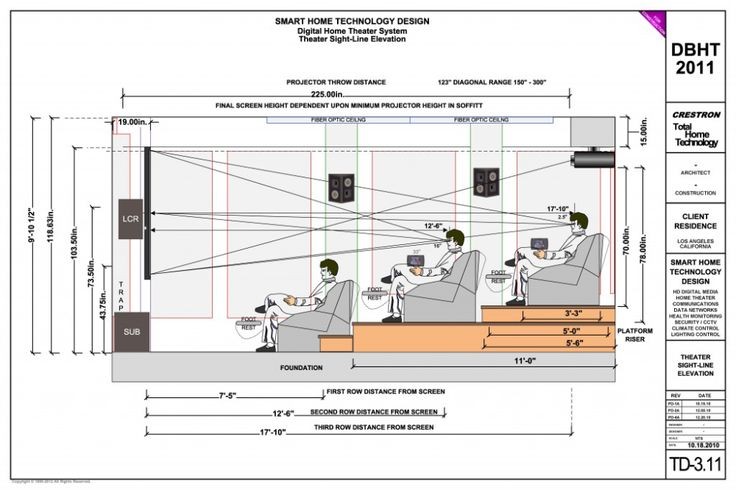
I wasn’t quite sure what to expect with the very large screen size. Surprisingly, it was a very natural and comfortable feel. I wonder if it is the lower down placement, as the viewing is straight ahead, not looking slightly upwards.

This is only possible with single row seating. Typically the screen height is a compromise for multi row. It has to be raised to maintain line of sight for the back rows. Also the reason for the risers on the back rows.
In this example, the 3rd row is actually still blocked by the 2nd row. And the screen is quite high for the front row.

4 Likes

I’ve got the honour to be invited (self invite actually lol) by @Wechnivag to visit his den, which is still a work in progress. I can feel SO MUCH dedication into his built upon stepping into the room

I’ll break my experience into 3 sections in brief

Screen and prj
Unlike my prj screen, it’s a little high up since it’s ceiling mount motorized, plus not to compromise my center spk height, there is a limit in how low I can set my prj screen.

His place is the 3rd or 4th place I visited that have full length ceiling to bottom screen size. Definitely an advantage when comes to viewing comfortably plus having center spk behind the acoustic transparent screen. It’s eye leveled without tilting the neck, very nice and relax feel. Can’t really see what’s behind but he showed a very cool jpeg pic on his screen on what’s behind it which is cool! Uncalibrated prj out of the box, definitely can improve in this aspect. *Can borrow you my meter to try out before you looking into a new purchase.

Sound
No heights, only bed layers, the over feel did however gave me a slight hint of height as well, could be the works of the ceiling panels or prolly due to the horn spk. I rem I experience this as well at bro @kennyluck2000 place.
Sound is dynamic, is clear, not to extend of fatigue. Do note that ALL spk are DIY and a huge thumbs up on this aspect. Perhaps shifting the LR surround spk a little back would be ideal for a better steering experience… need to try this out

Bass
Low end is power! Definitely natural rumble I can feel. Very powerful bass considering the room volume to be filled. Only front subs behind screen and the bass just fills the room! The mids is still a work in progress but considering what has been done till date, the bass will still bring a smile to anyone’s face I’m sure. A very interesting concept in achieving this kind of bass and I’m glad I’m able to experience them

Encore before I took leave
One needs to experience the bass at his living room. With ONLY just 4 x 10" sub in wall, I’m very surprised the bass is extremely evenly distributed. No crazy low rumble compared to the ones in the attic, still can feel a little though, but you’ll be suprise how well it worked! The bass comes from the front to the back, no localisation since it’s room filling. Moreover the room volume is even bigger than the attic. It’s very well built and I love it!

Am lucky to have experience this kind of bass and concepts at his place. We’ve discussed about his next idea of going full range for all his spk with bass not only you can hear, but also feel from the heights! Extremely intriguing on the outcome when the day comes!

I had an enjoyable afternoon at your place bro @Wechnivag. Thank you very much for your time :smiling_face: I would love to visit again after you’ve completed your work!

4 Likes

Yes, both you and Ralf pointed it out, definitely something I’m thinking about. The gap between side surrounds to back surround is quite large. Really ‘kiang’ ears all can pick out these areas for improvement.

Likely once the new LR mains are built, I can shift the current mains to the front wide, at the current surround LR position, and move the coax side surrounds to just back of MLP.

Or perhaps different layout and tweaking of the acoustic panels as well on the side walls, shift a bit here and there.

Thanks for the kind words and feedback, always helpful to get a new perspective to point out different areas, as I’m too deep into it myself and will miss some things.

1 Like

Not kiang la… :sweat_smile:… Well at one point in time when i started, my surround placement is like near to surround back lol

Welcome. Just helping each other to make things better. Really happy to get to hear such setup. Really ear opener :smiling_face: and admire your work/dedication on the diy

1 Like

I have a post covering this bass array in a separate thread.

I was really lucky that the open area to the rest of the house dissipates the bass energy enough that there is no first modal dip from the bass array, unlike in my attic room.

Suspect that modal dip is the cause of the ‘hole’ in the middle. The mid-upper bass above it, and the low bass below it seems good like you noticed.

Now currently working on the low bass diaphragmatic absorber for the back wall to try and tackle this dip. More on the theory and design later, provided it works… :sweat_smile:

You mentioned Trinnov waveforming. Bro Wong also just shared this link with me, looks like trinnov is also developing in this area, not unlike Dirac ART.