Gavin's DIY Home Theatre (Hardcore)

Ok, i think we have covered the center speaker enough :laughing:, time to switch gears to the ceiling and some acoustics aspect of the room. Sammy was asking about it, thank you for your patience.

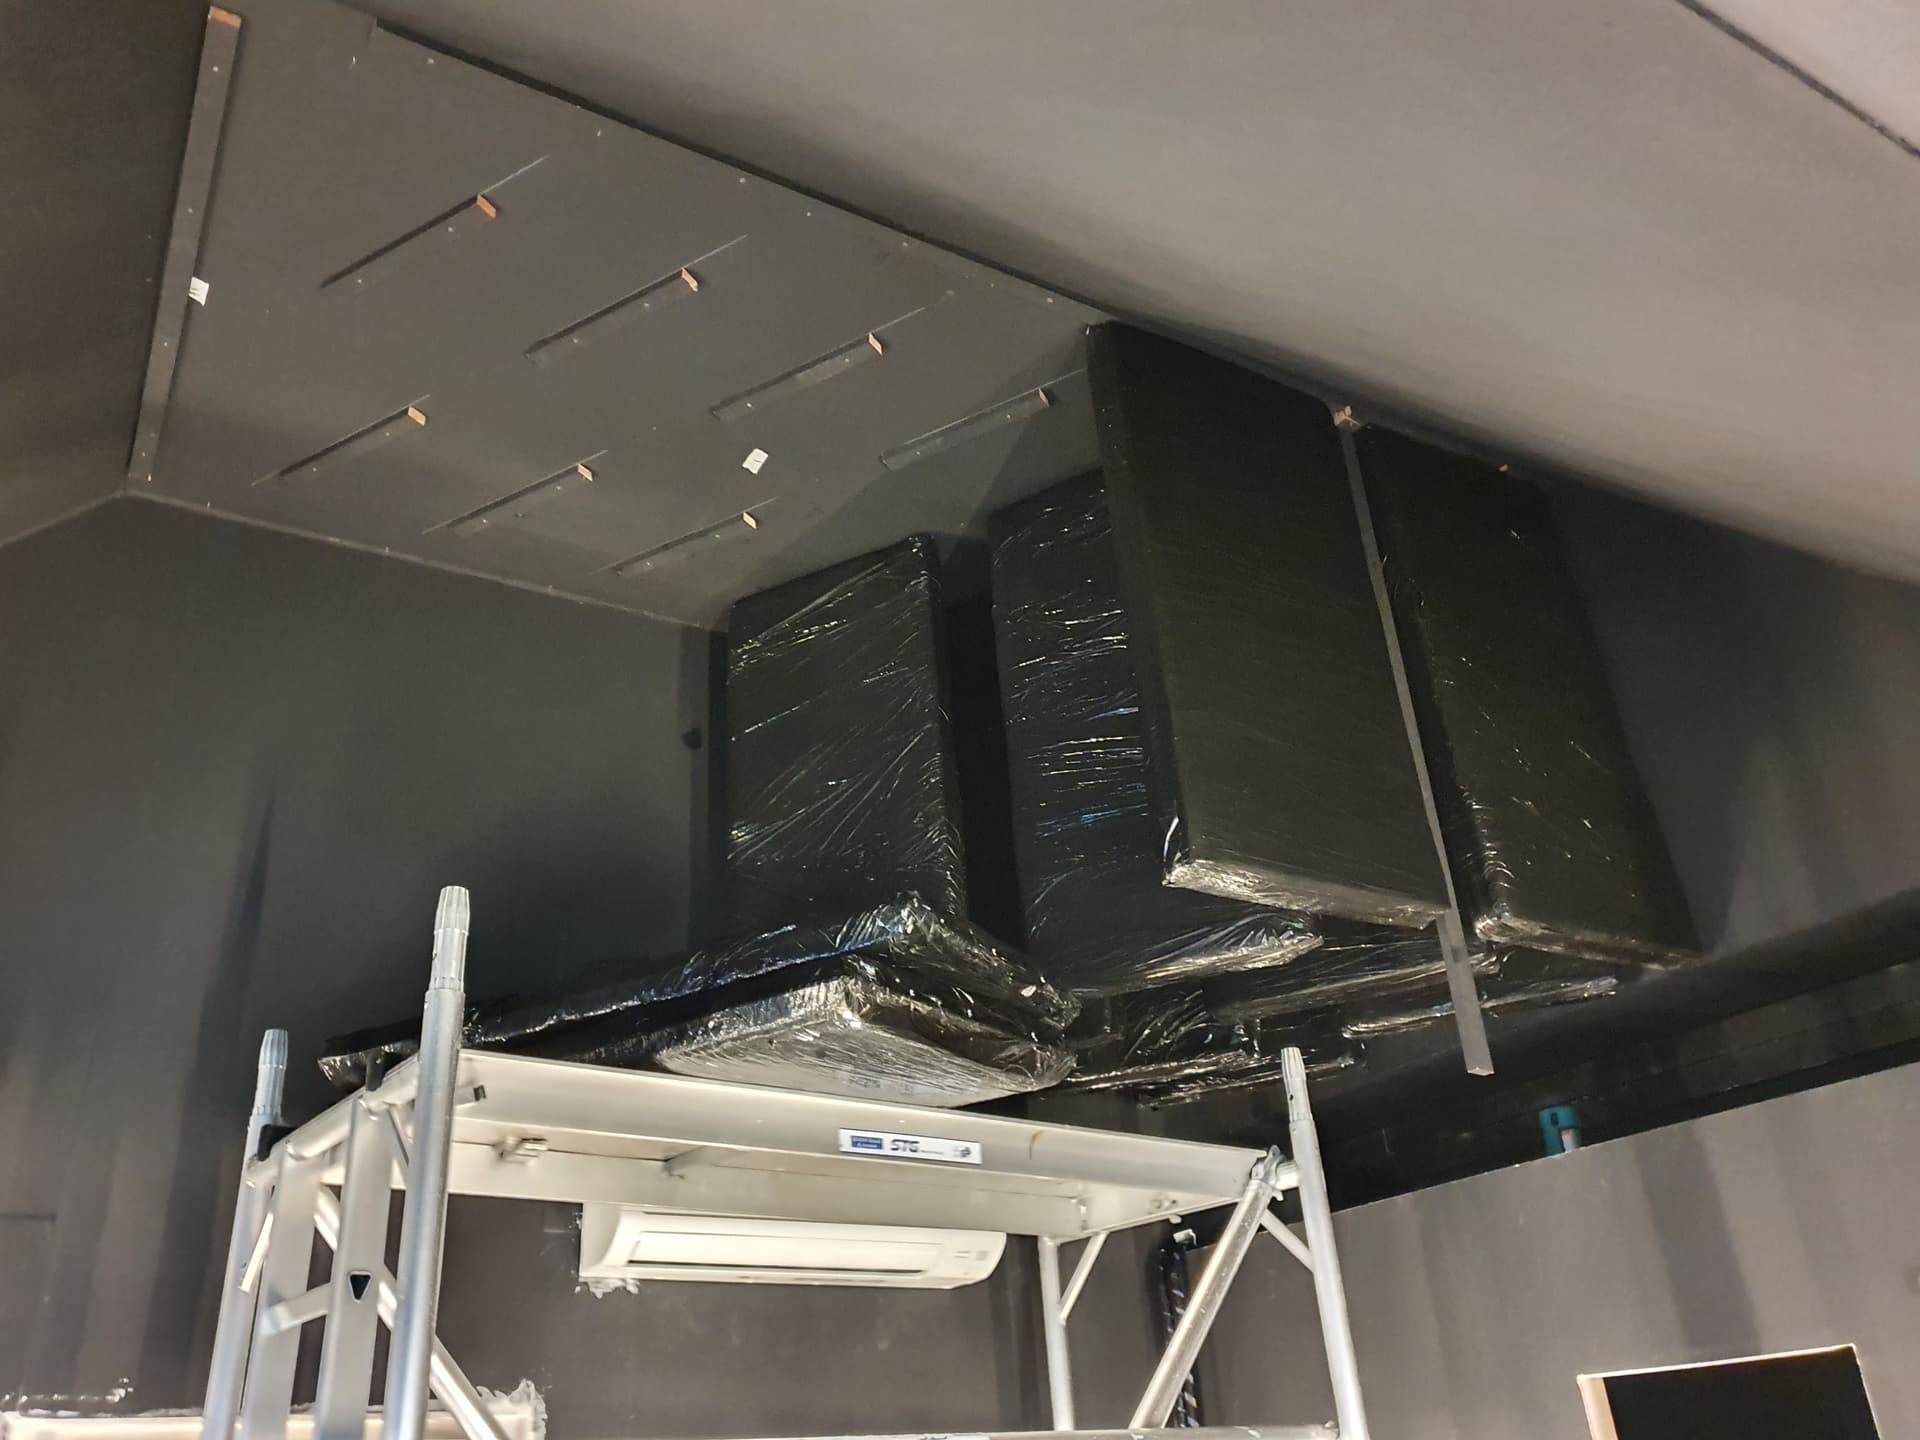
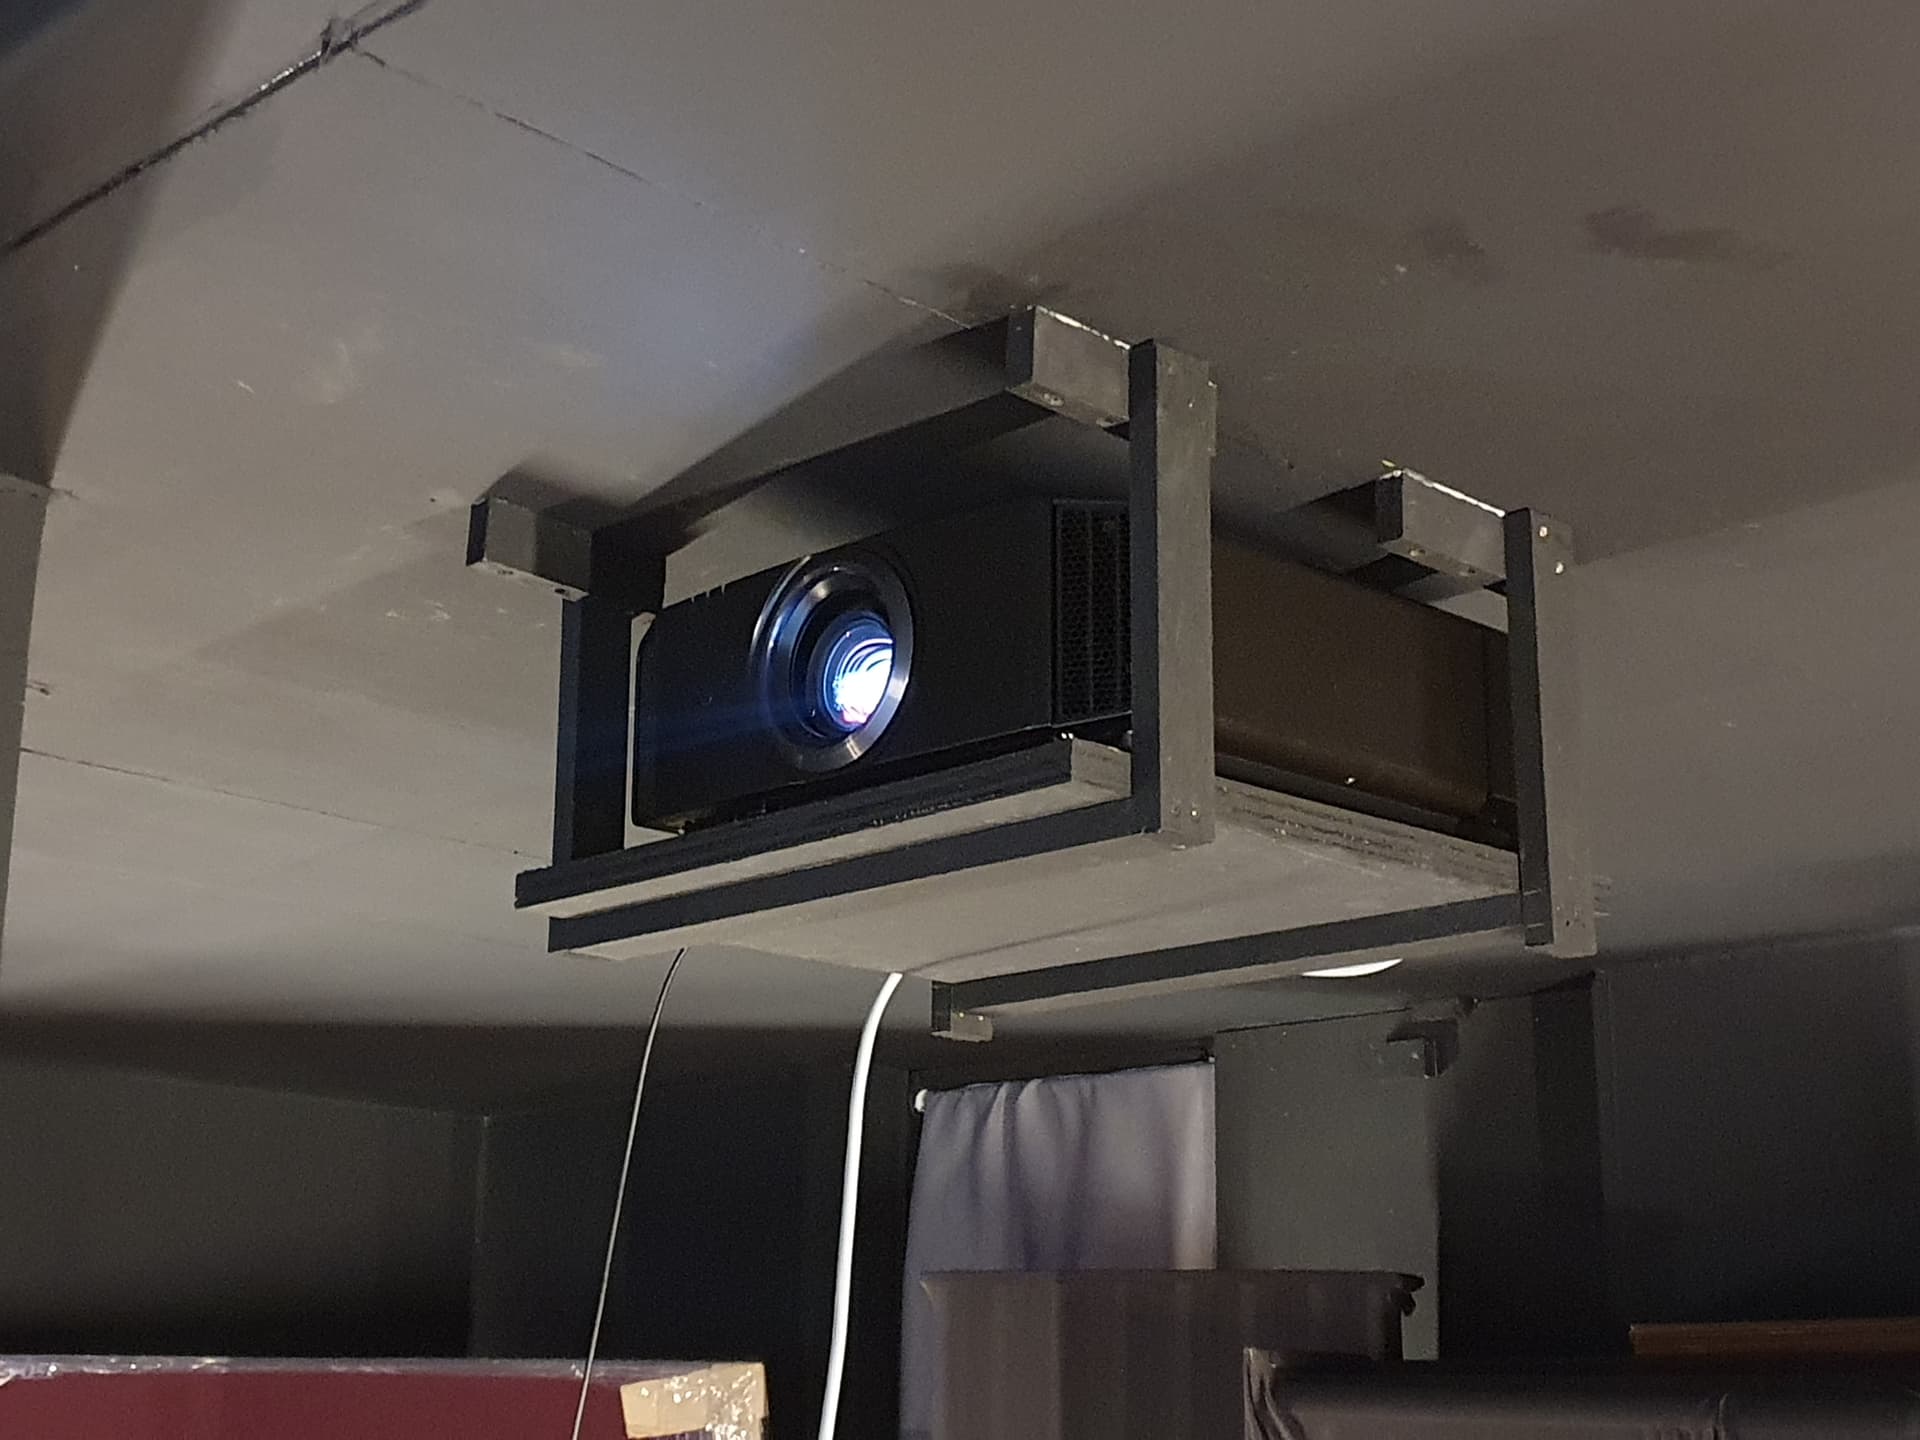
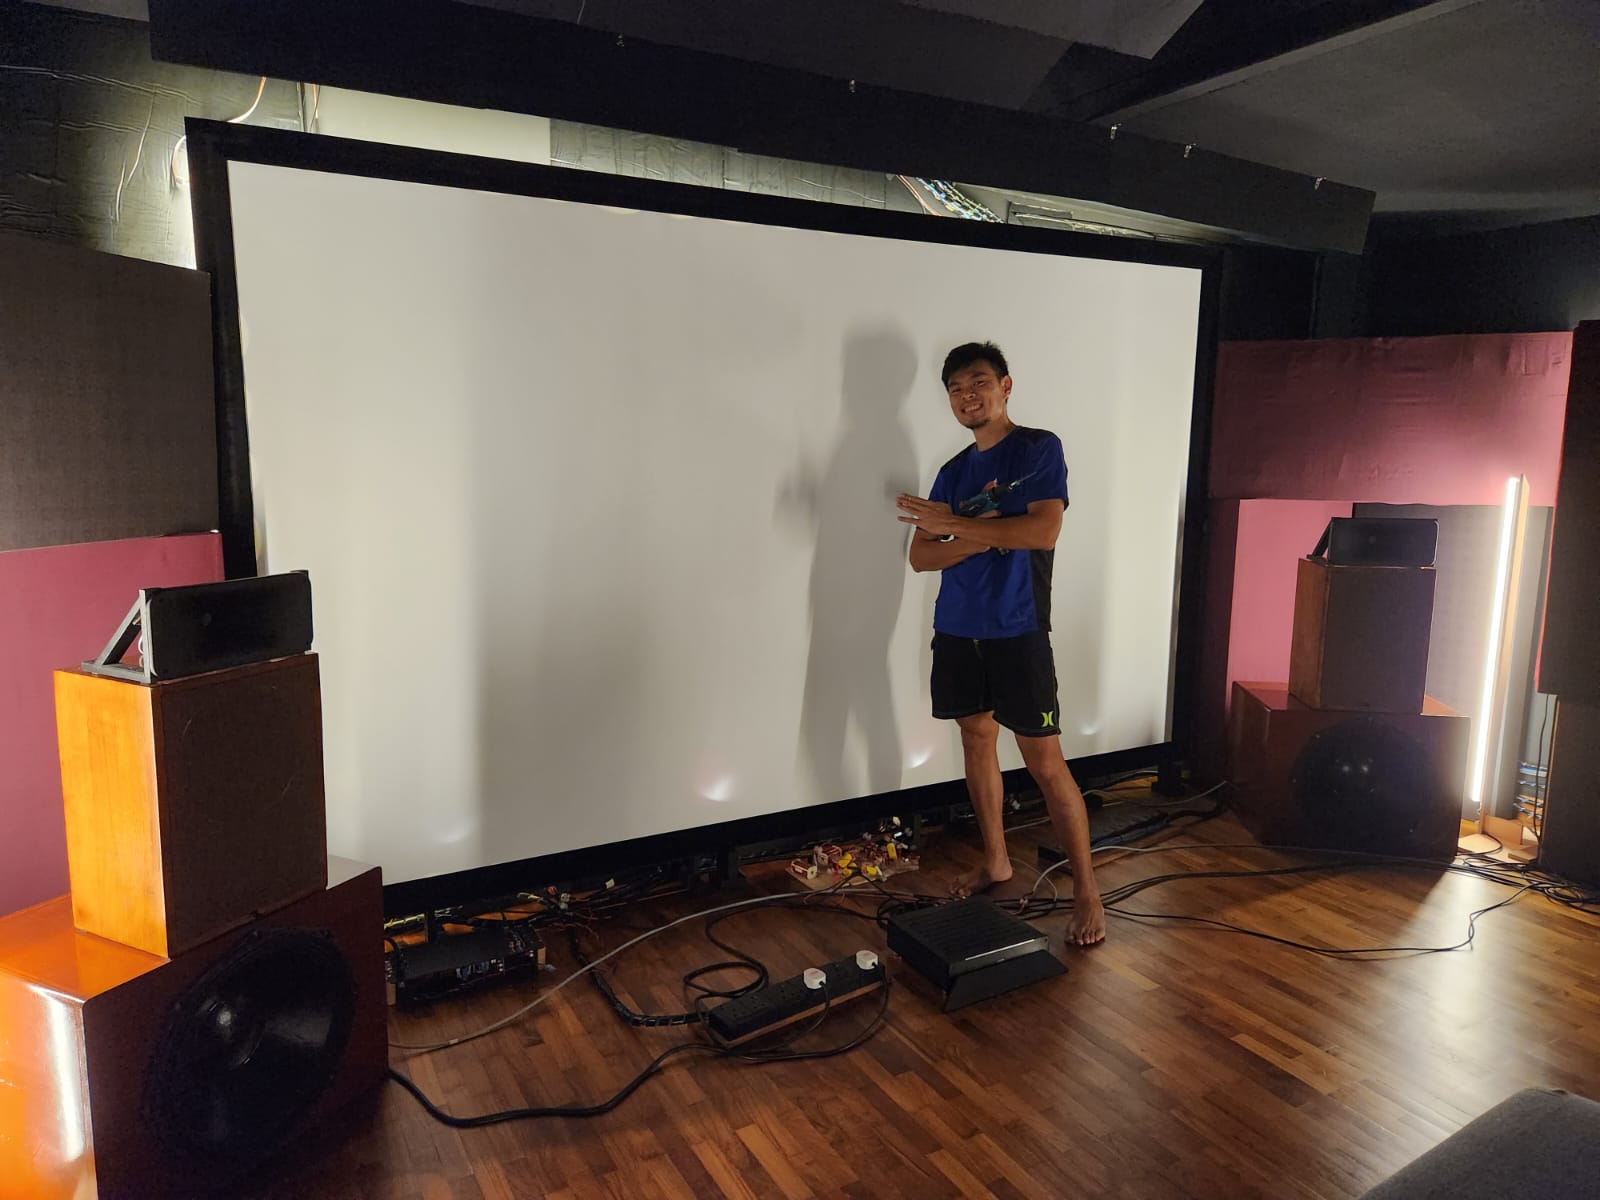
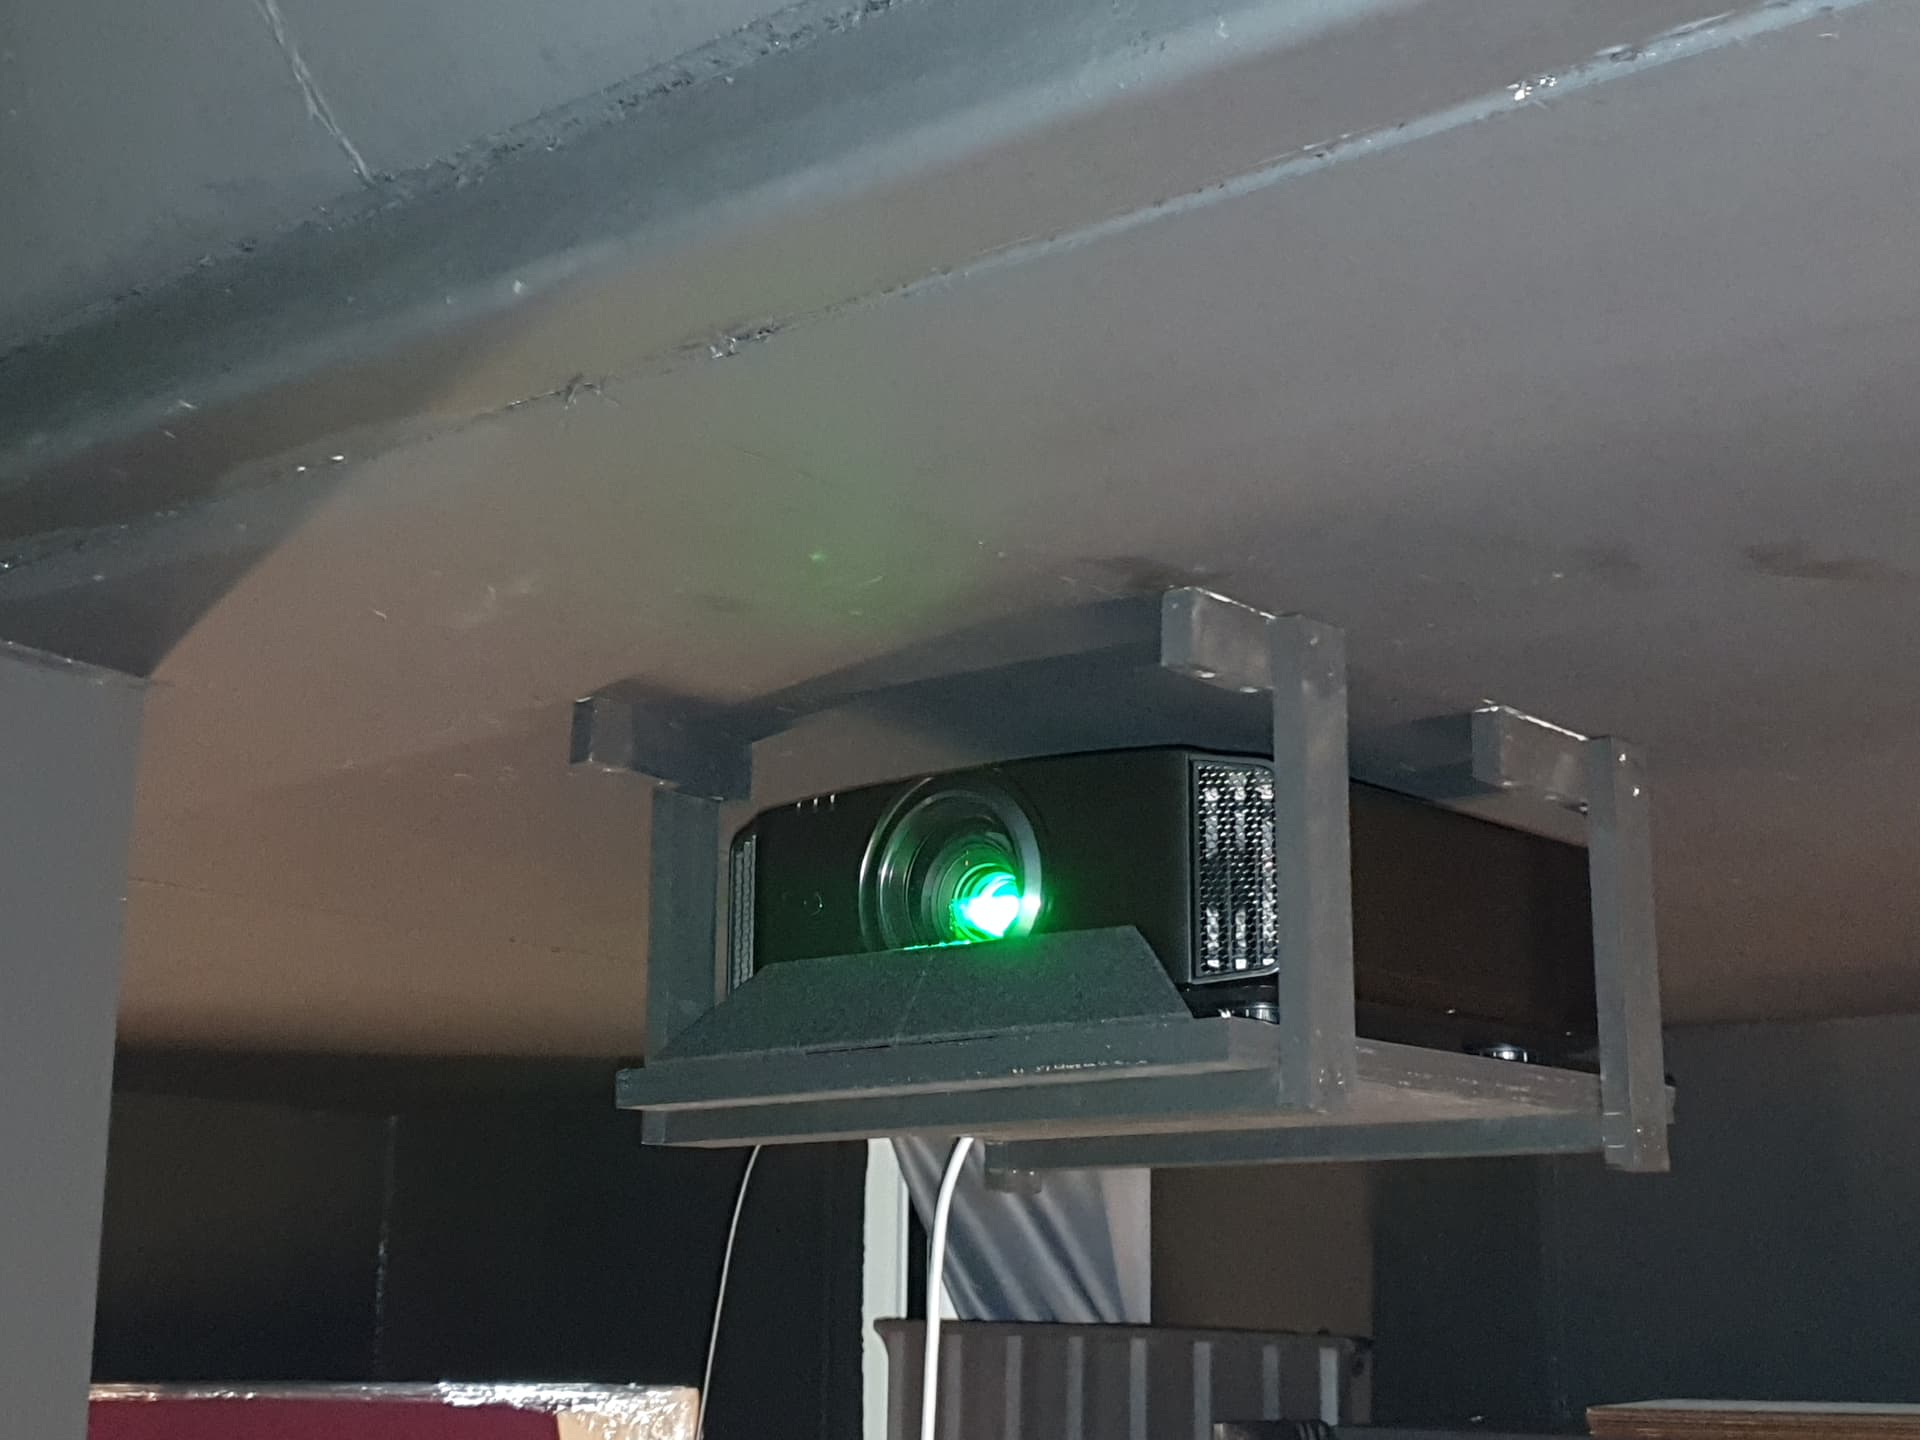
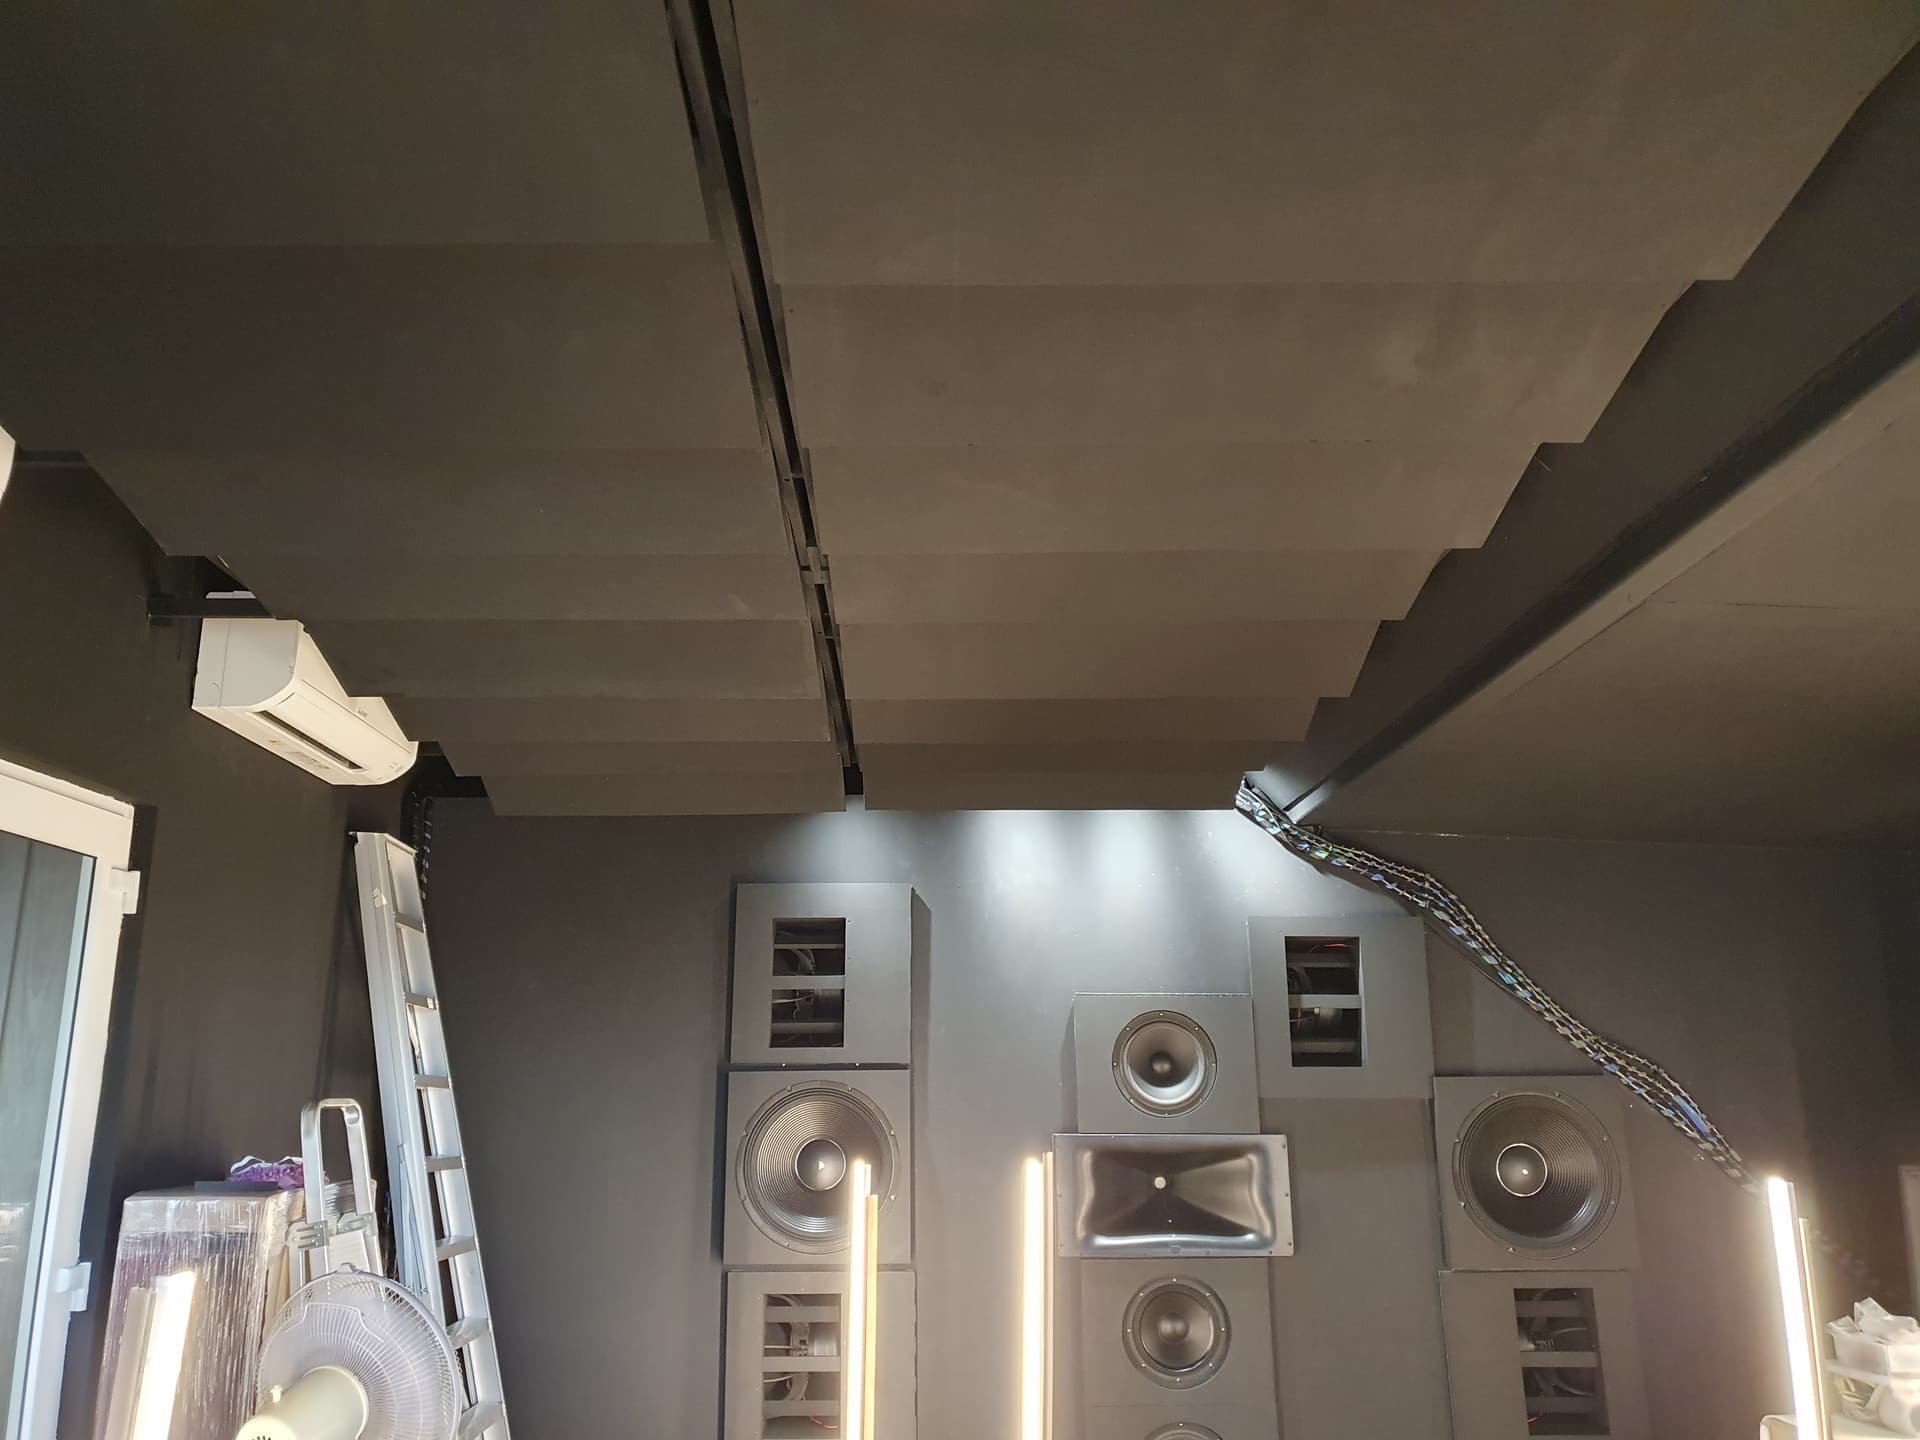
As i shared, the room is odd shaped with low ceilings to the right and back, due to it being a modified attic room. This pic should hopefully show the ceiling ‘situation’ better.

The front with baffle wall, subs etc etc. The pillar :dizzy_face: and the lower sides and back extensions.

What i have is a high ceiling area on the front and left portion of the room. In the design phase, i was wondering what to do with this space. If i left it open, it would surely sound acoustically ‘imbalanced’ with one side ‘spacious’ and ‘high’ while the right and back sounded lower.

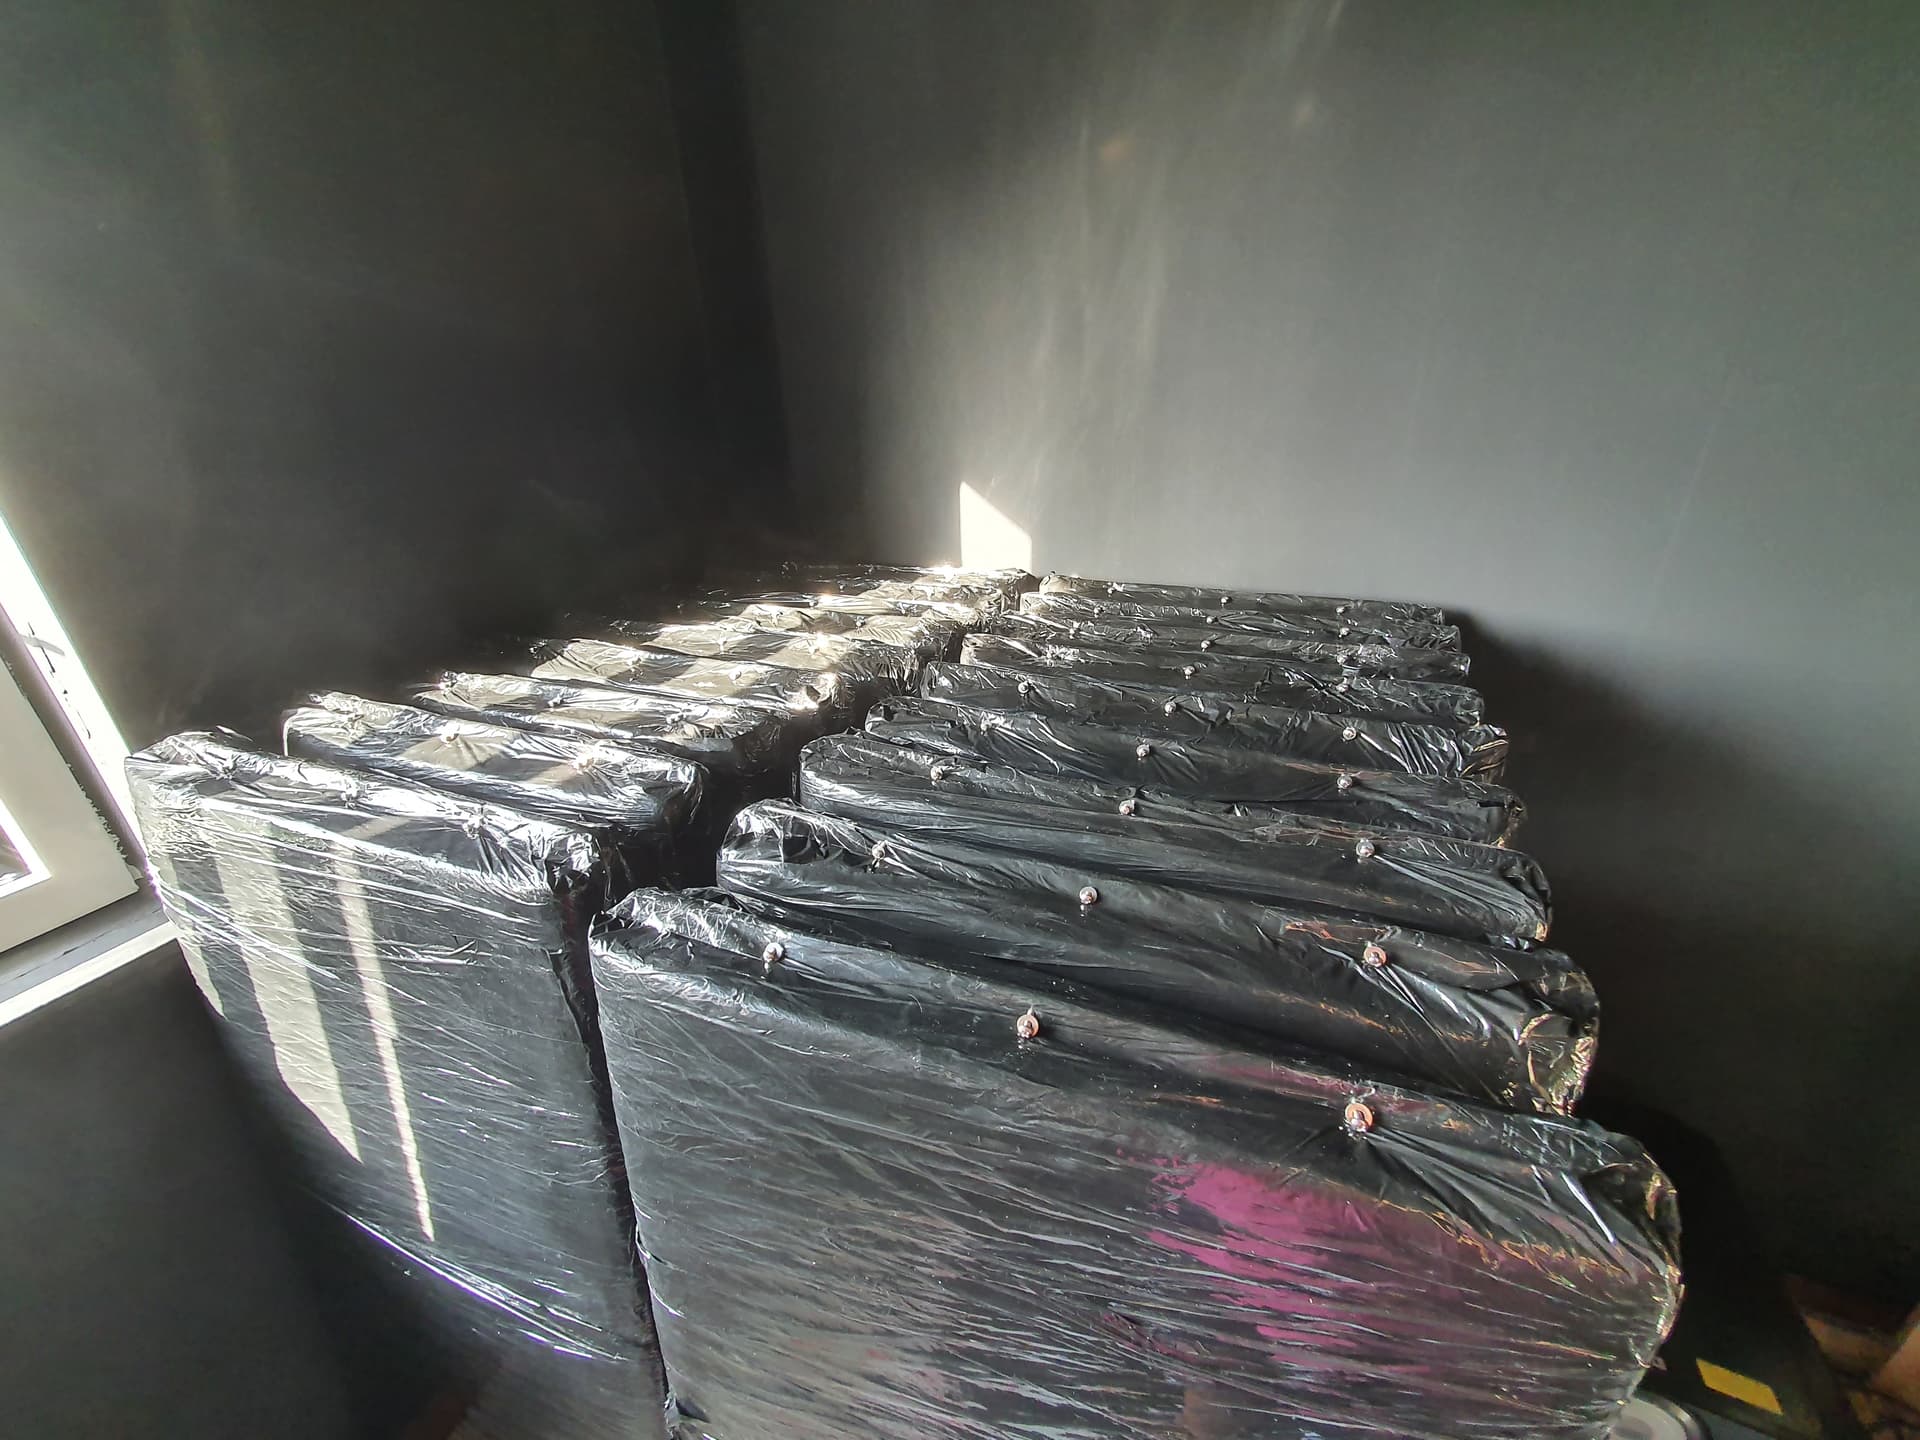
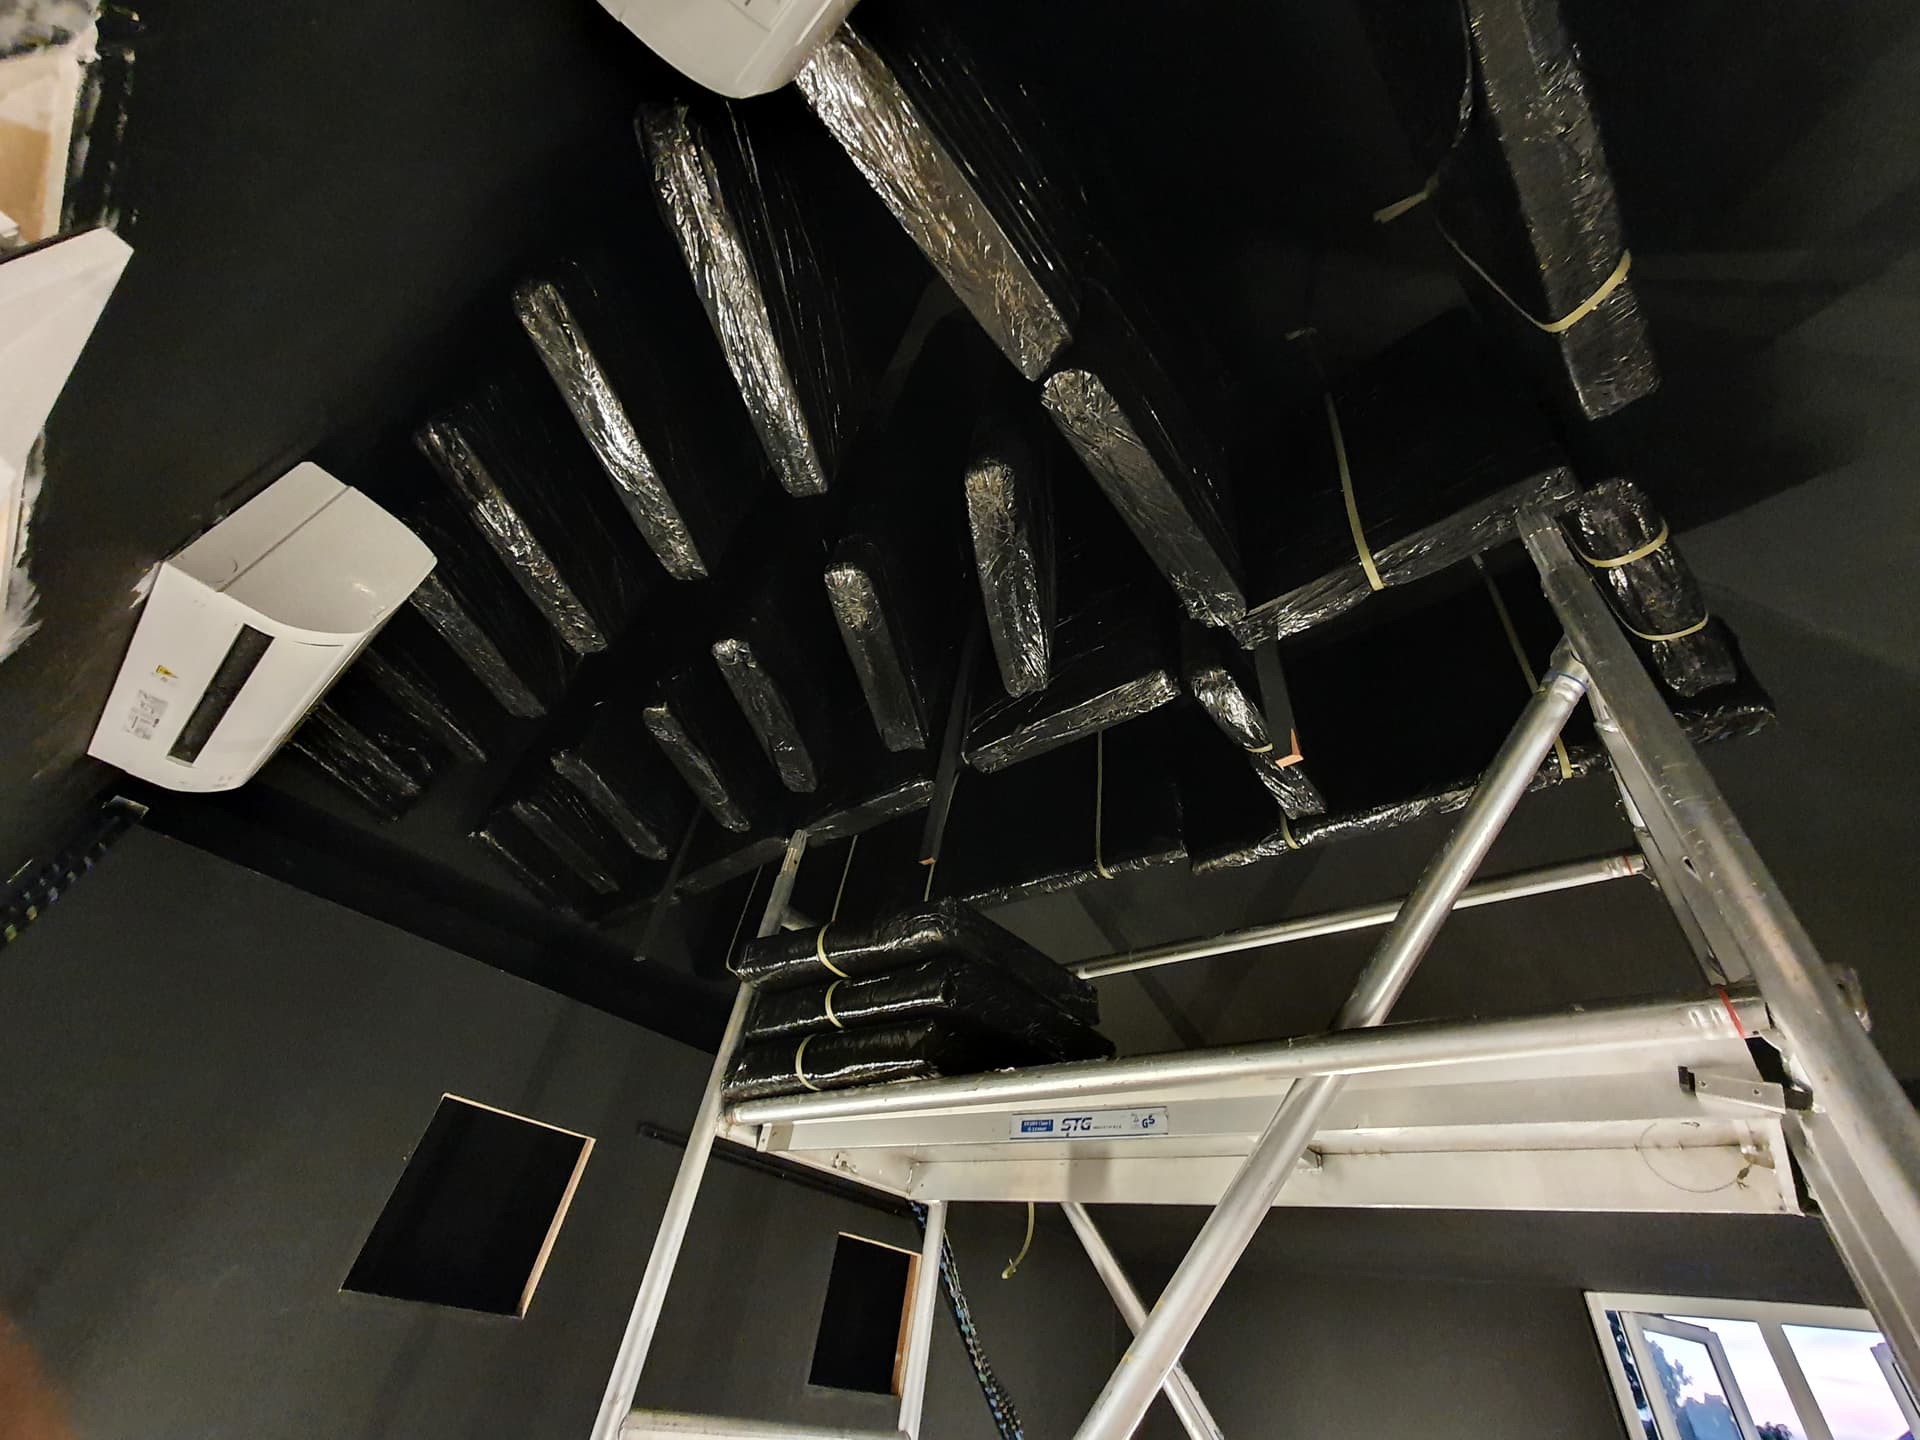
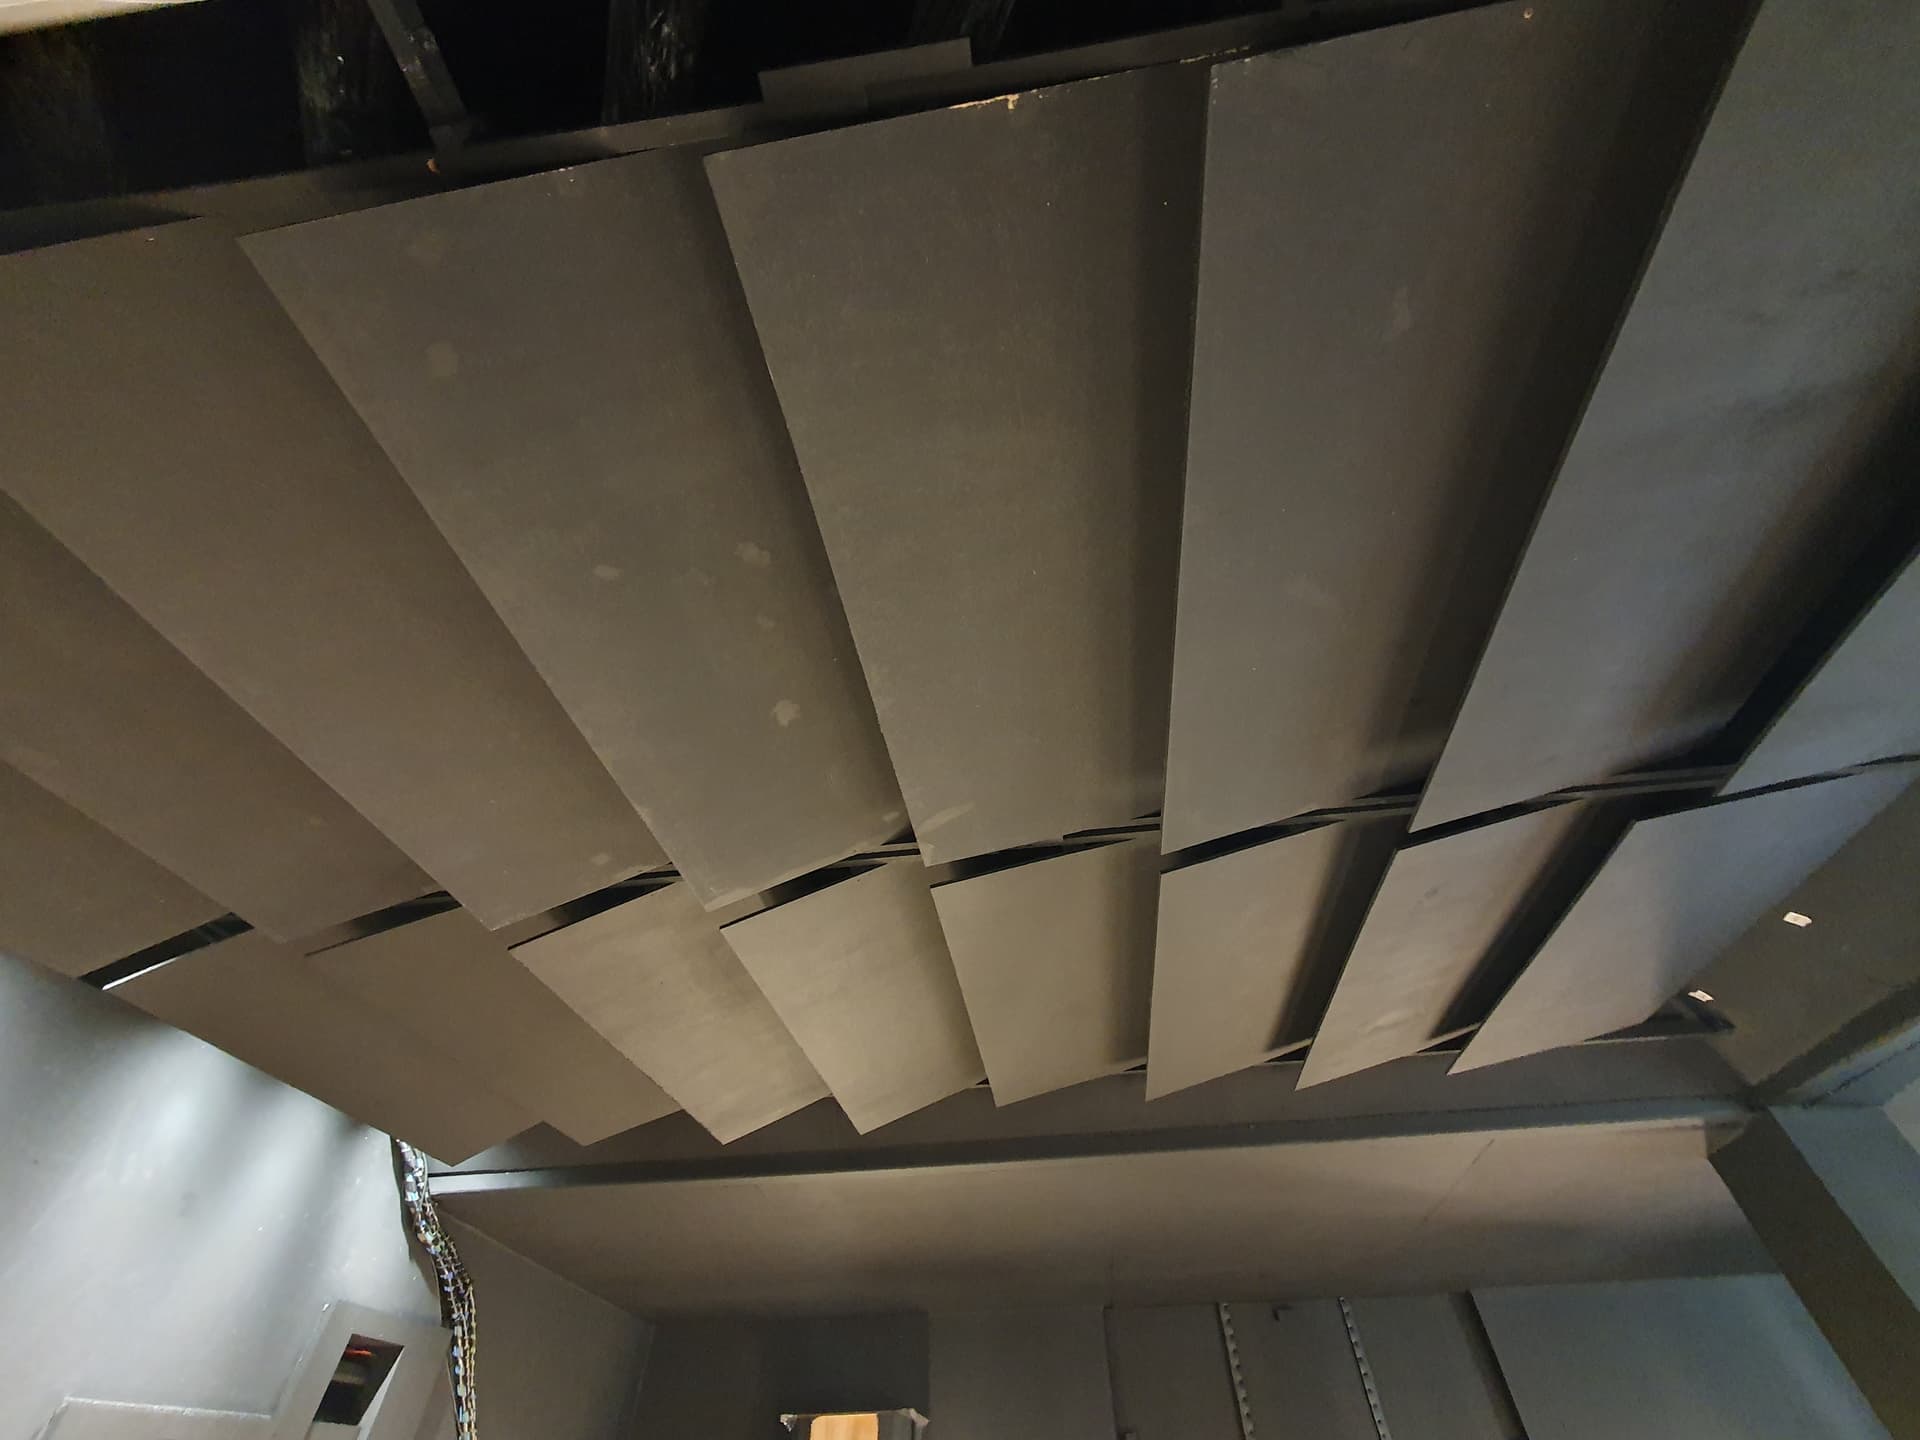
If i closed it off to level the ceiling, it would also ‘waste’ the space and the entire room would feel smaller, with the low ceiling. I arrived at the idea to use the high area for ‘hangar’ style bass traps. This is not talked about at all in the stereo or HT acoustic treatment circles. I got inspiration from architectural and studio acoustics sources.

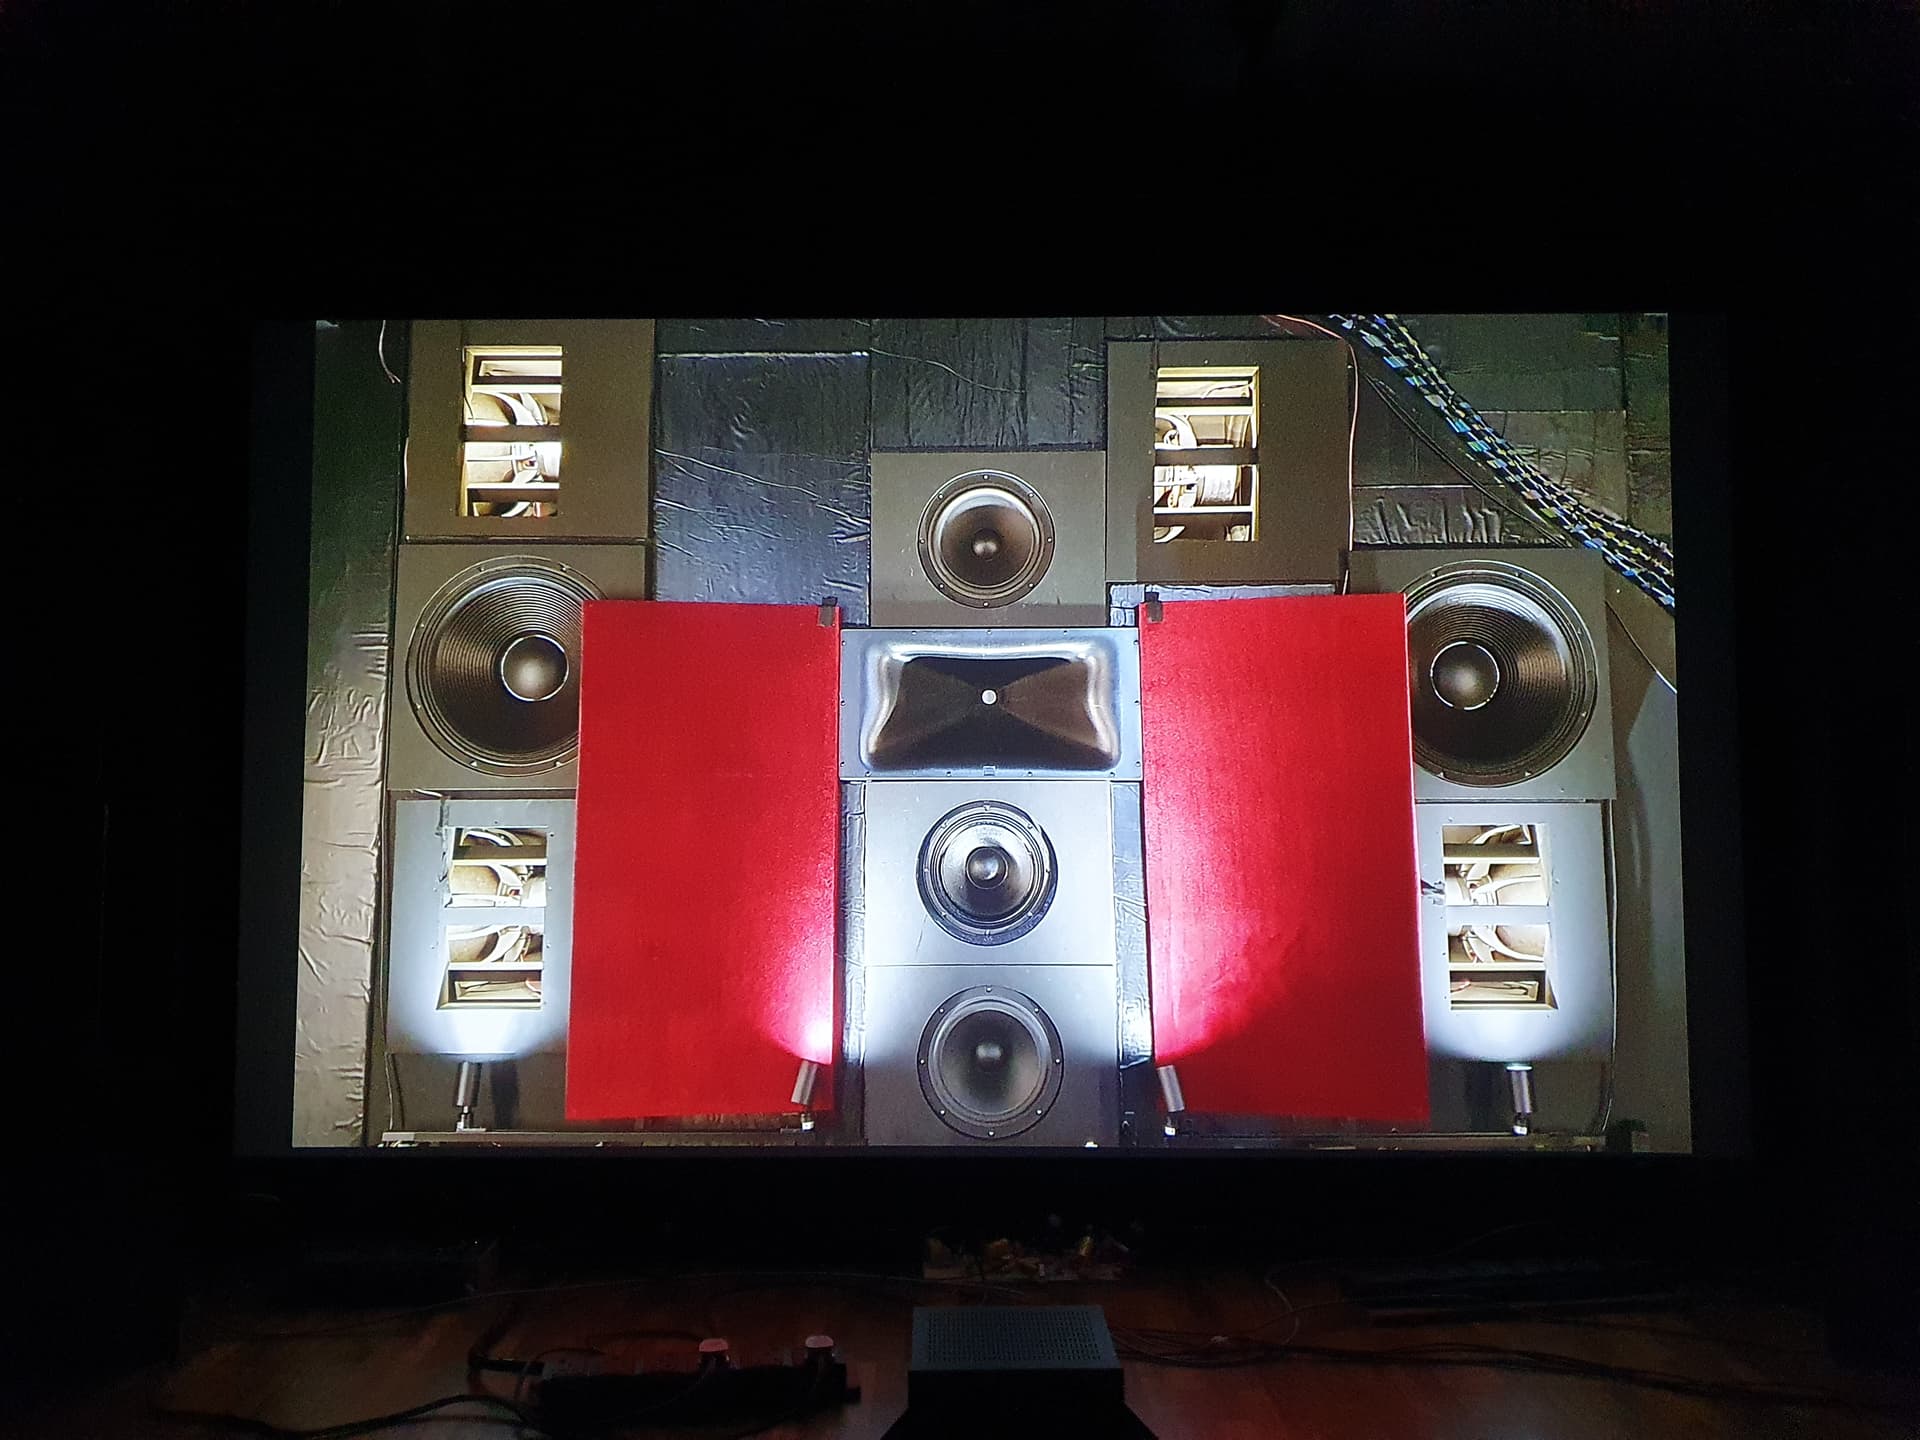
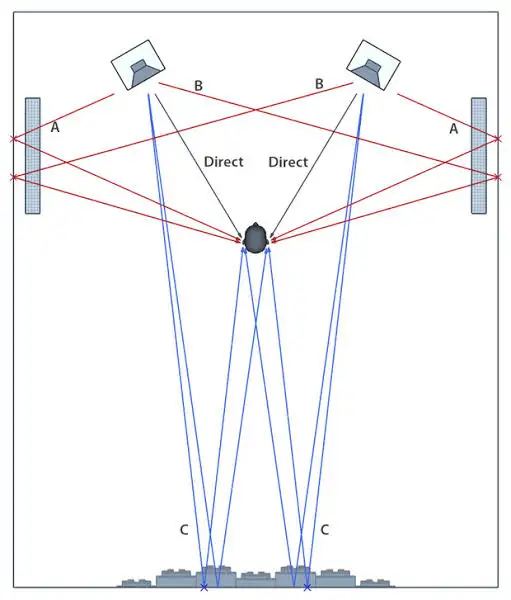
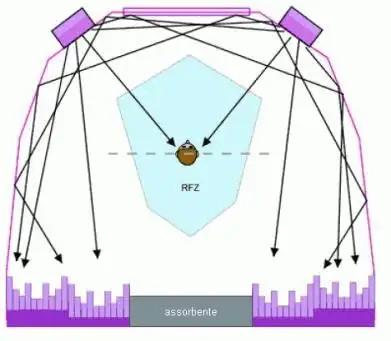
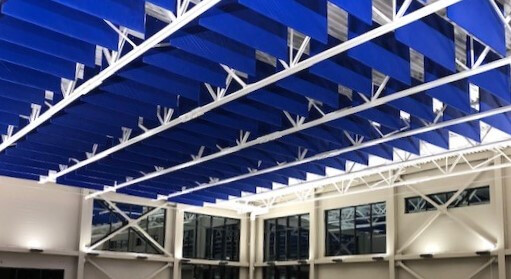
Here’s an example of hanging baffle acoustic panels in an auditorium. i like the idea as it allows for a lot of panels to be placed in a given space. More importantly, it places these velocity type traps further into the room, where the modal velocities (vs modal pressures) are higher.
image

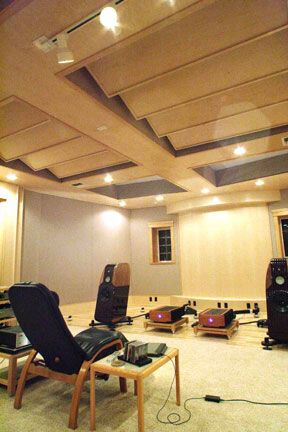
These type of panels are sometimes seen (very rare) in treated listening room ceilings, but usually angled. Angling of the panels - more on this later.
image

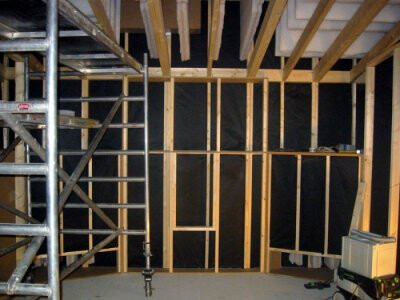
Studios constructions is where these hanger traps are most commonly used. Here you can see the white panels hanging vertically above the ceiling frames.
image

Hangers are also commonly used behind angled walls in studios as very deep bass traps.

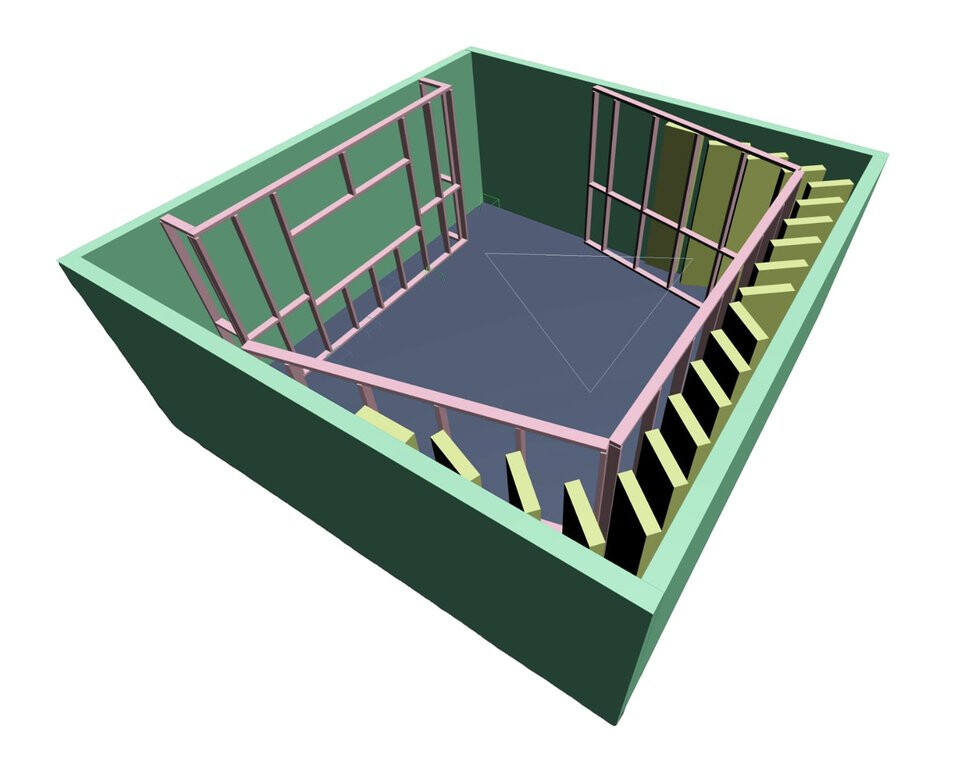
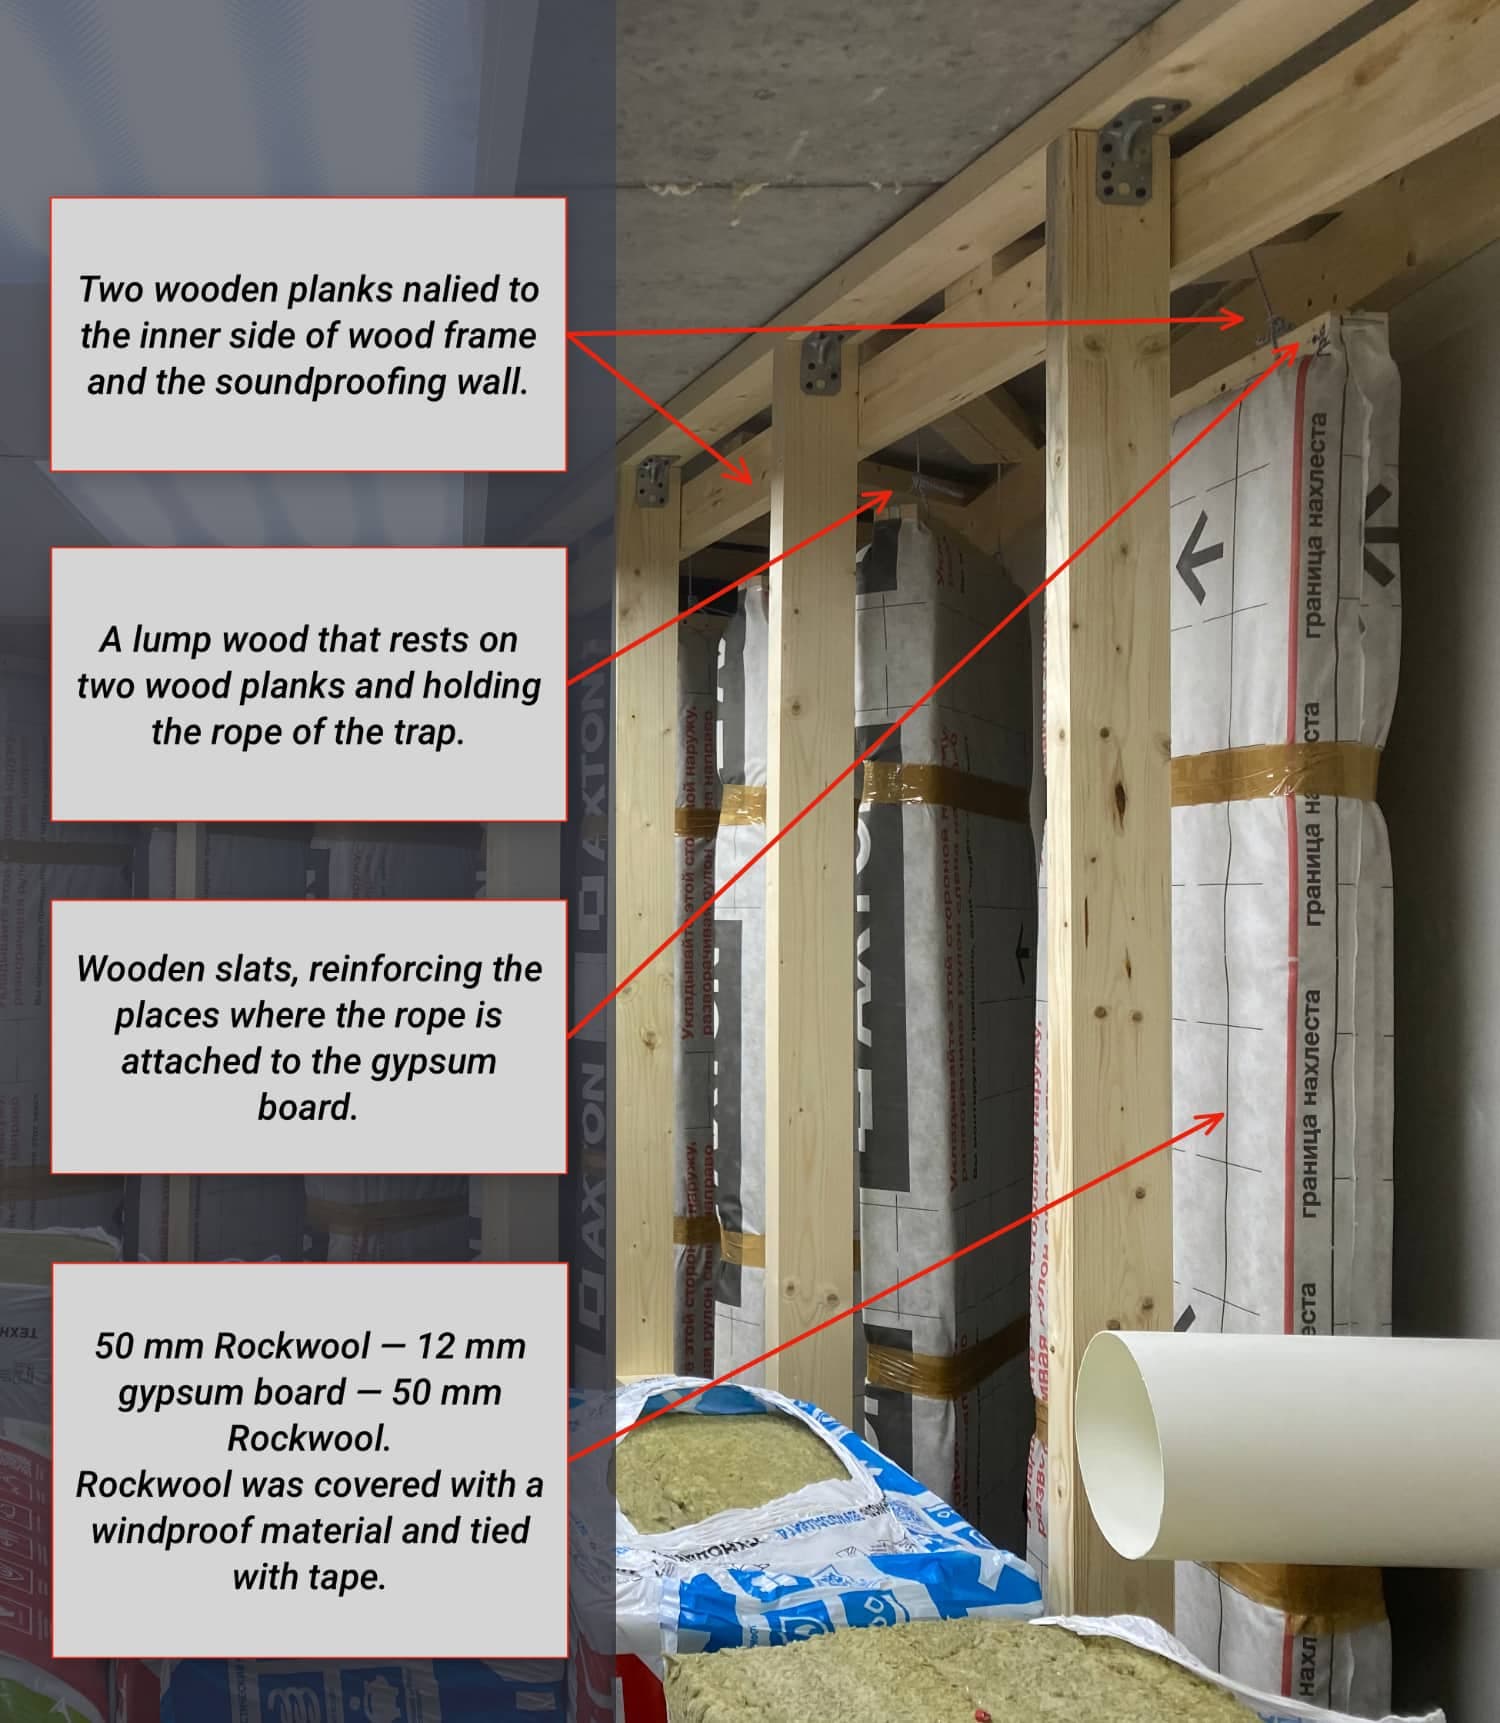
Here’s a great pic showing the construction of the hangers.

Source references :

https://www.johnlsayersarchive.com/viewtopic.php?t=10304&start=15

With that concept in mind, this is what i planned for my ceiling space. Layout and number of panels are rough estimate.

The hangers are made with 2 layers of 60kg/m3 density rockwool, 5cm each, sandwiching a 5mm piece of 60x120cm plywood. The entire panel is then wrapped up with black industrial cling wrap, those used by movers etc to wrap up items during moving. Except in black.

I have to look for photos of the hangers being made. Definitely the most nasty part of the work, wrapping up the rockwool fibers. Here’s a photo of all the panels done and lined up, ready for installation.

Next is looking up at the ceiling area where these panels are going. Hopefully can visualize the orientation. The scaffold was kindly lent by my contractor. I was installing this at the tail end of reno.

1 Like

So, naturally diy, a lot of sweat, not too much blood or tears. Installing the hangers onto the ceiling.

Take photo and tell story very fast done! Don’t seem to have a good angle to capture all the panels.

A candid WIP shot of yours truly in action.

Can’t recall the exact number, should be 27 pieces of 60 x 120 x 10cm thick panels up there in the ceiling.

Serious bass output calls for serious bass energy management. Fingers crossed this is effective.

Now, if only the ceiling was even rectangular, and I could have these baffles across the entire ceiling…

The other reason I like the idea of these baffles - they seem to naturally complement the SBA bass system. The SBA sends a plane wave down the length of the room. It bounces off the back wall and back to the front wall, repeatedly. Having these vertical baffles in the wall of the axial motion seems ideal to take excess reverberant energy out of the air.

2 Likes

Exciting updates from Fi. They launched 2 new models of their IB drivers.

There is now a IB2 range with 12 and 15in, and IB3 with 12, 15 and 18in models.

This is the most significant change on the IB3:
Great care was take with inductance mitigation and linearization utilizing three thick aluminum rings yielding excellent upper end response and amp friendly inductance levels.

Holy Camoly! That is some effort on the ceiling. My attic is similar to yours albeit probably half the size of yours and I’m using just half of the room. If yours is successful, I might just make some of those sound absorbing cushions too :rofl:

Currently, the main problem is actually the ceiling, which is just under the roof tiles. The sub makes it vibrate, just as it does during a thunderstorm. Do you hear any vibration noises in the room during a violent thunderstorm? If you do, they will happen with high subwoofer output too.

Massive manual work. Salute!

2 Likes

As this room is purpose built, I did include some isolation work to keep noise out as well as to keep HT sounds in.
The road in front of my house has some traffic, and the attic HT is at the front of the house. Also there are airplanes going to land frequently at Paya Lebar.

Achieving a low noise floor is actually one of the most important foundations for a HT system. Keith Yates, designer of the Hahn theater, talks about this in his interview.

These days, the word immersive is thrown around all the time when describing object based home theatre systems. However, Keith argues that the word is actually Envelopement. The sound field should envelop the listener in a bubble, to complete the transportation into the content together with the wide field of view and great image quality.

Immersive, to him means listener is not taken out of the content. Any external noise disturbance will break the ‘spell’. No to mention a low noise floor also helps with detail retrieval, and dynamic range, ‘loud’ over the ‘quiet’.

Back to the room build - it is finished in plywood, layered over bitumen over drywall, on hat channels, on resilient clips. More on this later on the room construction details.

Here’s the Keith Yates interview for anyone interested.

While we are talking about low noise floor, I would like to highlight the difference - it is not an anechoic chamber.

The key difference between a low noise floor, treated HT or dedicated stereo room is the presence of reflections.

A well treated room, has a balance of absorption and diffusion to preserve energy in the room. An anechoic chamber aims to absorb any and all reflections.

When a person in in an anechoic chamber, it is an unpleasant and disorienting sensation. Often described as a sensation of ‘pressure’ or actually ‘vacuum’ of nothingness. Because there are no sound reflections - something our ears instinctively use to evaluate the space we are in.

A properly acoustically treated space, with diffusers and liveliness maintained, is a very confortable space to be in. When one sits there in the quiet, there is a pleasant sensation of airiness and spaciousness that the ear and brain naturally approves of.

Remember how my plan to light up behind the screen to ‘see thru’ didn’t quite work? Well I came across a different method on avsforum.

:laughing:

Simply quite brilliant. The funny thing is how it never occurred to anyone…

Yesterday, I tried the first prototype concept for light management from the screen to increase perceived contrast.

You can probably tell I’m obsessed with acoustics, and I wanted to avoid spamming black velvet for light reflection management, as it only absorbs the very high frequency, and will reduce the ‘airiness’ of the sound.

It consists of a felt panel hung vertically from the ceiling to block the reflection light path, while still keeping the ceiling mostly reflective acoustically.

Here’s what the image looks like with the felt panel .

2 Likes

I can appreciate this. Jason Yeo’s anechoic chamber was fantastic for removing all reflections, but it was odd having a conversation in it. I was like speaking in the middle of a large football field. You had to speak louder.

1 Like

Yes, dialogue intelligibility, detail retrieval all will be affected when there is excessive absorption, and unbalanced absorption, where predominantly mids and high frequency energy is absorbed.

Finally mounted the projector on a diy shelf and got rid of the stock of boxes.

Wife stopped by as I was working and asked me to pose ‘for scale’. :rofl:

I saw the 3D printed cover to block light leakage. It actually goes both upwards and downwards. I used a piece of felt to block the lower part.

4 Likes

Well done…

1 Like

Continue the build story. After installing the absorption panels on the ceiling space, I need to somehow level out the ceiling so the space sounds somewhat ‘balanced’ acoustically. As opposed to high one side low the other.

Most are familiar with the concept that near reflections affect the soundstage and imaging from the speakers. However, we do not want to absorb all the reflection energy, as the extreme of an anechoic chamber is not pleasant.

It used to be popular in studios for this Live End - Dead End (LEDE) concept, where the front half of the room where the speakers and monitors are treated with absorption (dead end) whole the back half of the room is treated with diffusers to preserve late reflection energy, which adds fullness, body, detail, spaciousness to the sound.

The LEDE concept looks like this.

The reason for the dead end around the speakers is to reduce the negative effects of early reflections. Key word is early. The threshold is subjective. Ideally 10ms or more, but even 5ms of clean initial signal is audibly beneficial.

In other words, the absorption is used to create a reflection free zone. Ray tracing diagrams is useful to see where all these first reflections in the front part of the room comes from…

Notice the diffusers on the back wall, as well as the later reflection energy from them. If late diffuse reflection energy is good, then more must be better. Also, with controlled directivity speakers, the off axis energy is closely timbre matched with the direct energy. It seems a pity to absorb all this energy on the sidewalls…

What if there is a way to preserve this sidewall reflection energy, but still achieve the reflection free zone? This is what they do in studios.
images-4
By angling the sidewalls, the first reflections are redirected to the diffusers on the back wall. Wow, it is not everyday that you can find a way to have your cake and eat it too!

This concept can be extended to manage the ceiling reflection energy, instead of using a ‘cloud’ ceiling absorber. The angled panels similarly redirect energy towards the back of the room.

media-1064974-acoustics-and-psychoacoustics-combined-fig7t

This brings us to the design of my ceiling panels.

1 Like

I made reflector panels out of plywood, with a strut that has a layer of sealant for a bit of damping to avoid excessive ringing.
The reflectors are mounted on a pivot point, and the angled can be adjusted later as needed.

Looking upwards and forward from MLP. Can also see the extent of the ceiling imbalance. This was the most challenging part of the room design.

Side view of the panels.

5 Likes

You got the next level s*** kind of skill. Really kowtow to you buddy!

I can’t wait for all these to fall into place and hopefully I have the chance to get invited to have a listen.

Jia you bro!! I salute and give you some of my energy to keep you going!!!

3 Likes

Speechless. Ultimate hardcoreness. Hats salute off . 1 day to sit down enjoy all your hard blood deserve worth fruits ! Cheers

4 Likes

A lot of respect for all our brother in this forum with good diy skill. My last visit to Ricky101 was impress by his work. This time see Gavin work, OMG this guy just bring it to another level :heart::+1:

4 Likes

Gavin is on another level ! If u need to know what driver to use, he is the man to ask !

3 Likes