Hello,
Sharing my current build in progress.
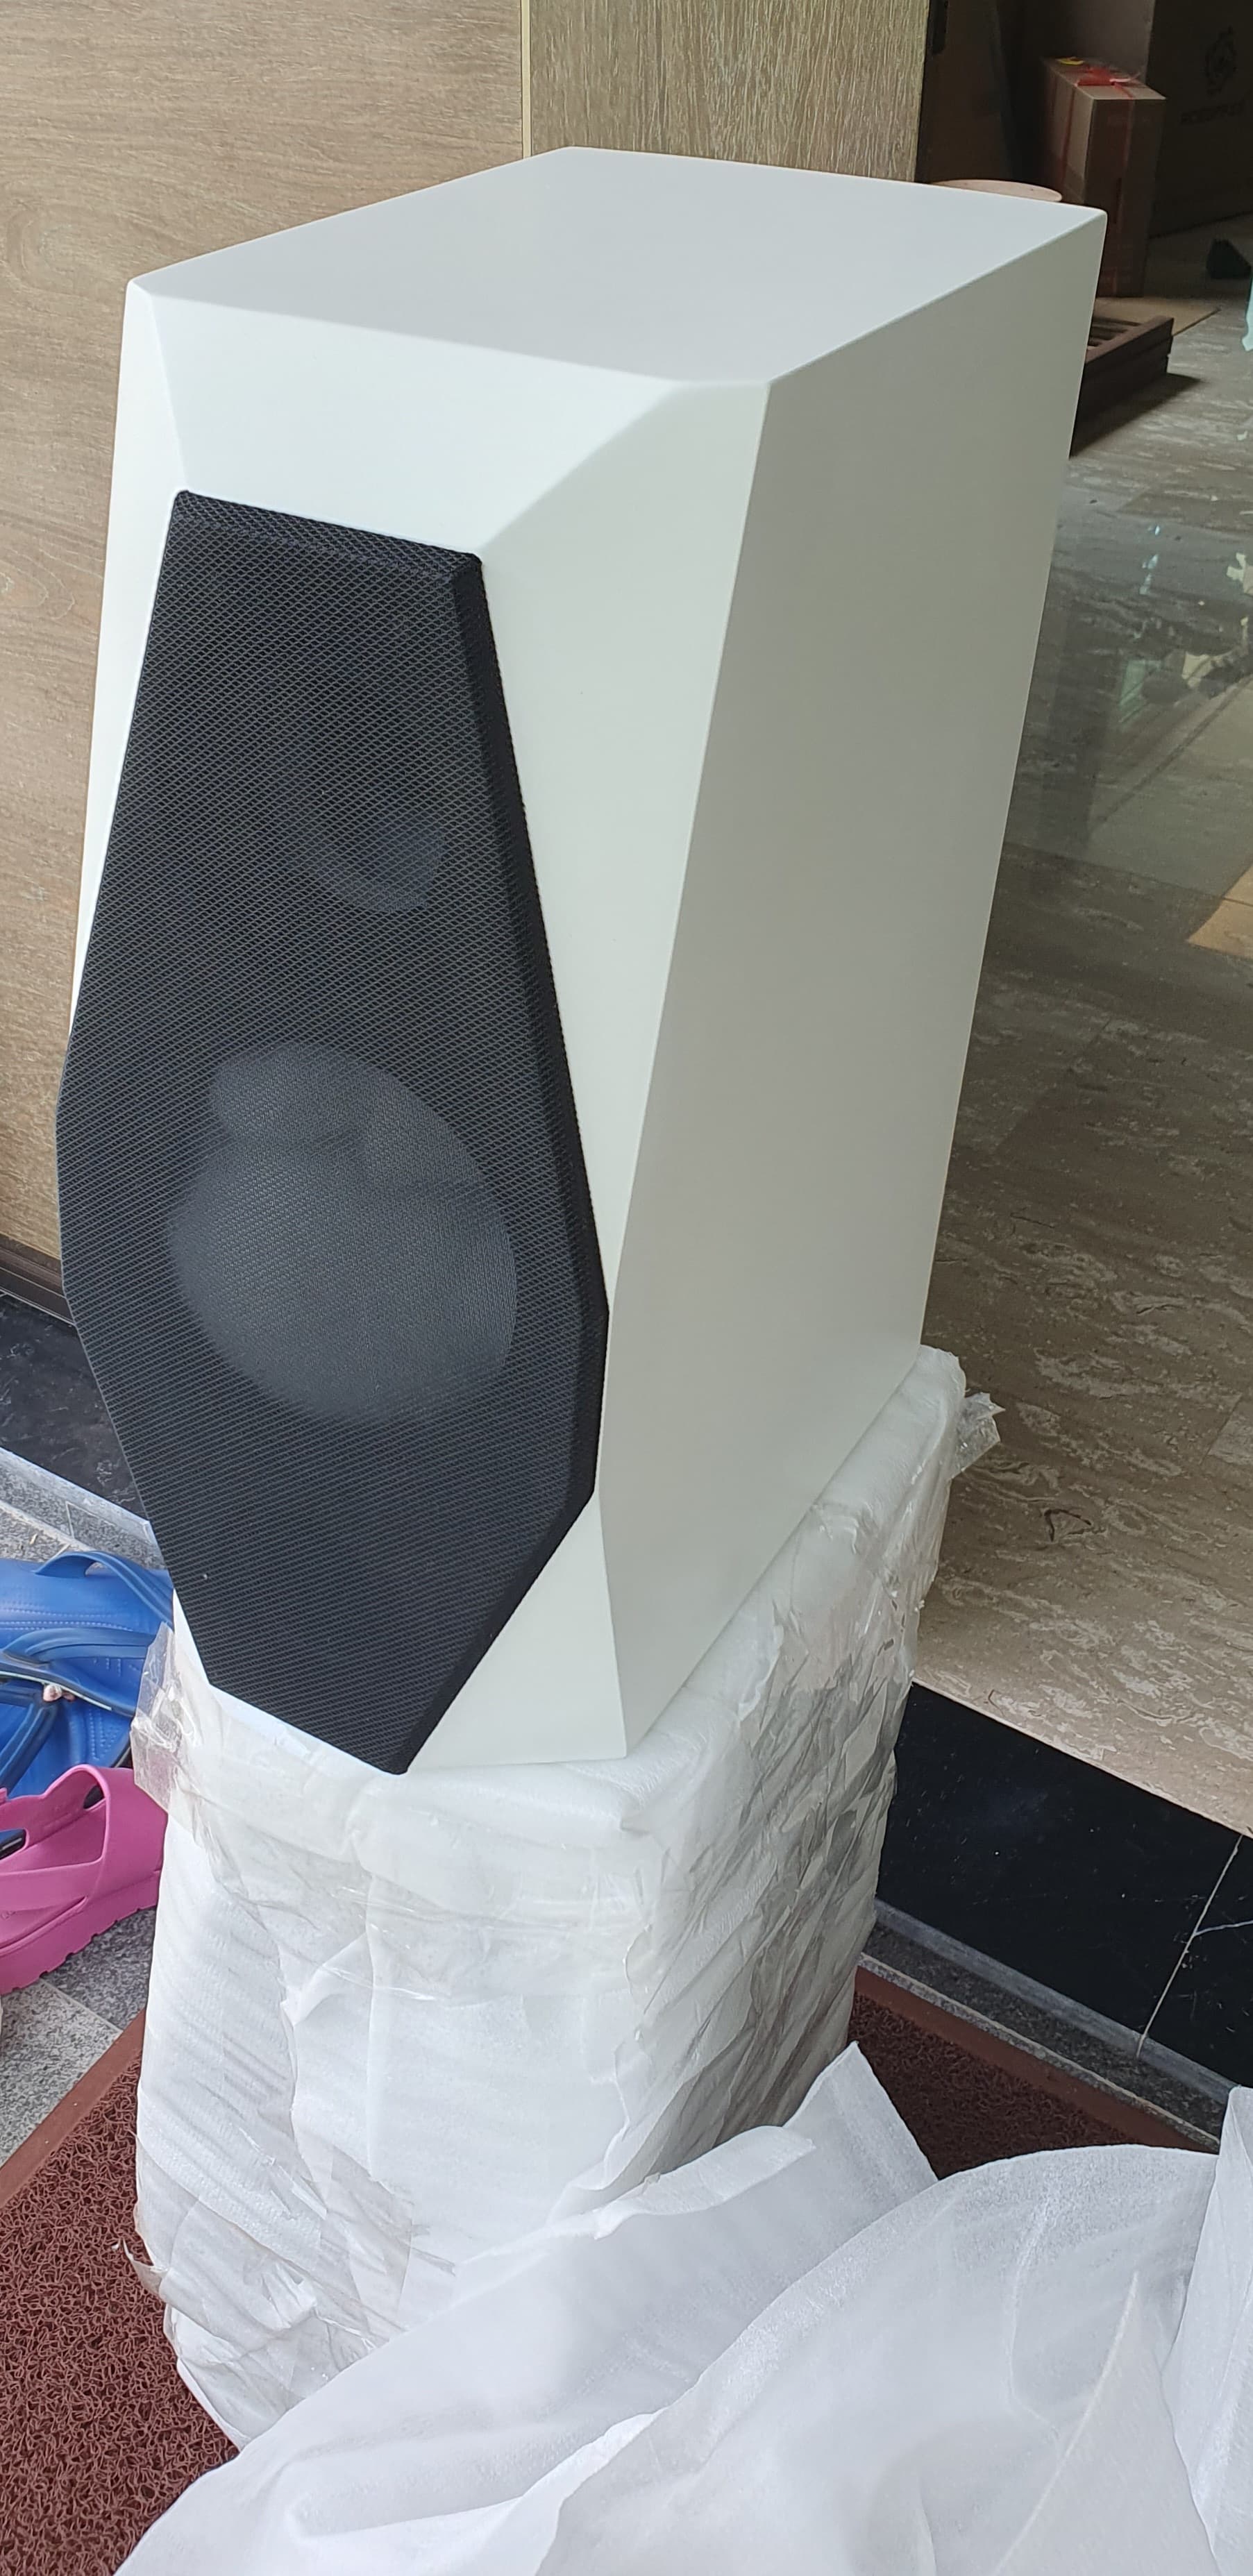
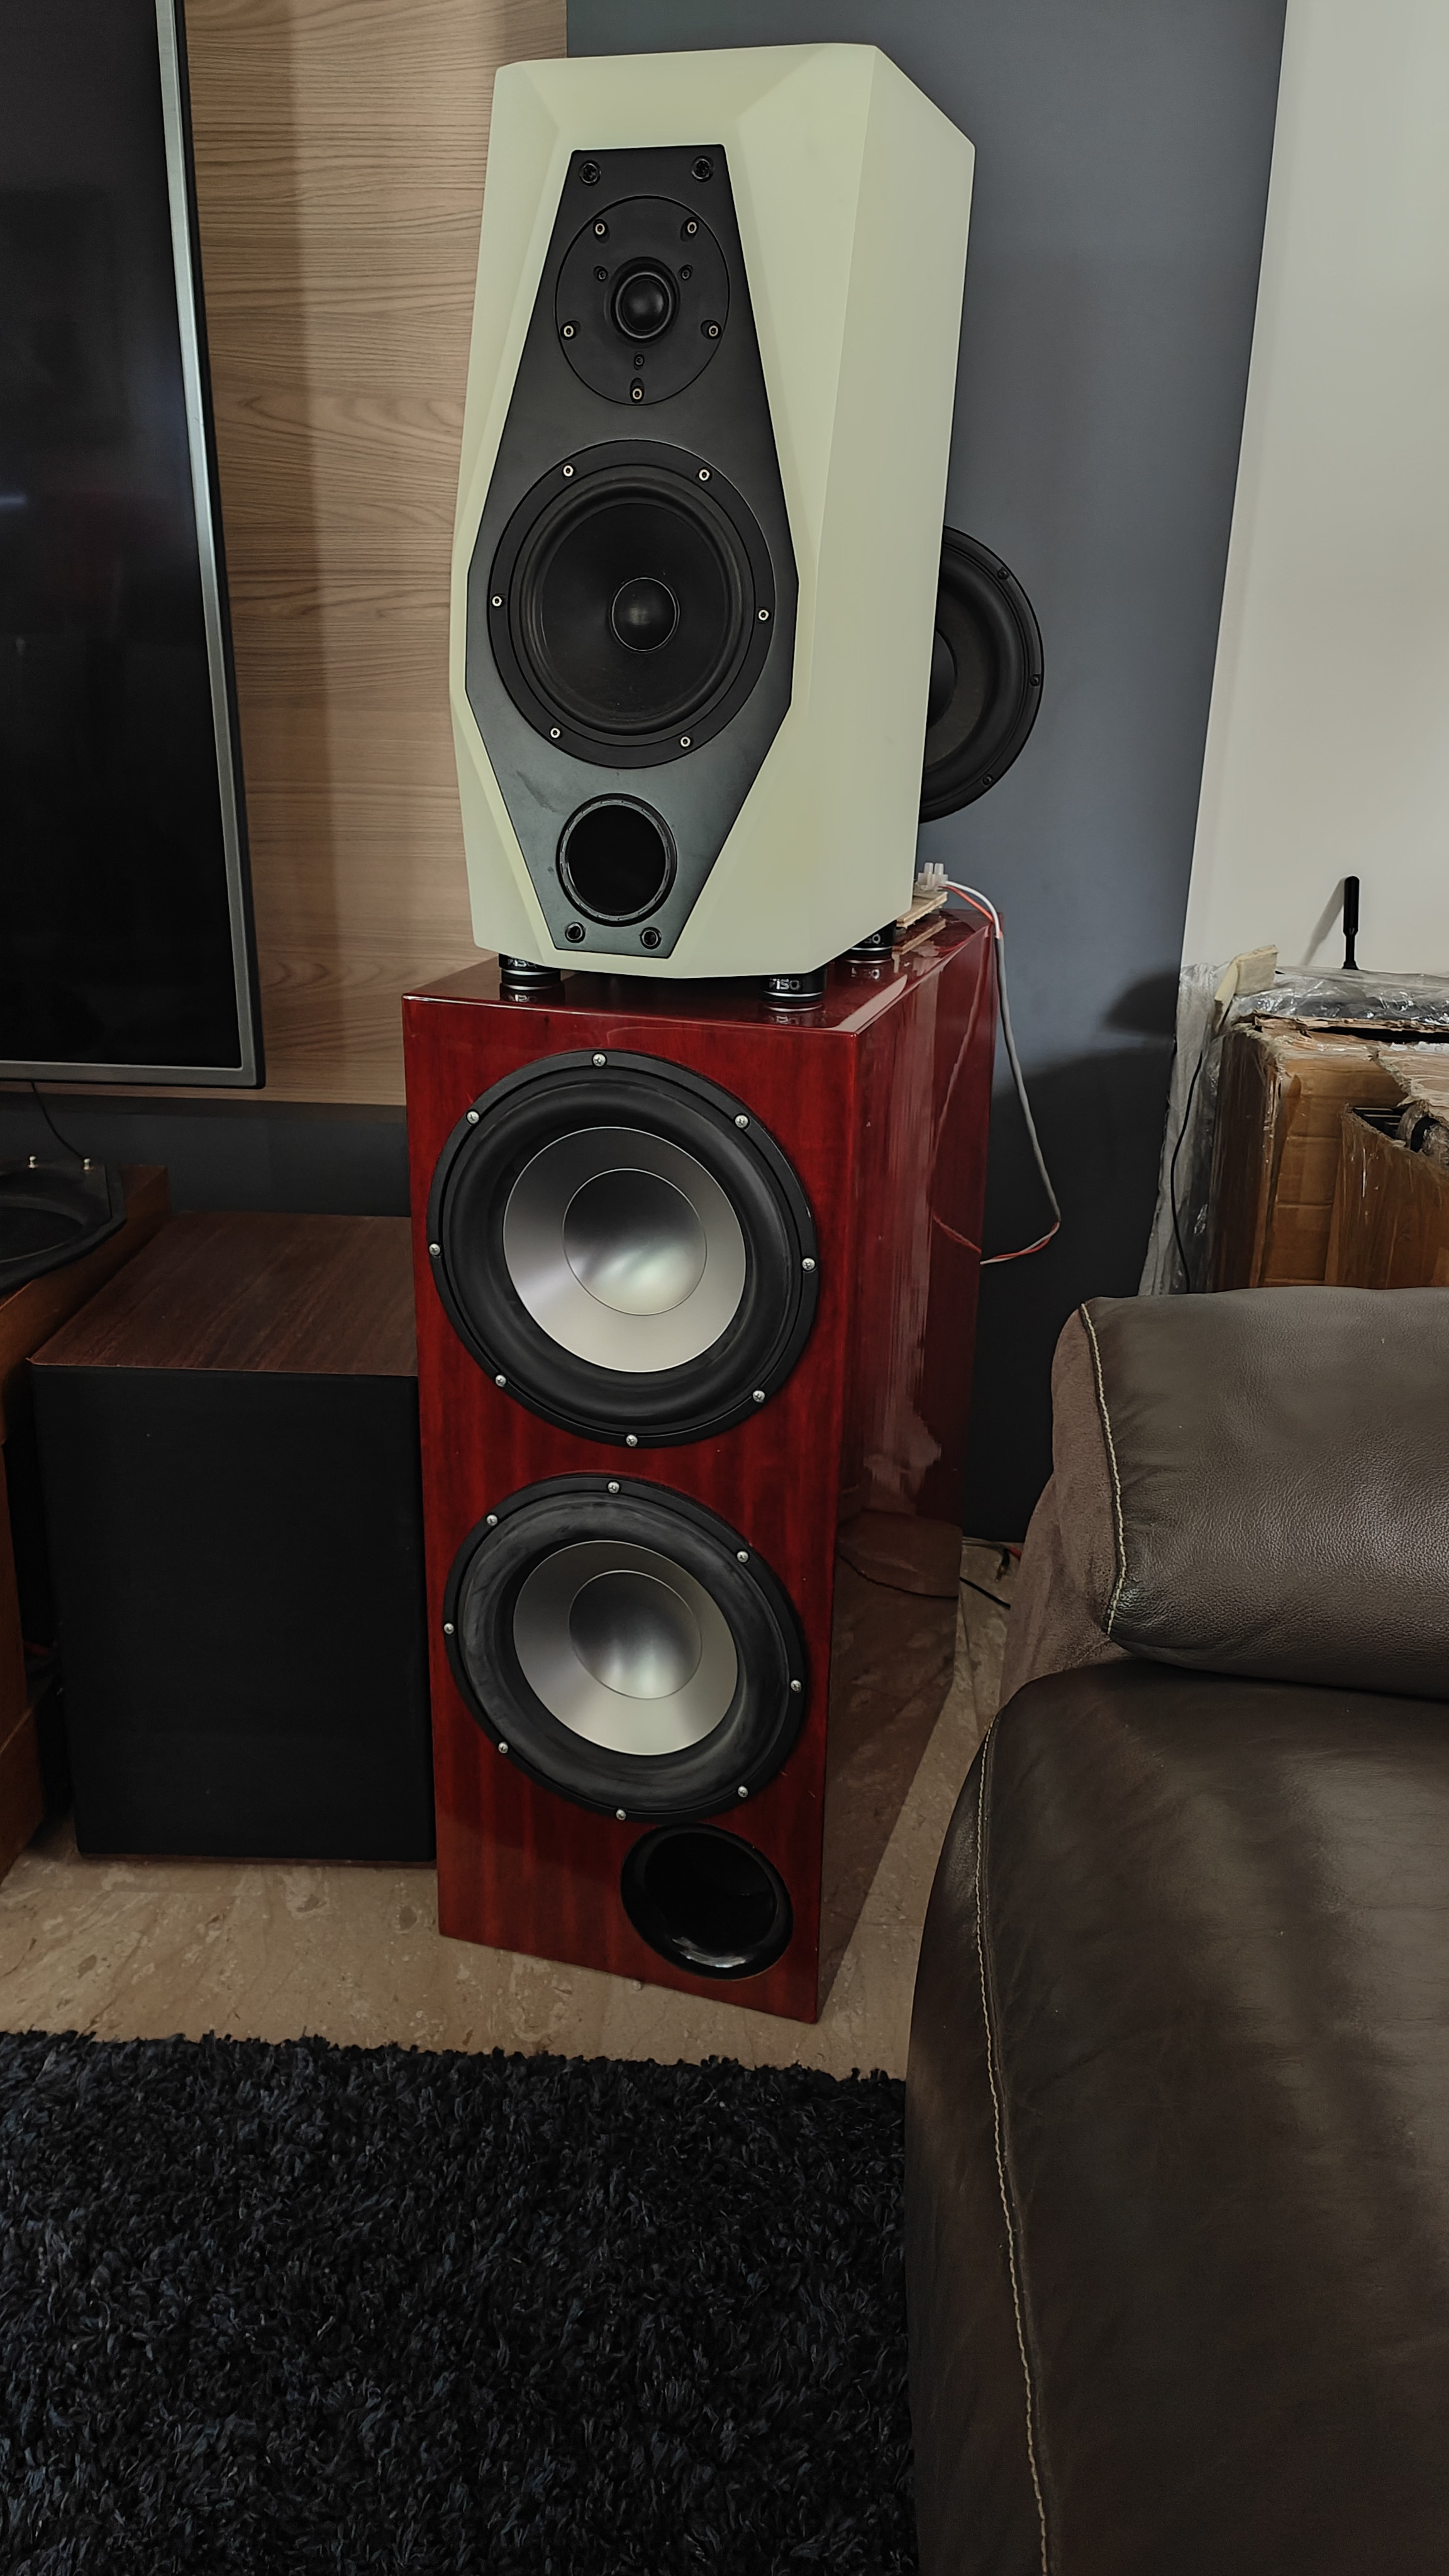
It’s a 2 way bookshelf speakers using Scan Speak drivers from the Discovery series. Not the most premium range, but I understand are very competent in their category range.
I bought over these drivers from a fellow diy kaki’s collection. To have made it past his selection criteria means it is quite special.
Tweet
Midbass
The cabinet is from Taobao. I was browsing and came across it. Seems perfect - I have been wanting to do a build with nicer drivers, with chamfered baffle for diffraction mitigation.
The cabinet came with a single shelf bracing between the T and W. However, it is a large bookshelf, 20L and there is definitely work to be done if this speaker is to reach its potential.
First I added bracing with some damping tape in the woofer area. A bit messy with the acrylic sealant as adhesive, due to tight access via woofer hole only.
Next, I wanted to try just CLD (constrained layer damping) without bracing, on the cab around the TW area.
Prepped some ply with the damping tape.
Stick on internally on the top, sides and back walls around the TW.
Most speaker cabinets can be modified this way, access via the driver holes.
1 Like
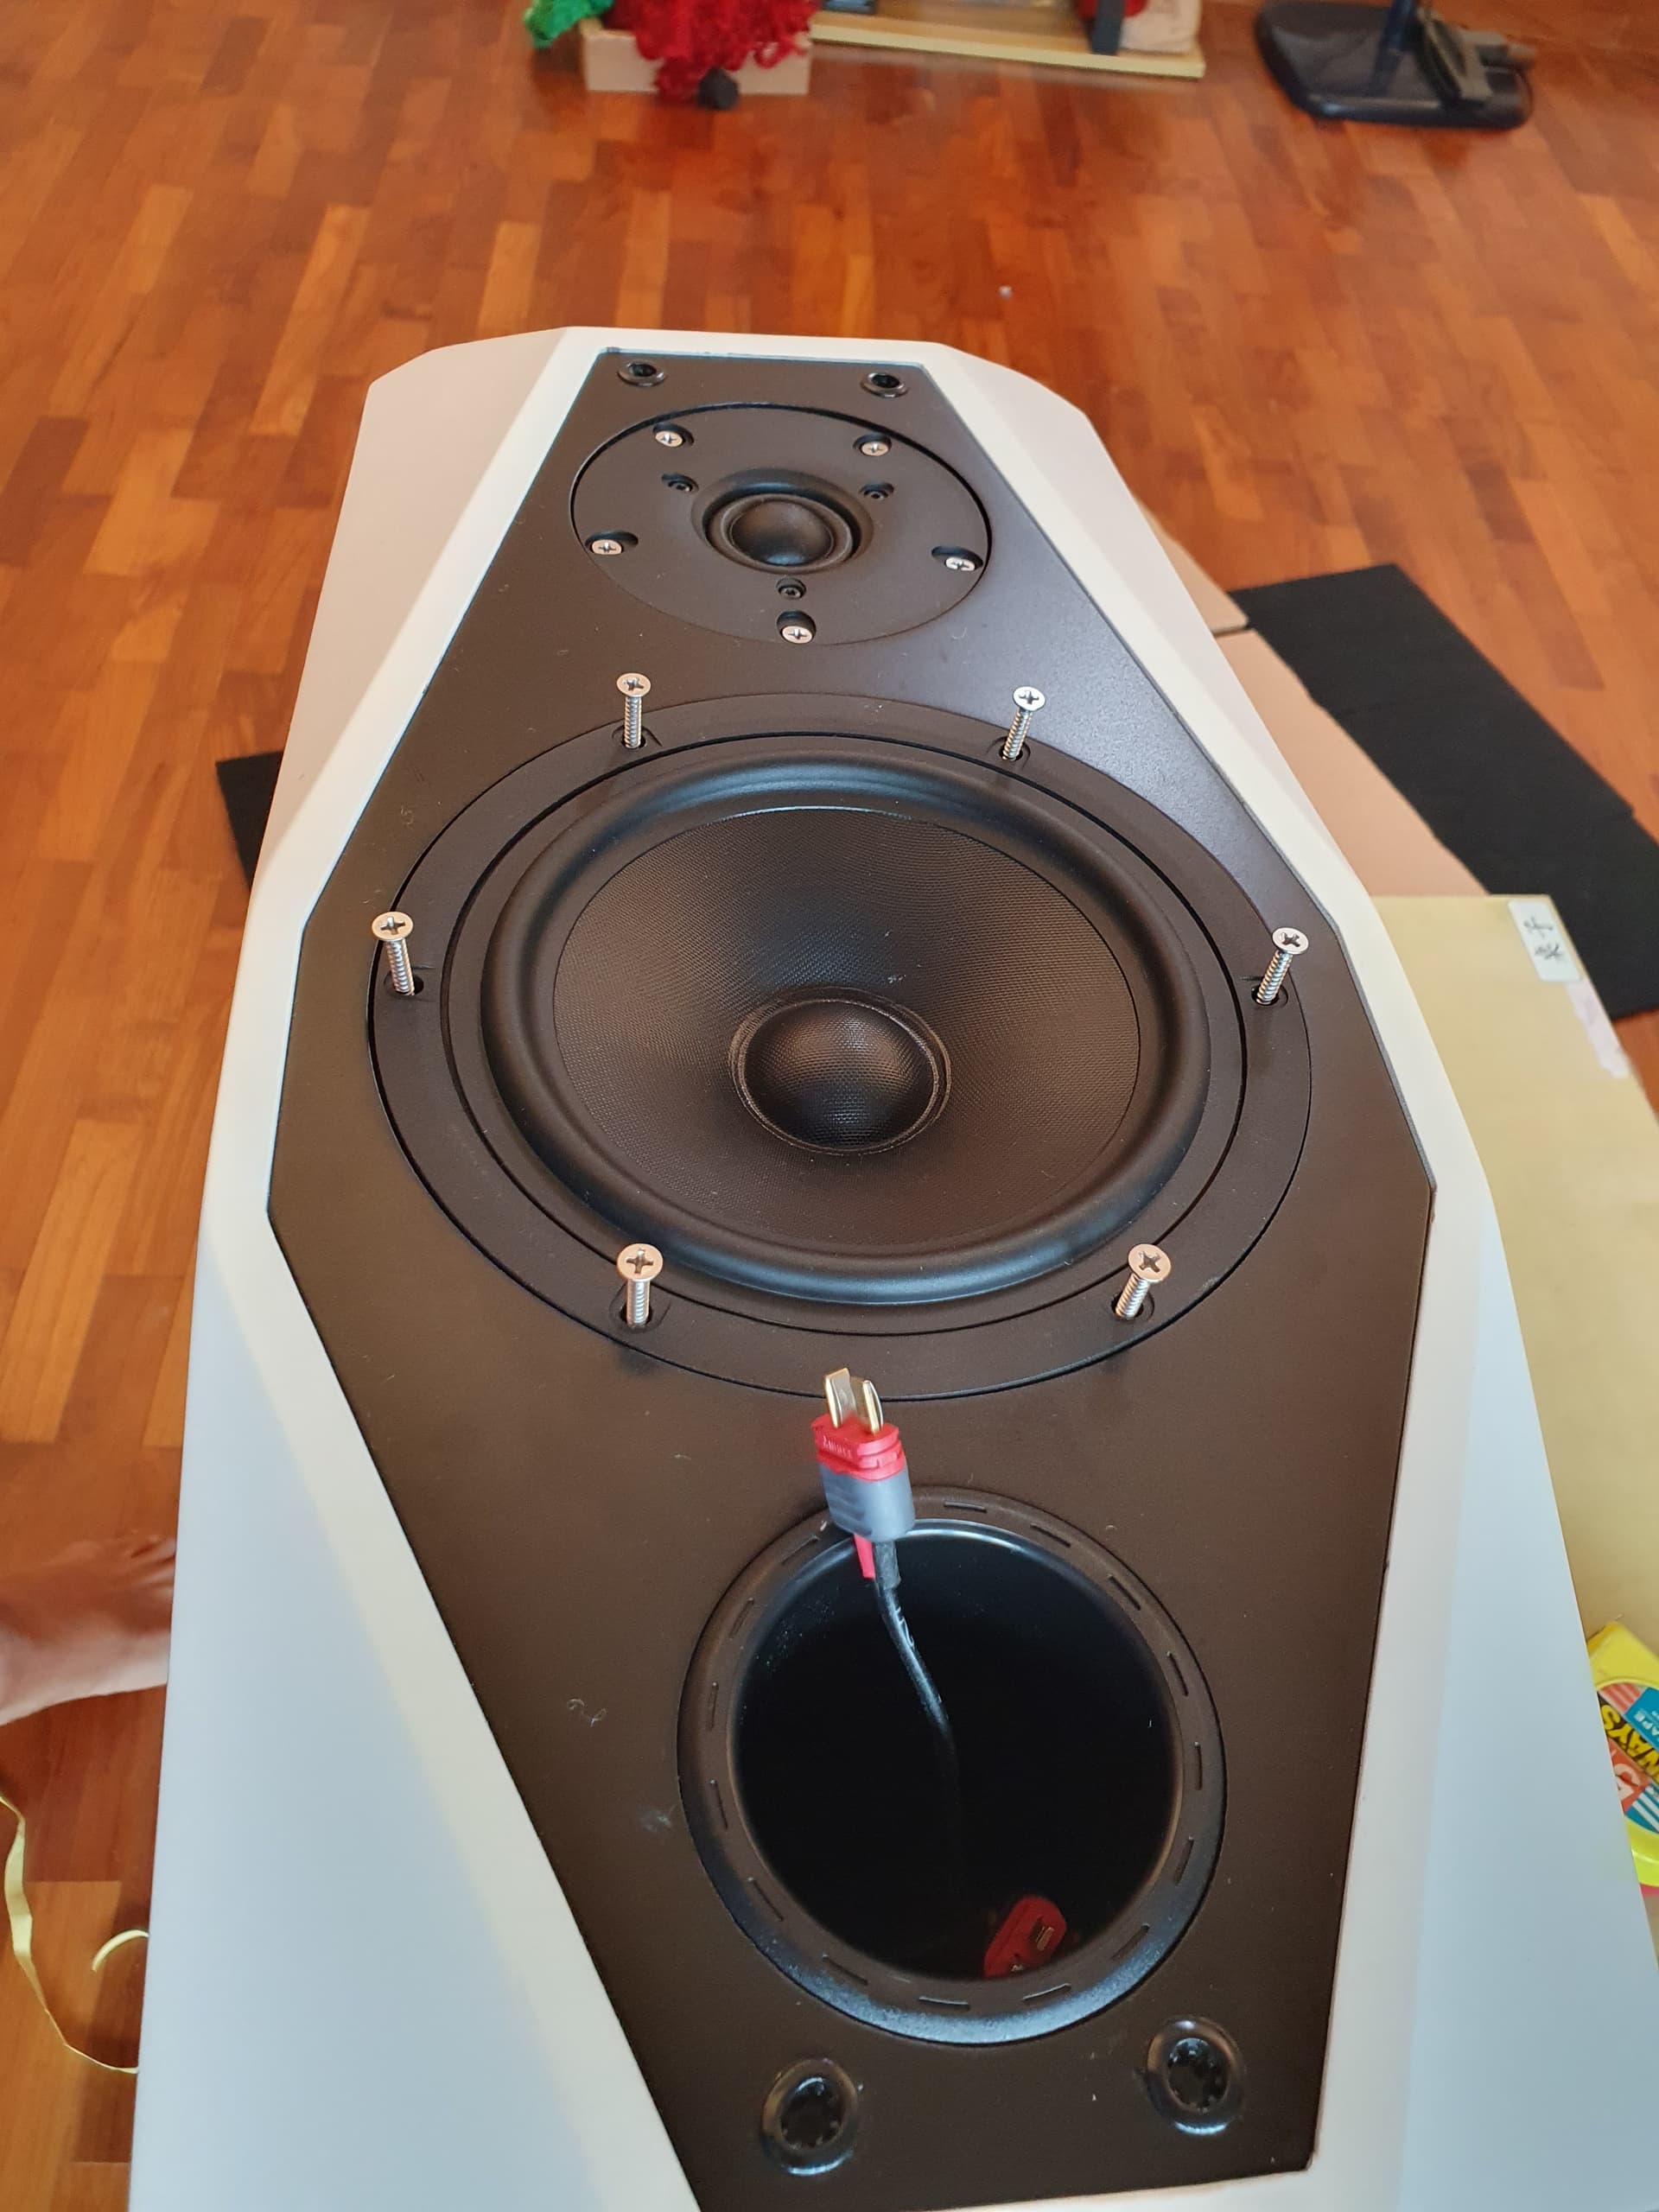
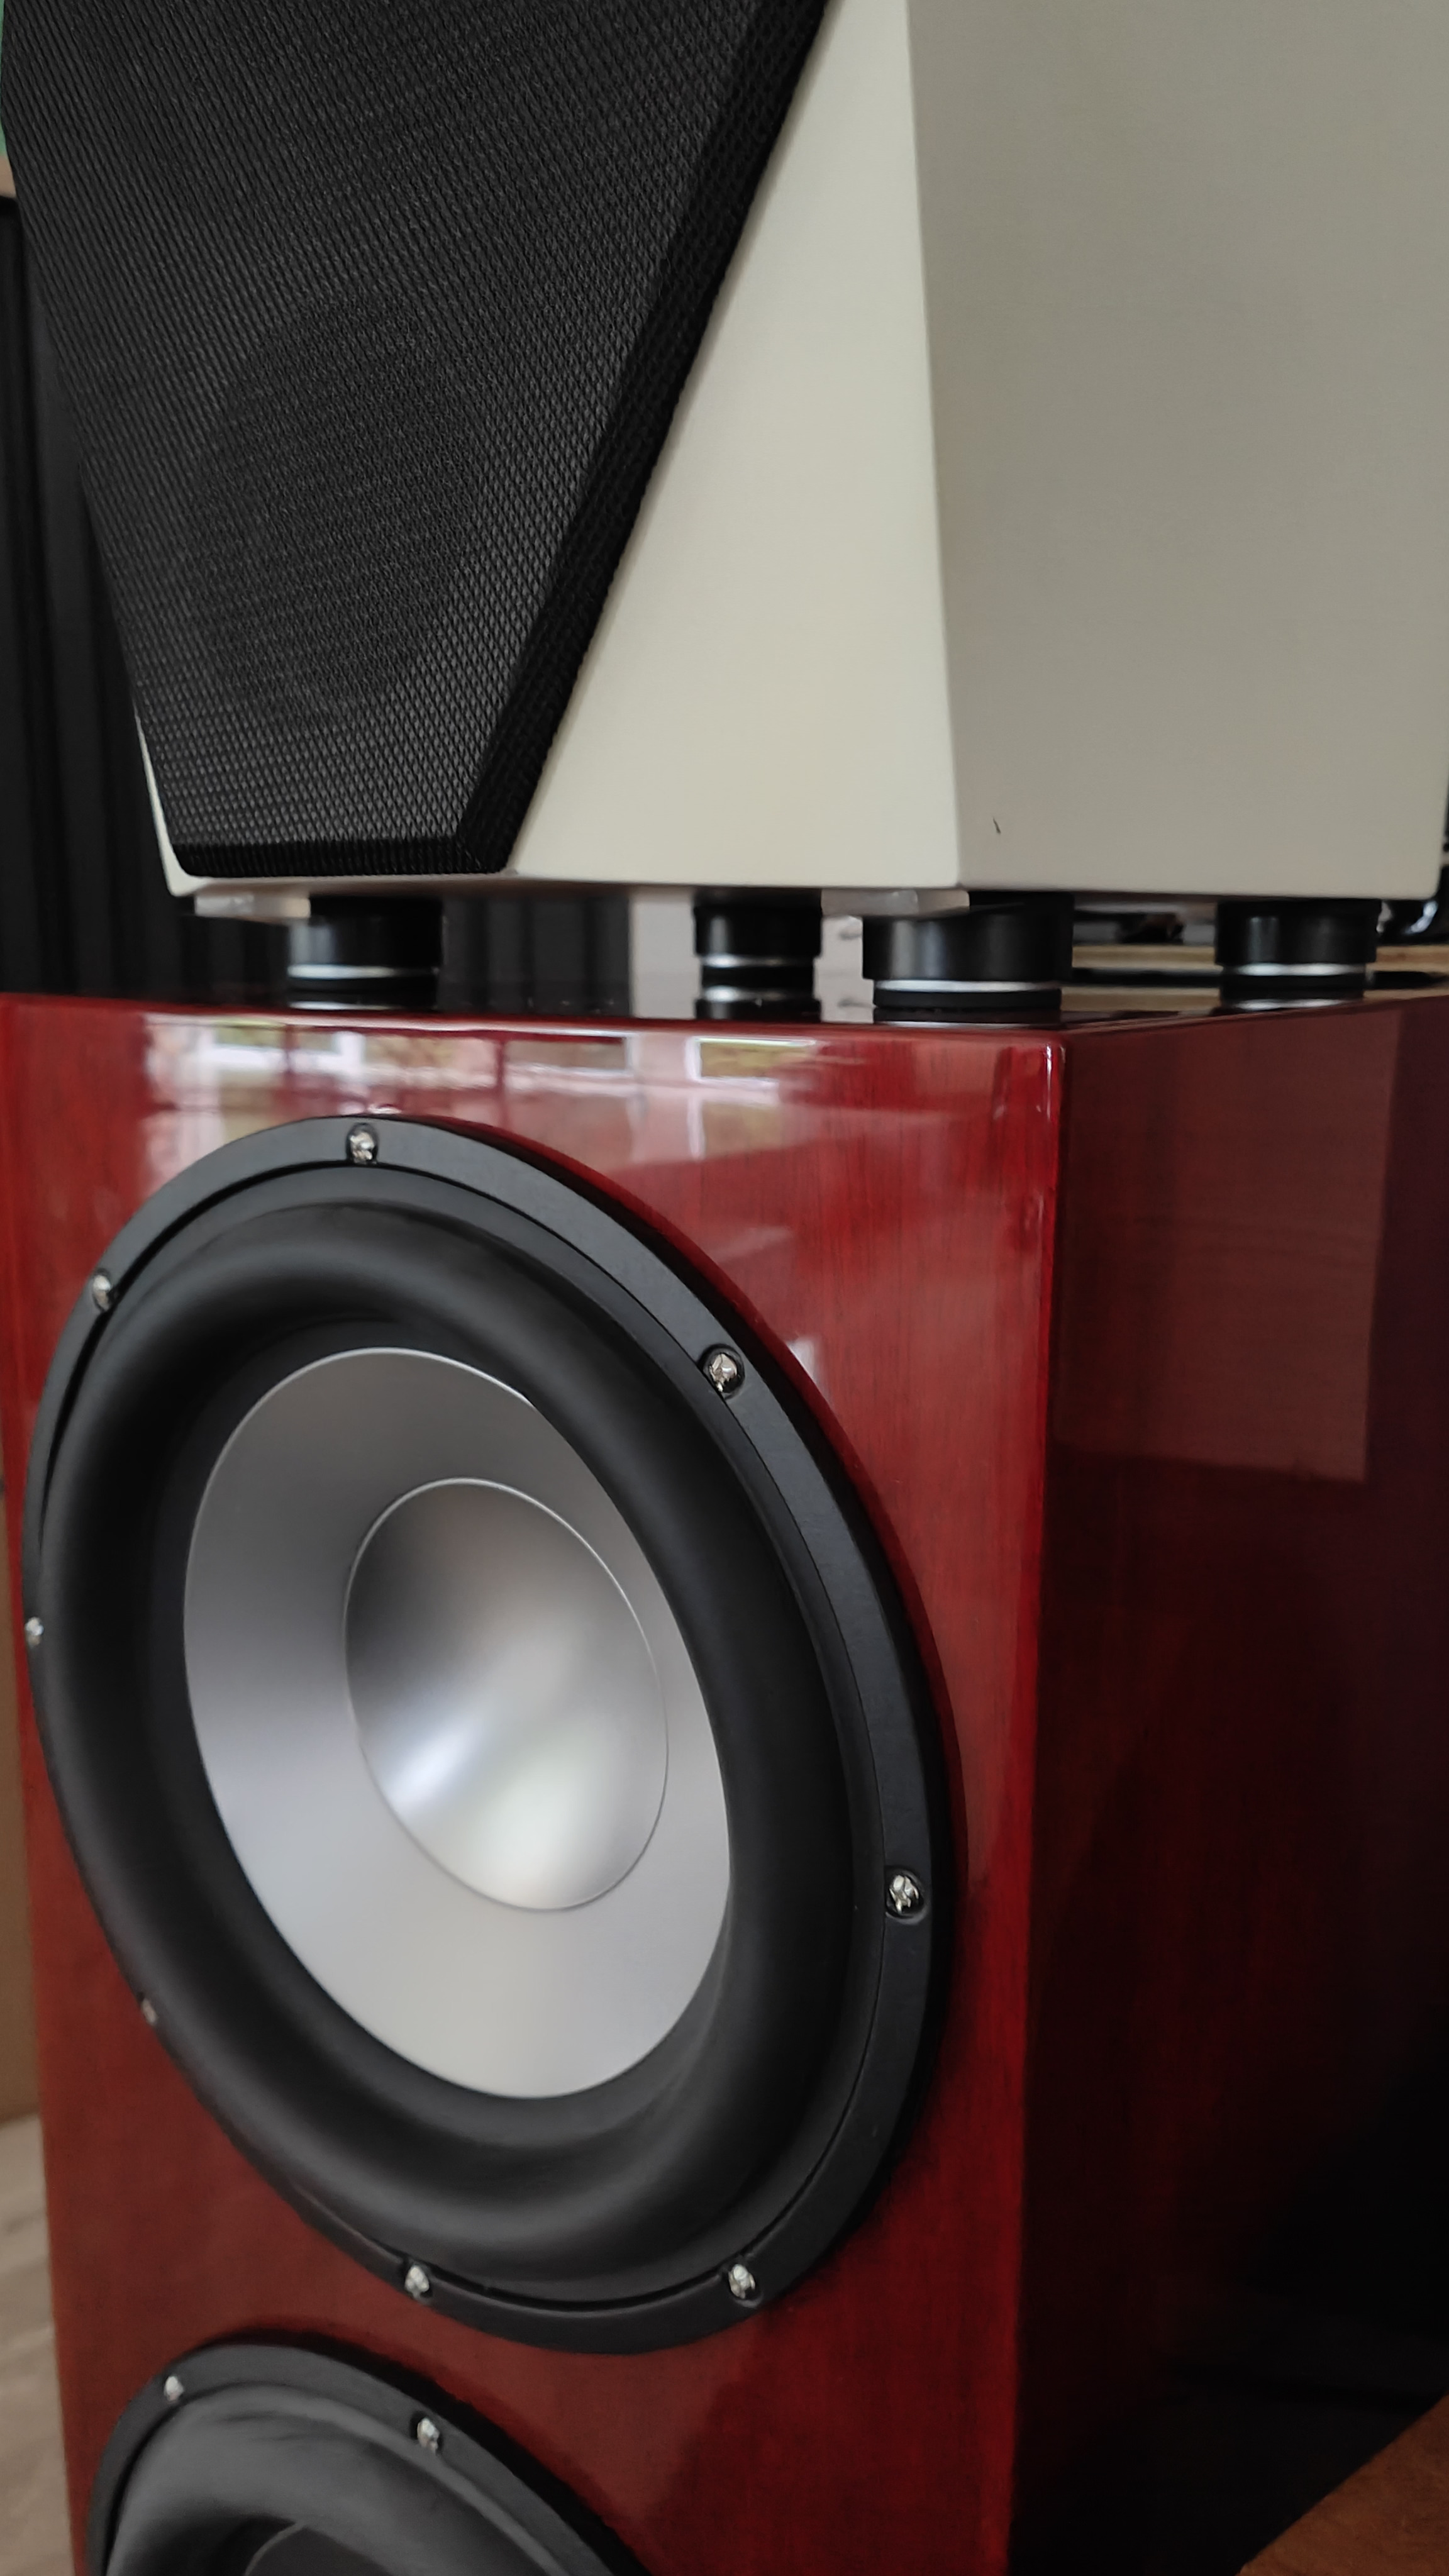
Drivers installed. Nothing special here. Apply gasket tape. Drill and screw. Connect wires.
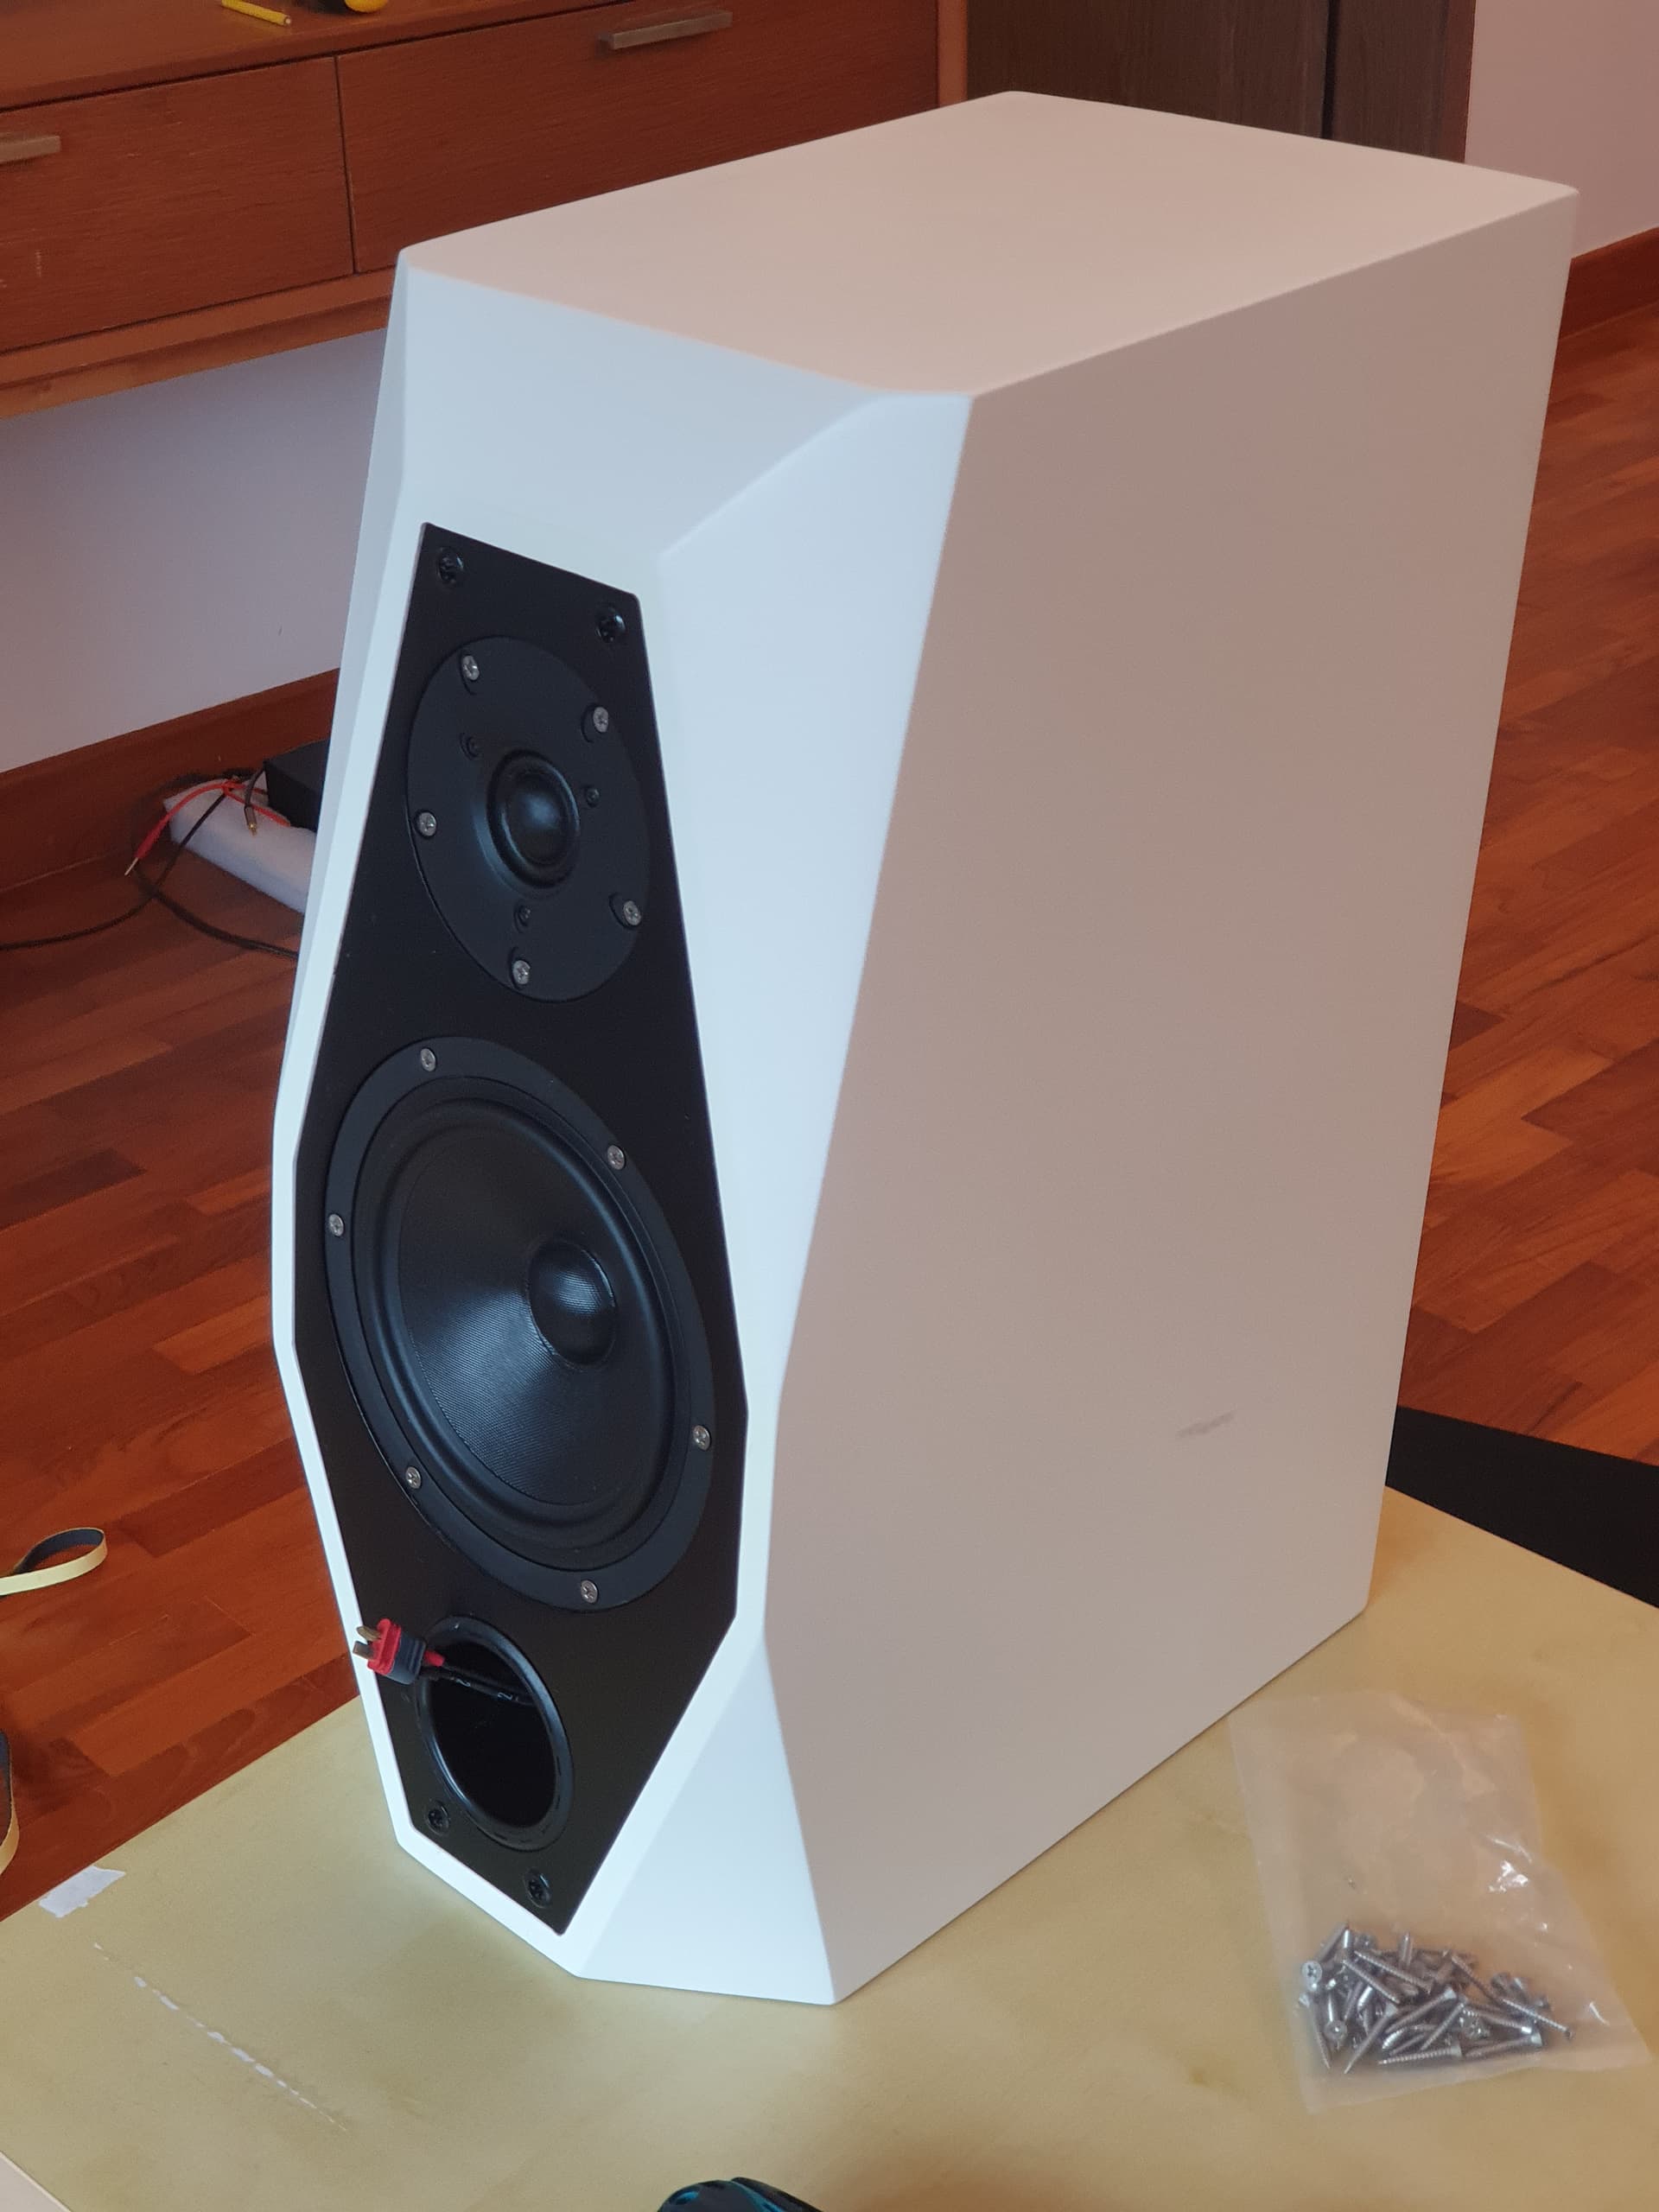
Looks pretty sharp!
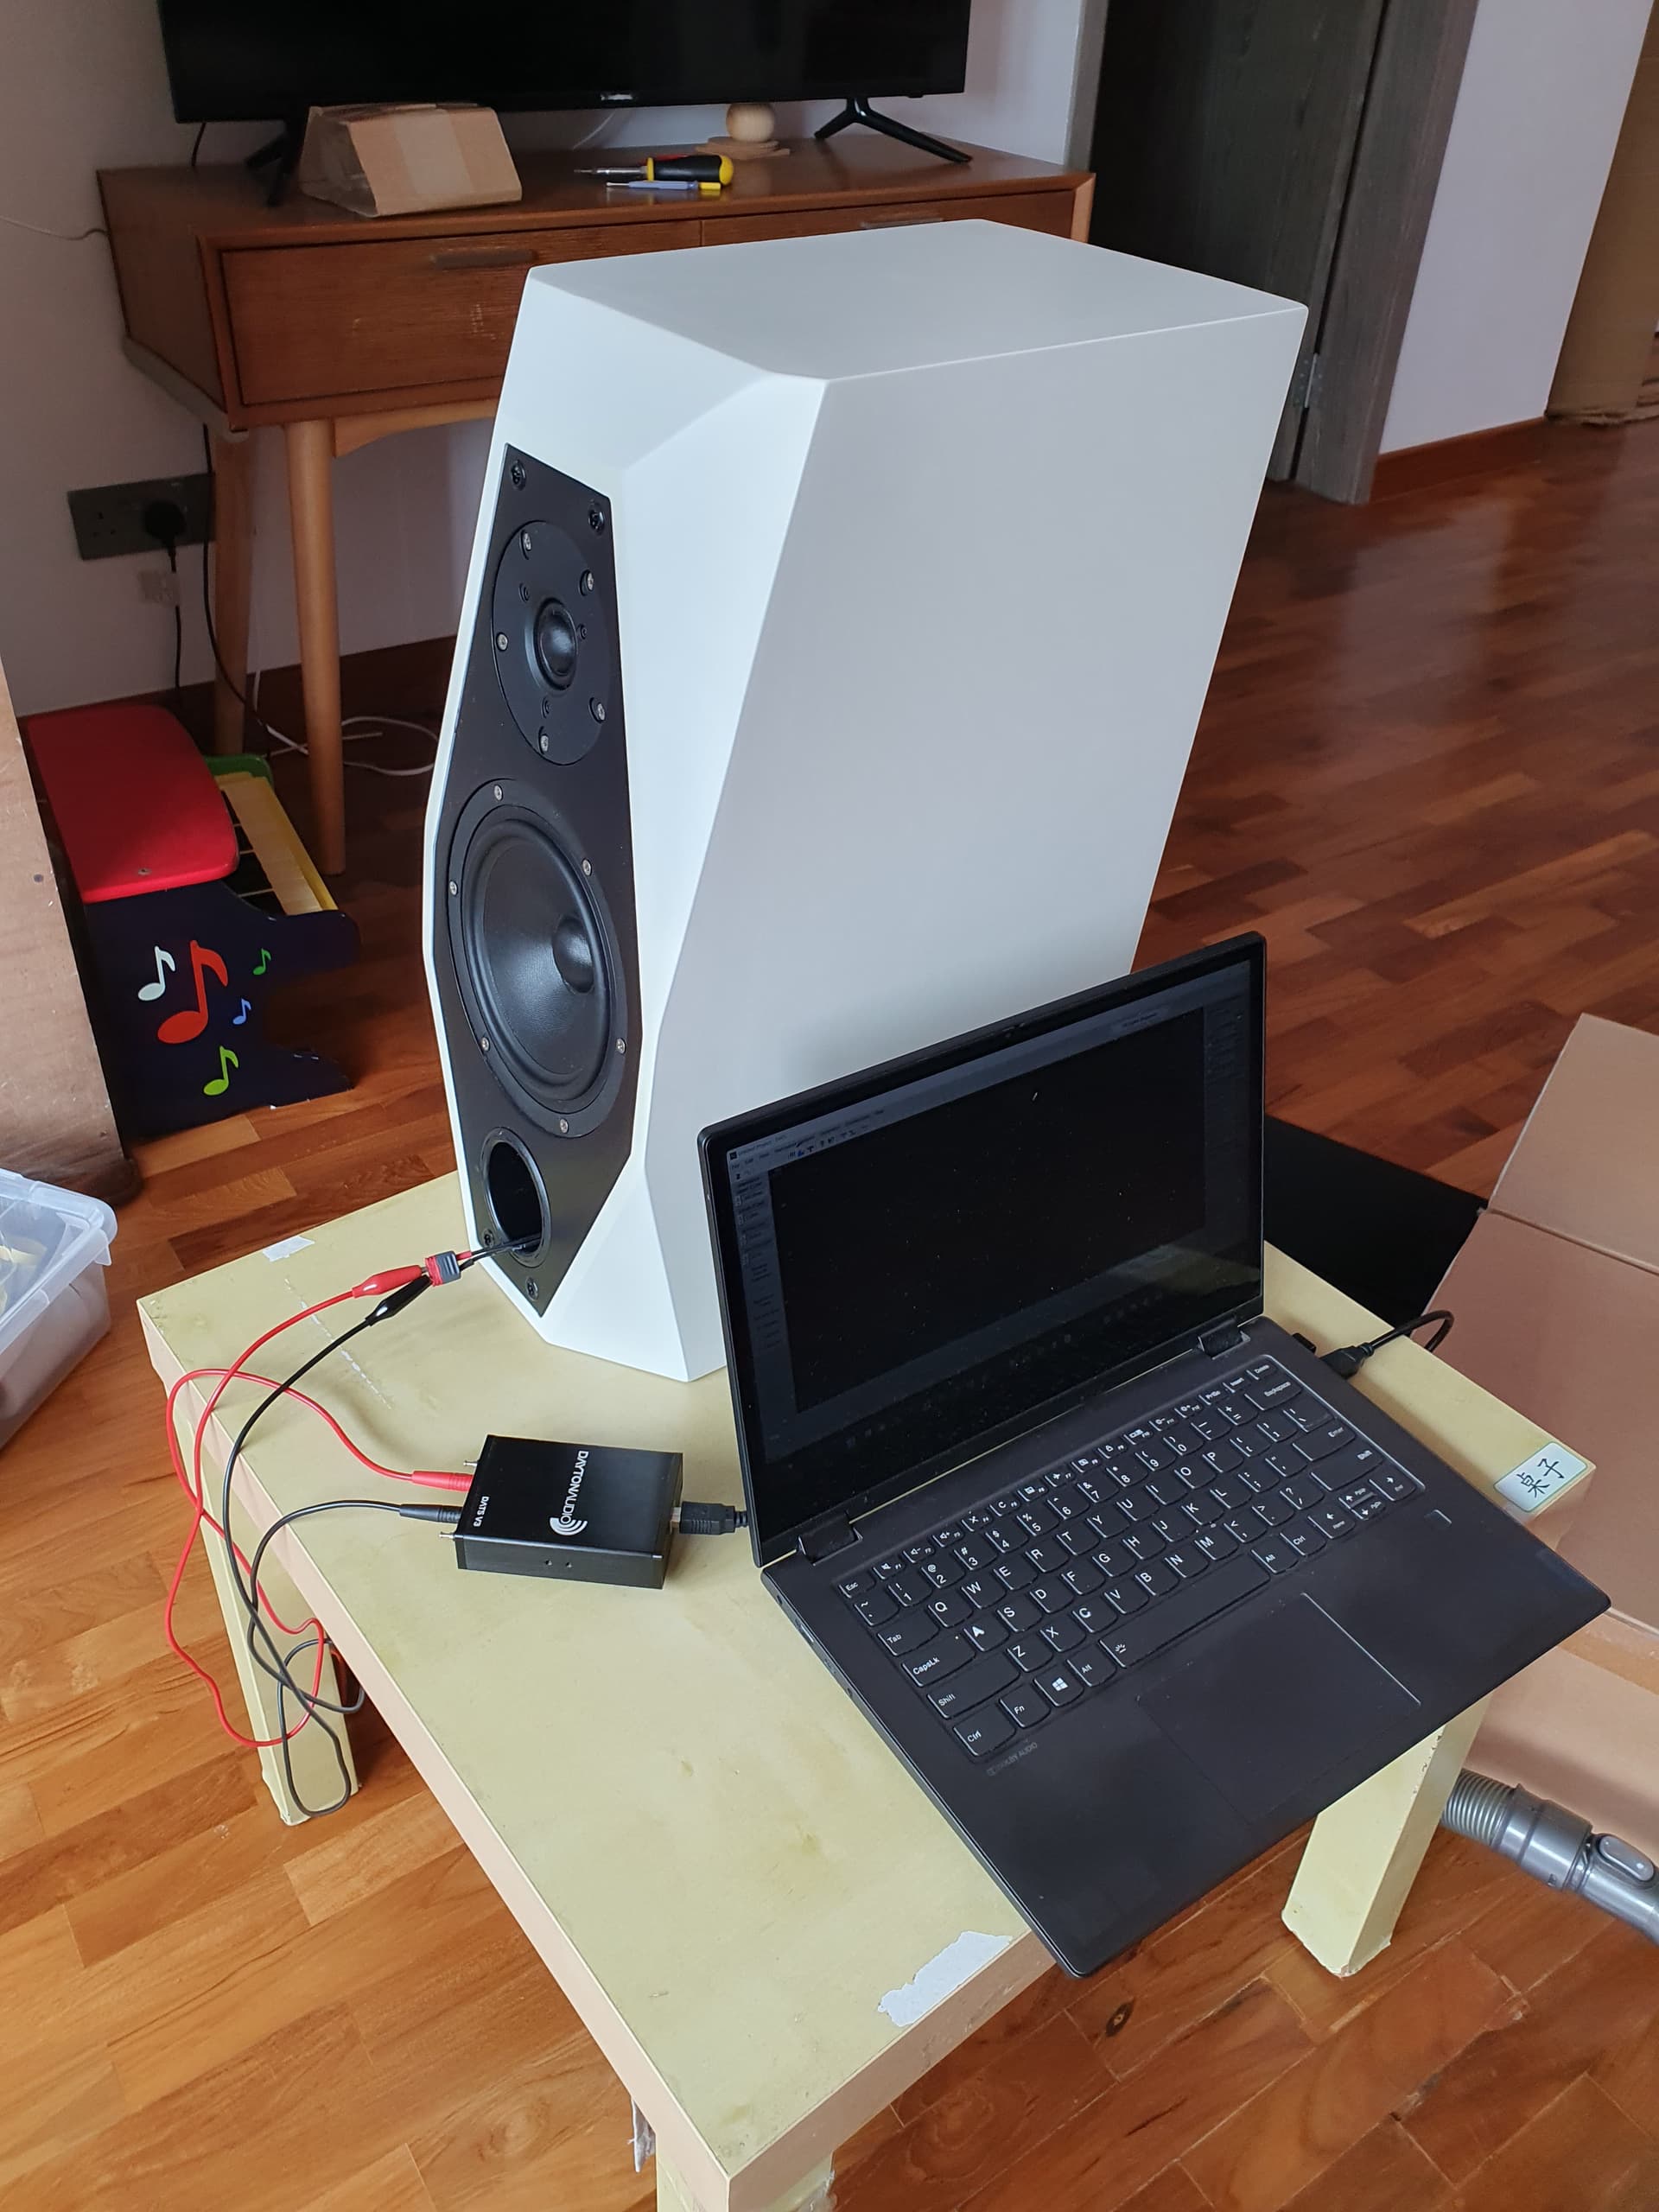
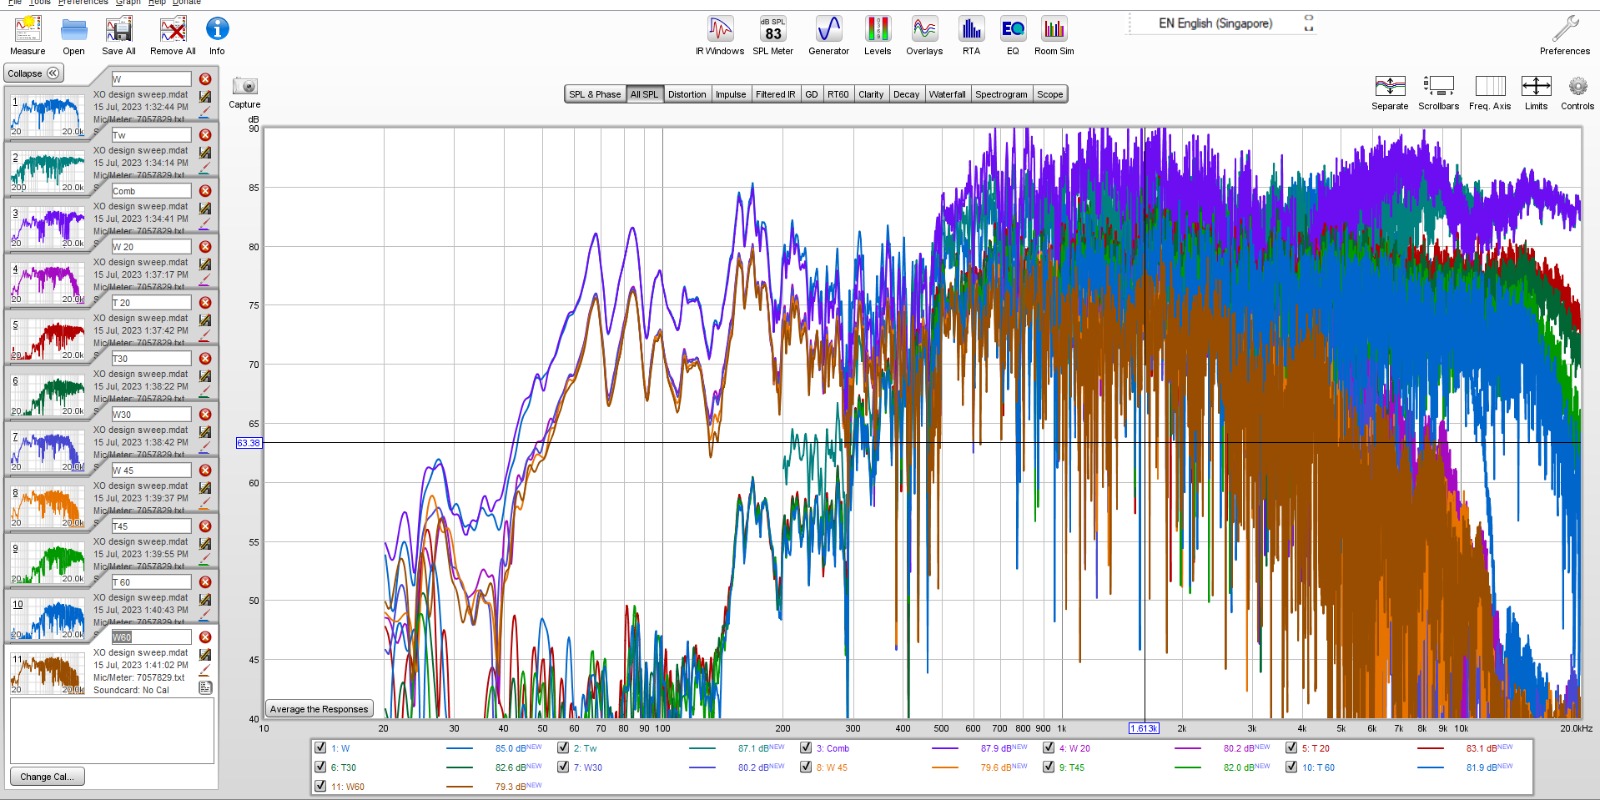
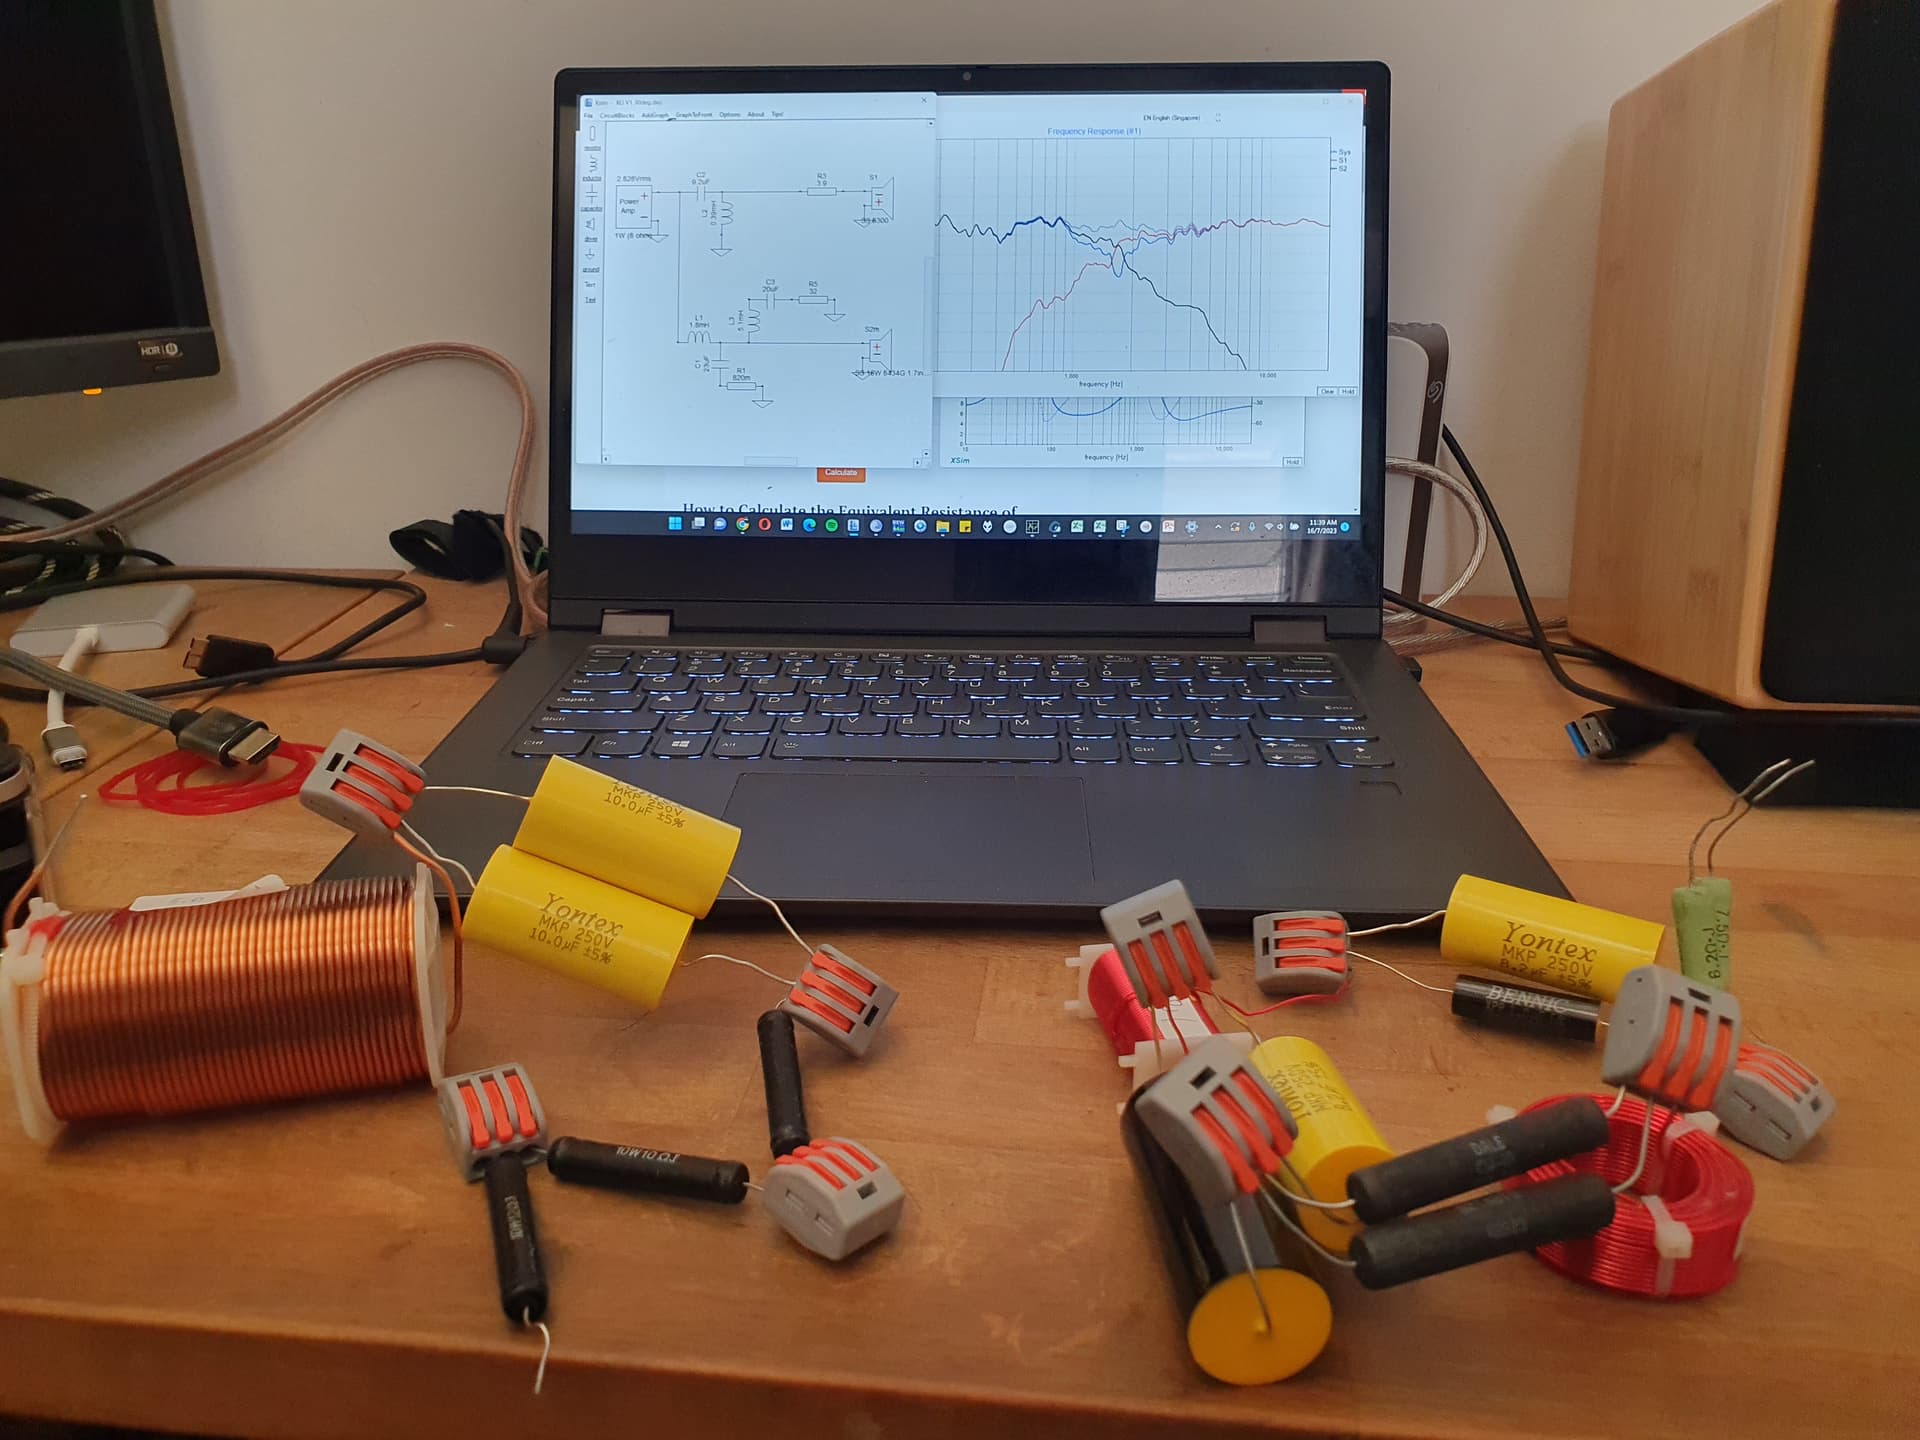
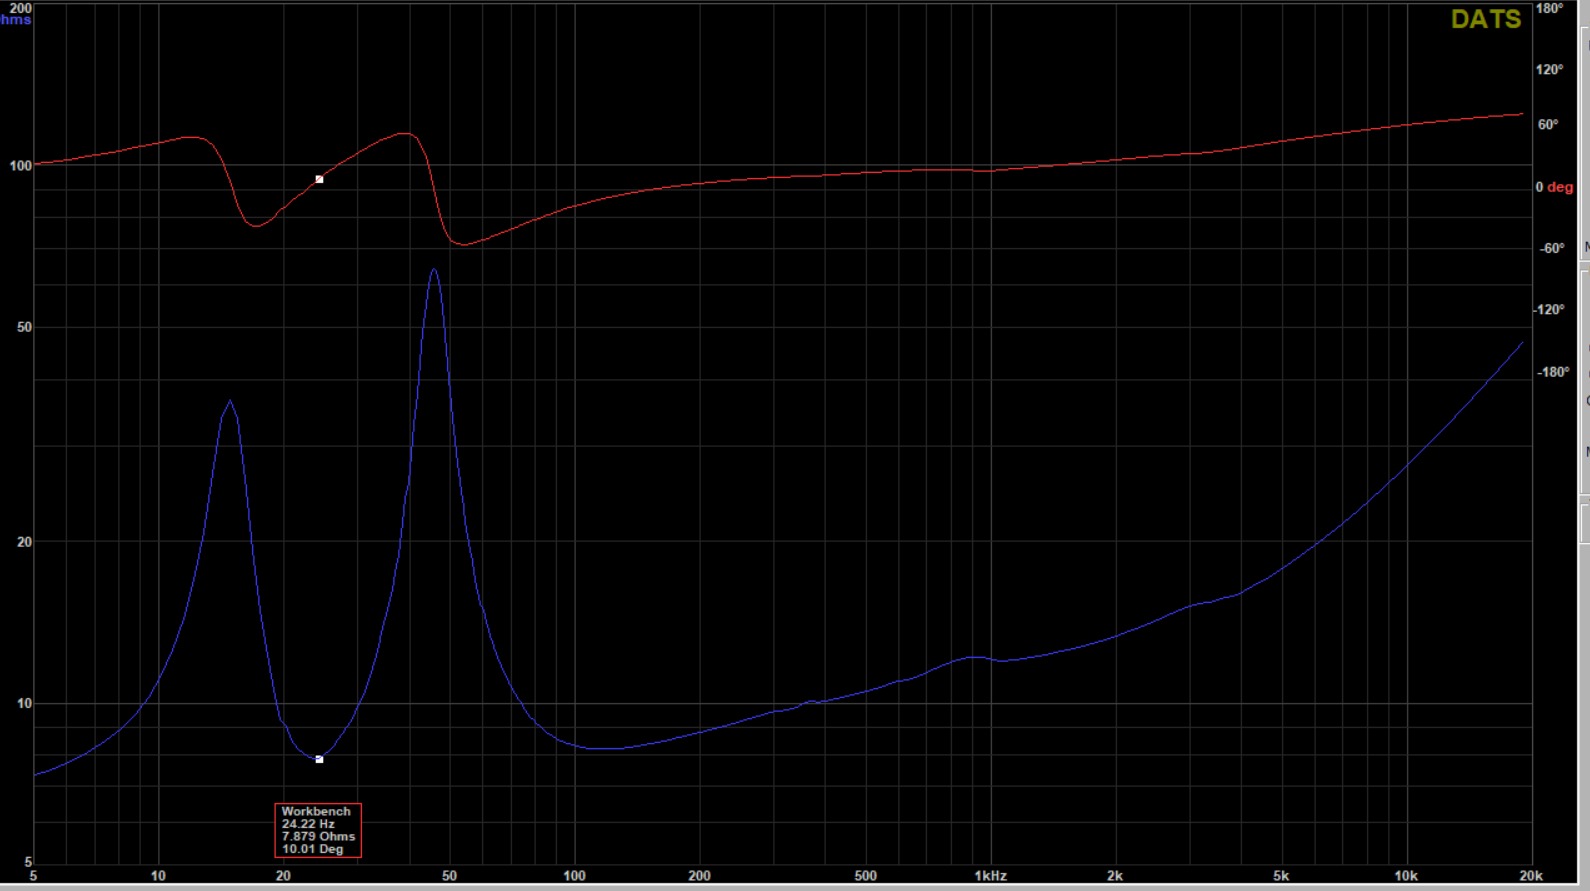
Next, taking impedance measurements with Dayton DATS, for crossover modeling.
Next, we need to measure driver response in the cabinet, for crossover modeling. This is where ‘anechoic’ measurements would be ideal. However, we don’t all have access to a chamber…
Given that this is a more serious build, I tried my best to get cleaner measurements.
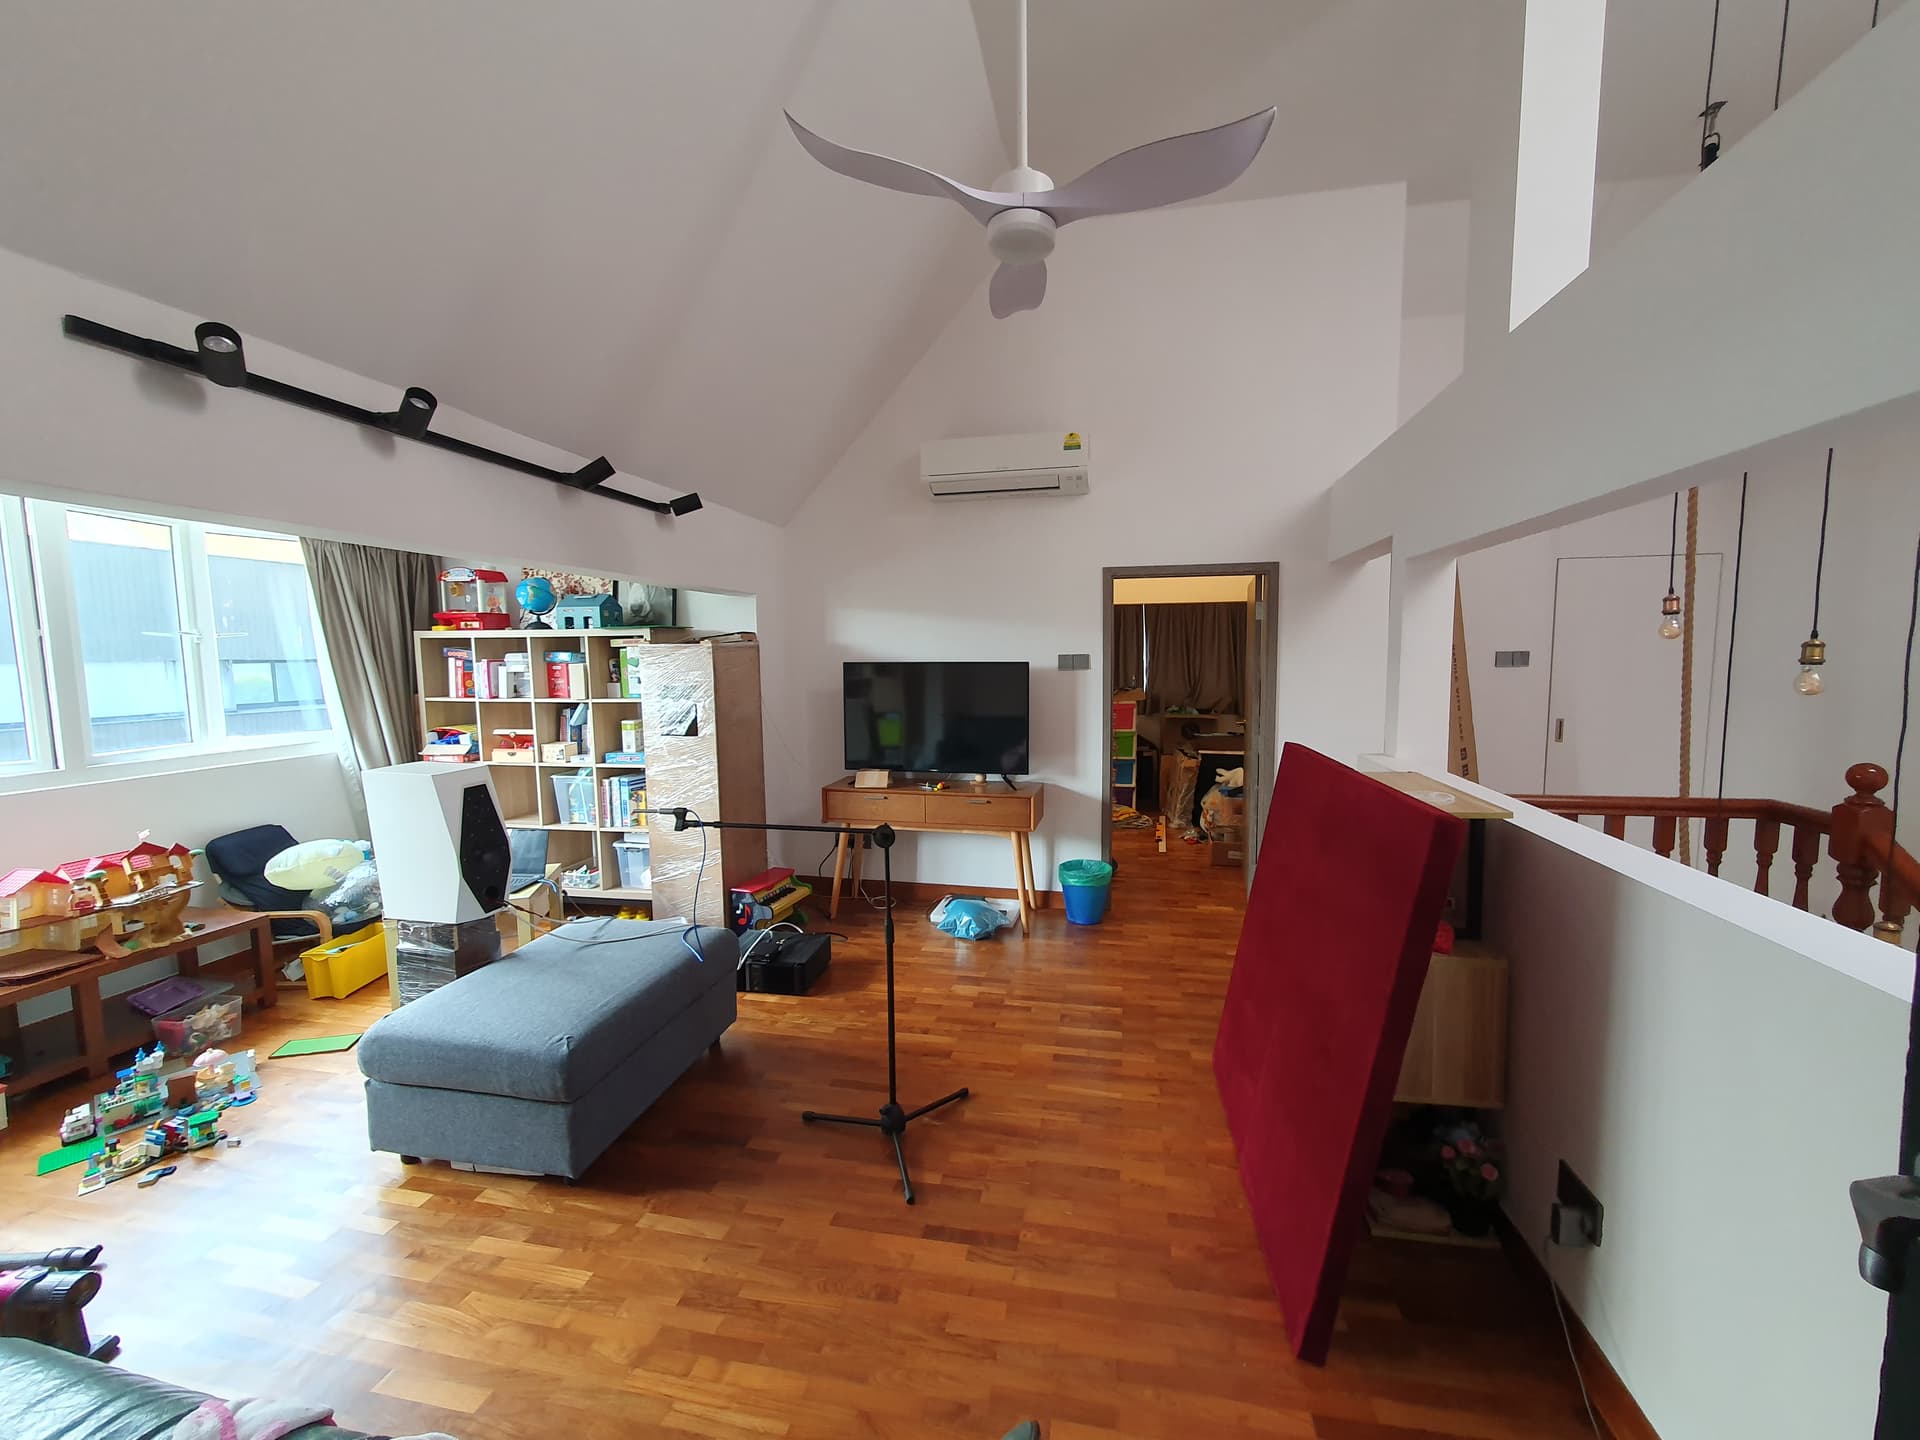
Pardon the mess… 
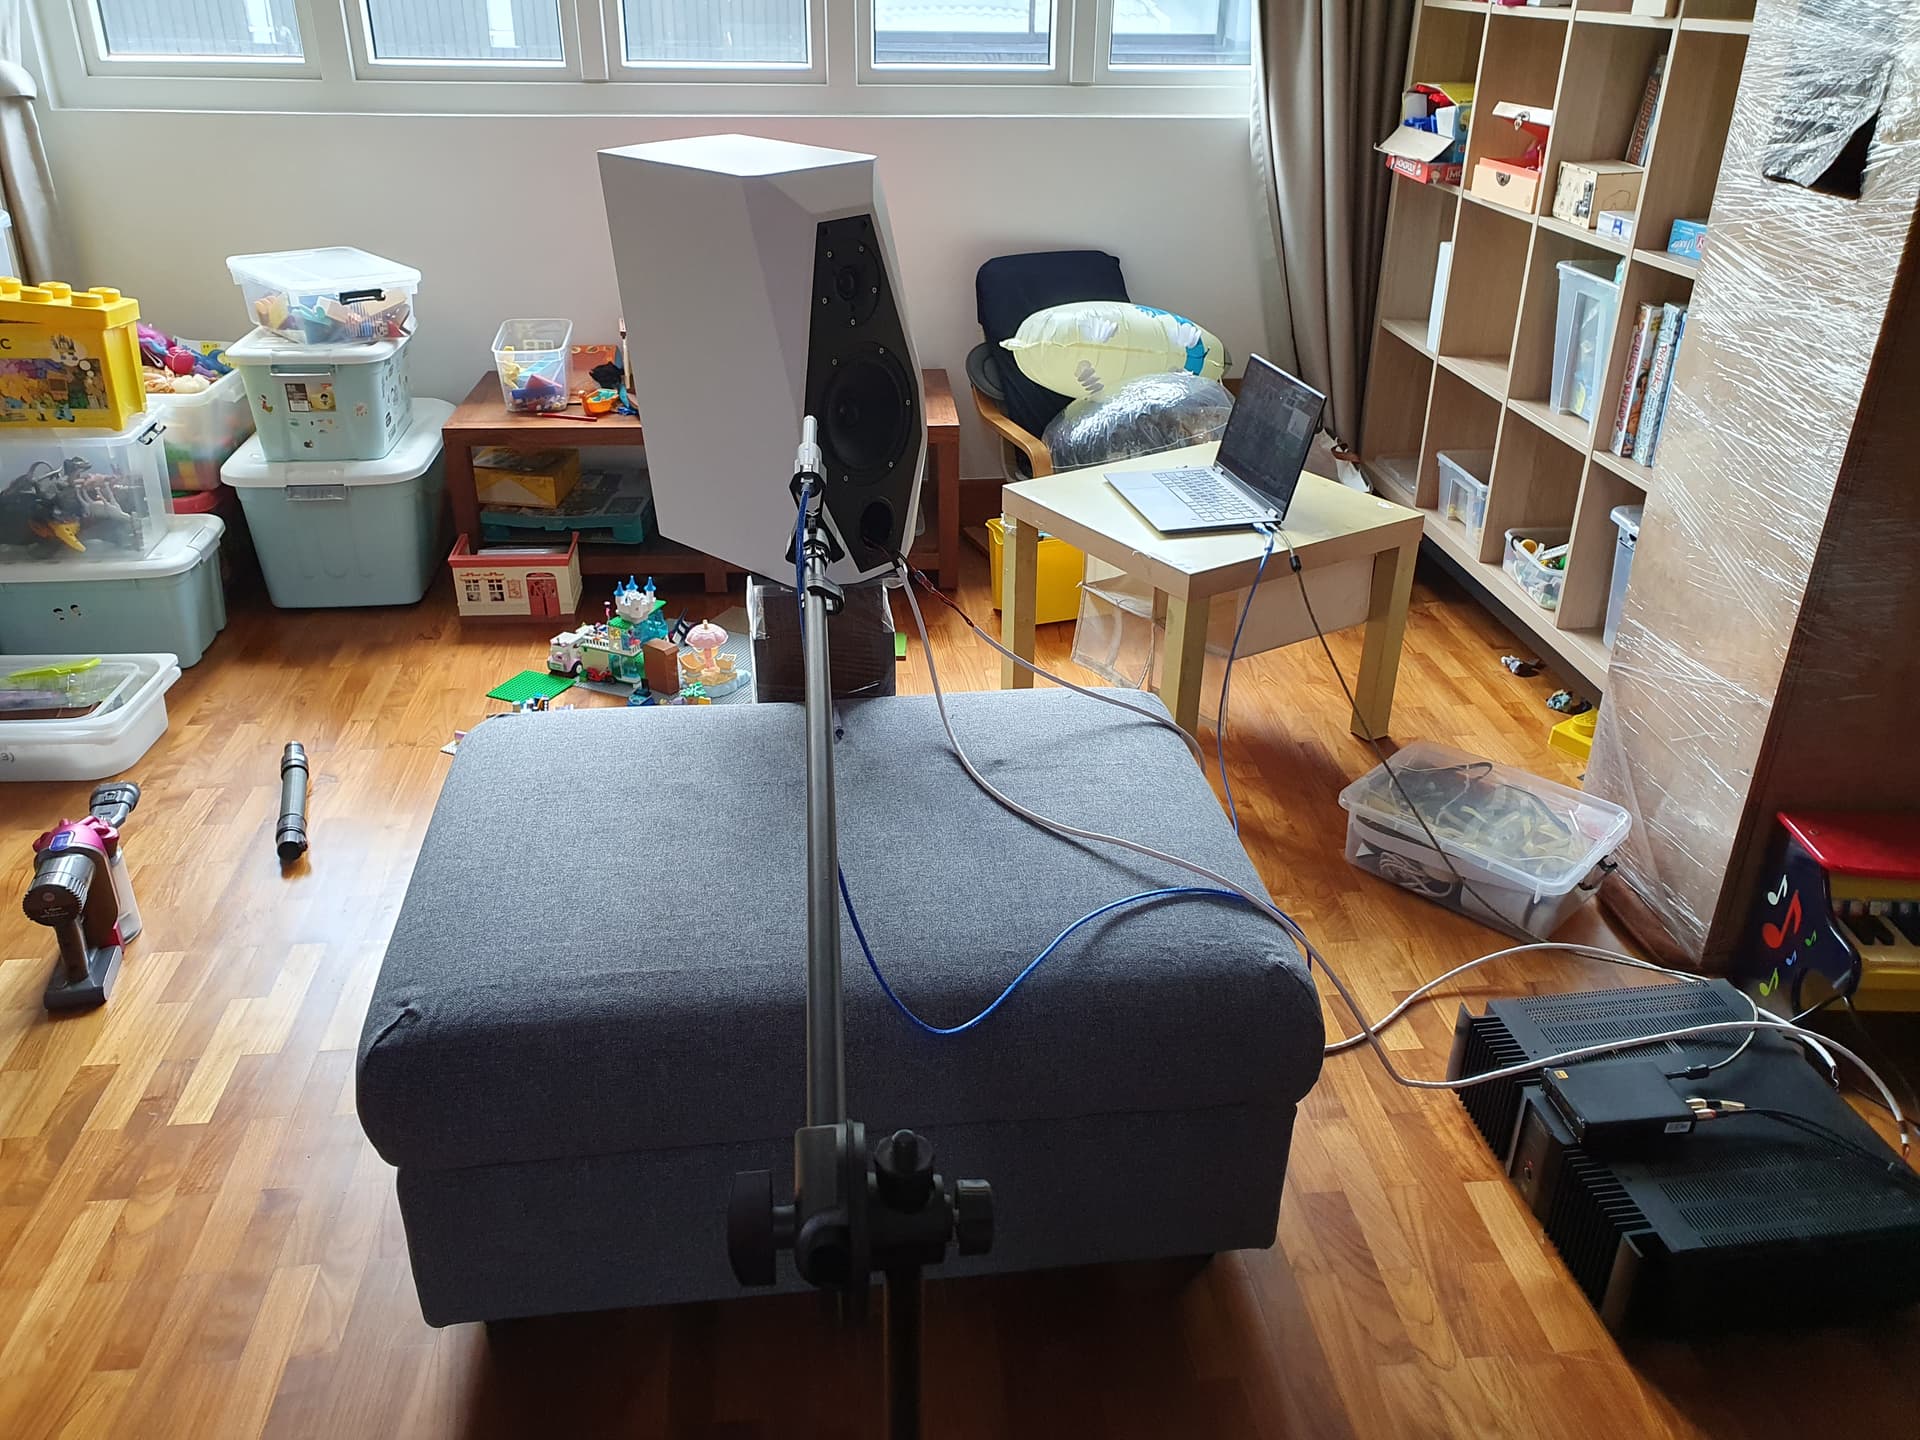
I used the ottoman to manage the floor reflection. It will be the closest source of reflection. The next closest is either the sidewalls, or the wall behind the mic, where I have placed a couple of panels to try and mitigate slightly.
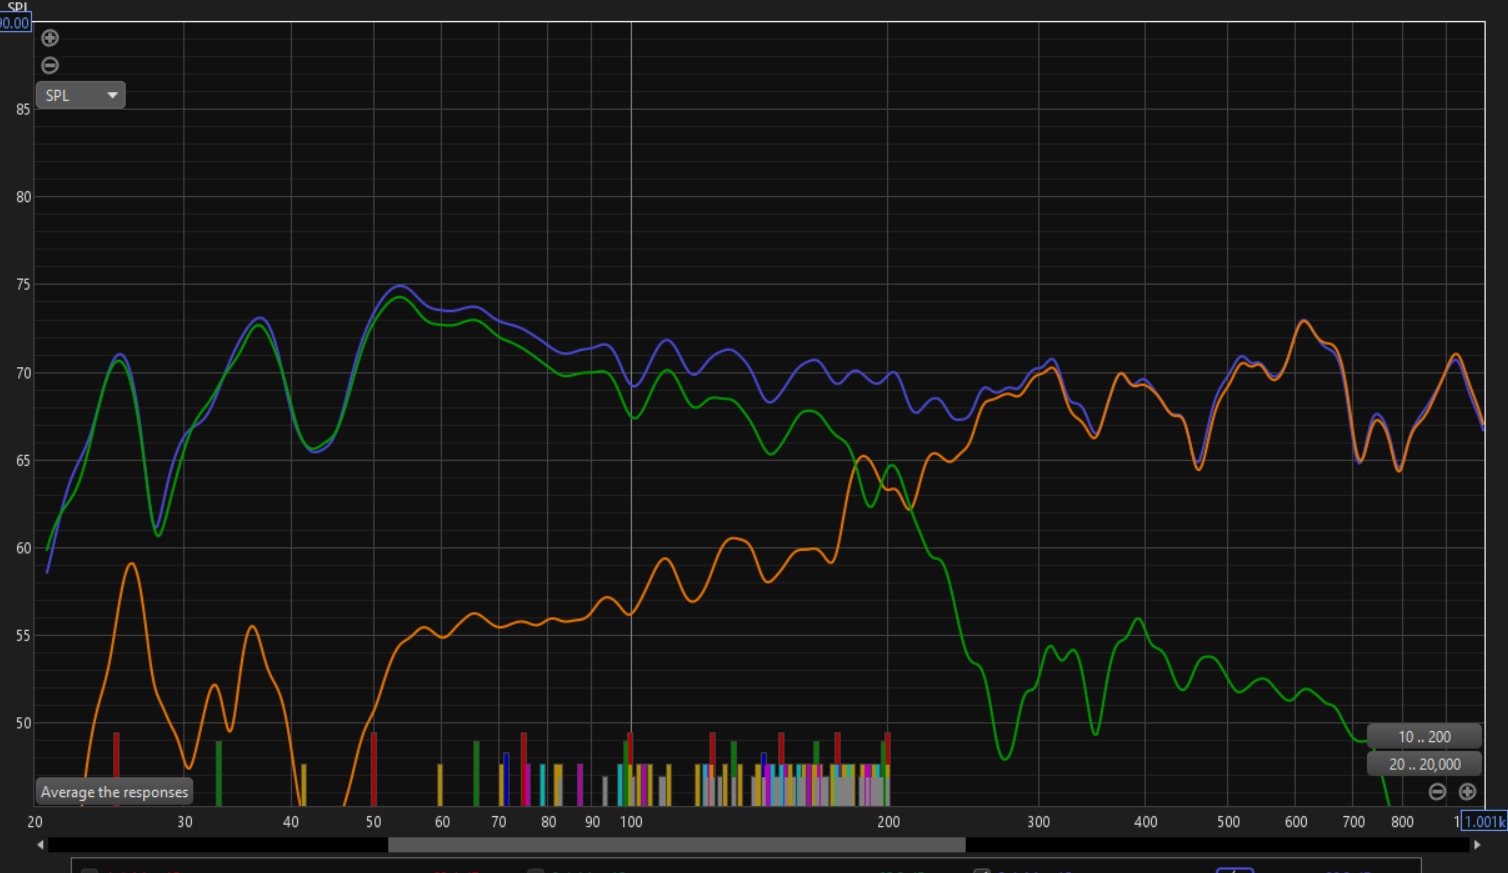
This is also the first time I’m taking so many angles for the crossover simulation. Will try to sim with a different too that can calculate the spinorama curves.
Taking measurement off axis.
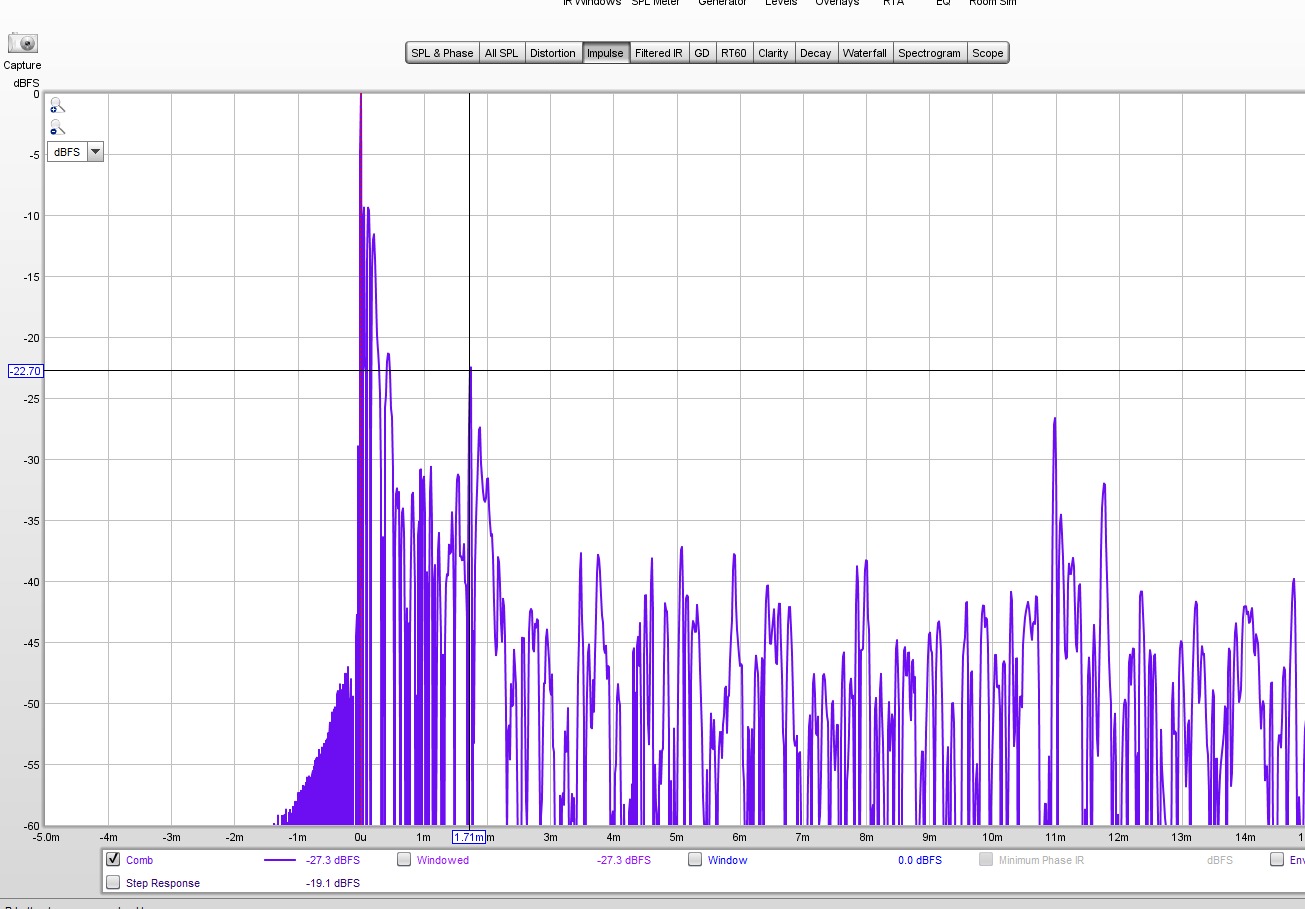
As I was saying, I’m pleasantly surprised how much ‘reflection free’ (edit : technically this is 2nd reflection, the tough one would be to get the first reflection out as far as possible, not 1.7ms) time I had on the measurement.
There is one blip at 1.7ms after first arrival, 23dB down. The next significant reflection is actually all the way out to 11ms.
A bit of computer aided voodoo, and we have a prototype crossover ready for listening test.
Long time never update this.
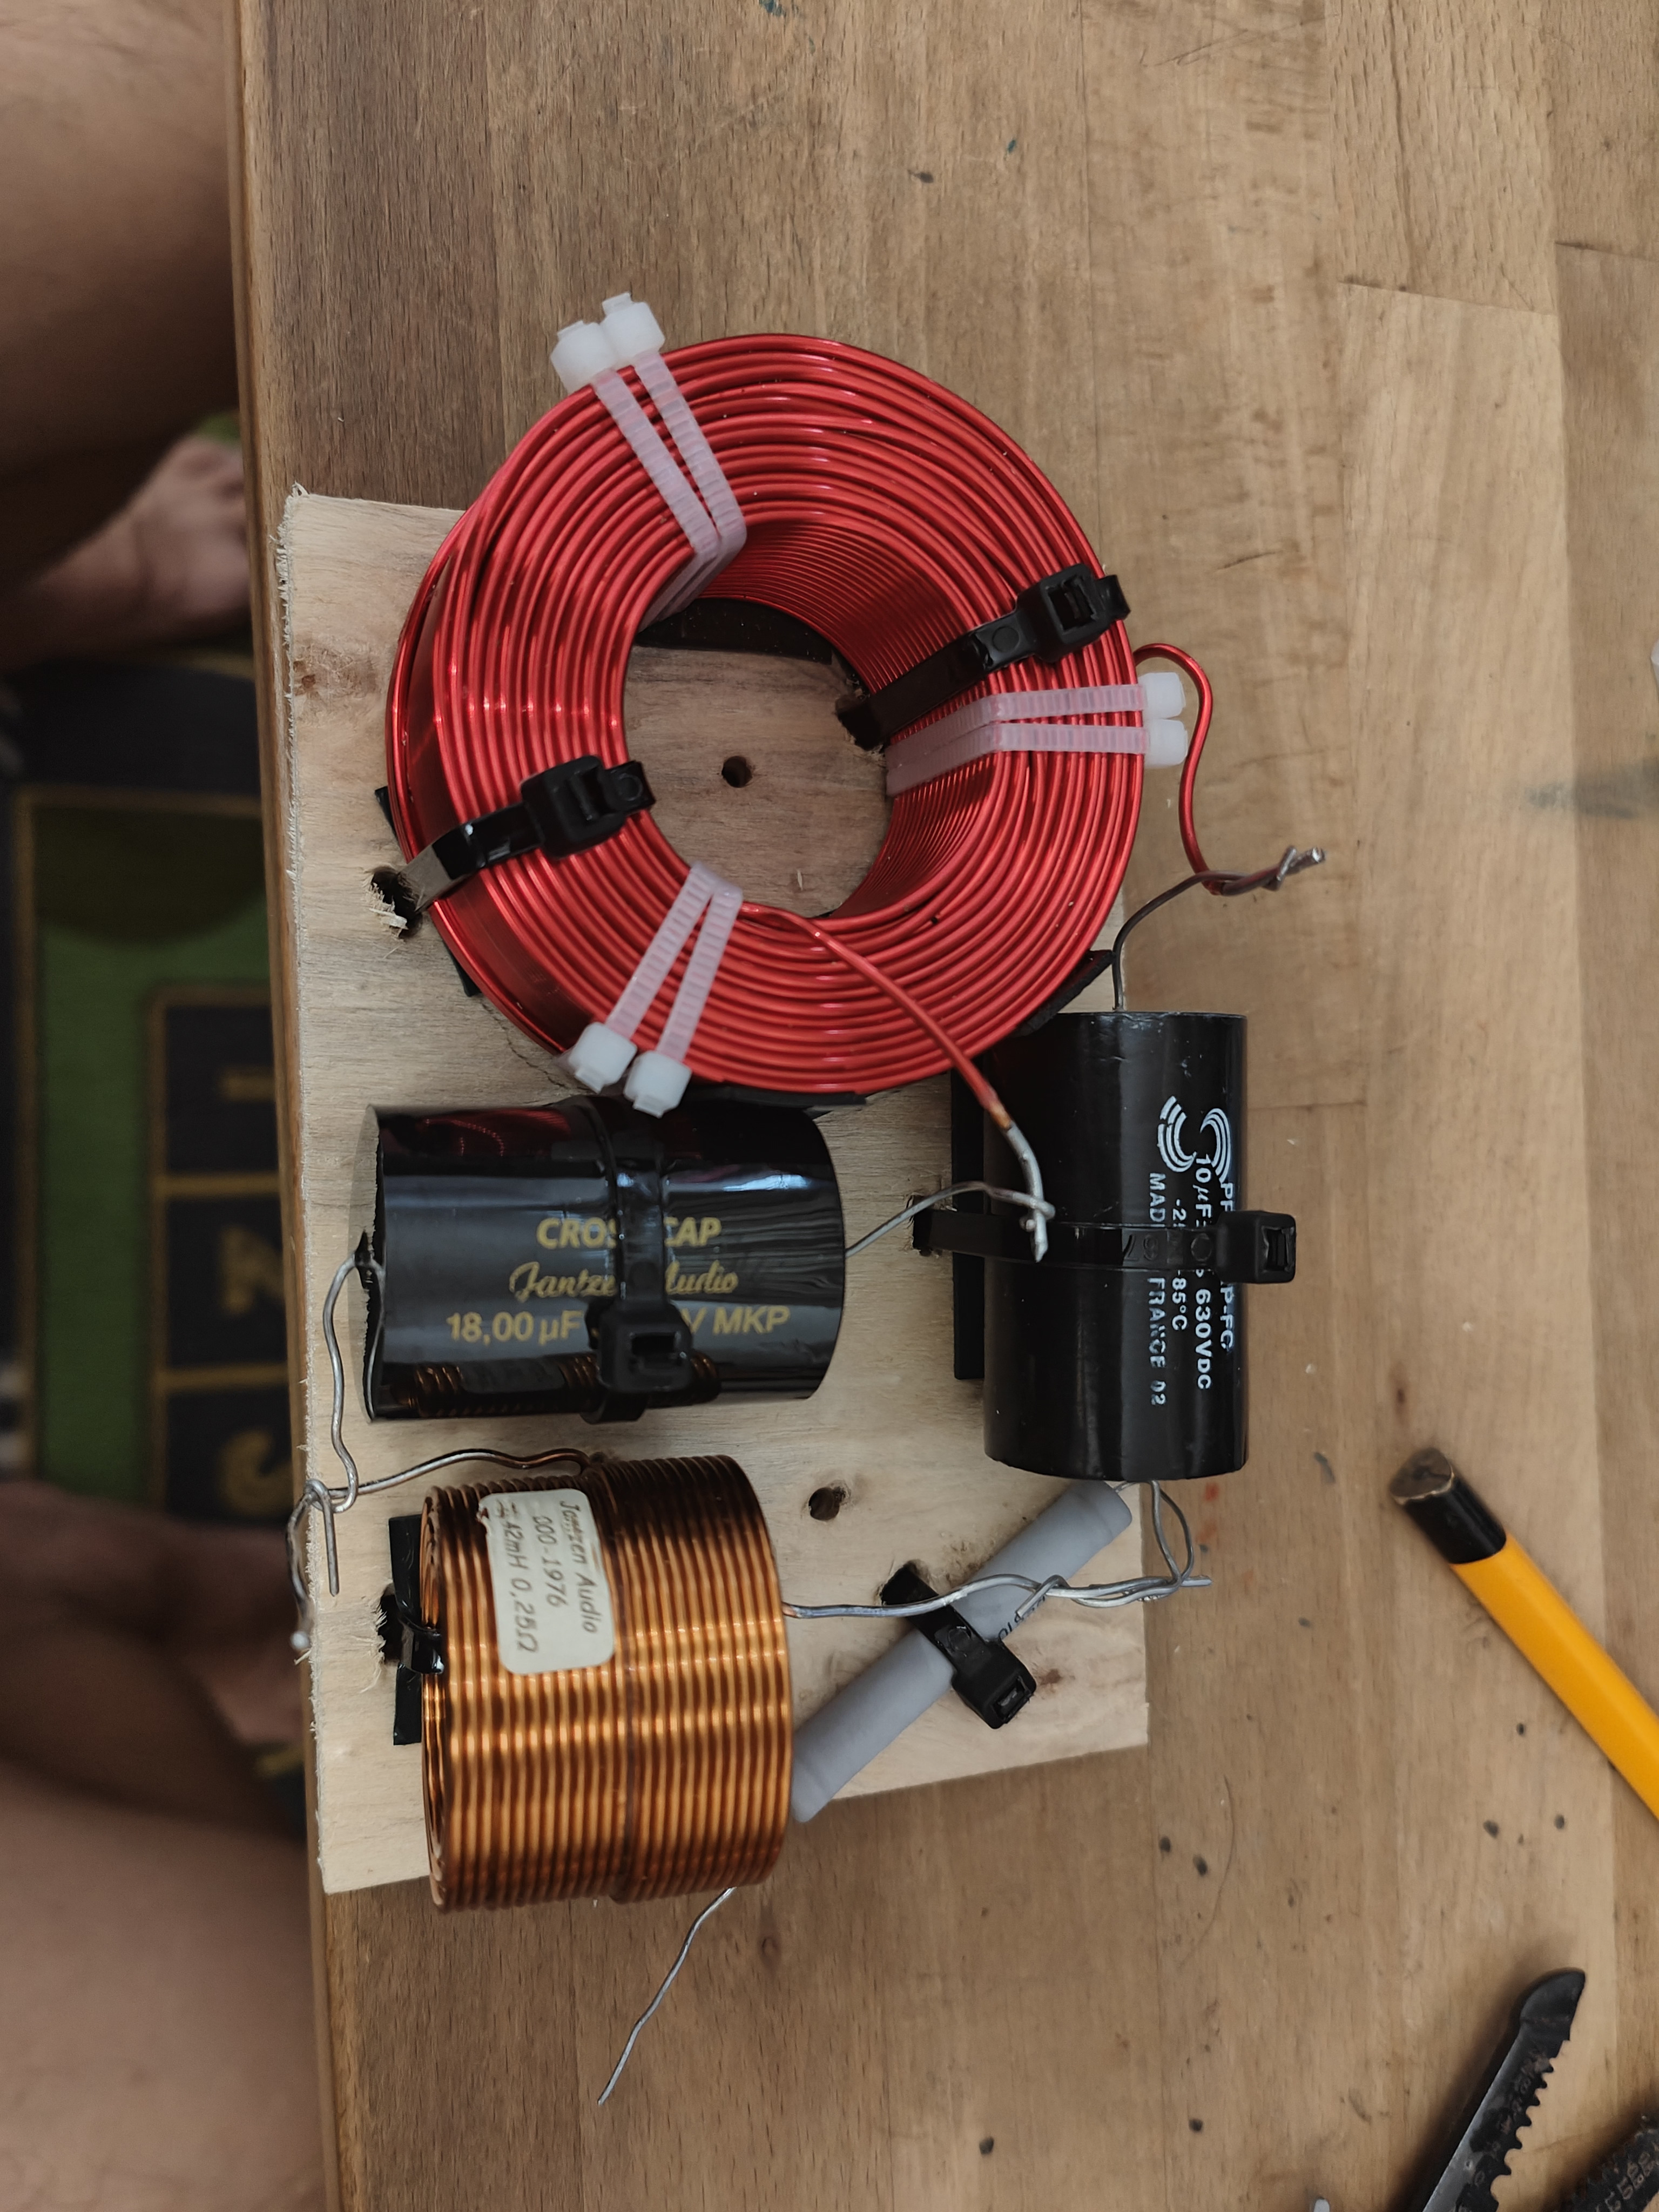
Simple 2nd order acoustic high pass low pass, and a single tweeter level resistor.
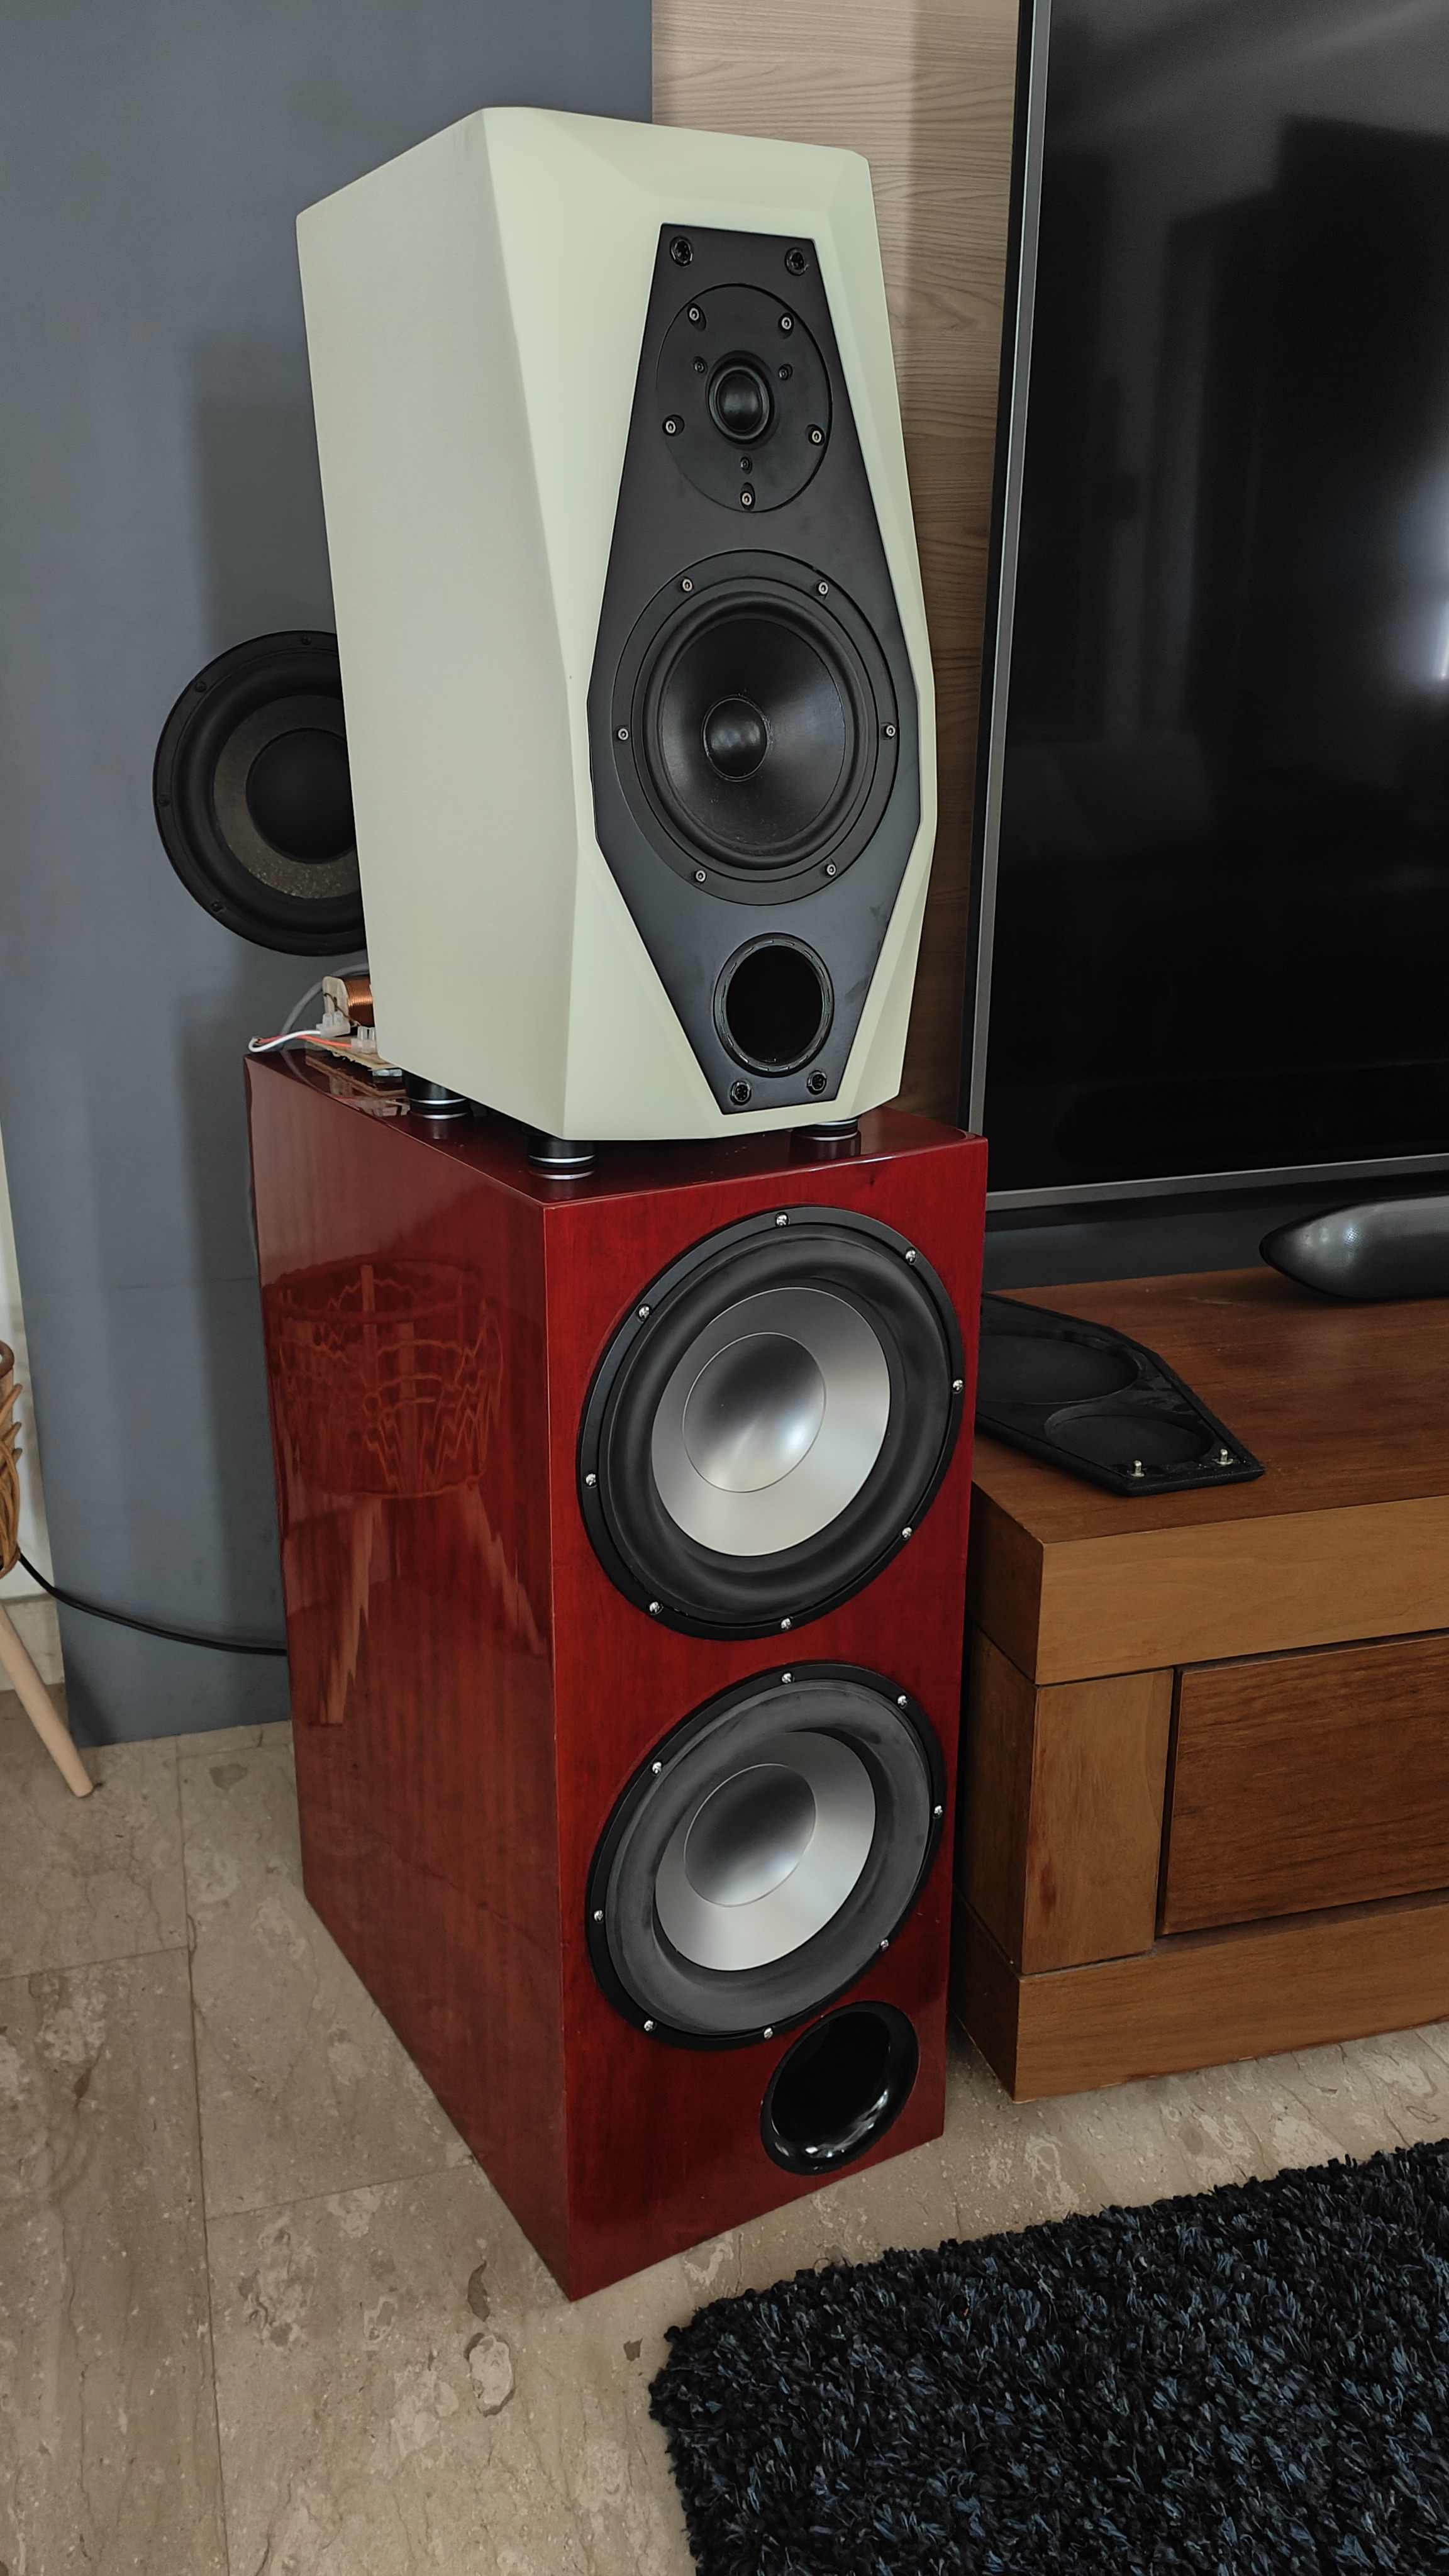
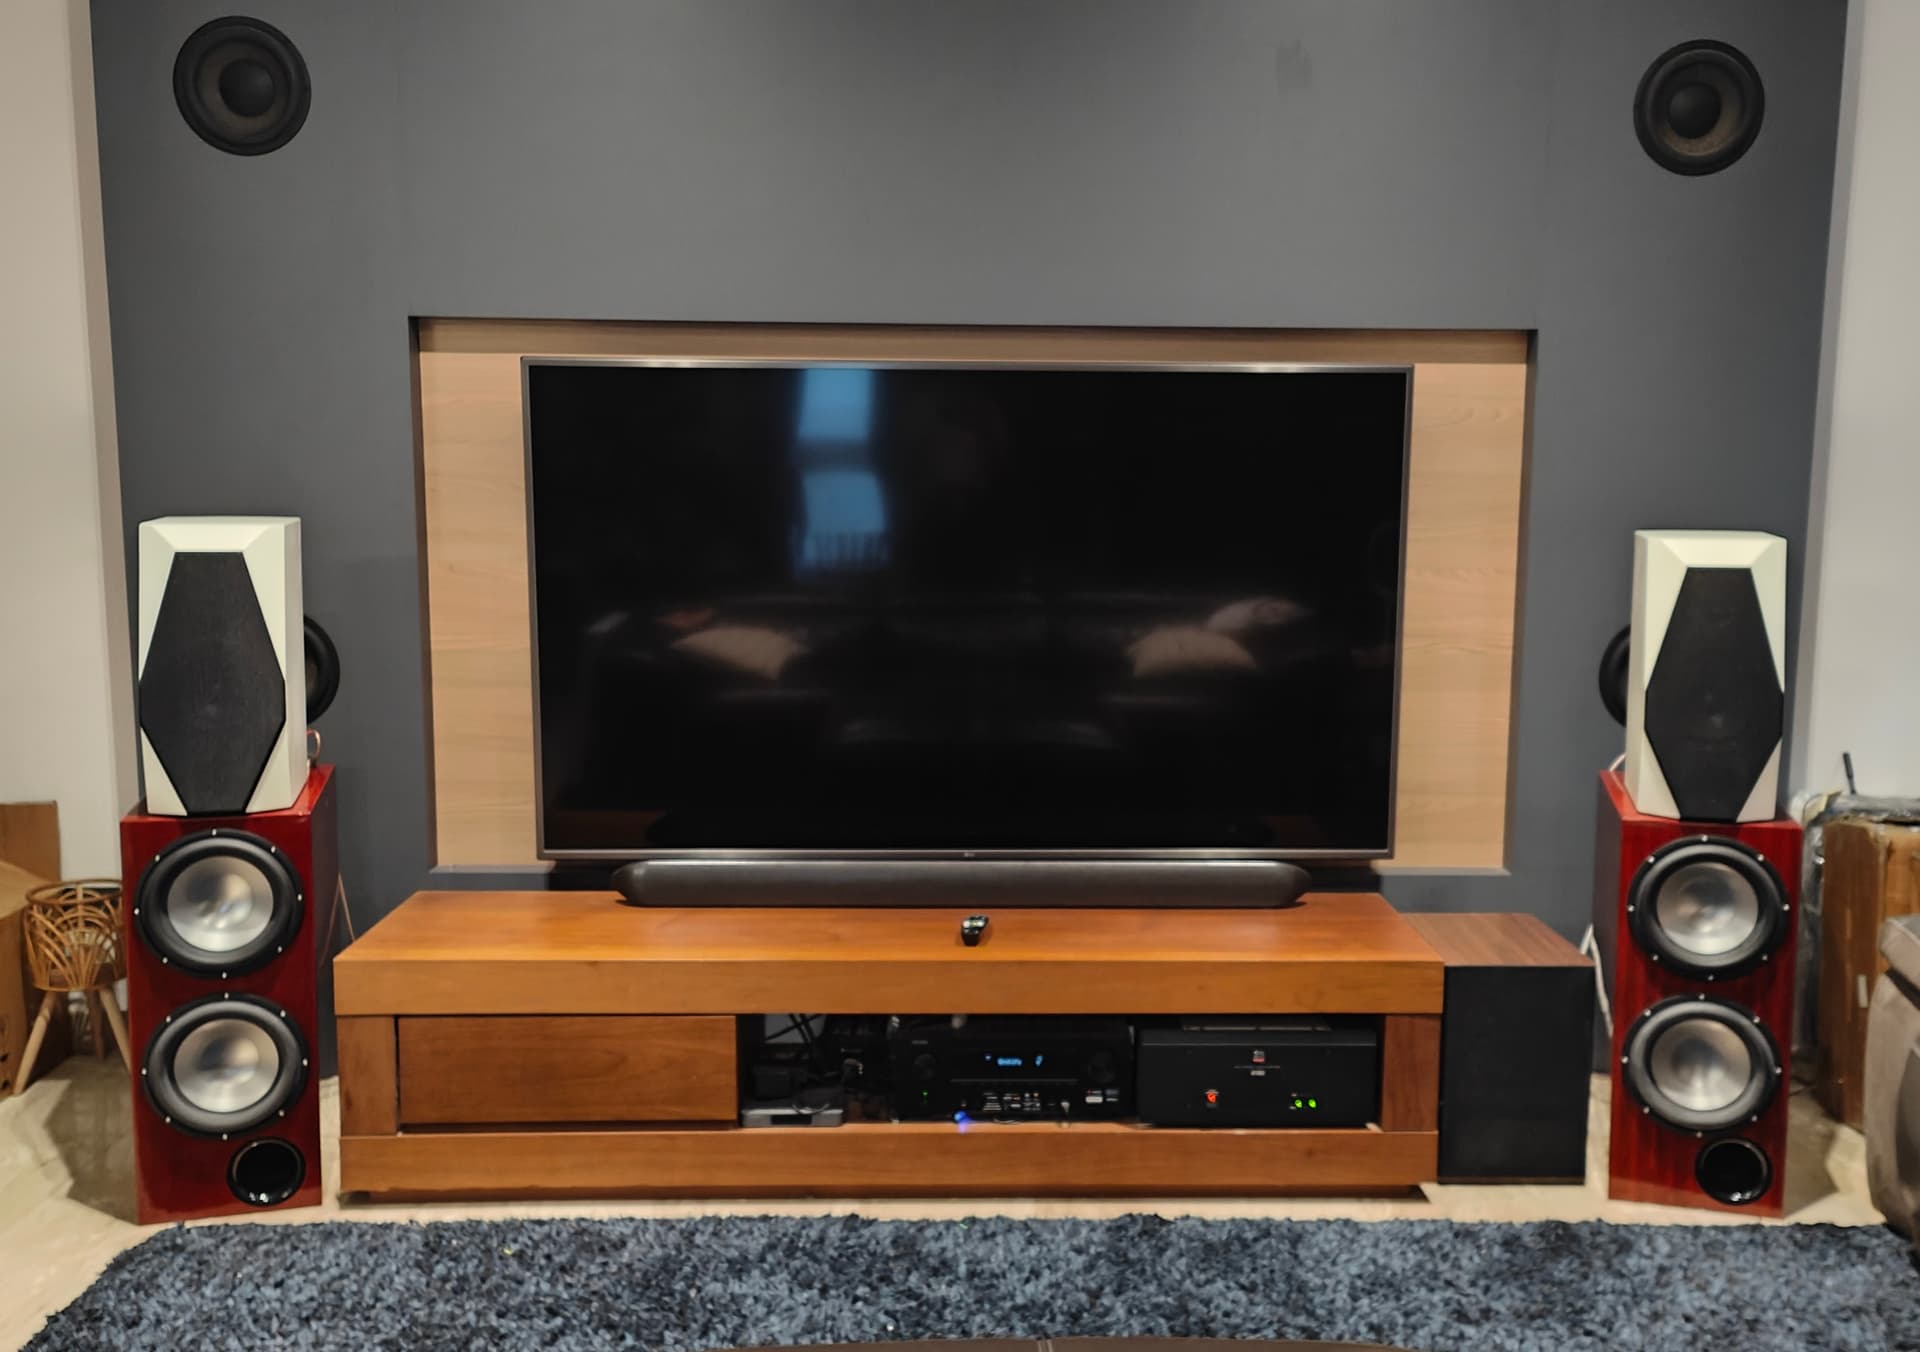
Recently decided to build out as full 3 way speaker with woofer module to use in living.
Modular design. Questionable aesthetics, hahahaha.
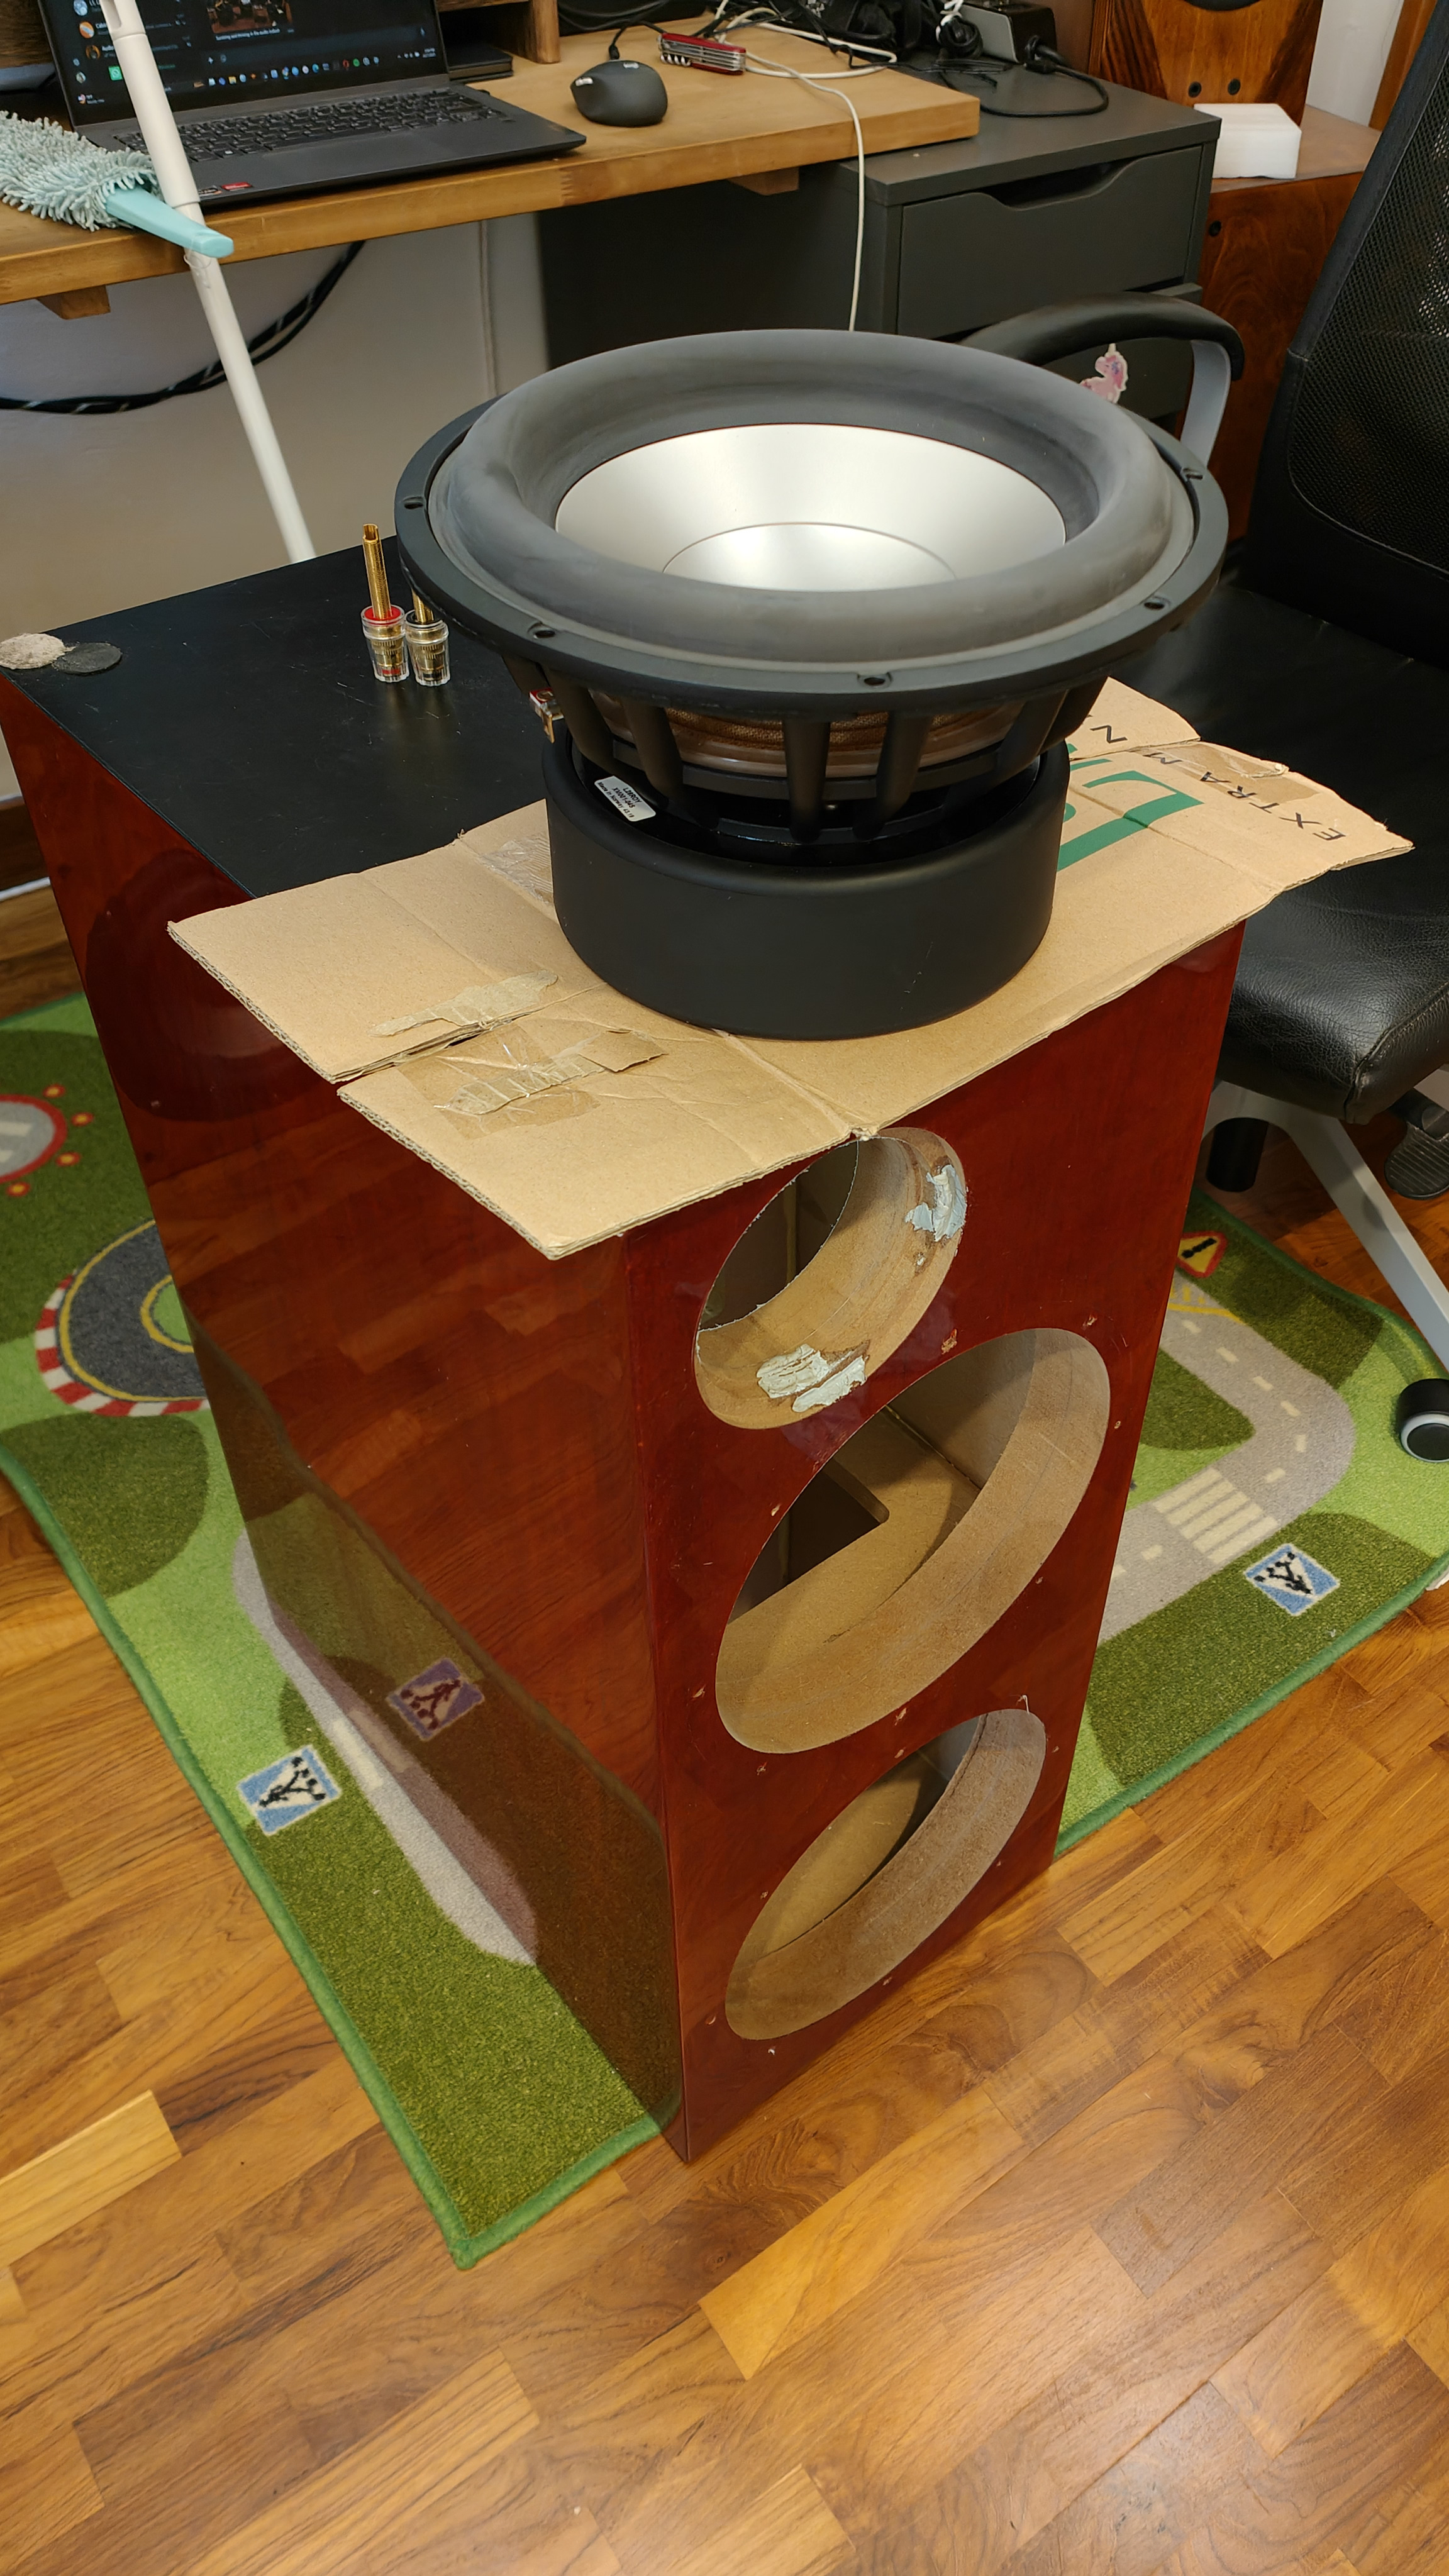
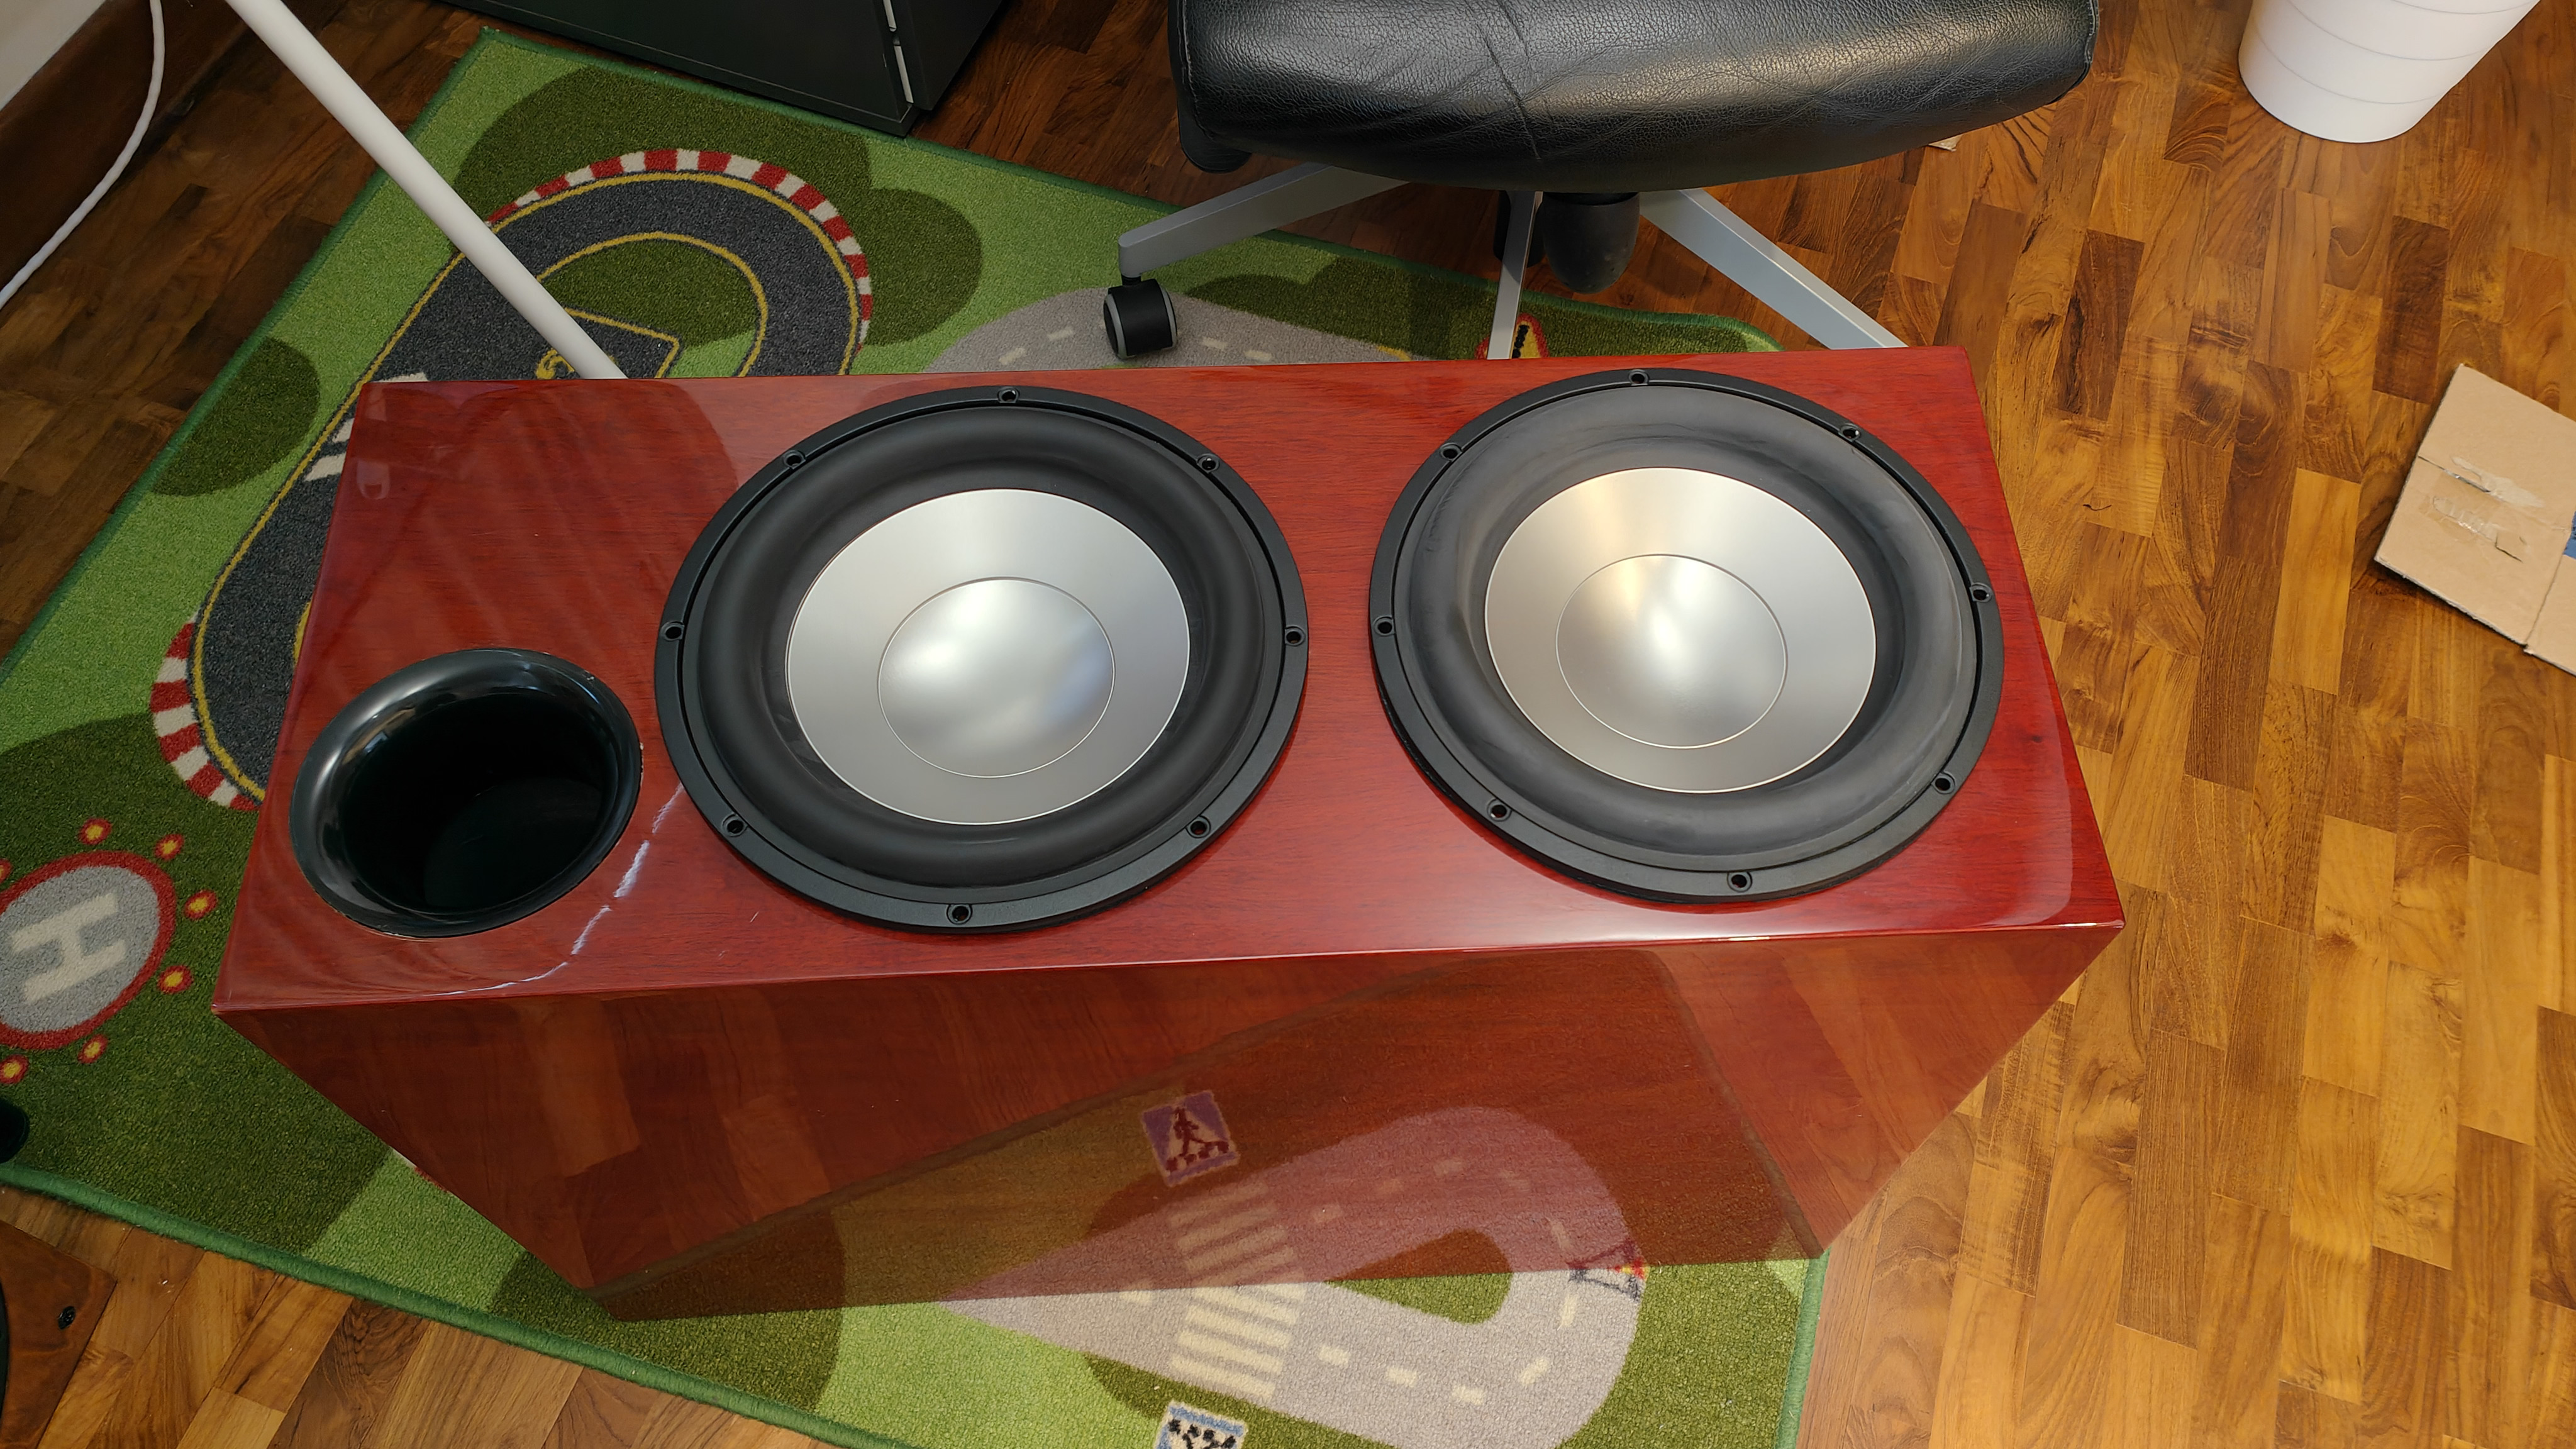
Making use of existing 2x10 woofer cabinet, so doesn’t exactly match the bookshelf.
Woofer module uses the seas L26ROY woofers.
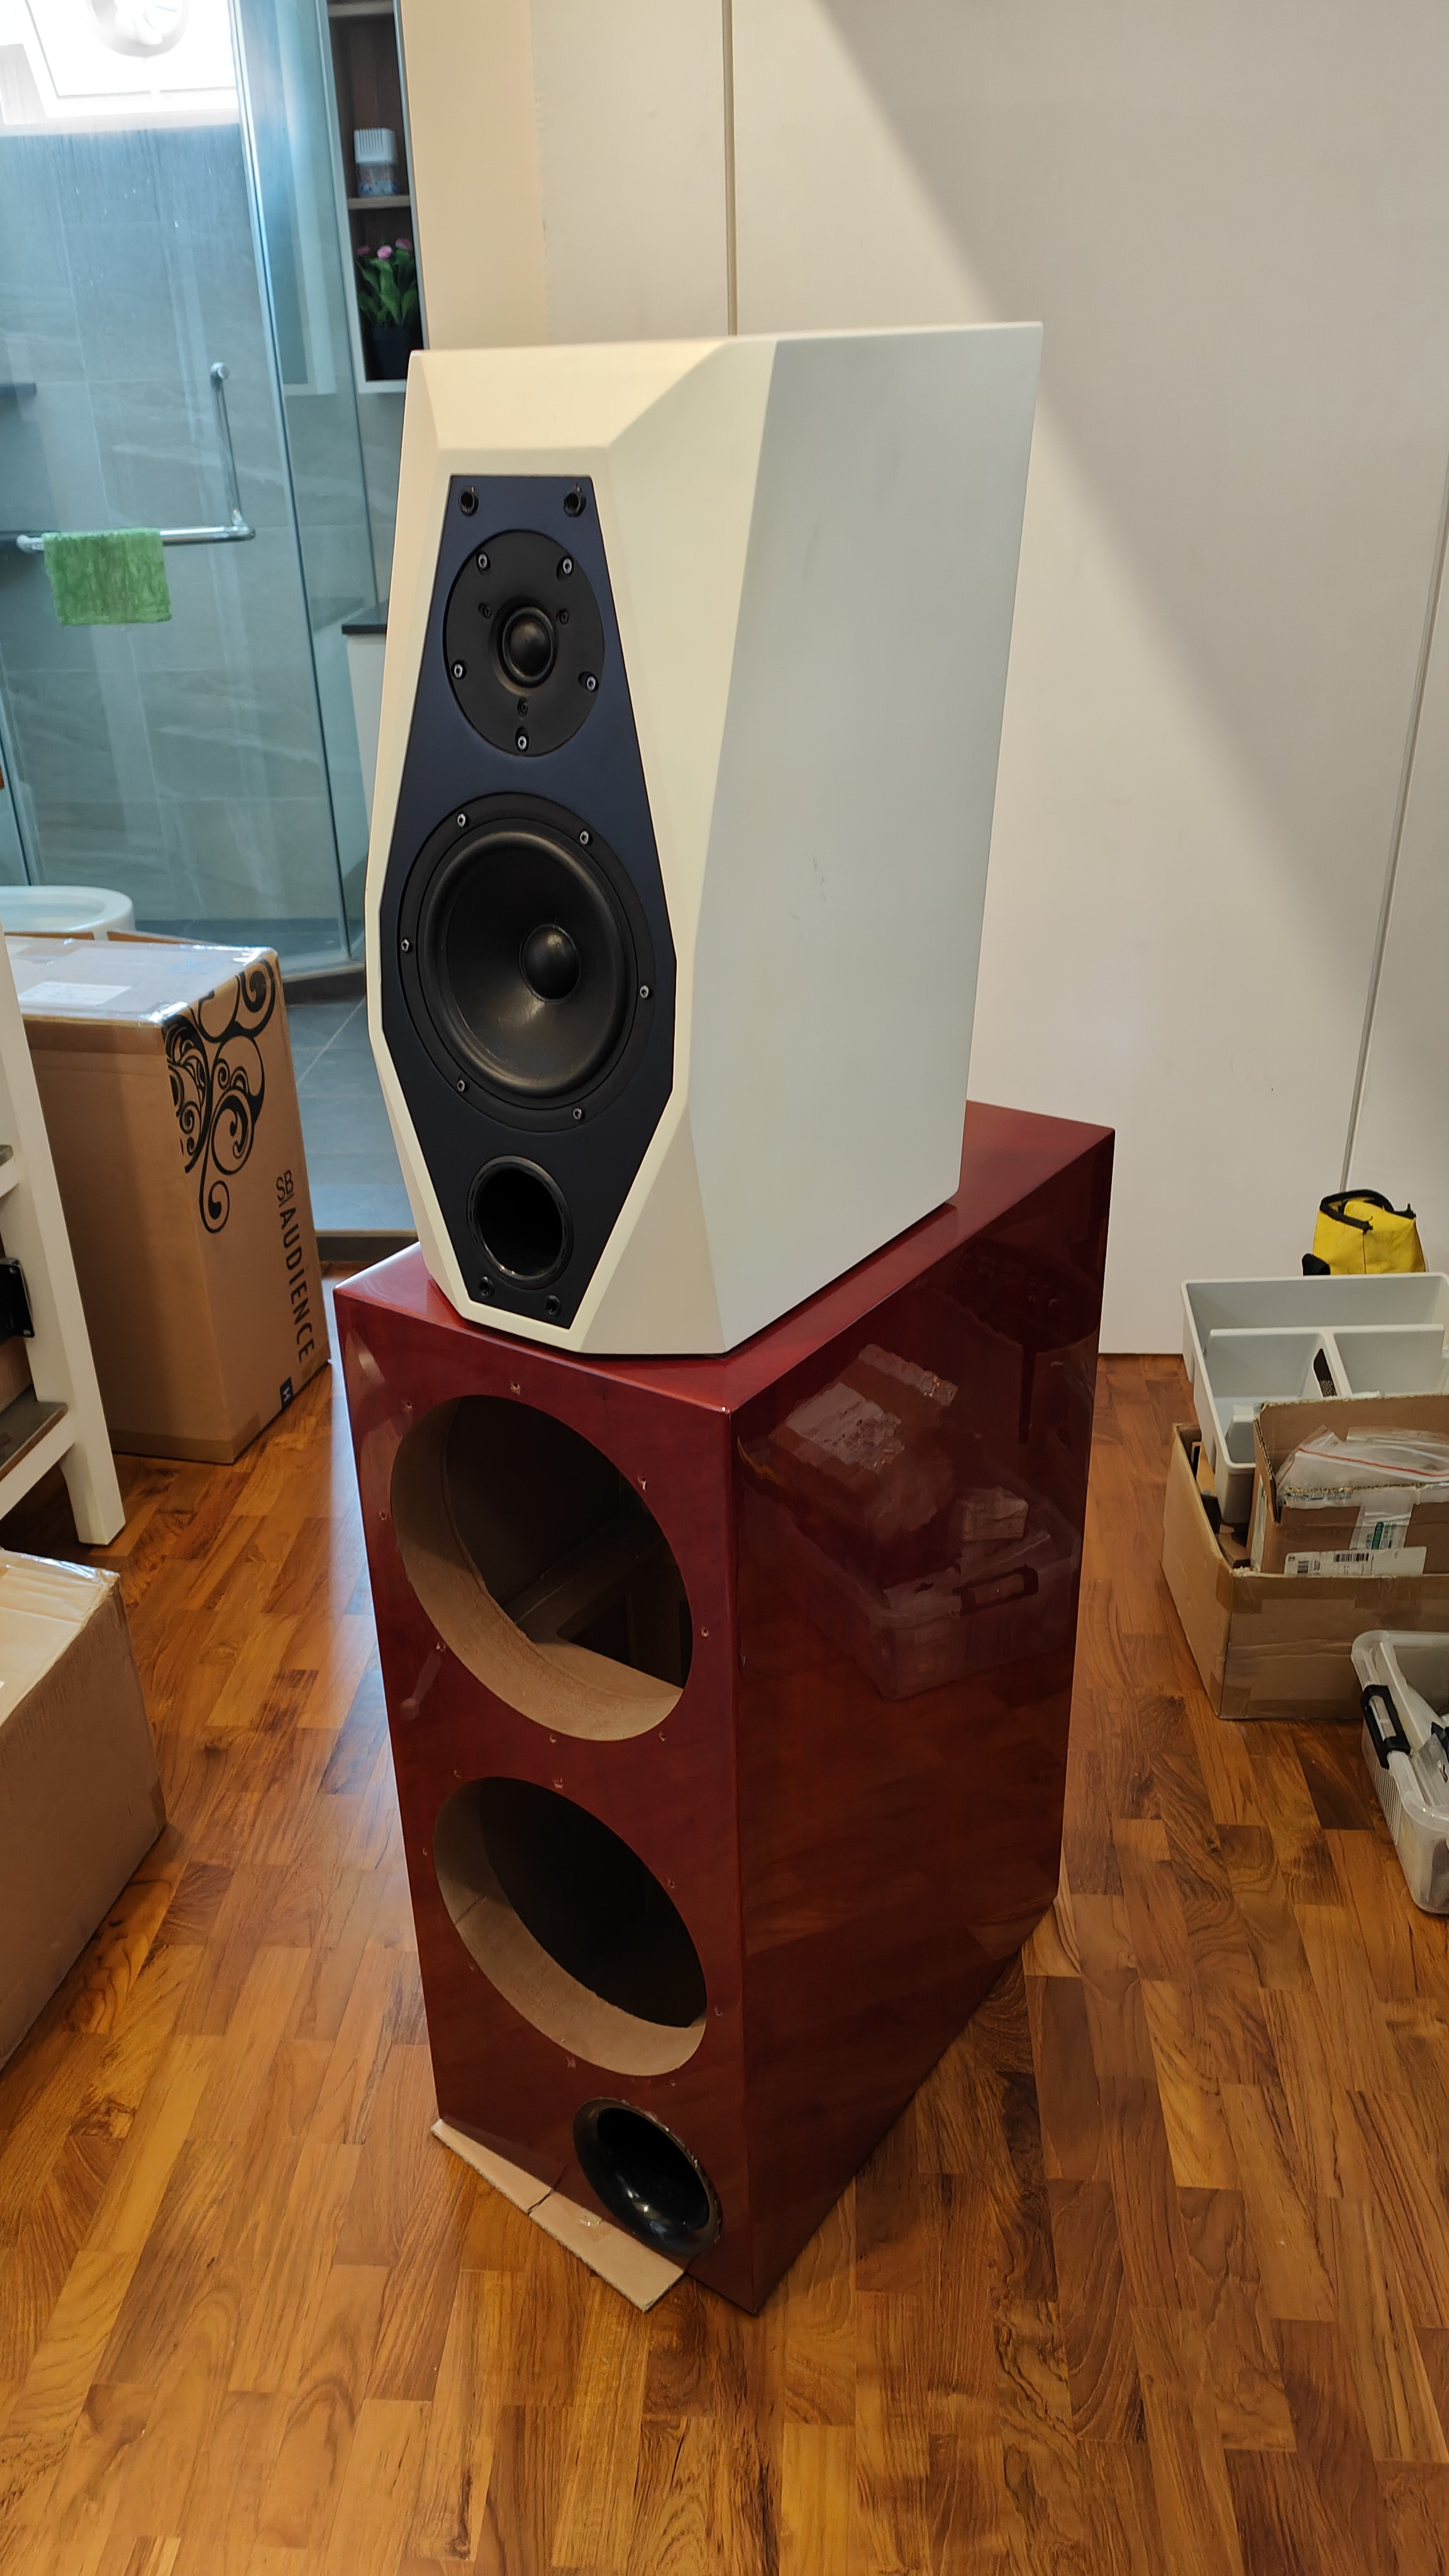
Photon check of bookshelf and woofer modular design. Hmm.
Fit check of drivers in existing cabinet. Hole cutout fits, screw holes lines up!
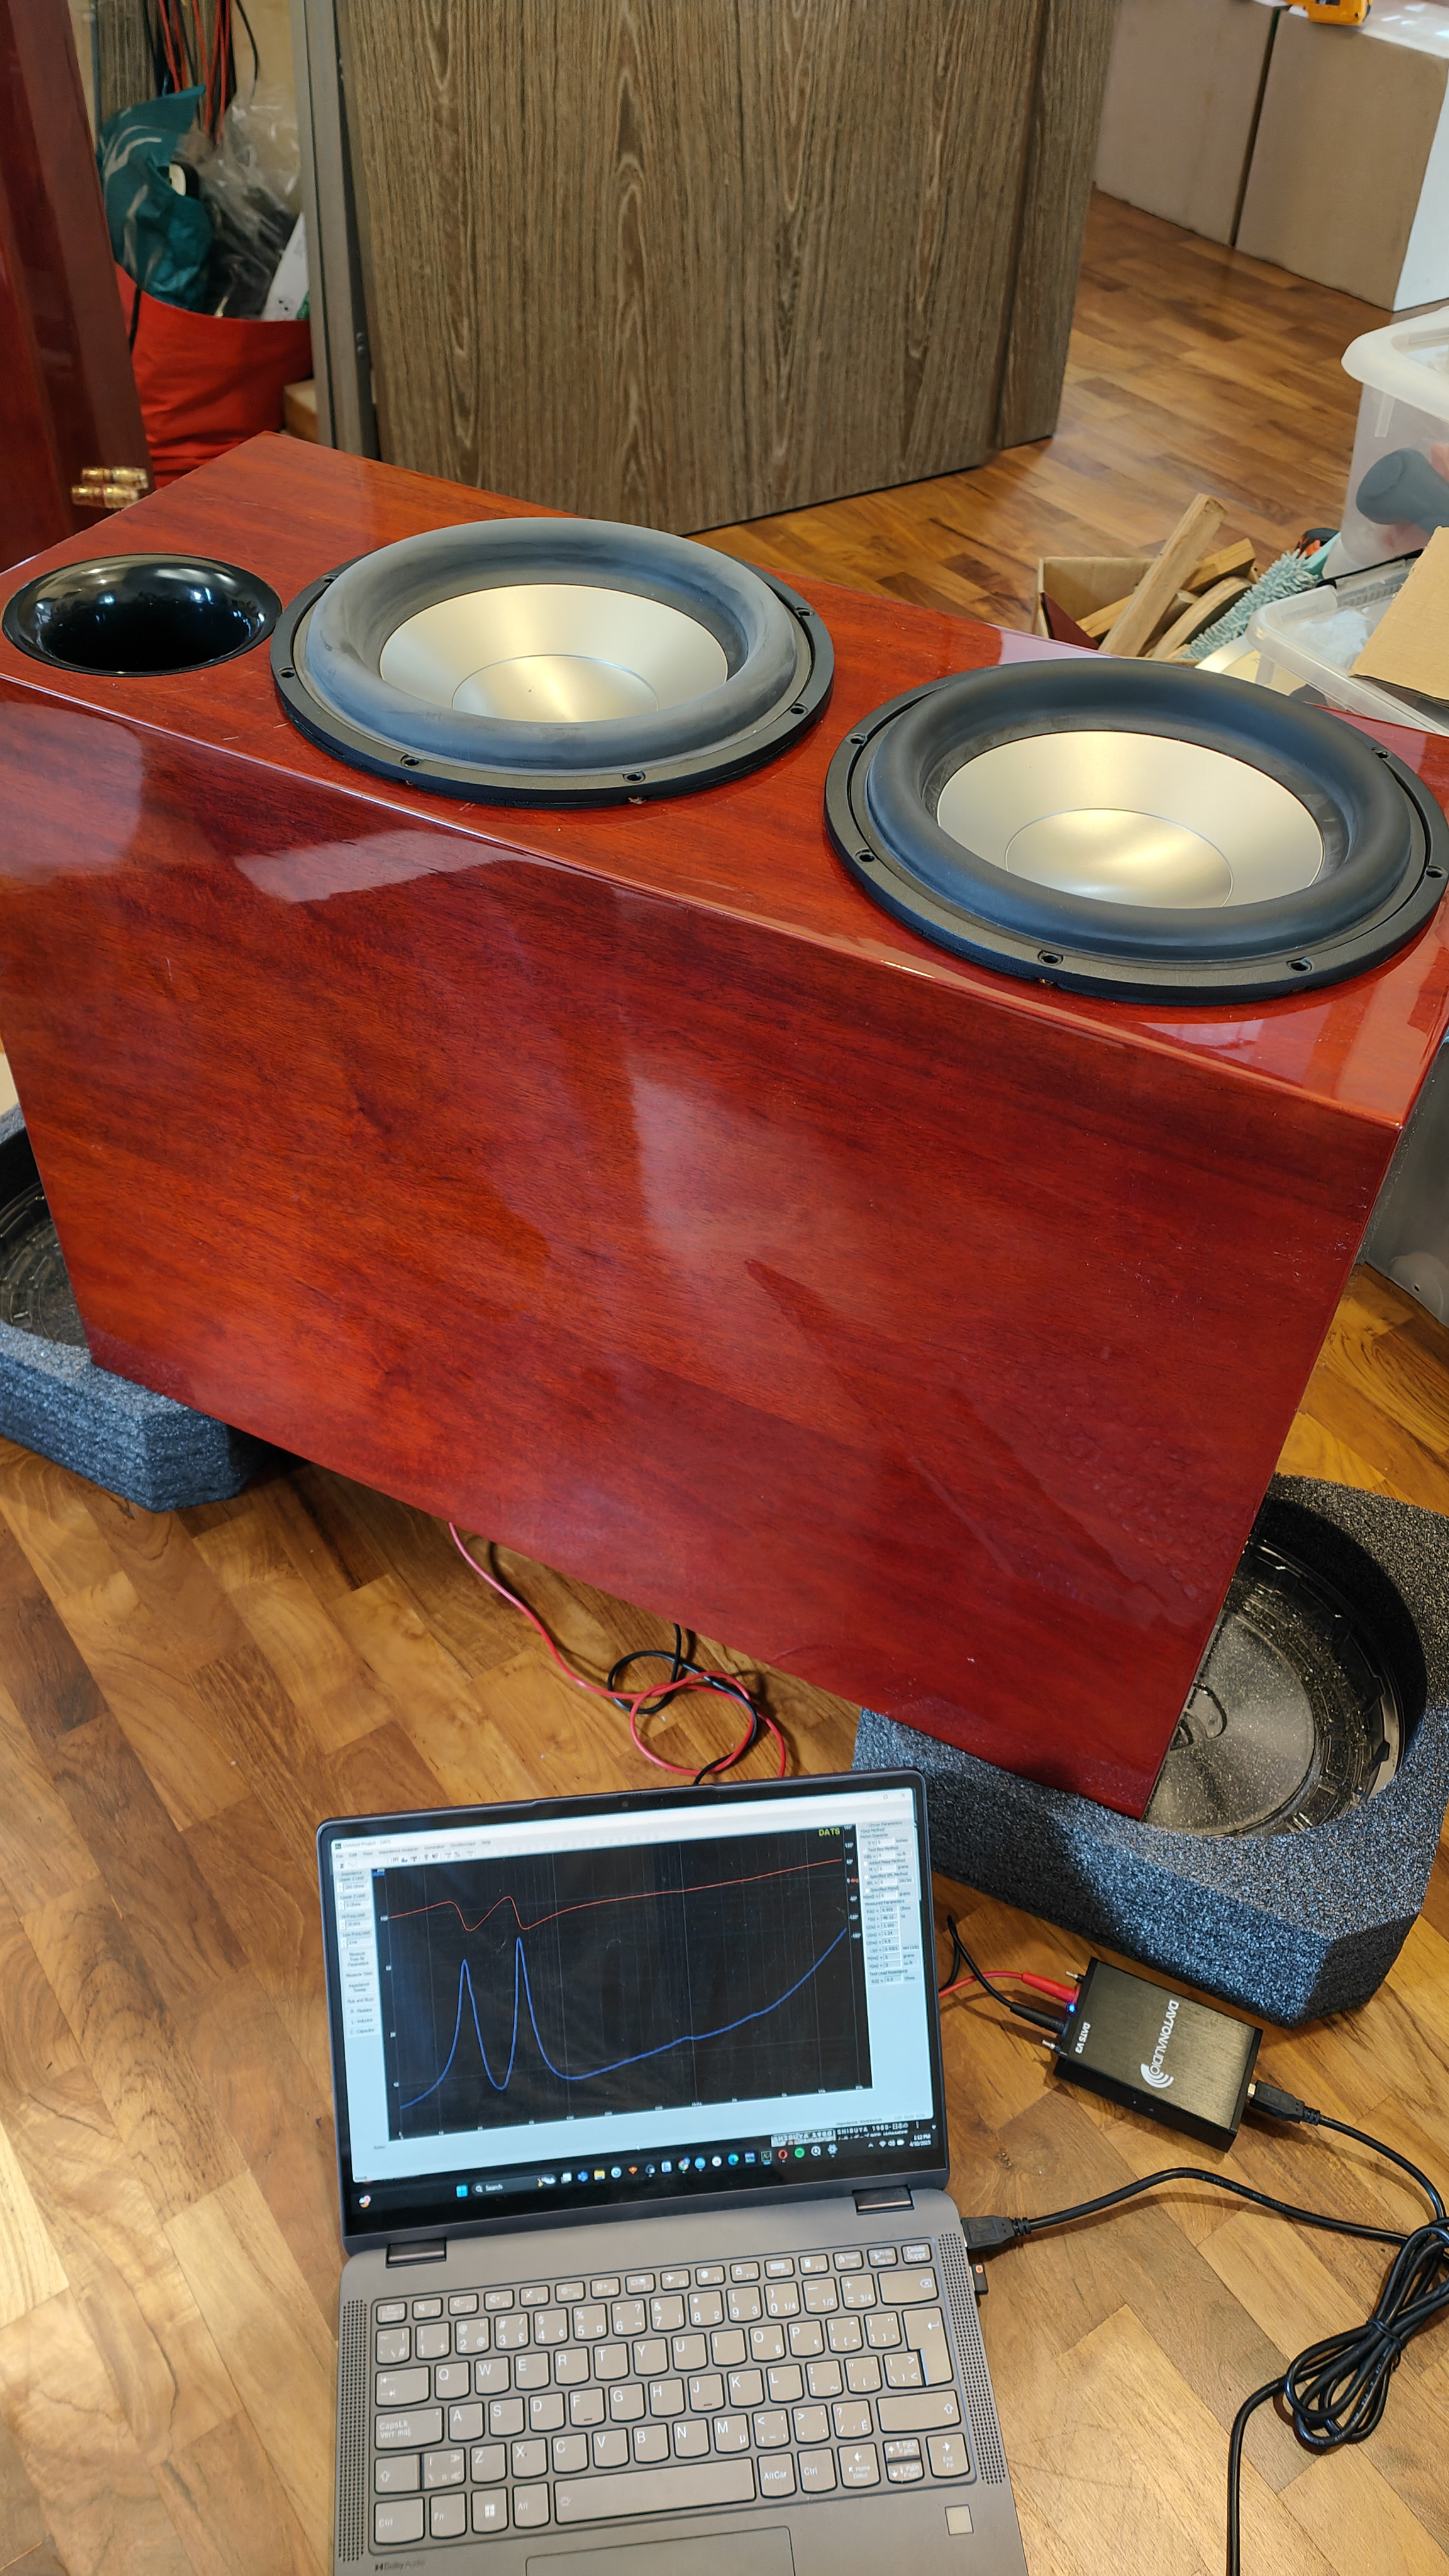
Tuning check - 75L cabinet ported to 30hz
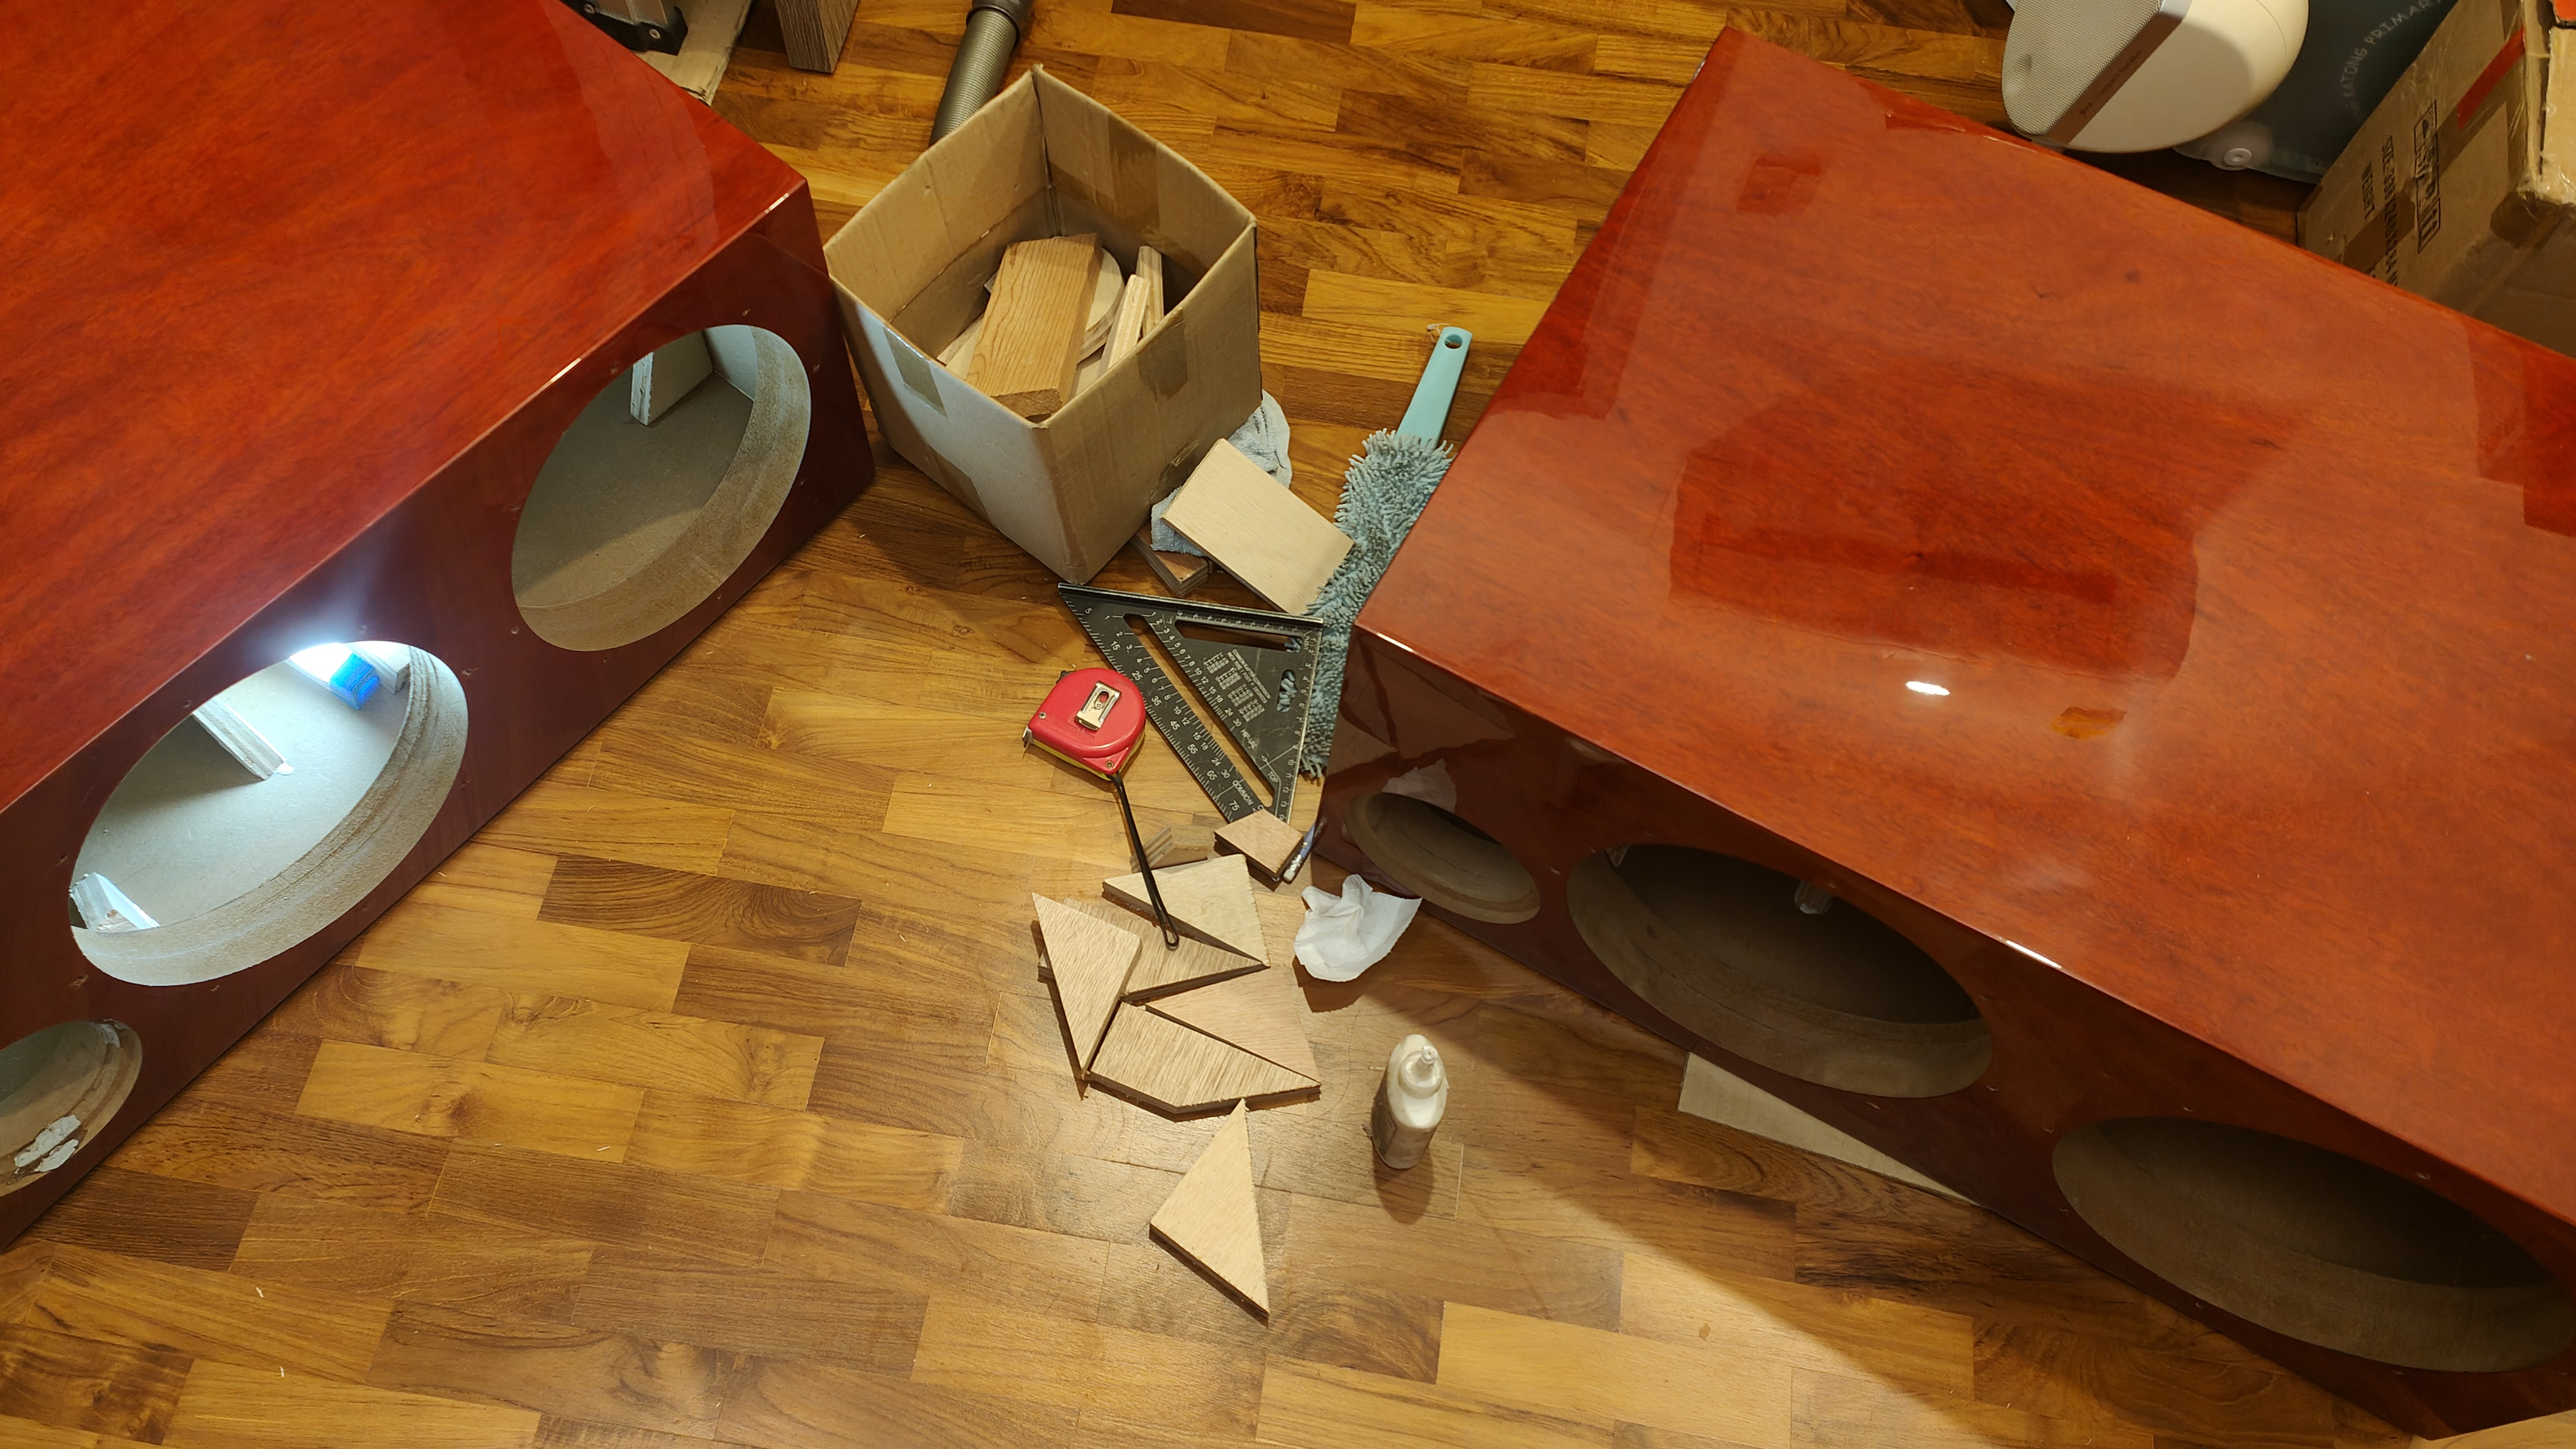
Some minor bracing reinforcement on the cabinet, not used to MDF cabinet resonant character.
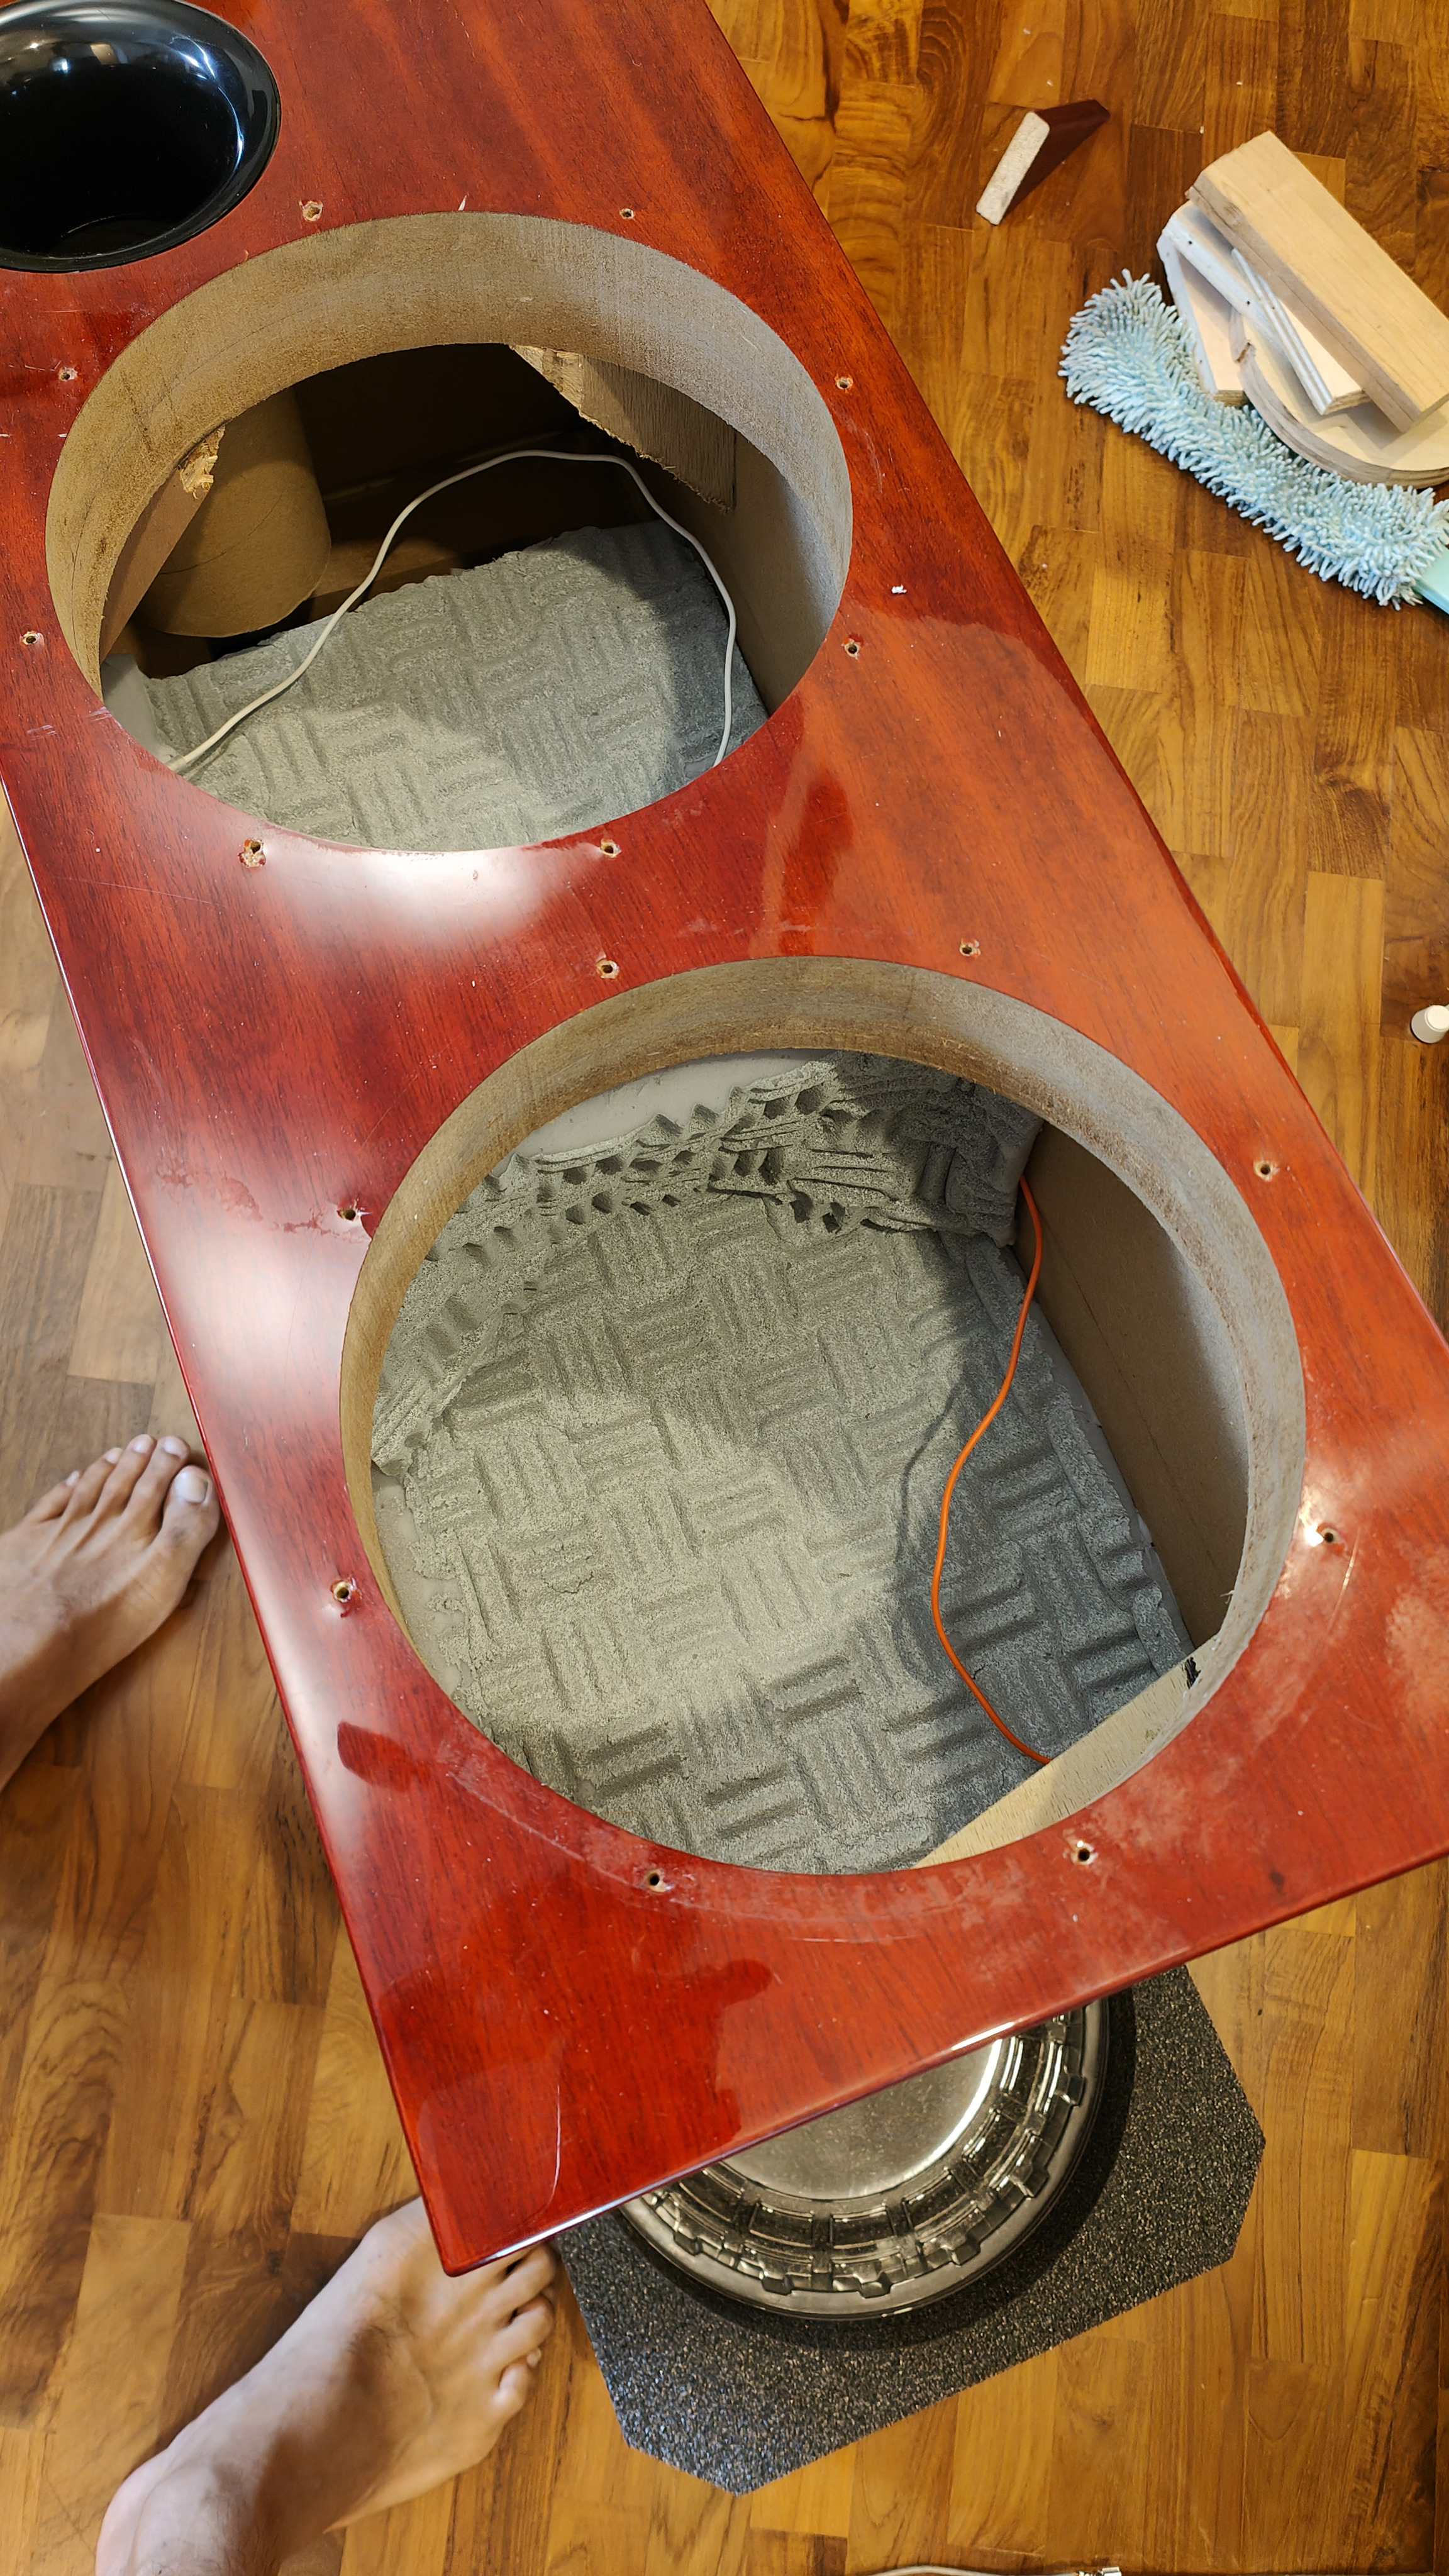
Minimal stuffing for maximum bass efficiency. Should be fine for the 200hz and below passband for this module.
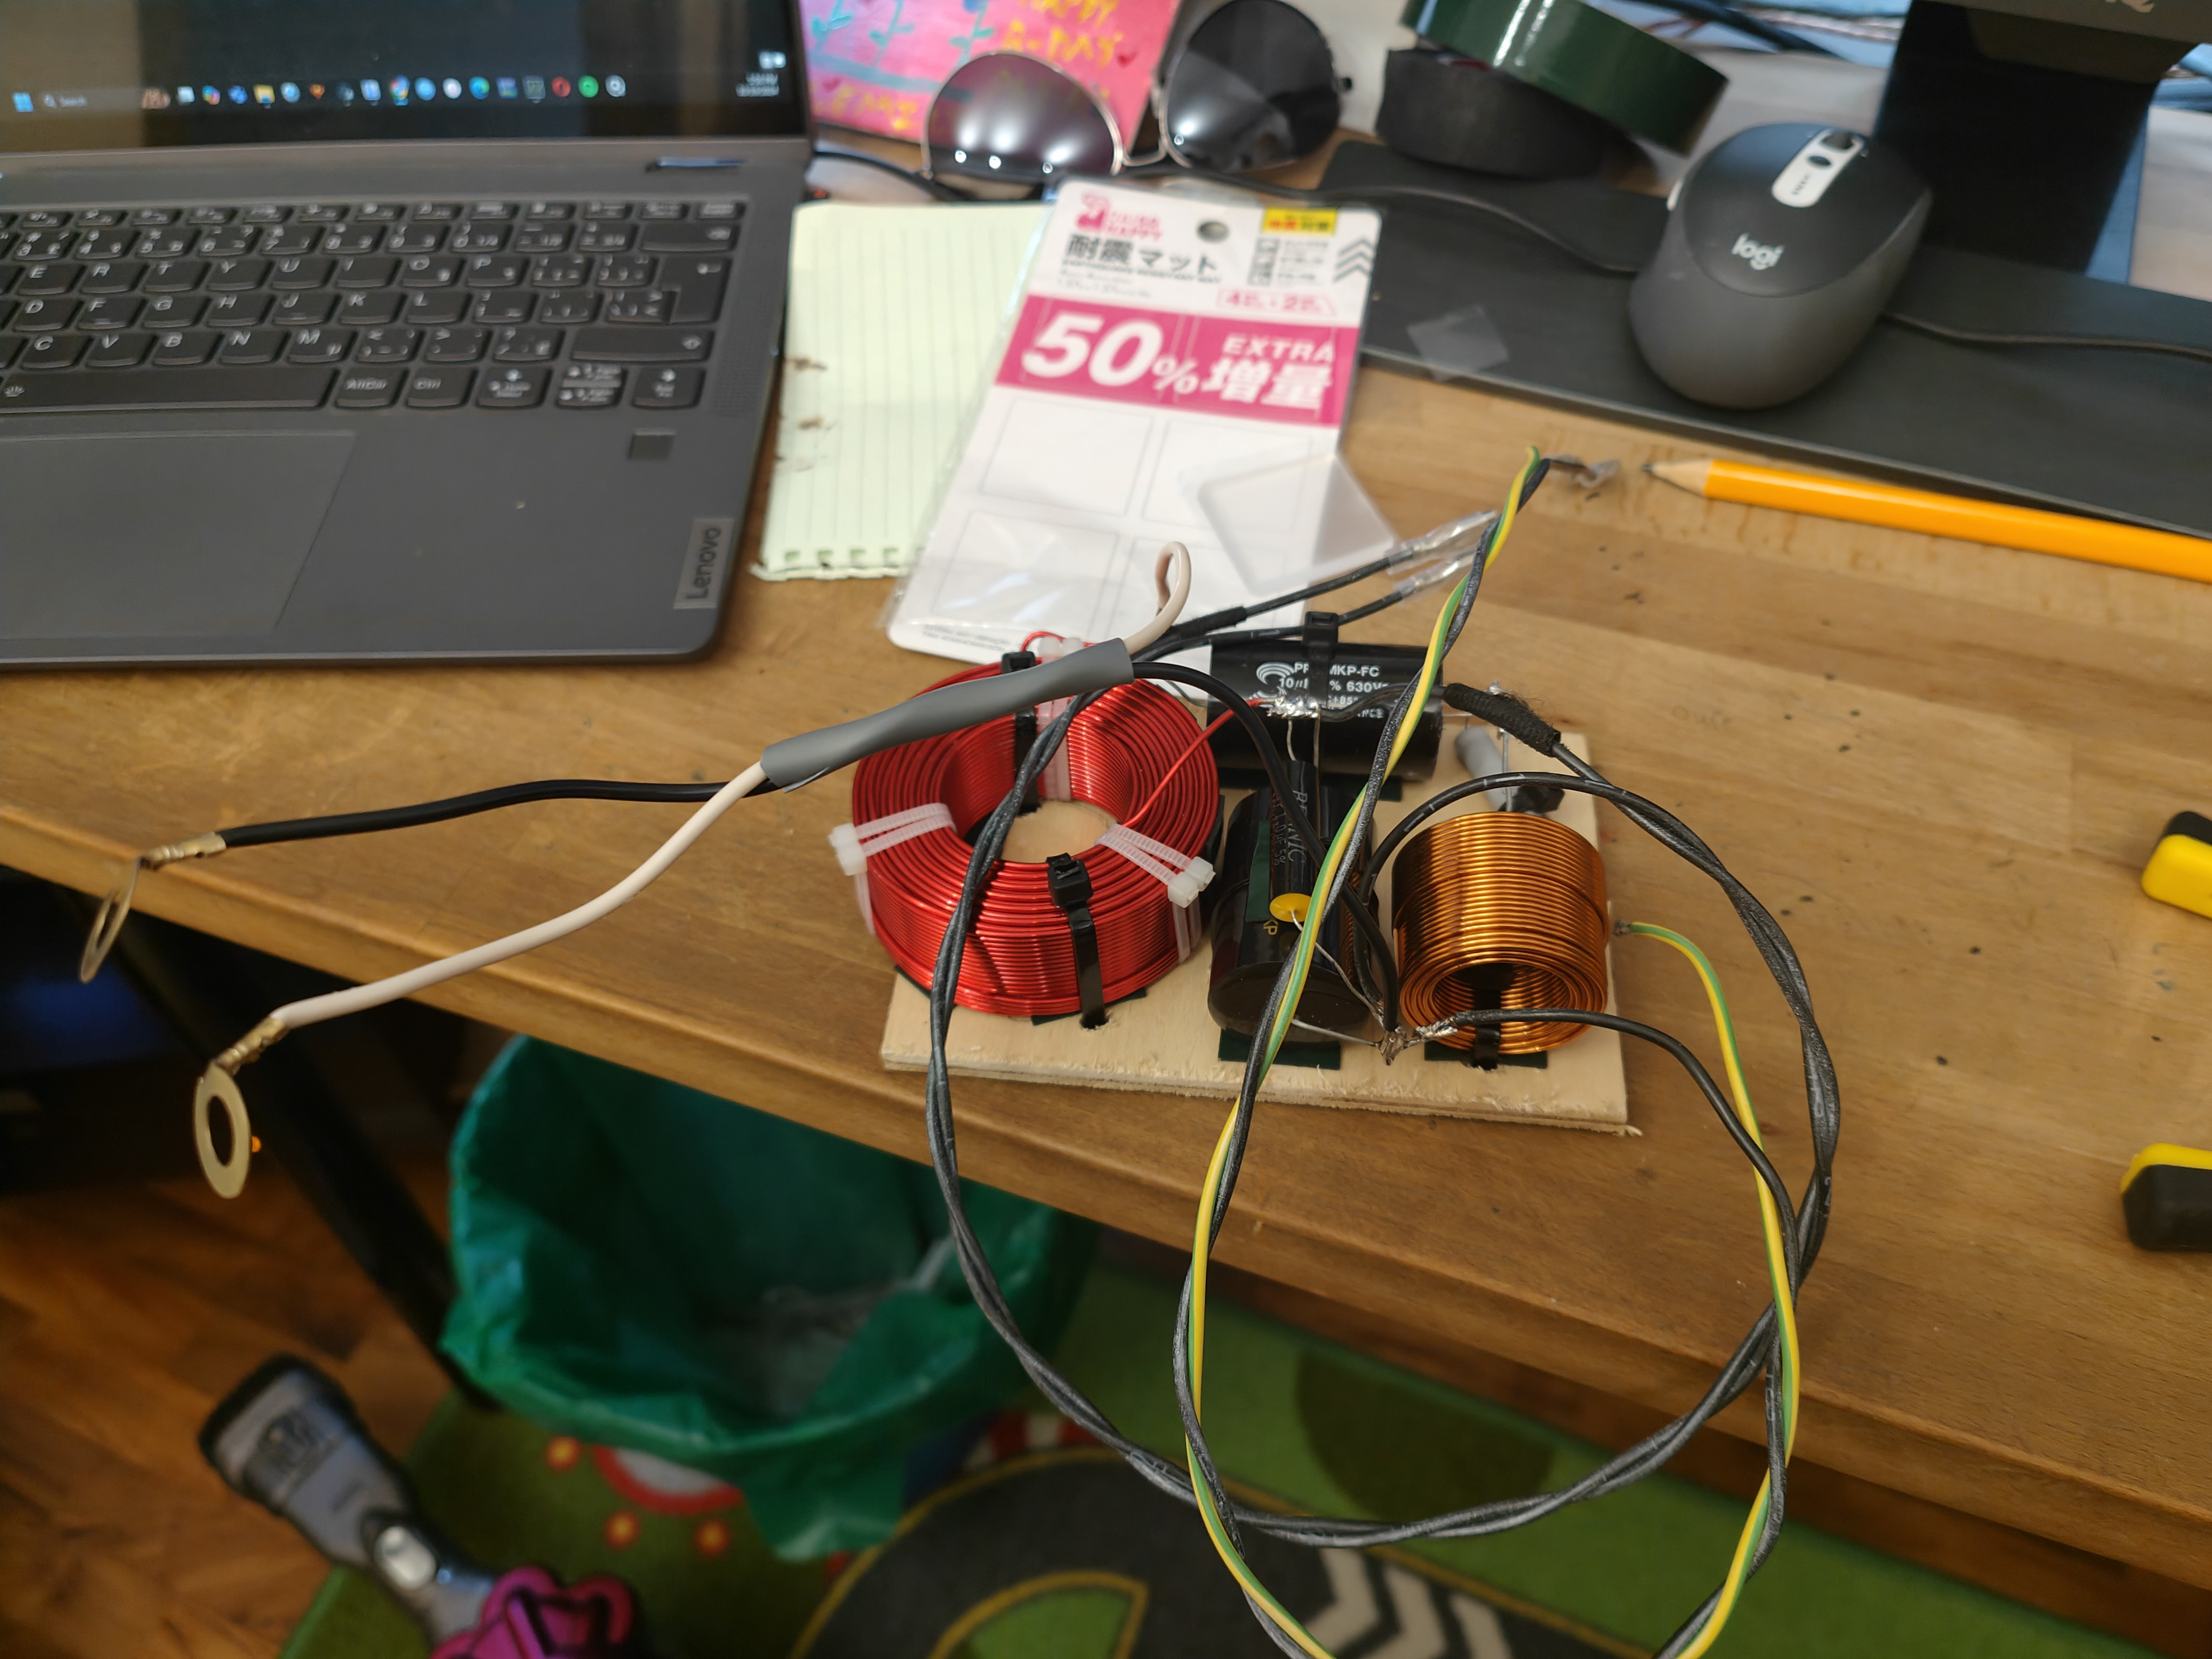
Woofer low pass and bookshelf high pass for 3 way design.
Checking the crossover and sum between midrange and woofer. Looking good with a ~200hz cross.
Testing some footers from taobao but end up using sorbothane instead.
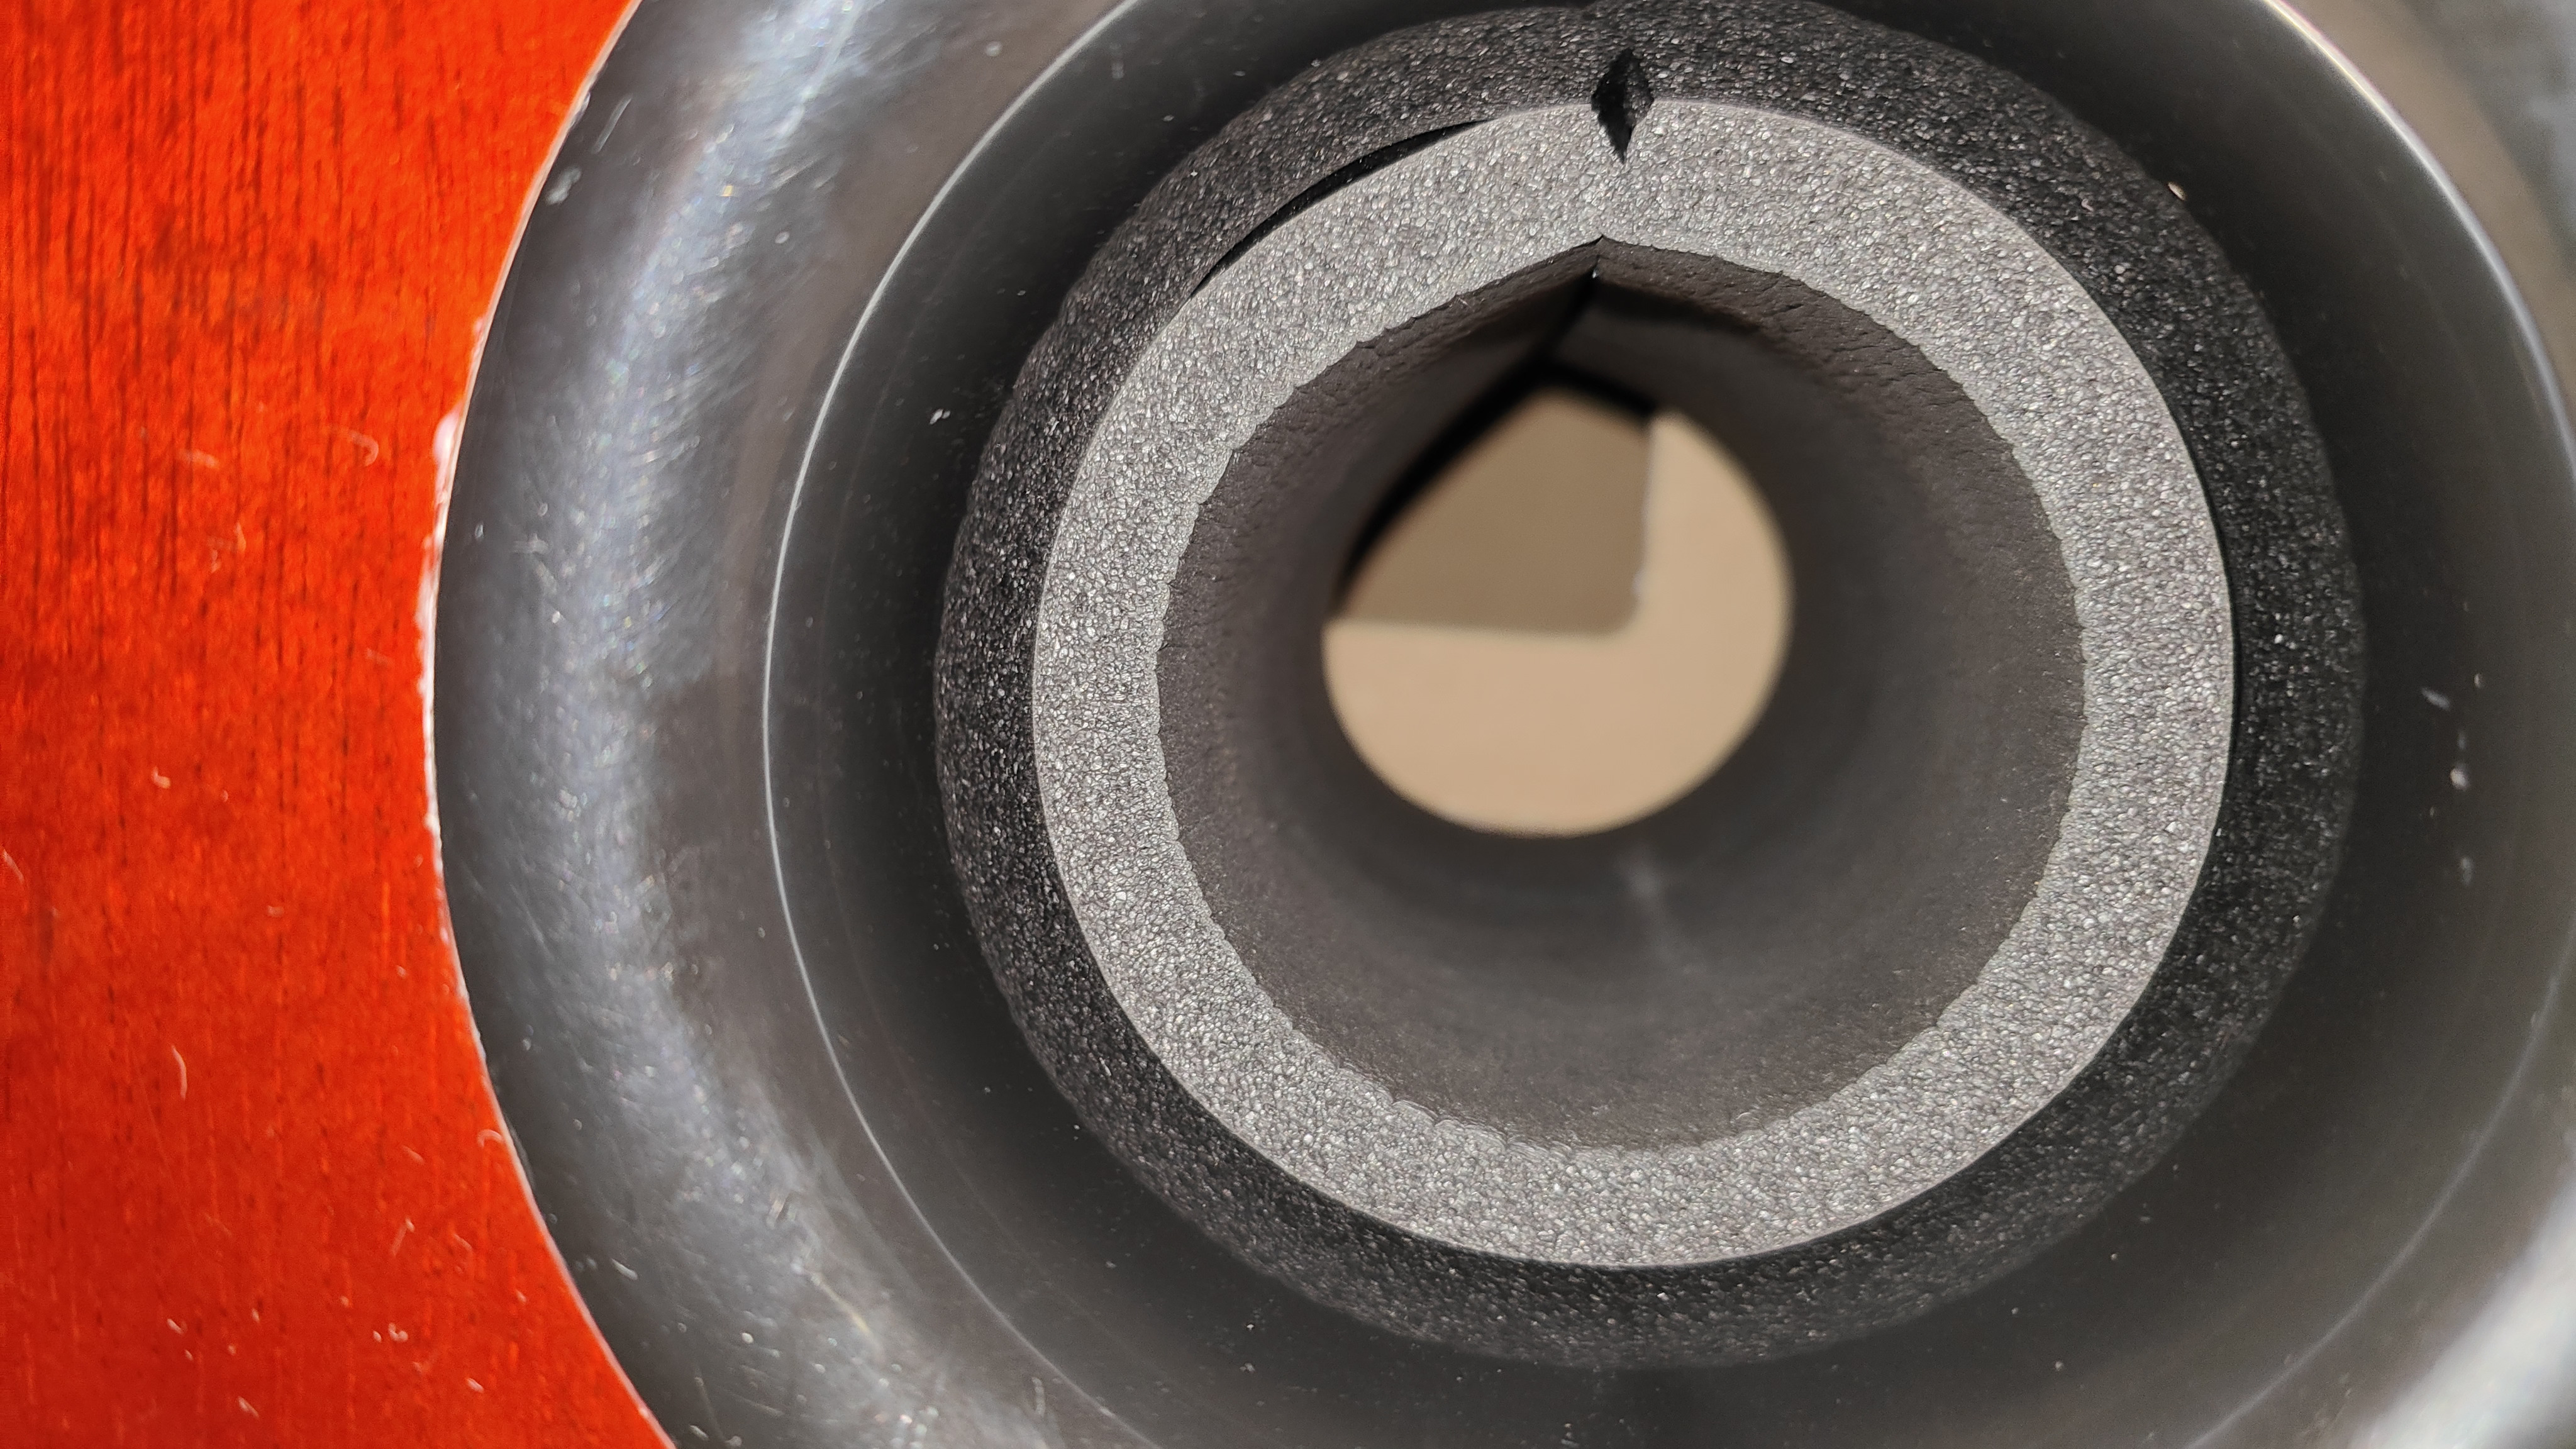
From listening tests, found the 30-40hz abit bloomy and smeared low bass details. Dropped tuning with a foam insert in the port.
Verified tuning at 24hz with DATS.
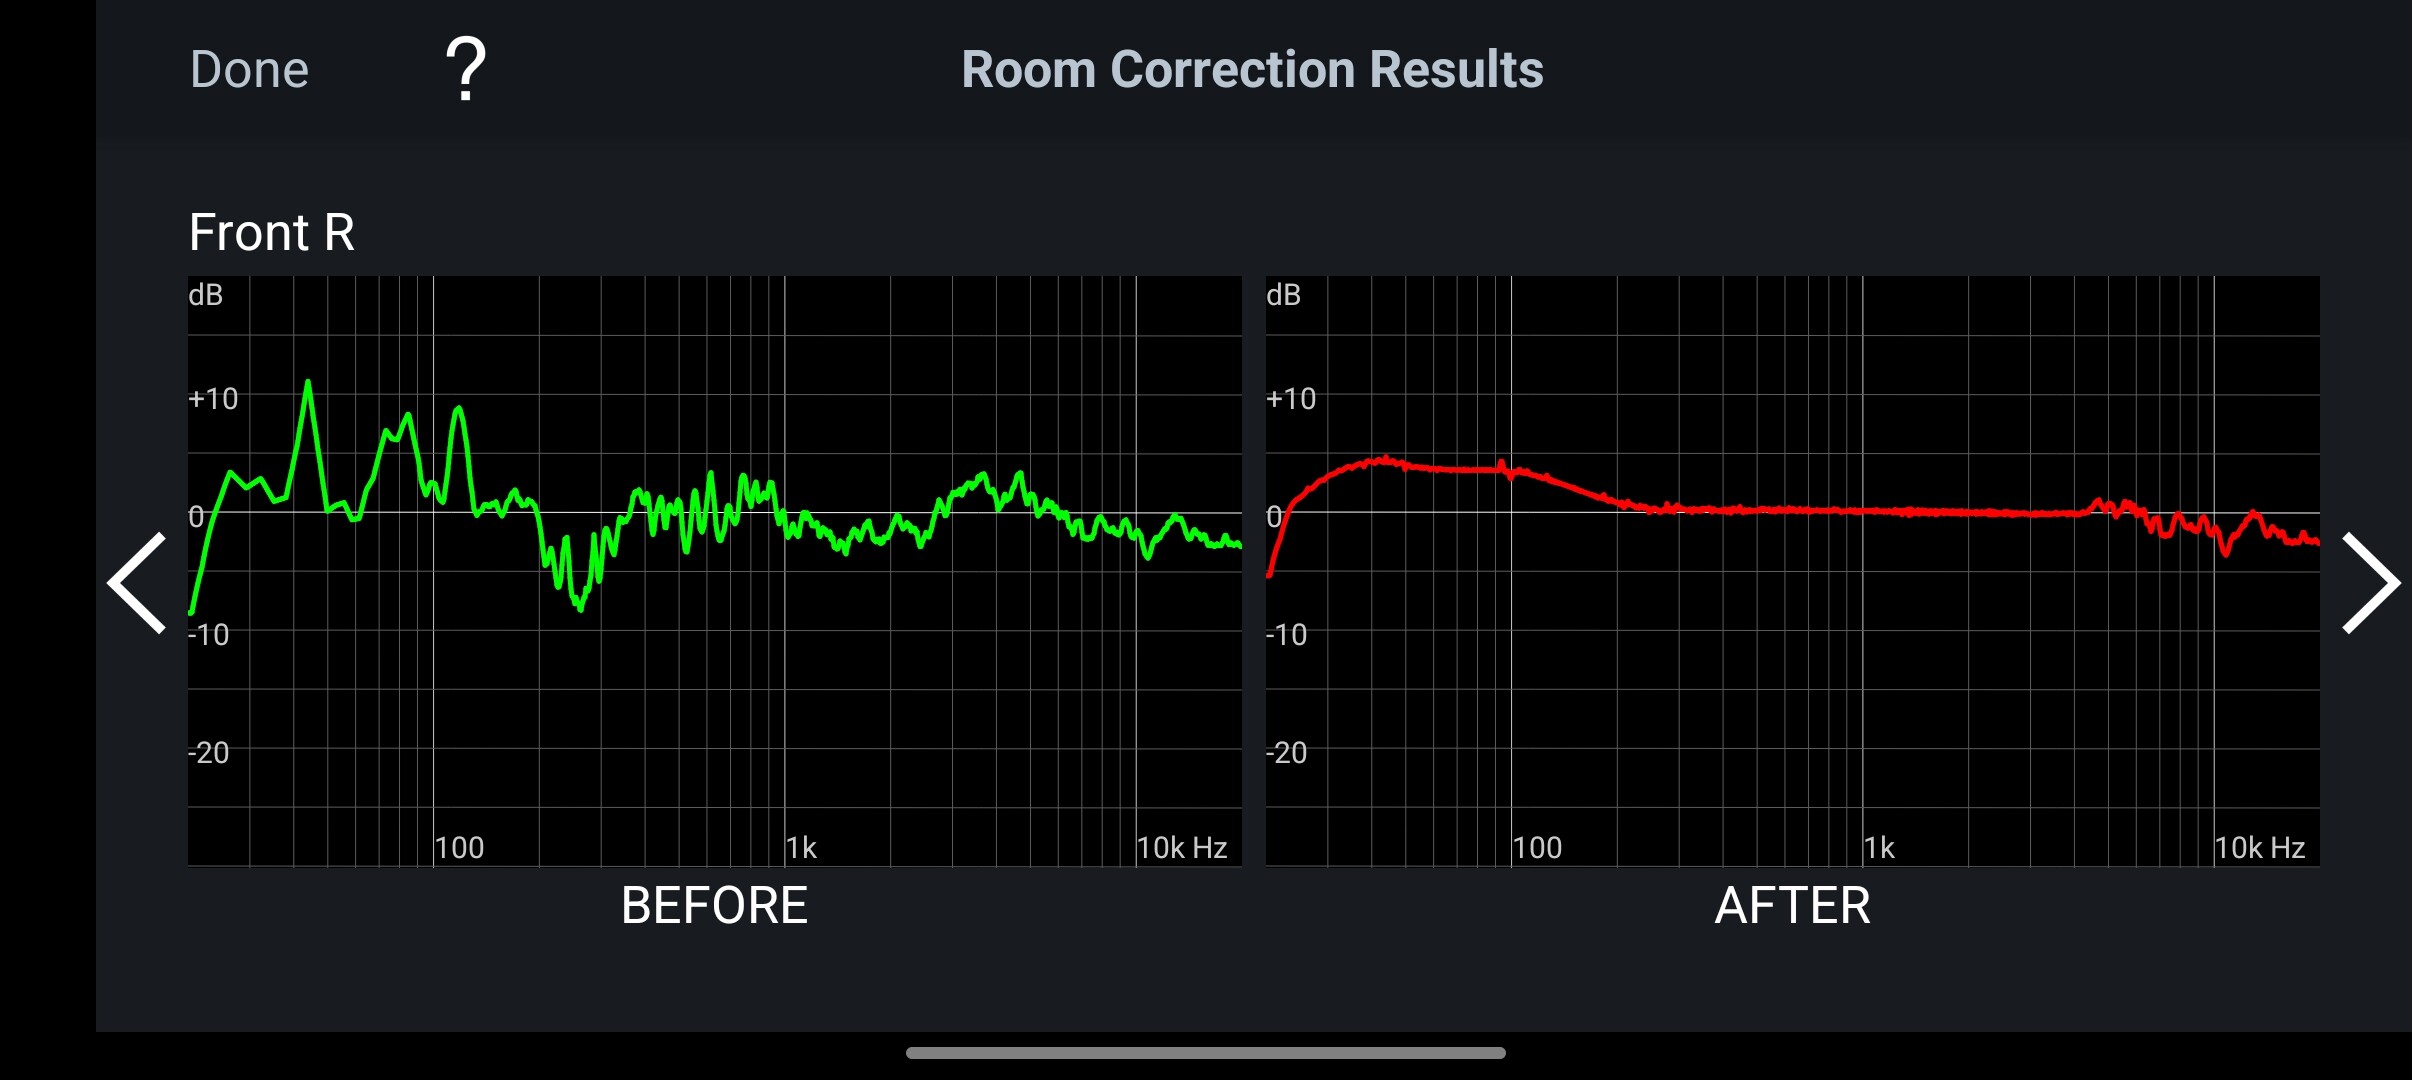
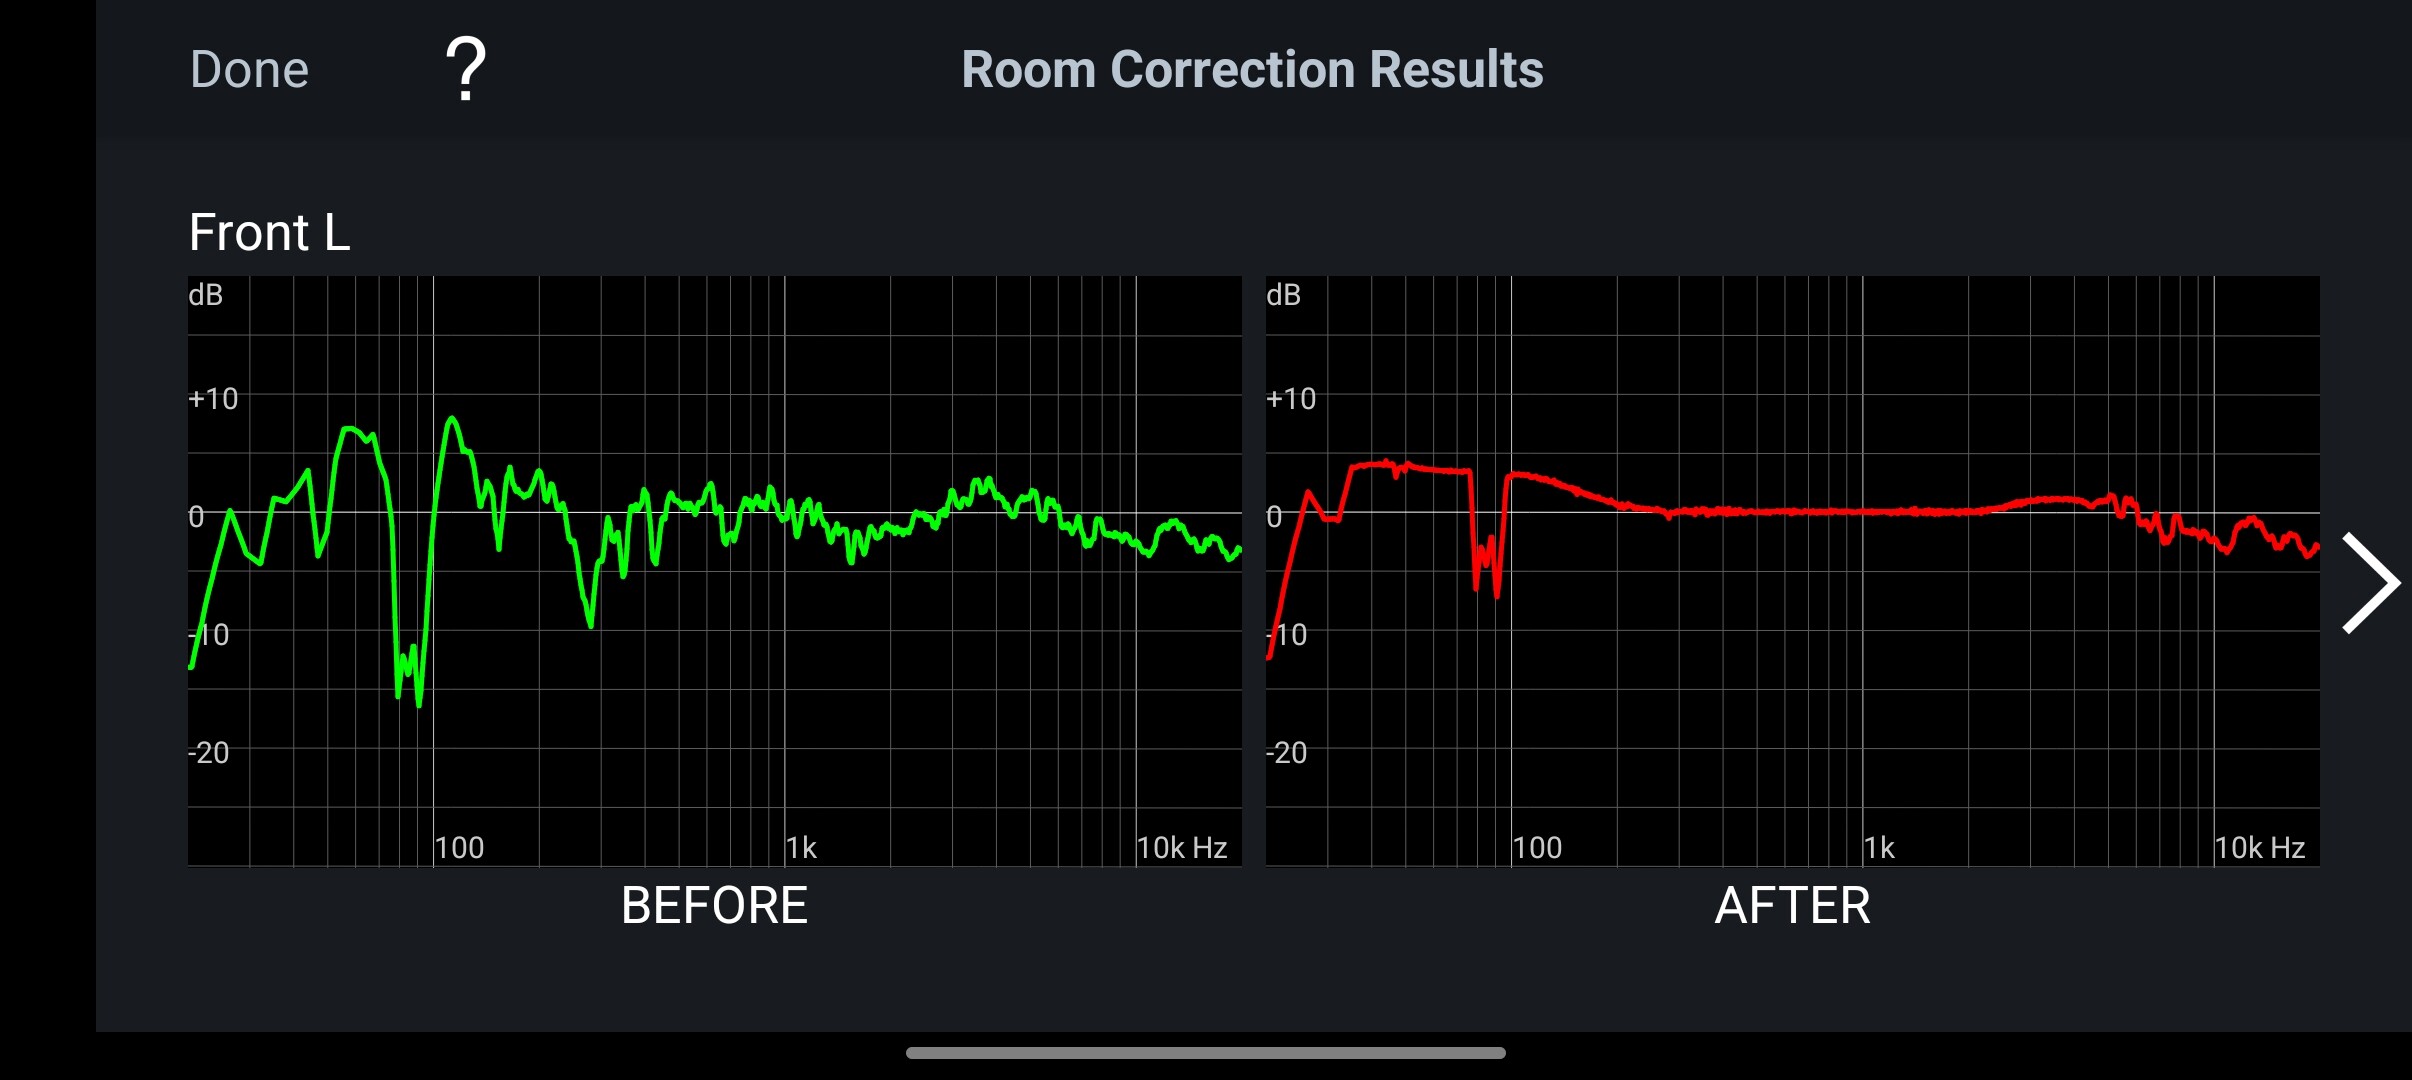
Reran audyssey calibration with the new speakers.
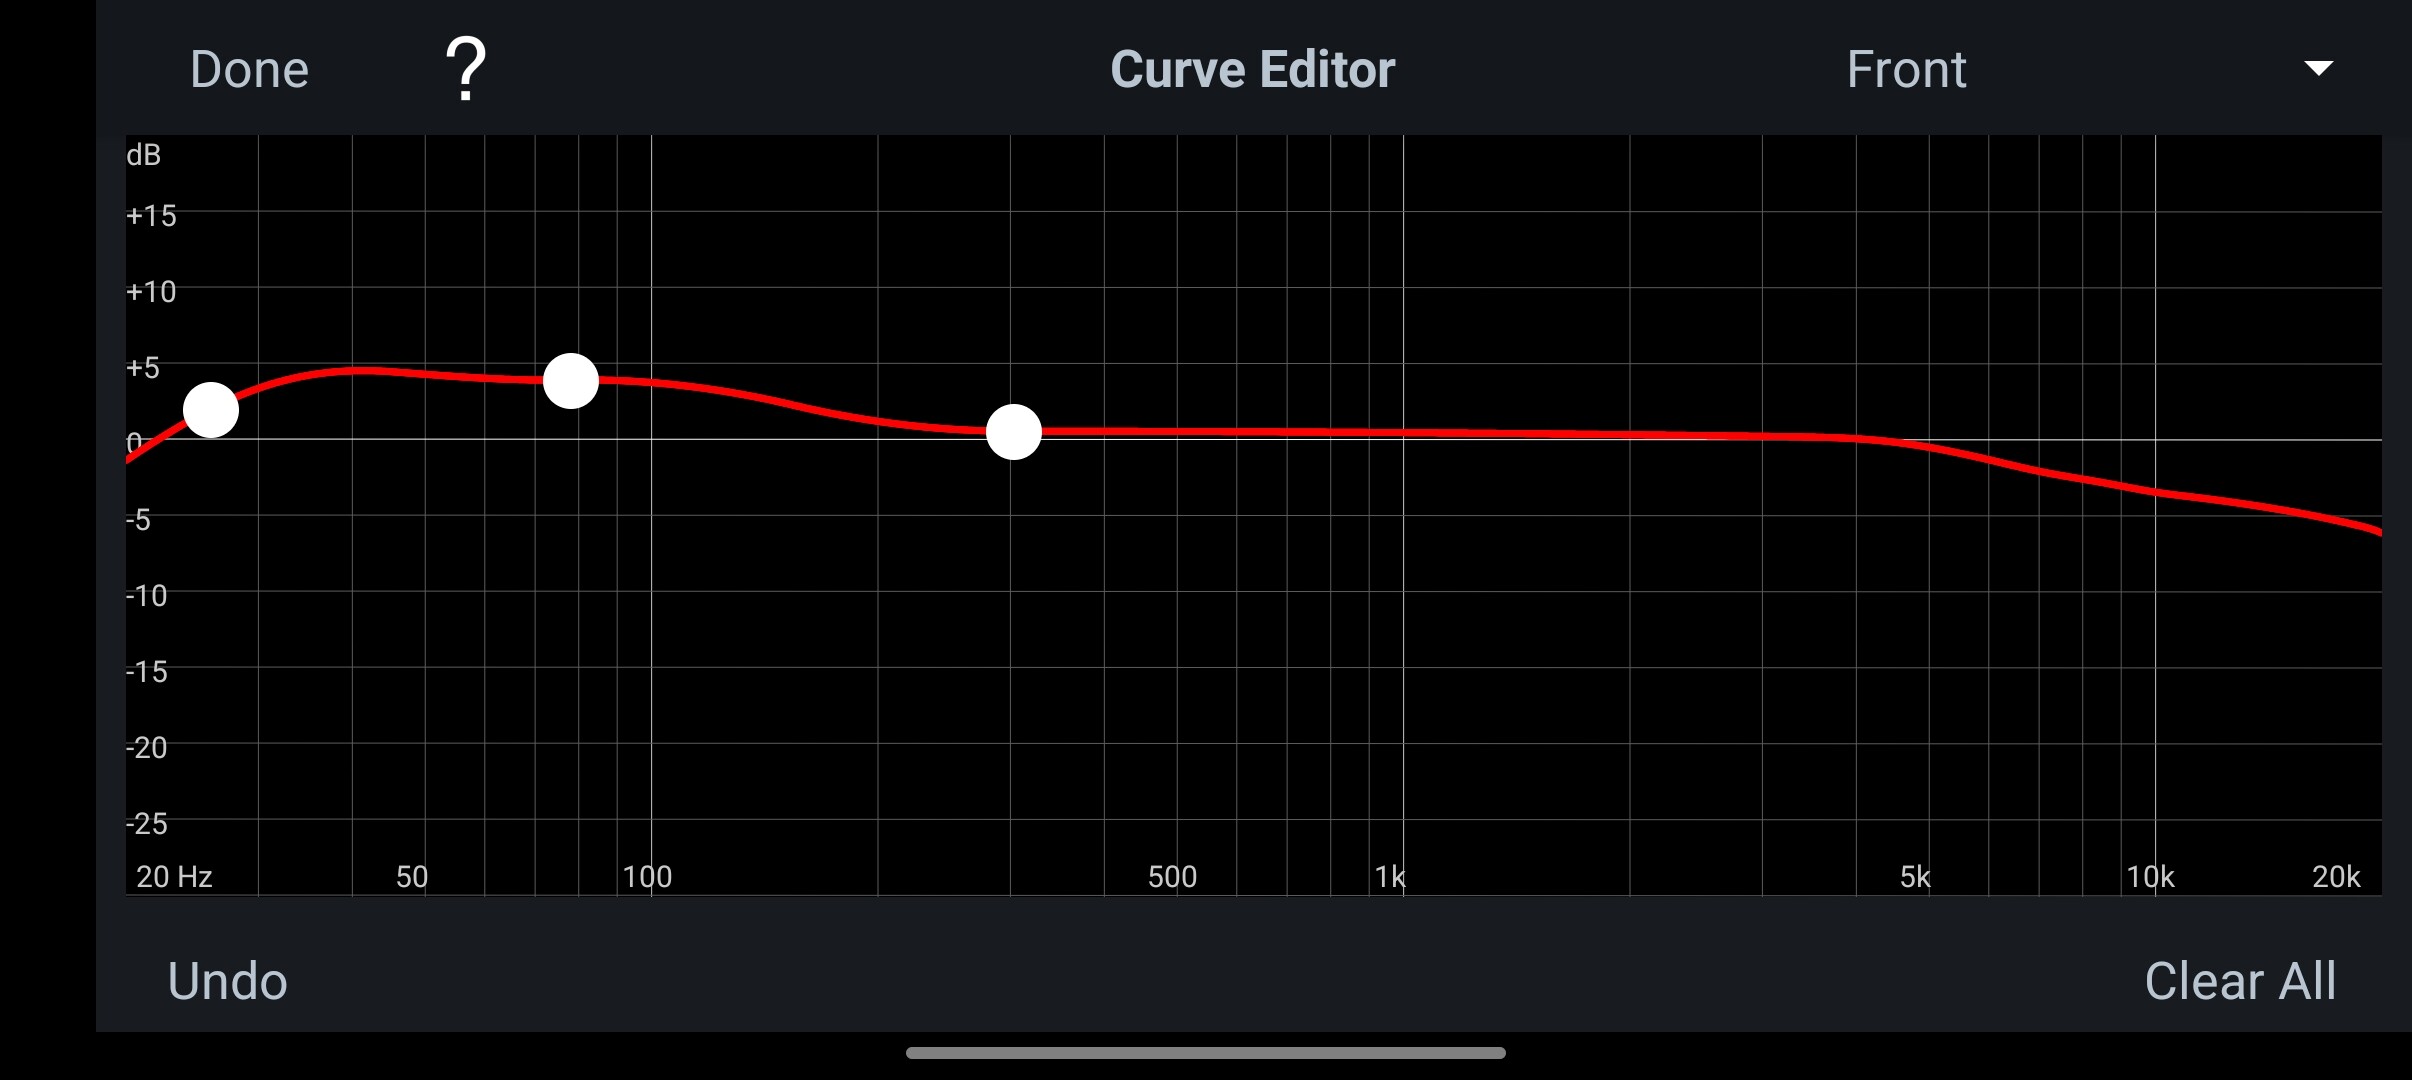
Trying this target curve. Correction is limited to ~6.5khz.
Before and after with the Audyssey app.
The in room response has elevated energy in the 3-5khz range, due to wide directivity of the tweeter without wg.
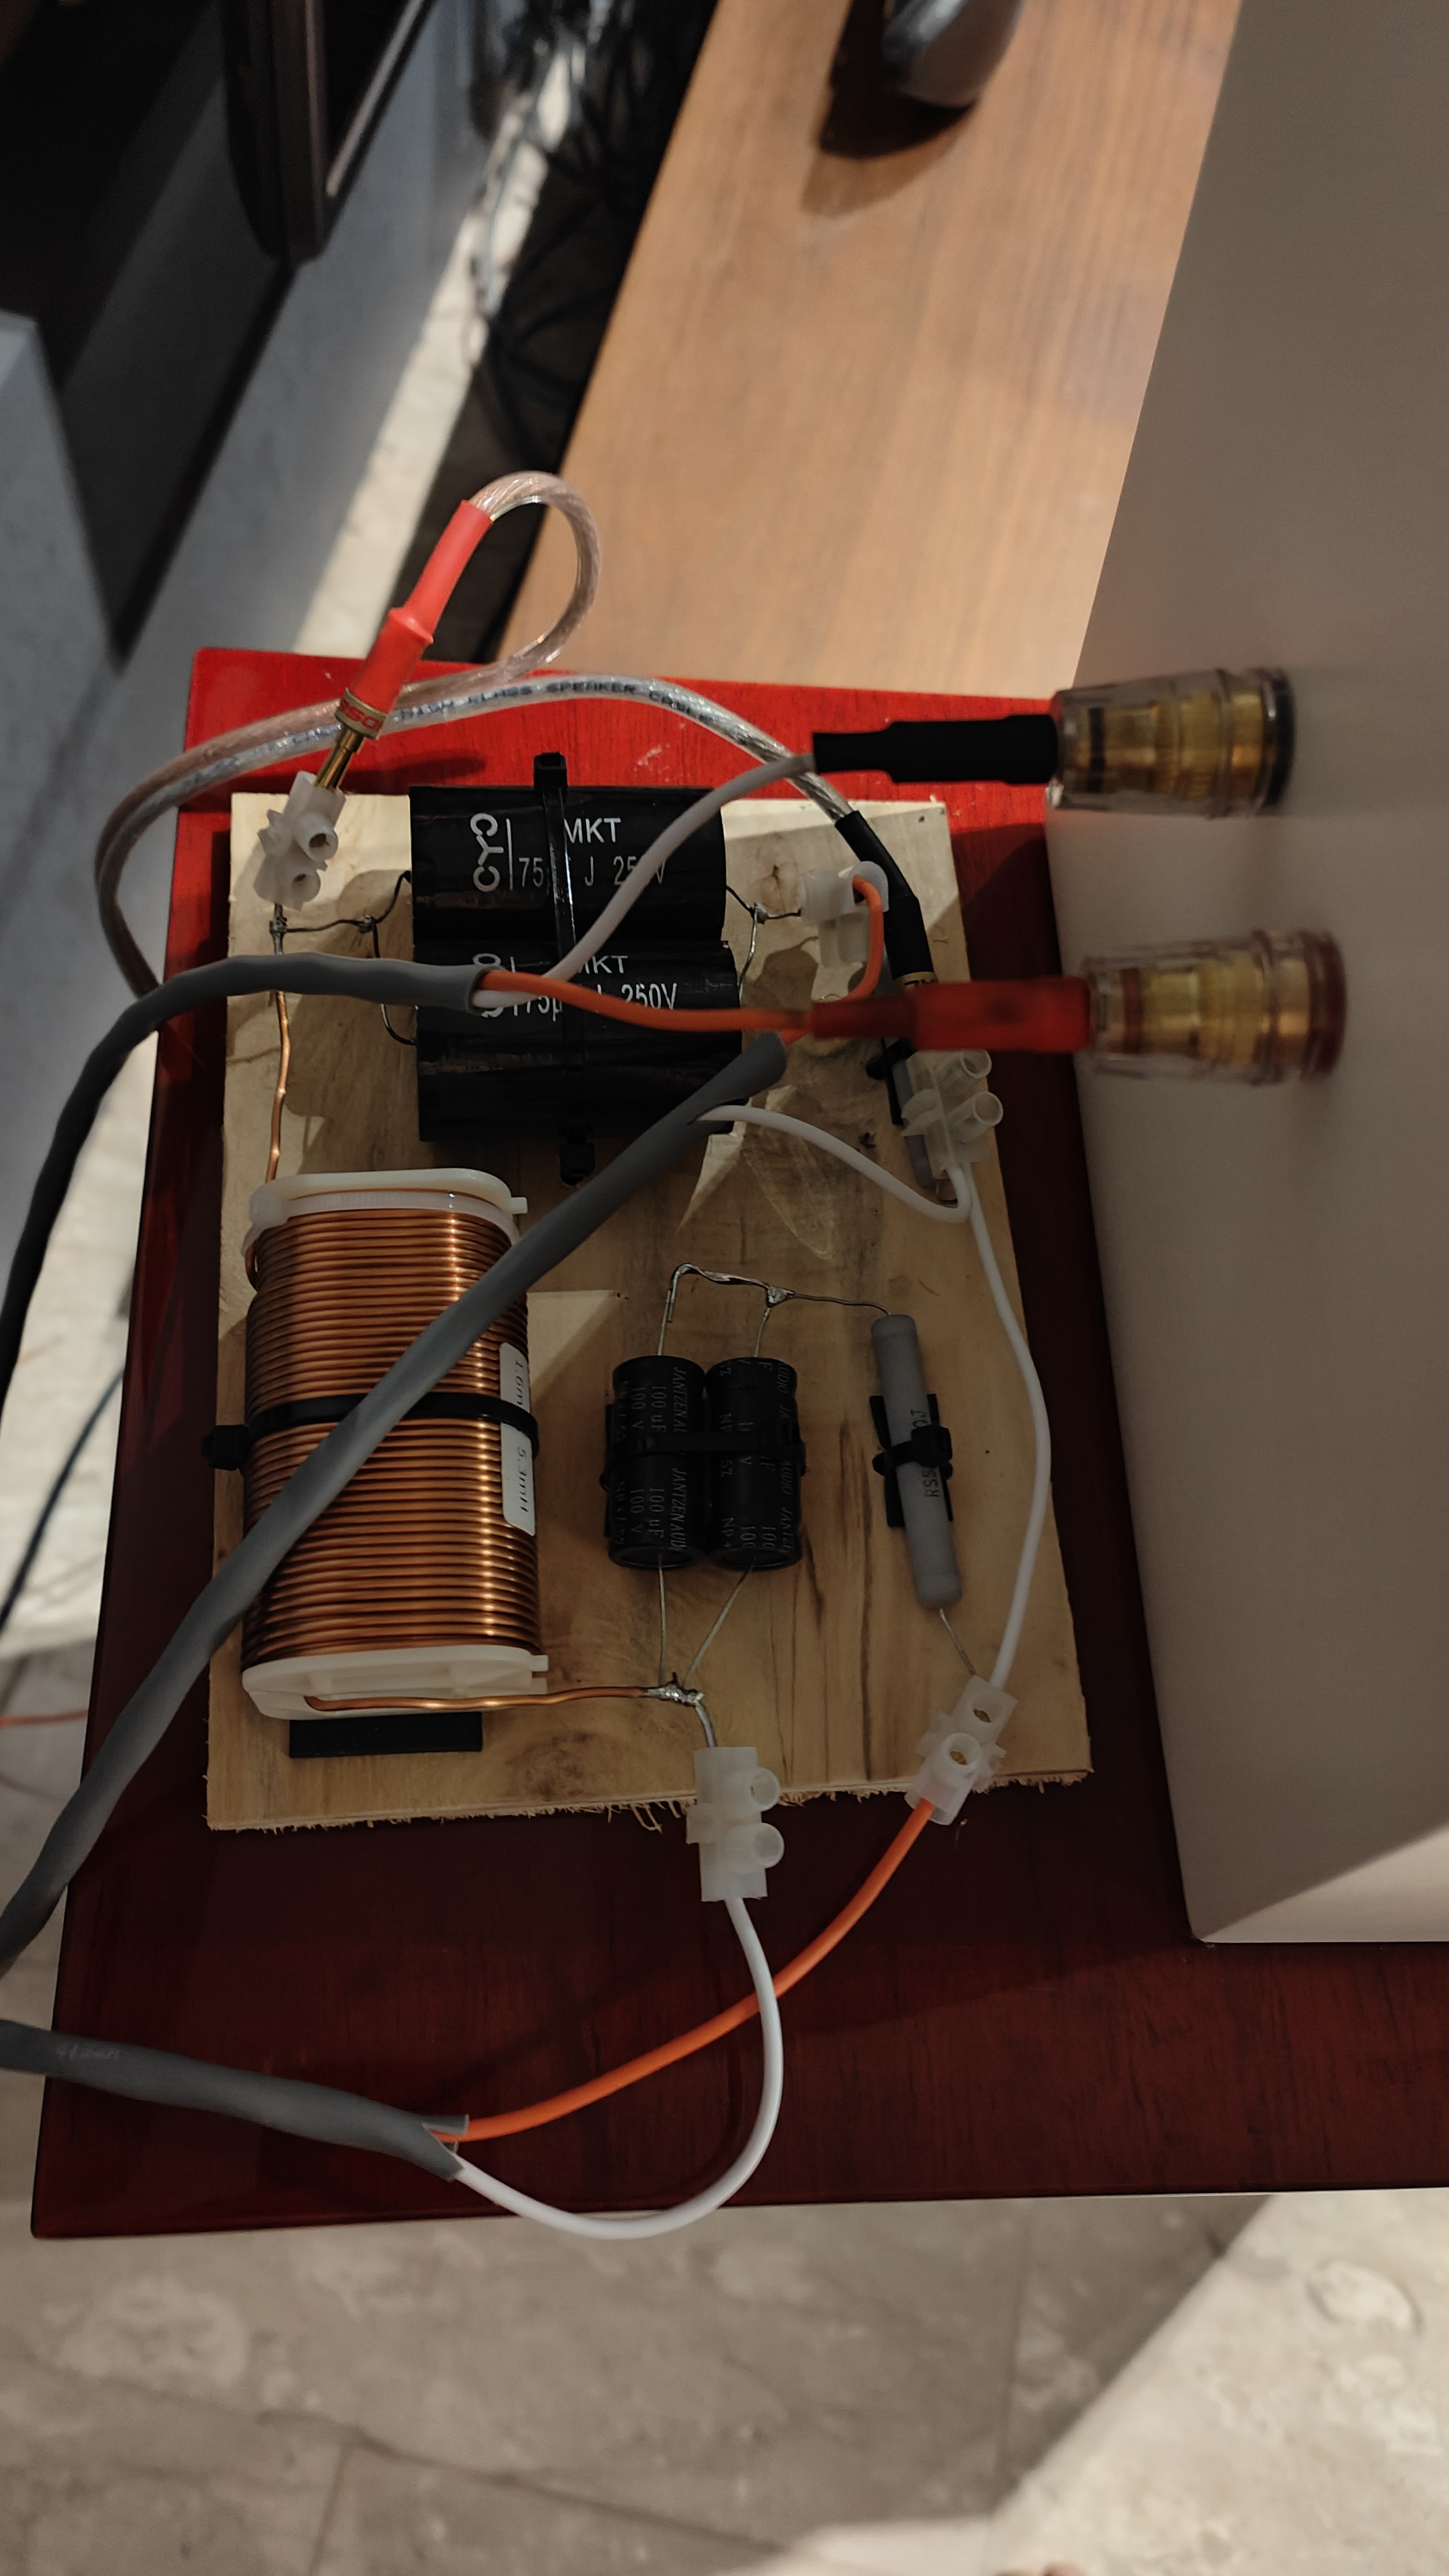
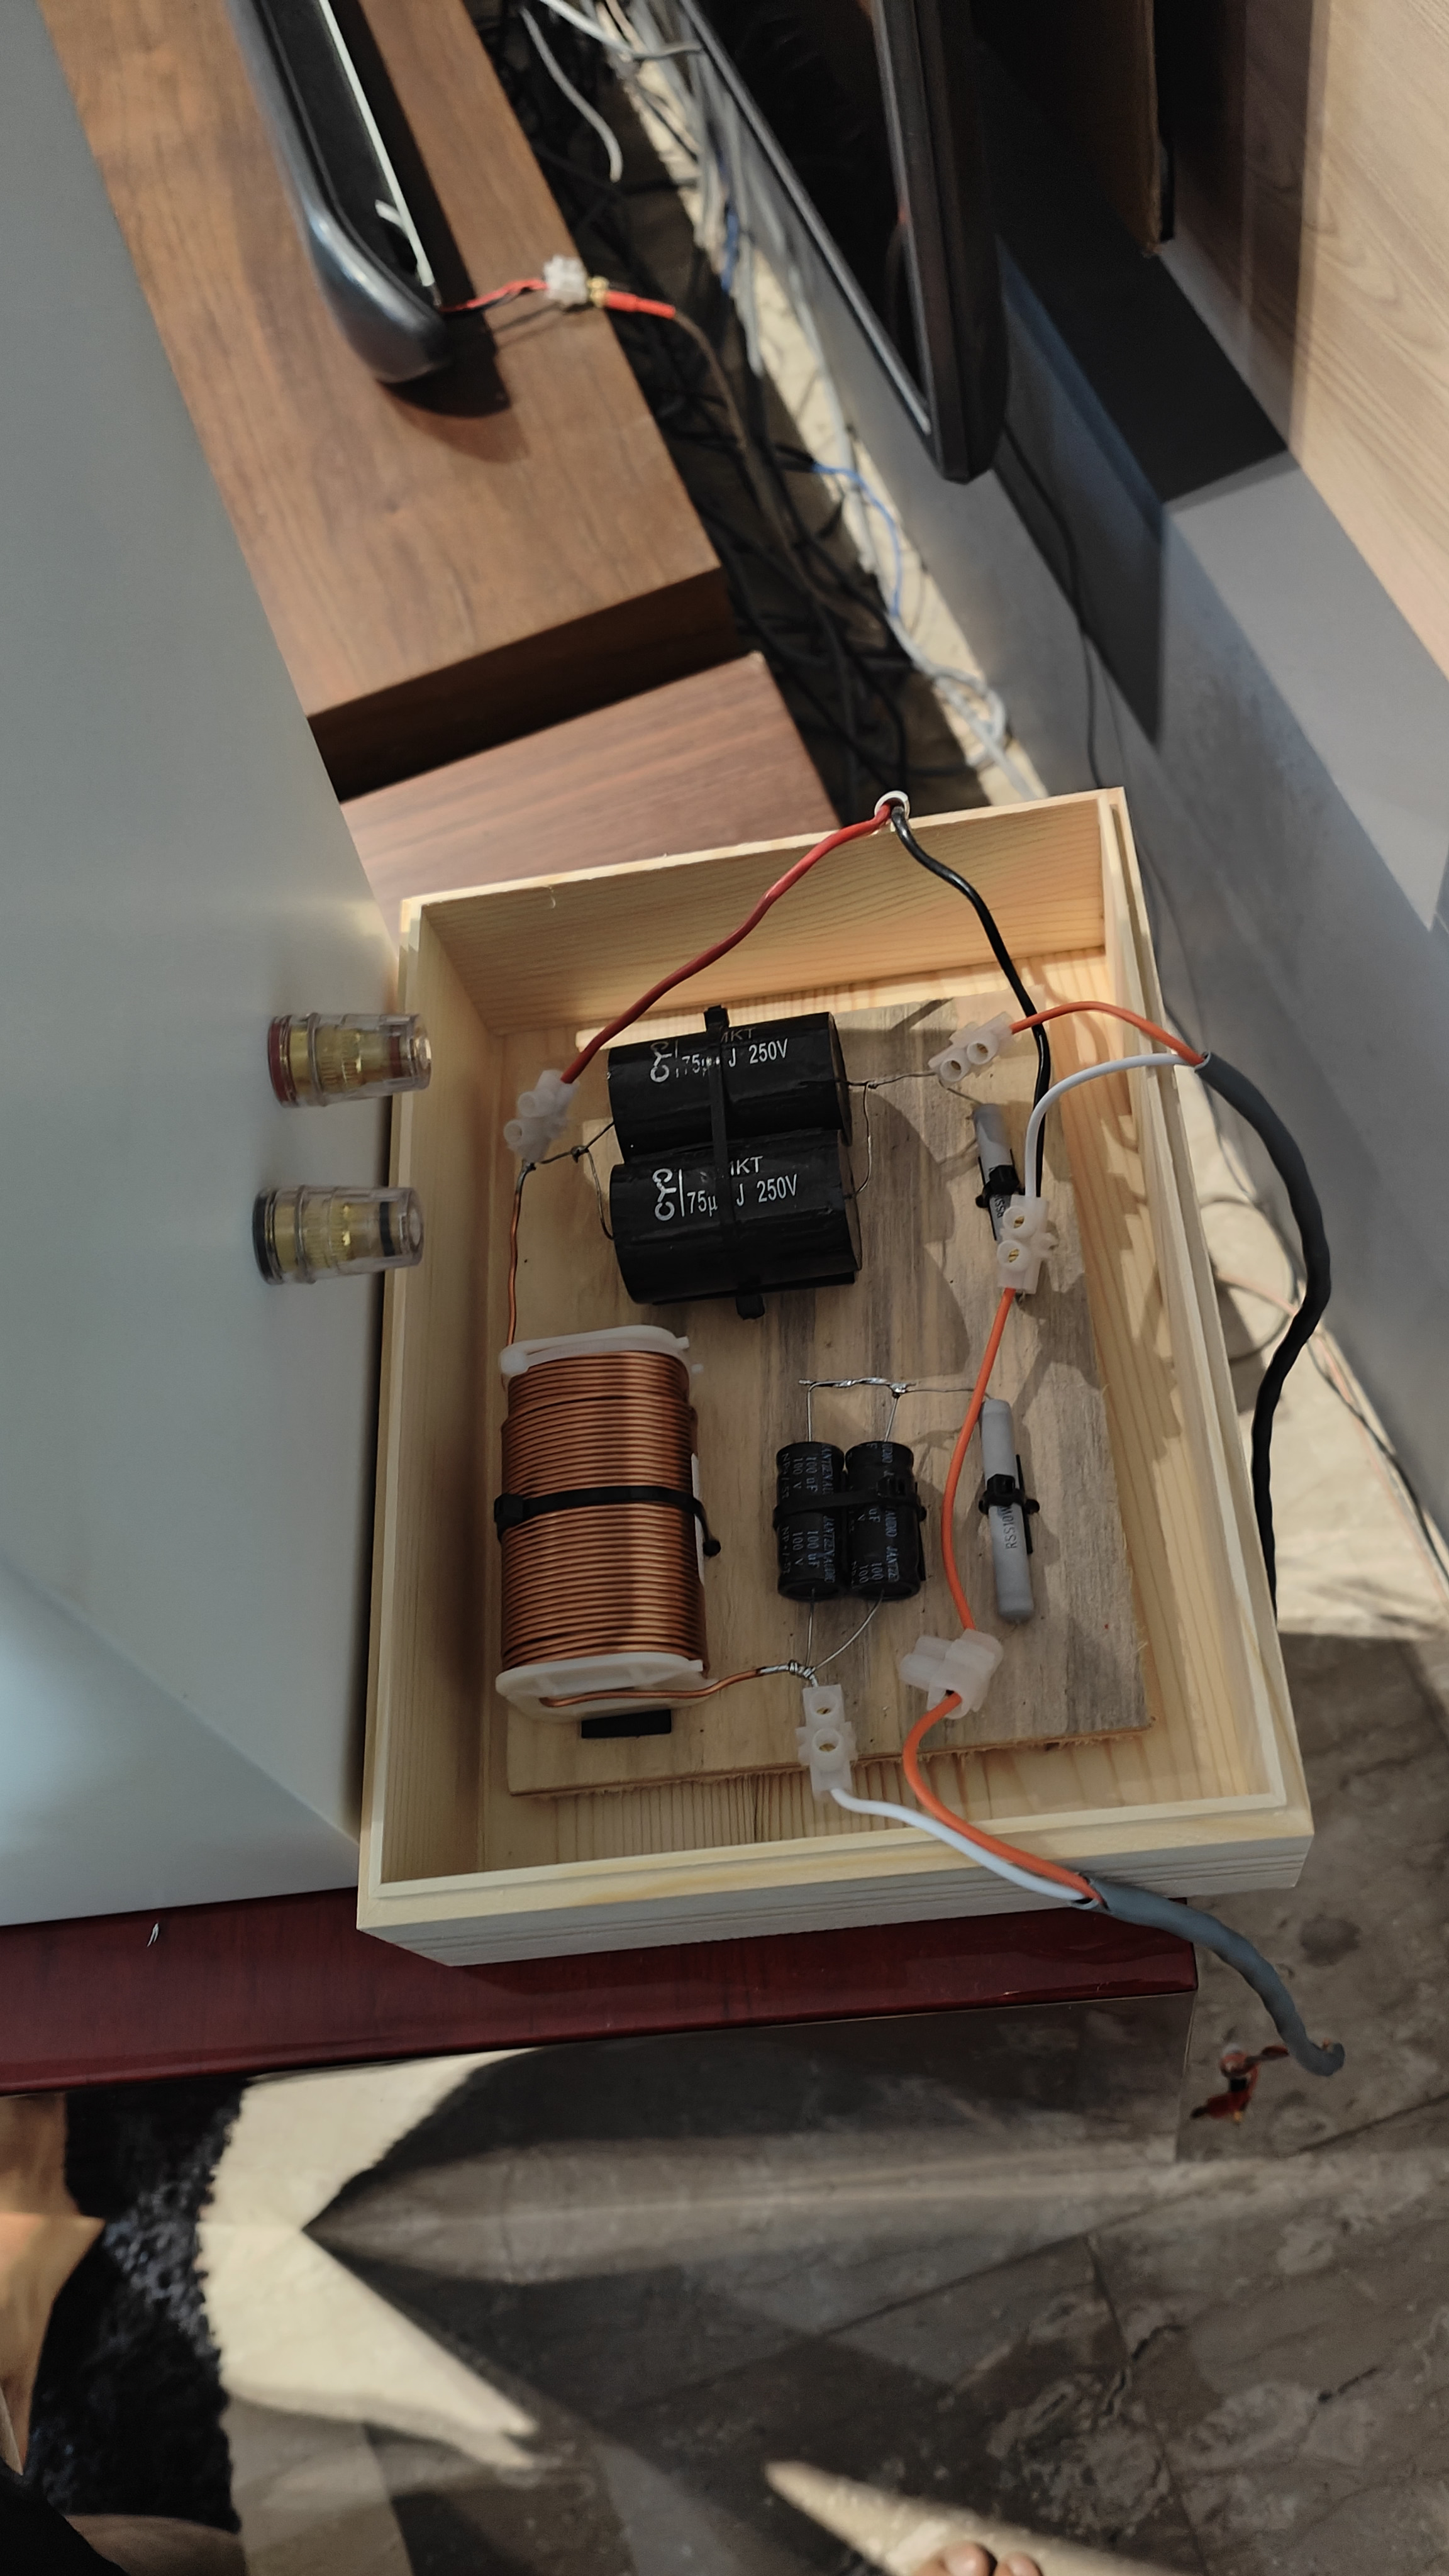
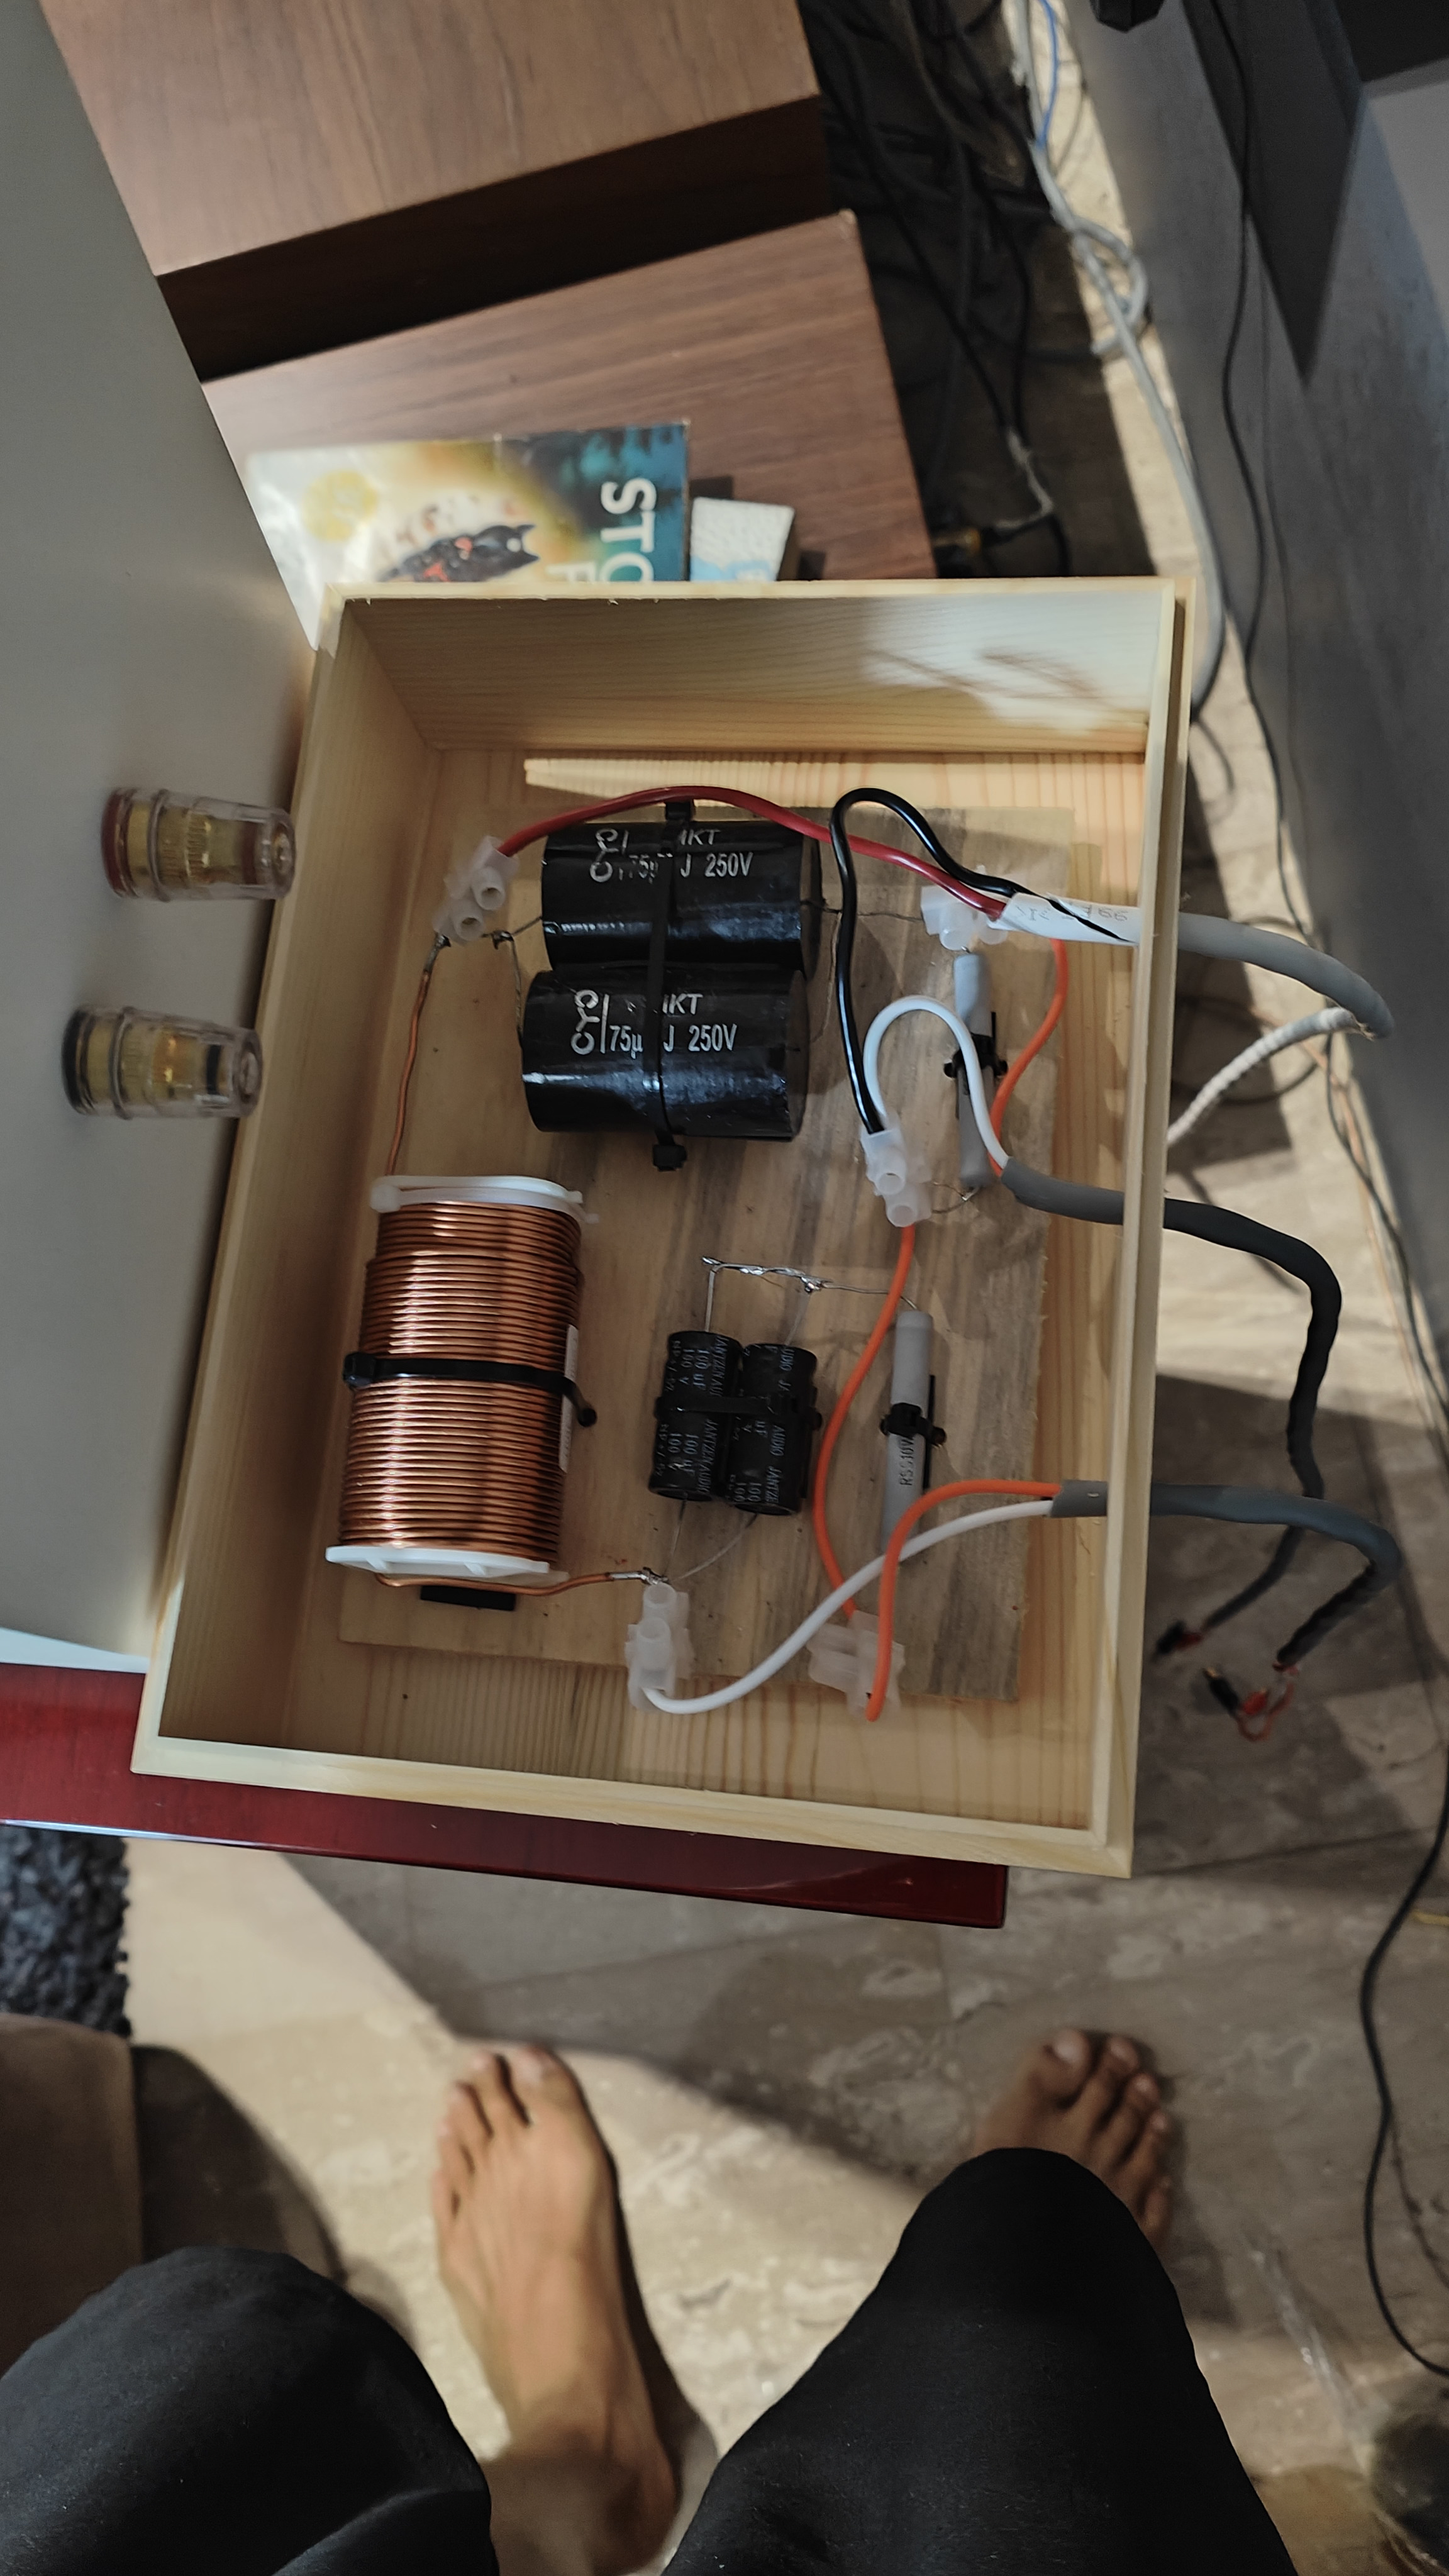
With this being a living room speaker, having the crossover board exposed is not practical.
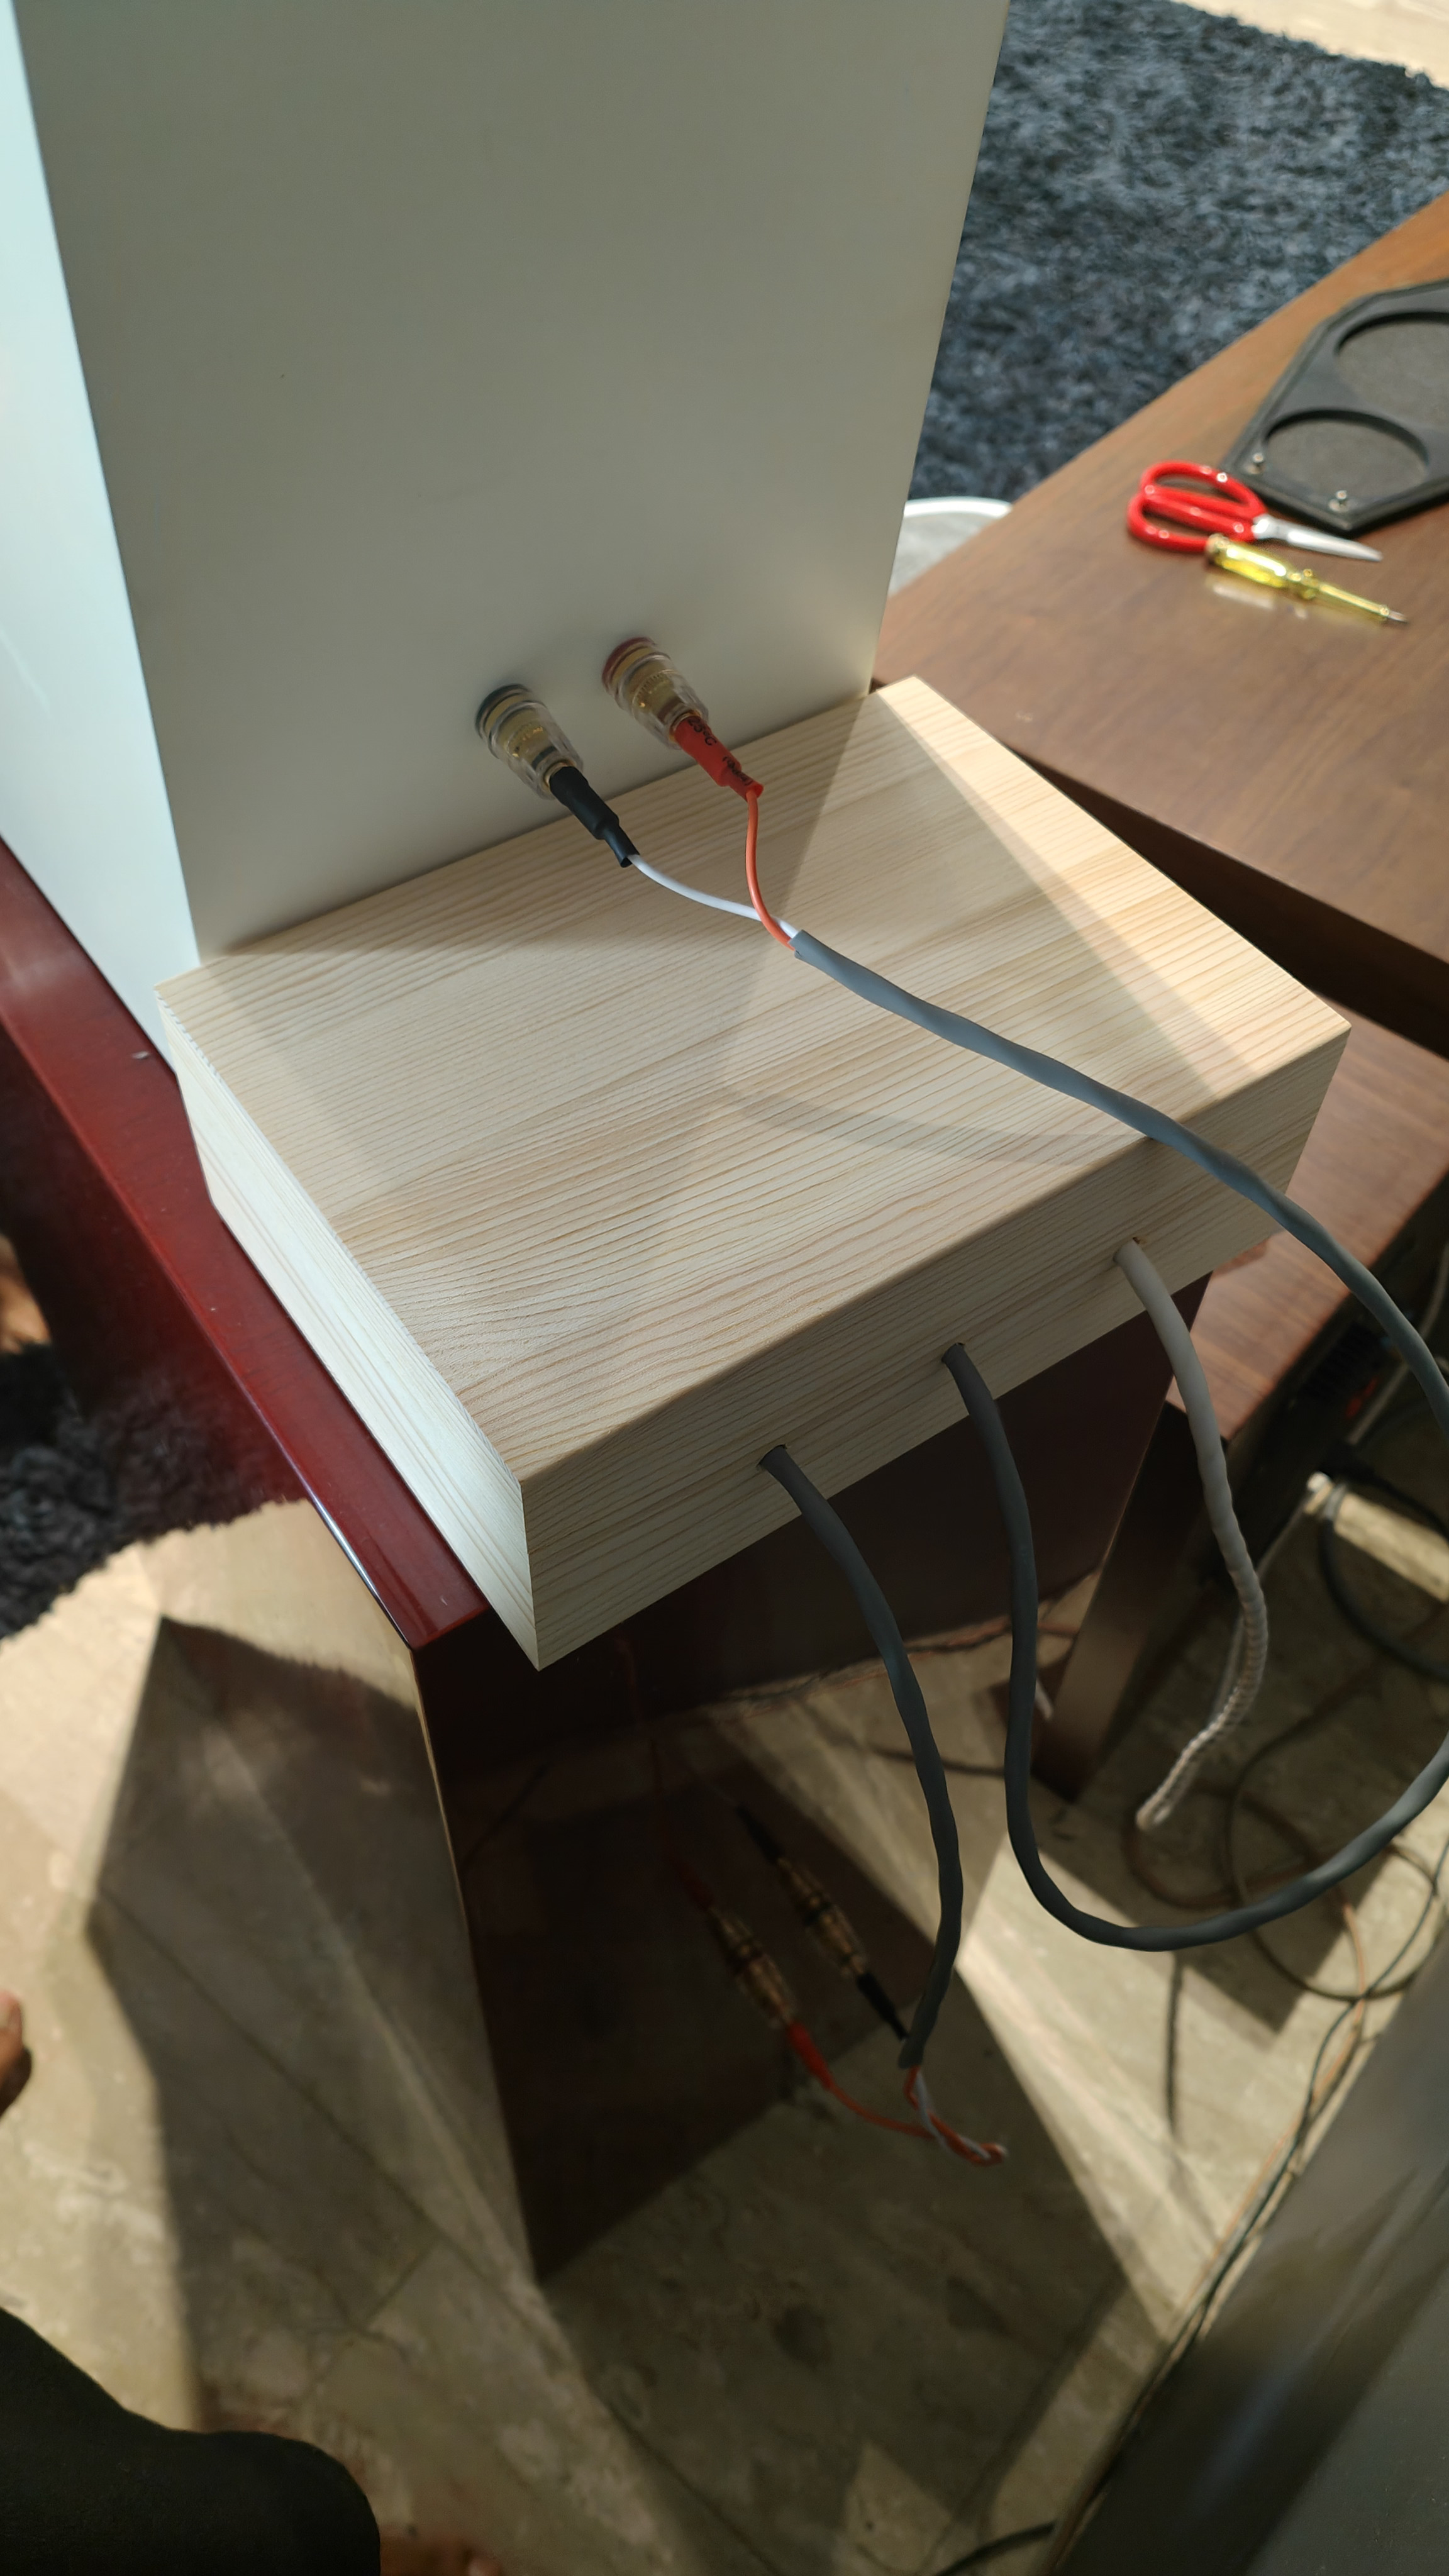
Got a box for the crossover.
Fit check
Wires thru the walls instead of additional lossy plug socket connection.
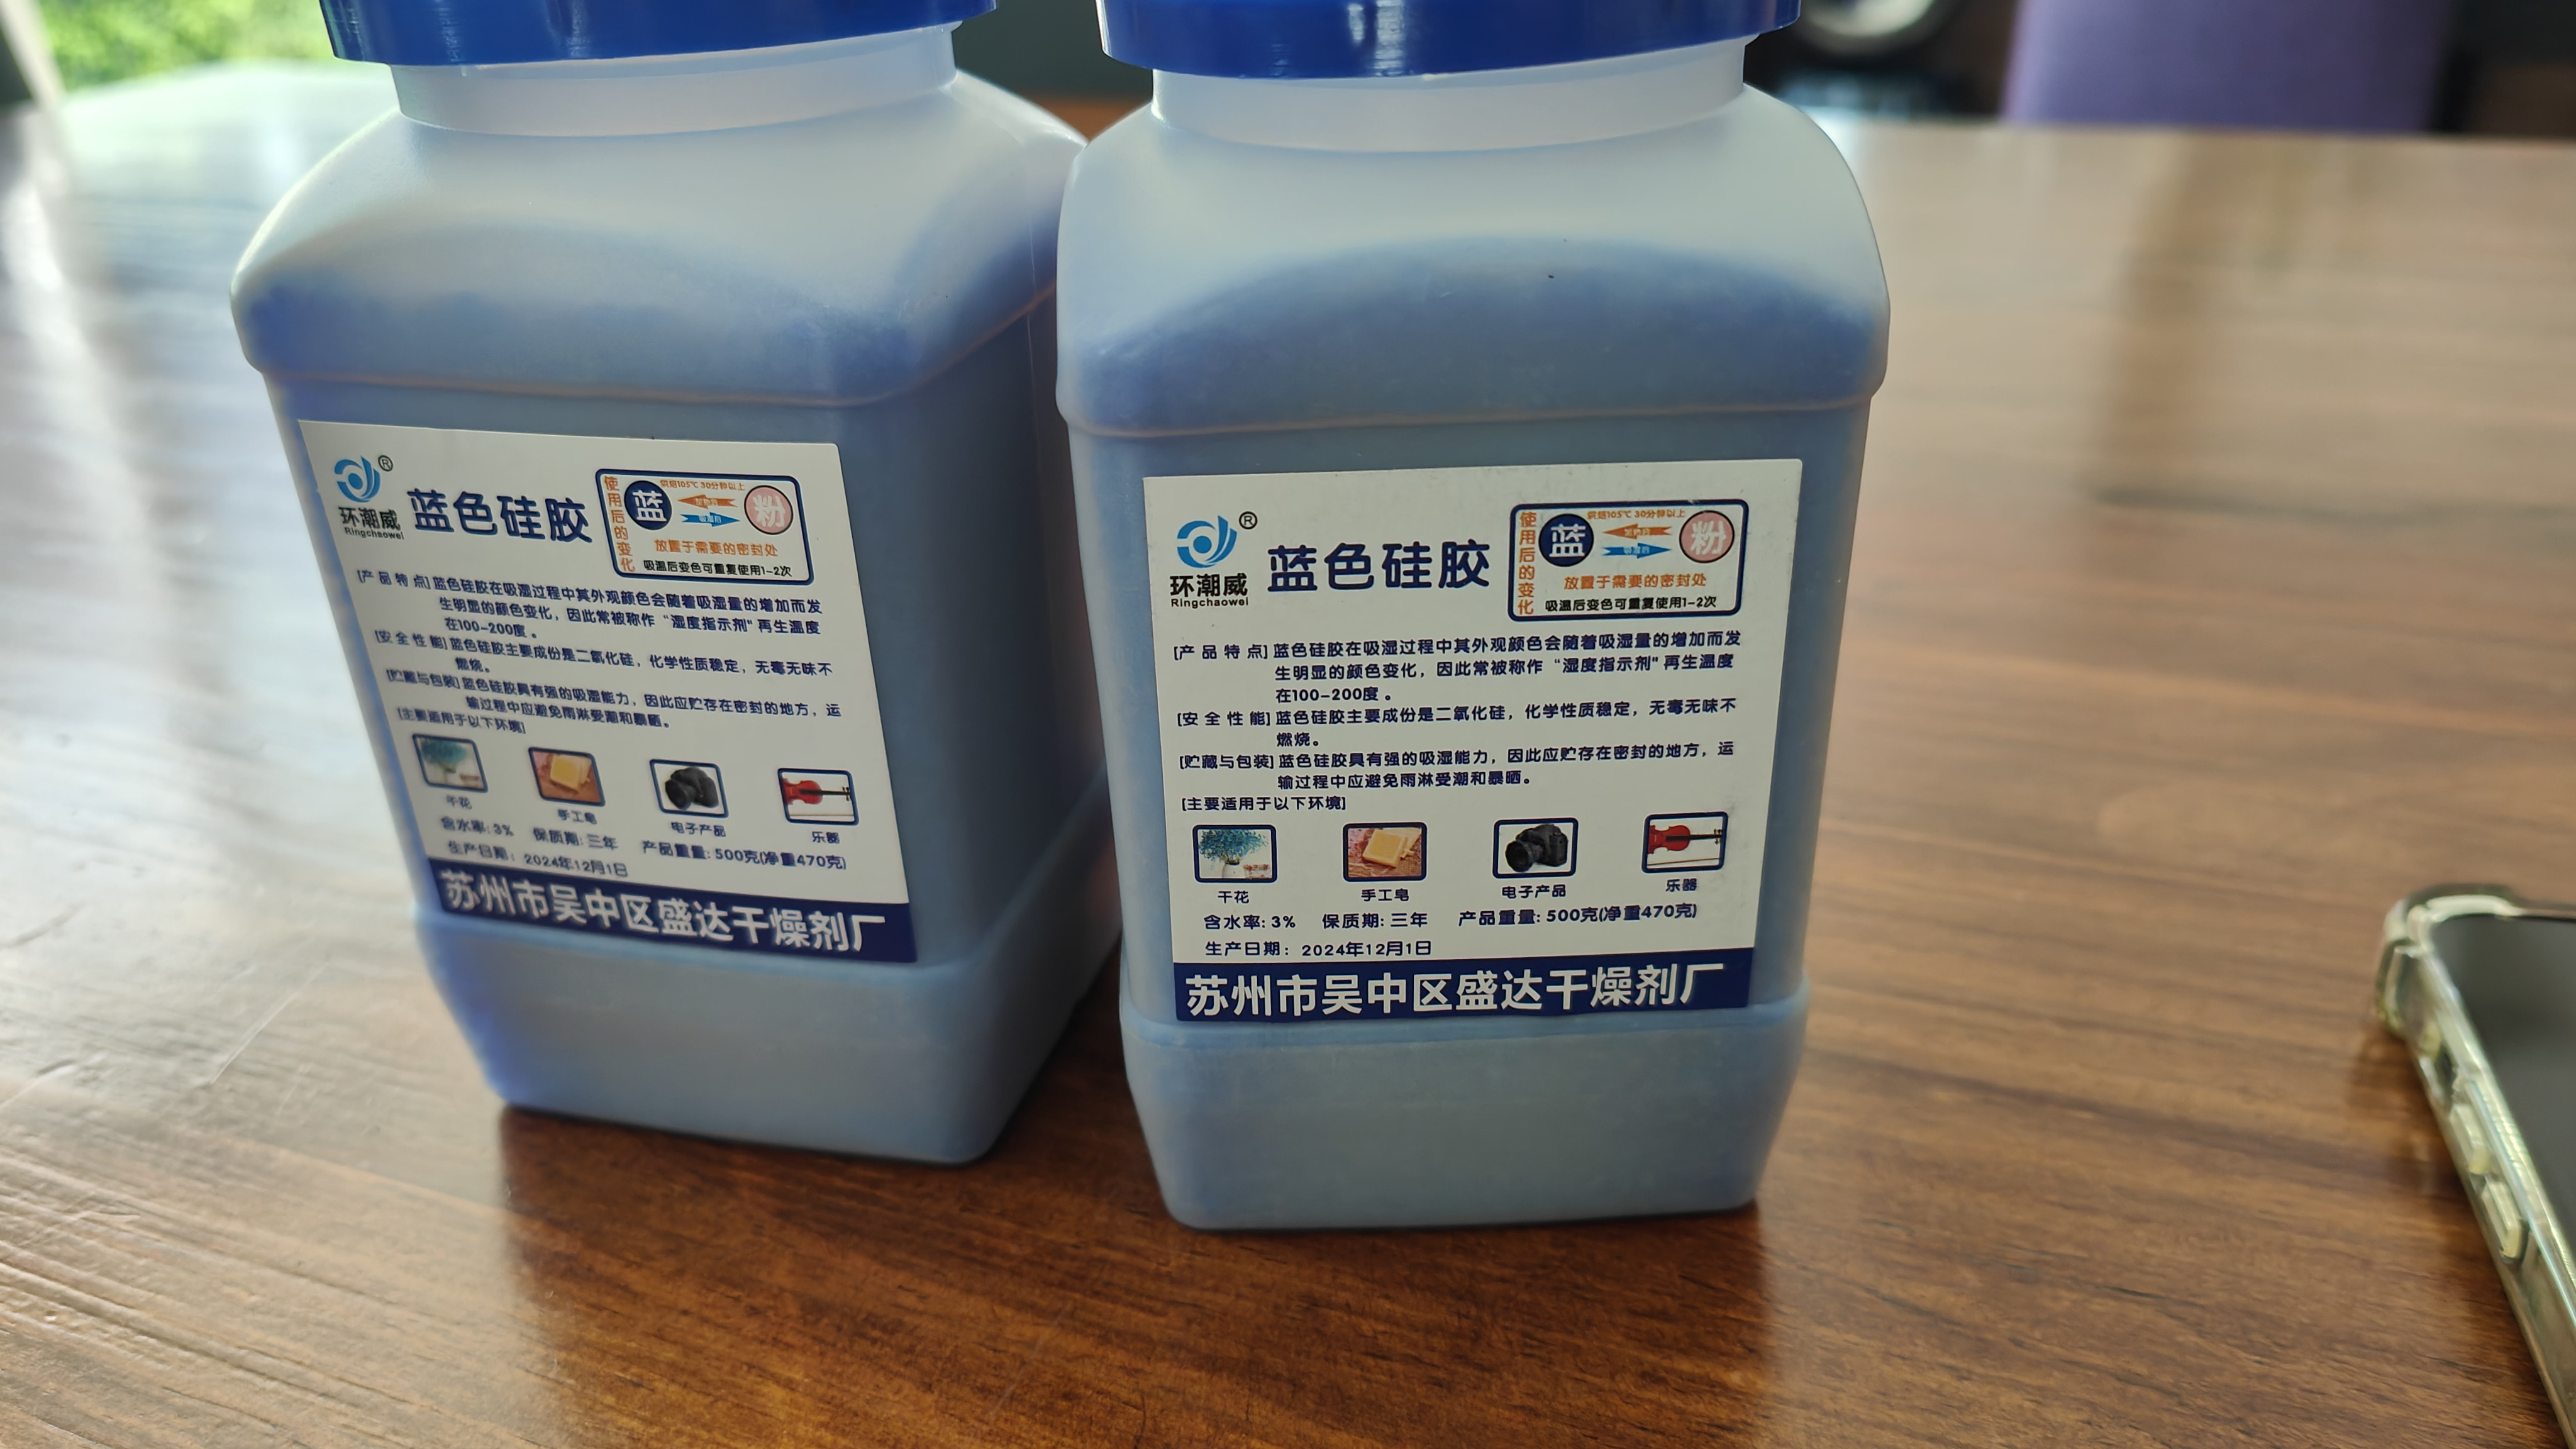
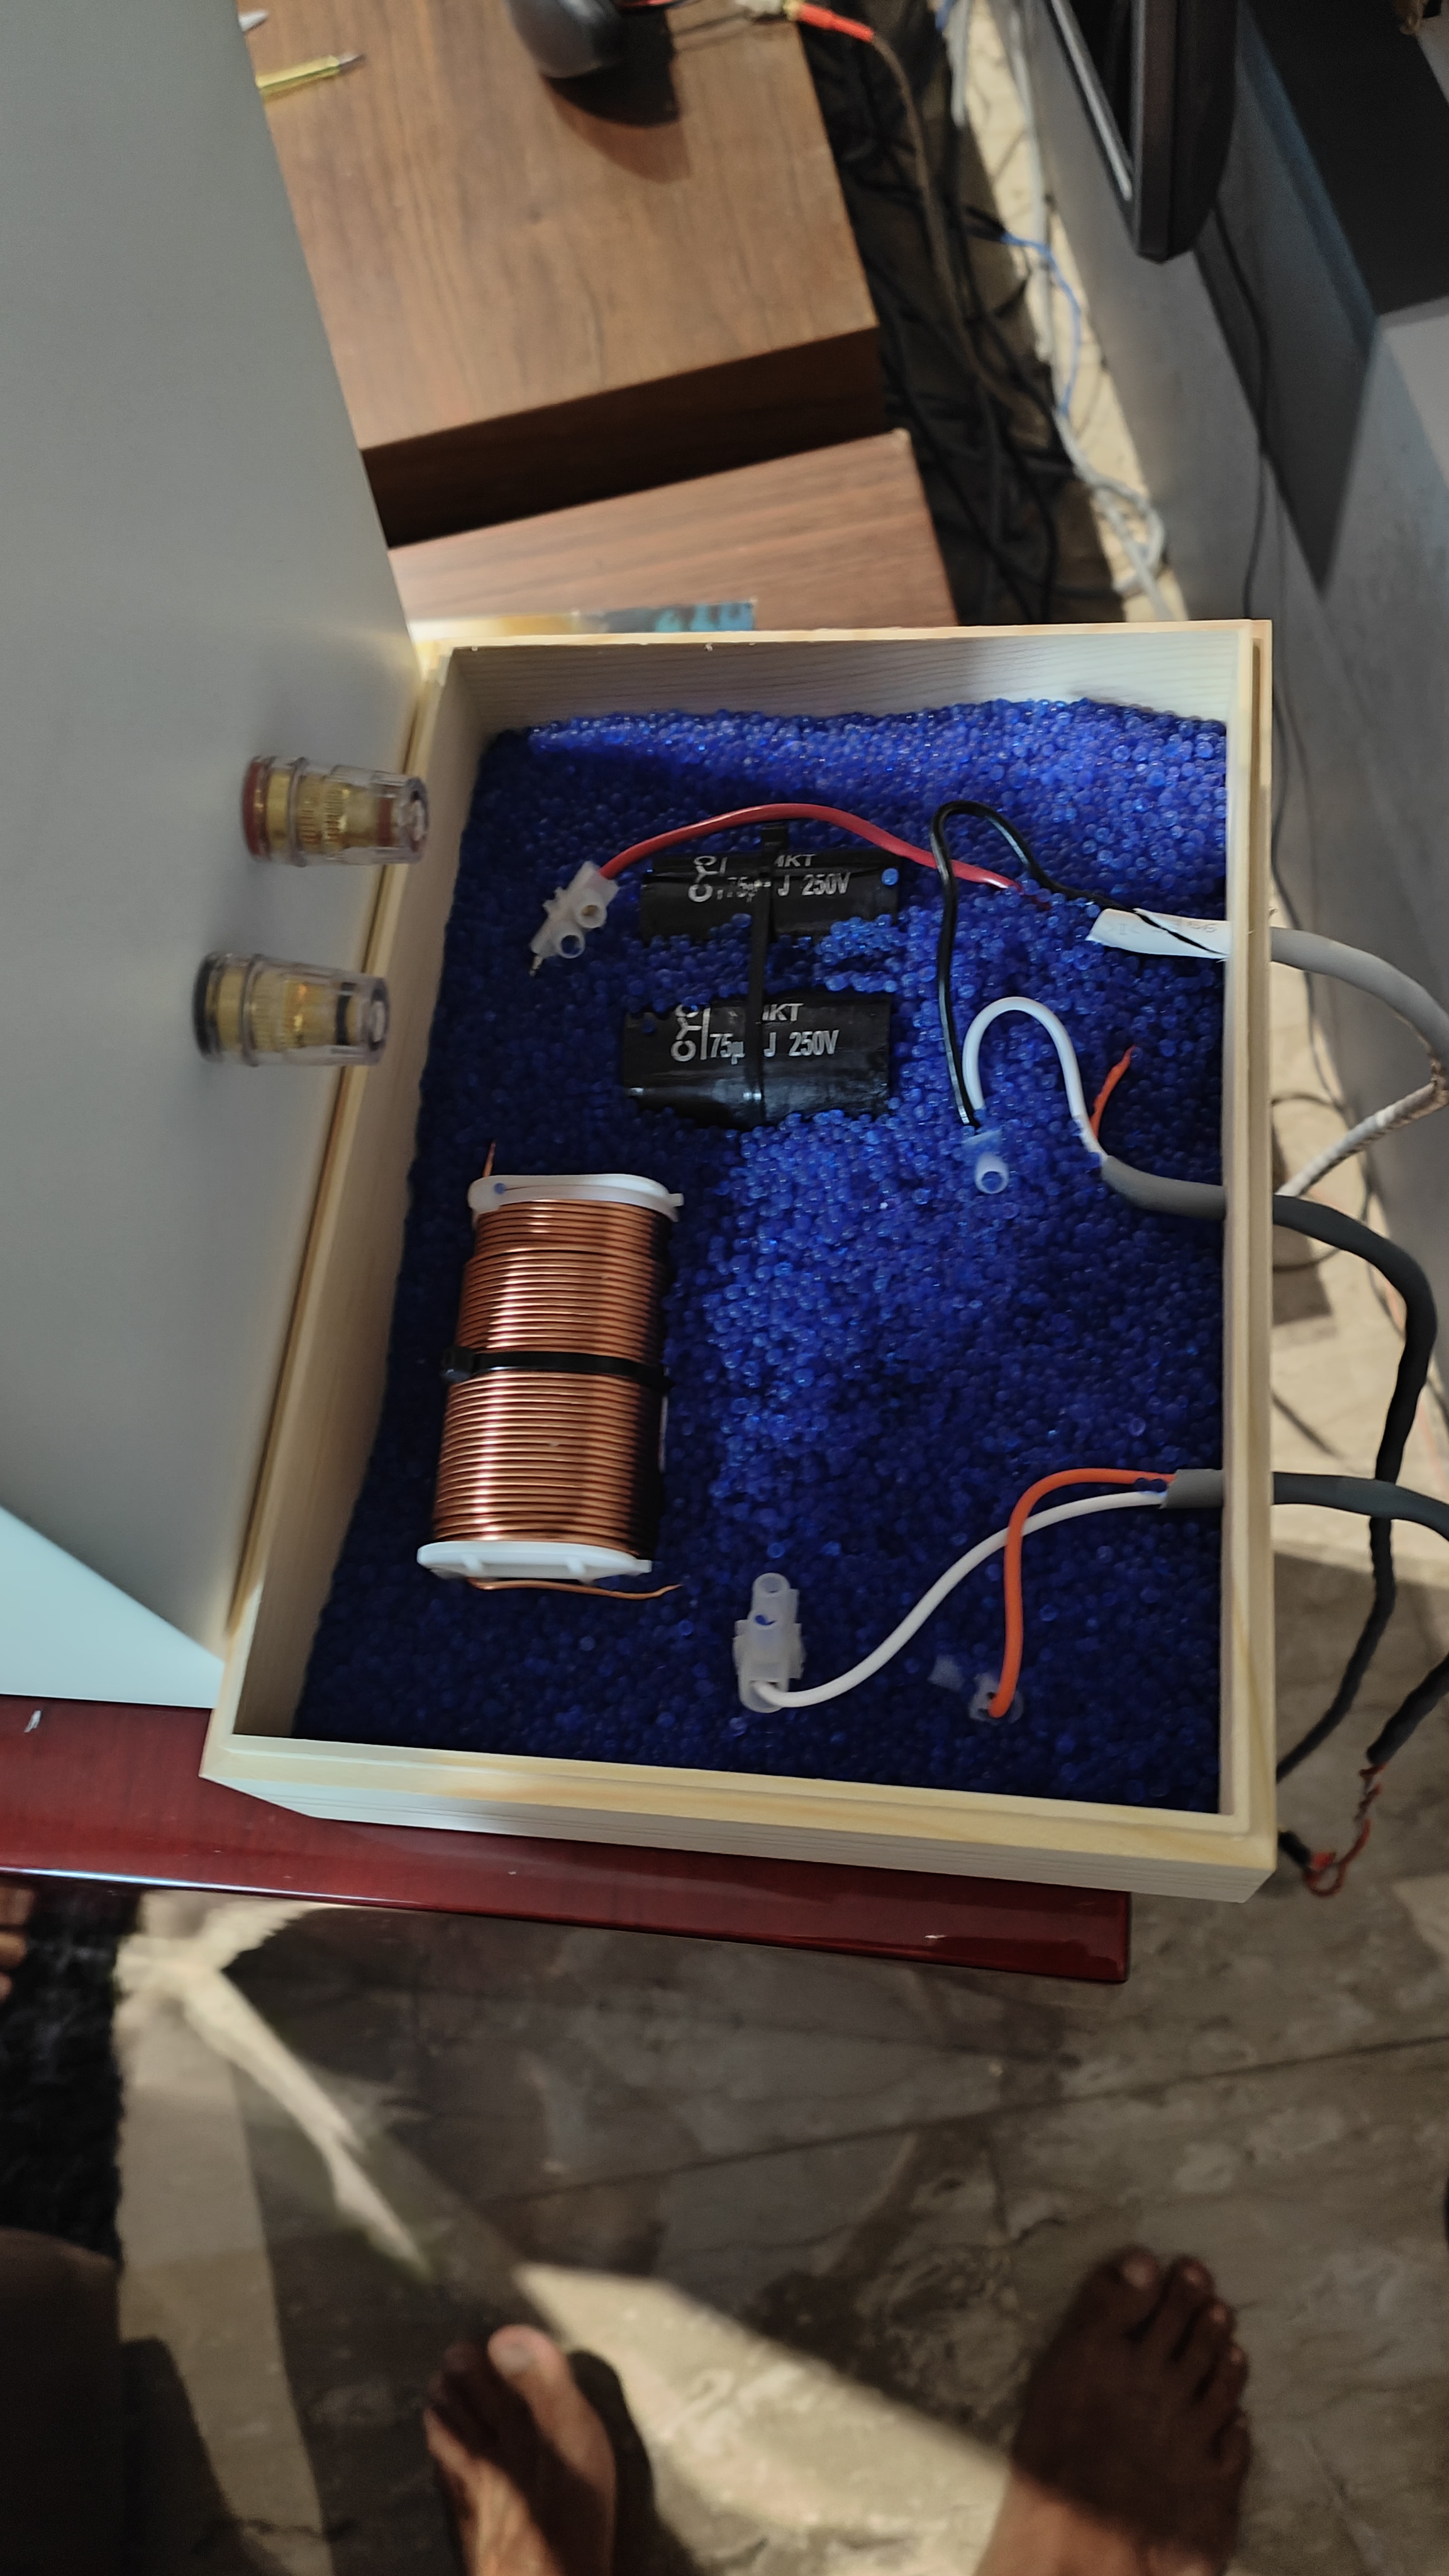
Wanted to try potting the crossover, but casting solid in epoxy seems impractical and overkill. I like particle impact damping, but steel shots are electrically conductive. Enter silica gel.
Worth a laugh, if nothing else.
Done and closed up
1 Like
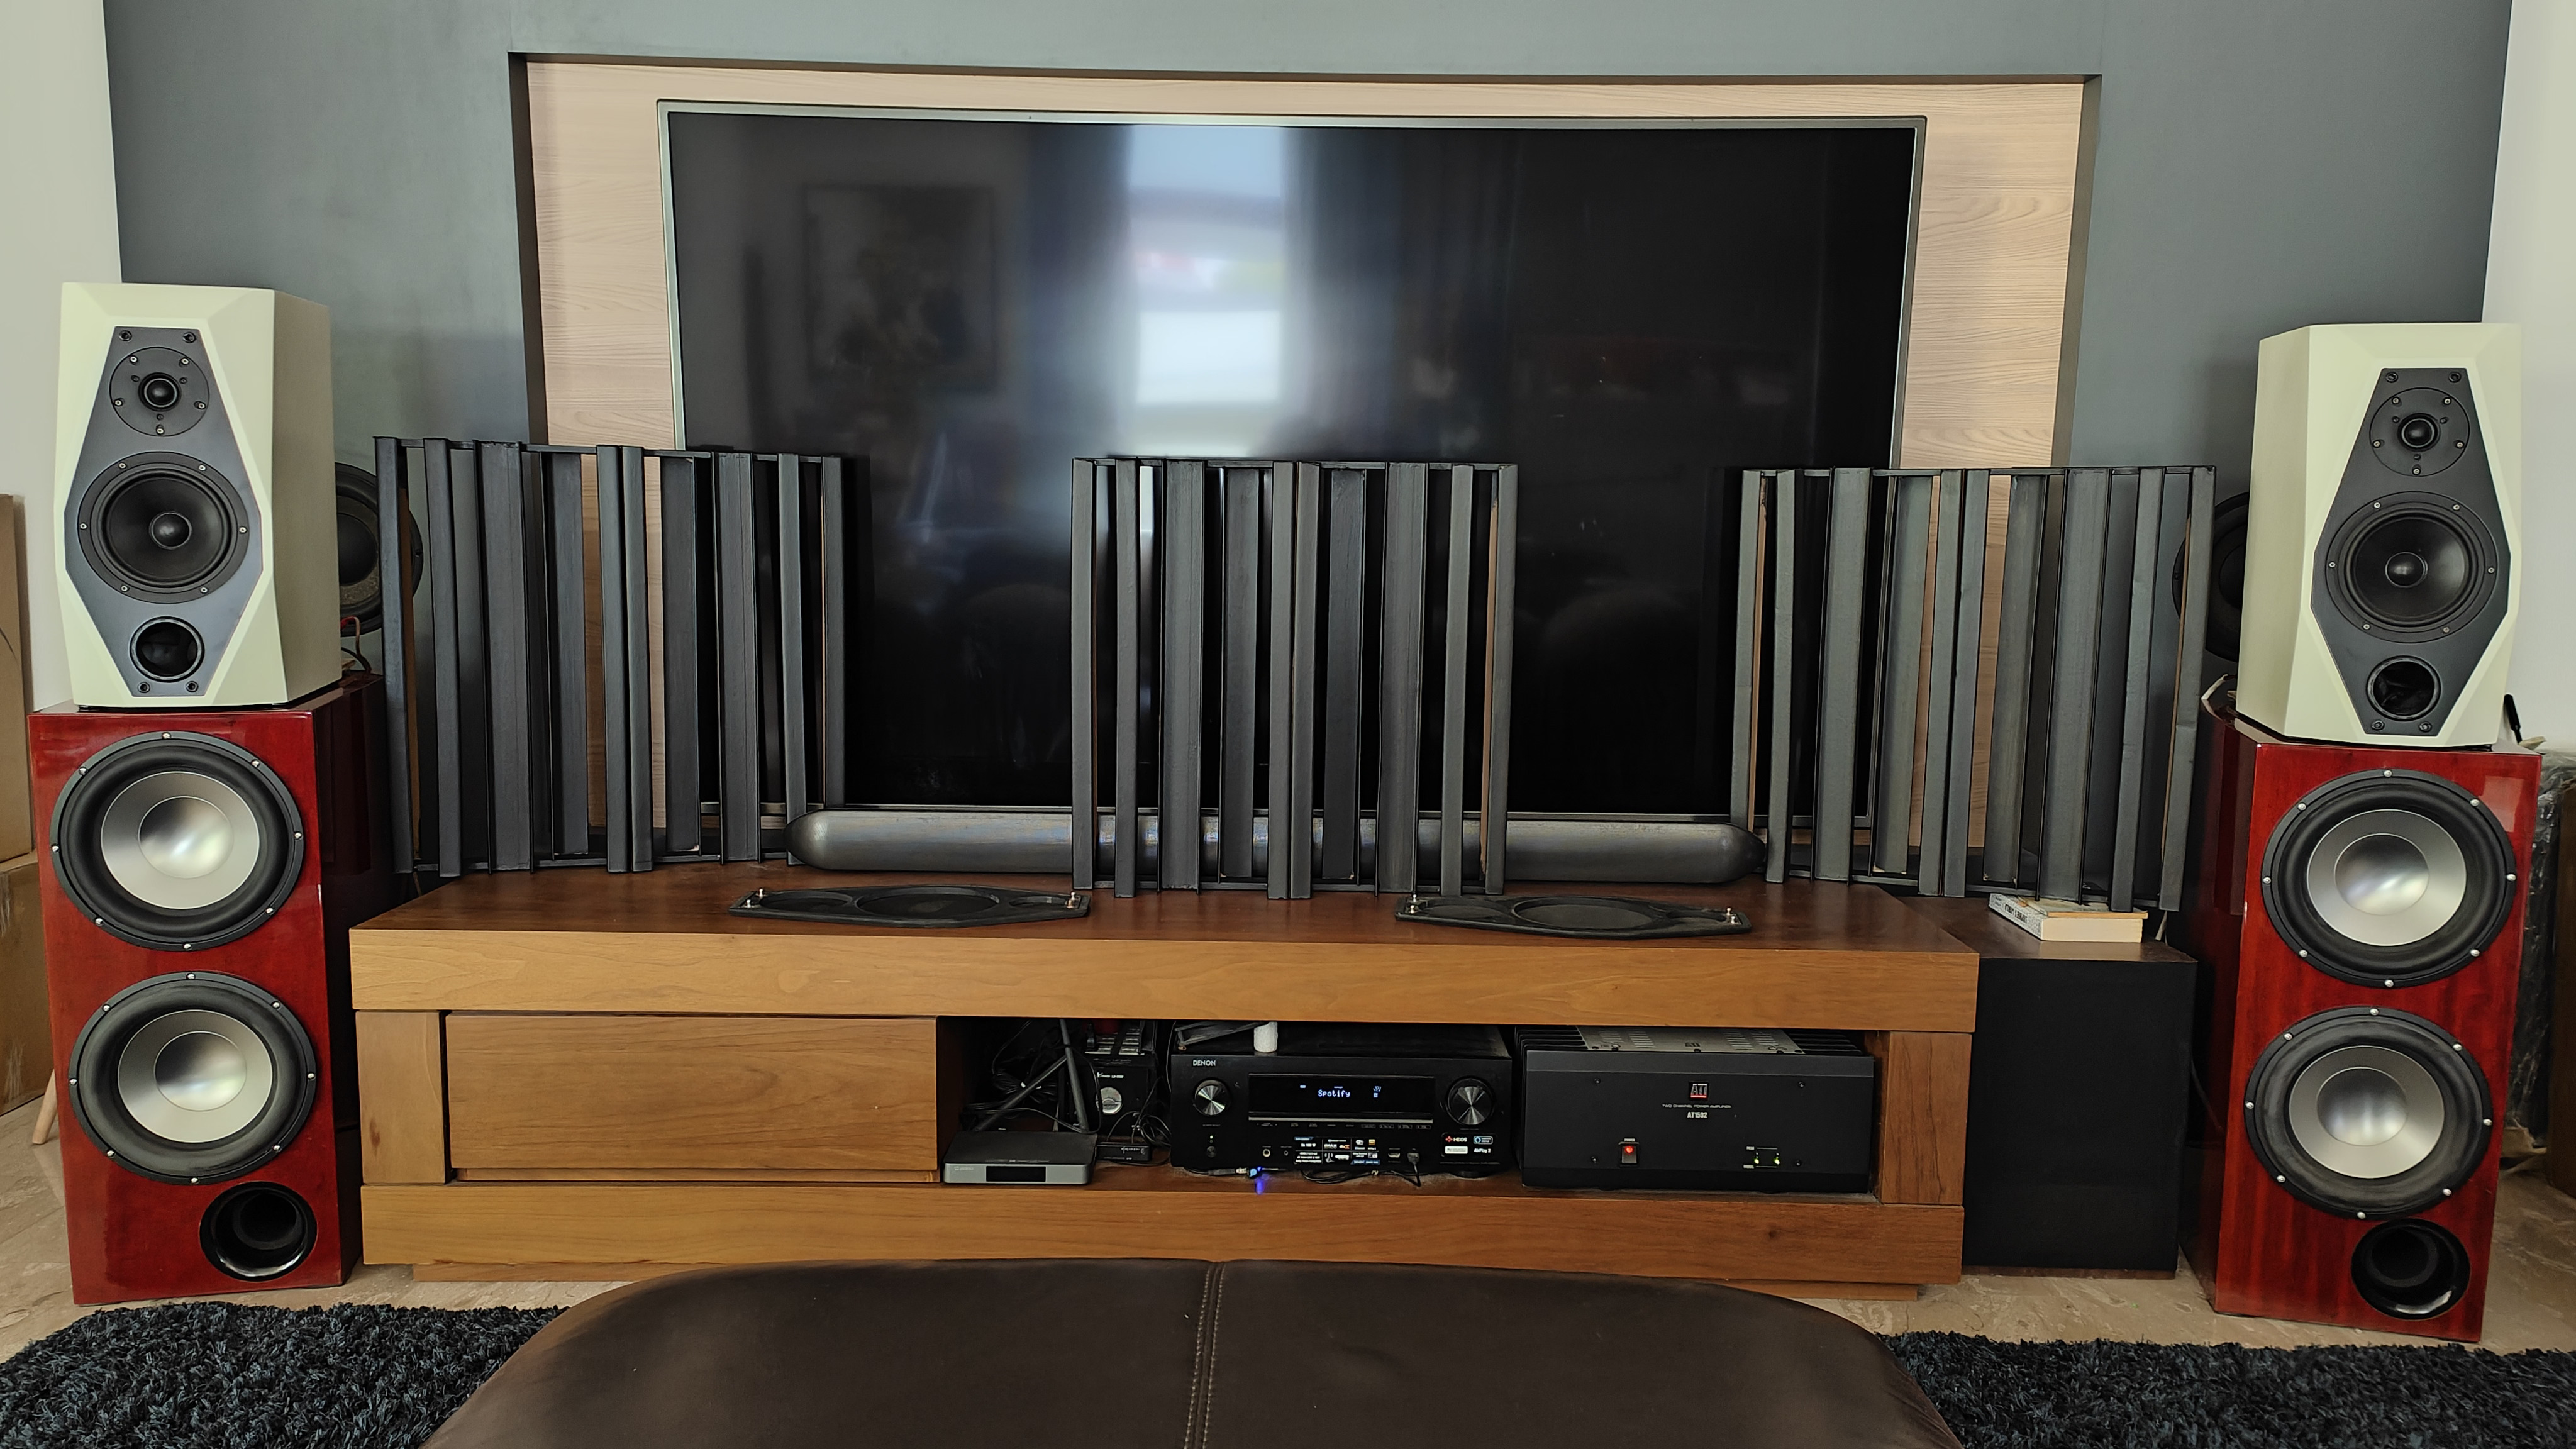
Designed and Built some new diffusers for HT room. Testing on stereo front stage.
Seems to work well. Reduces a slight hollowness that I didn’t realise without AB. Also improves imaging depth and separation.
1 Like
Some recent conversations with hifi friends about that 3-4khz power response peak.
How this is so common with speakers with square baffles, it has become expected. Meaning cut it away totally and something feels lost.
So I’m experimenting with a more restrained cut with the target curve in this area.
So, put in a slight peak in the area mimicking the original power response peak.
And yields this corrected response. It cuts less and preserves a bit more of the original power response peak.
Have you tried Audysessy acoustica by OCA yet?
No, I didn’t. Haven’t gotten round to doing all the various step